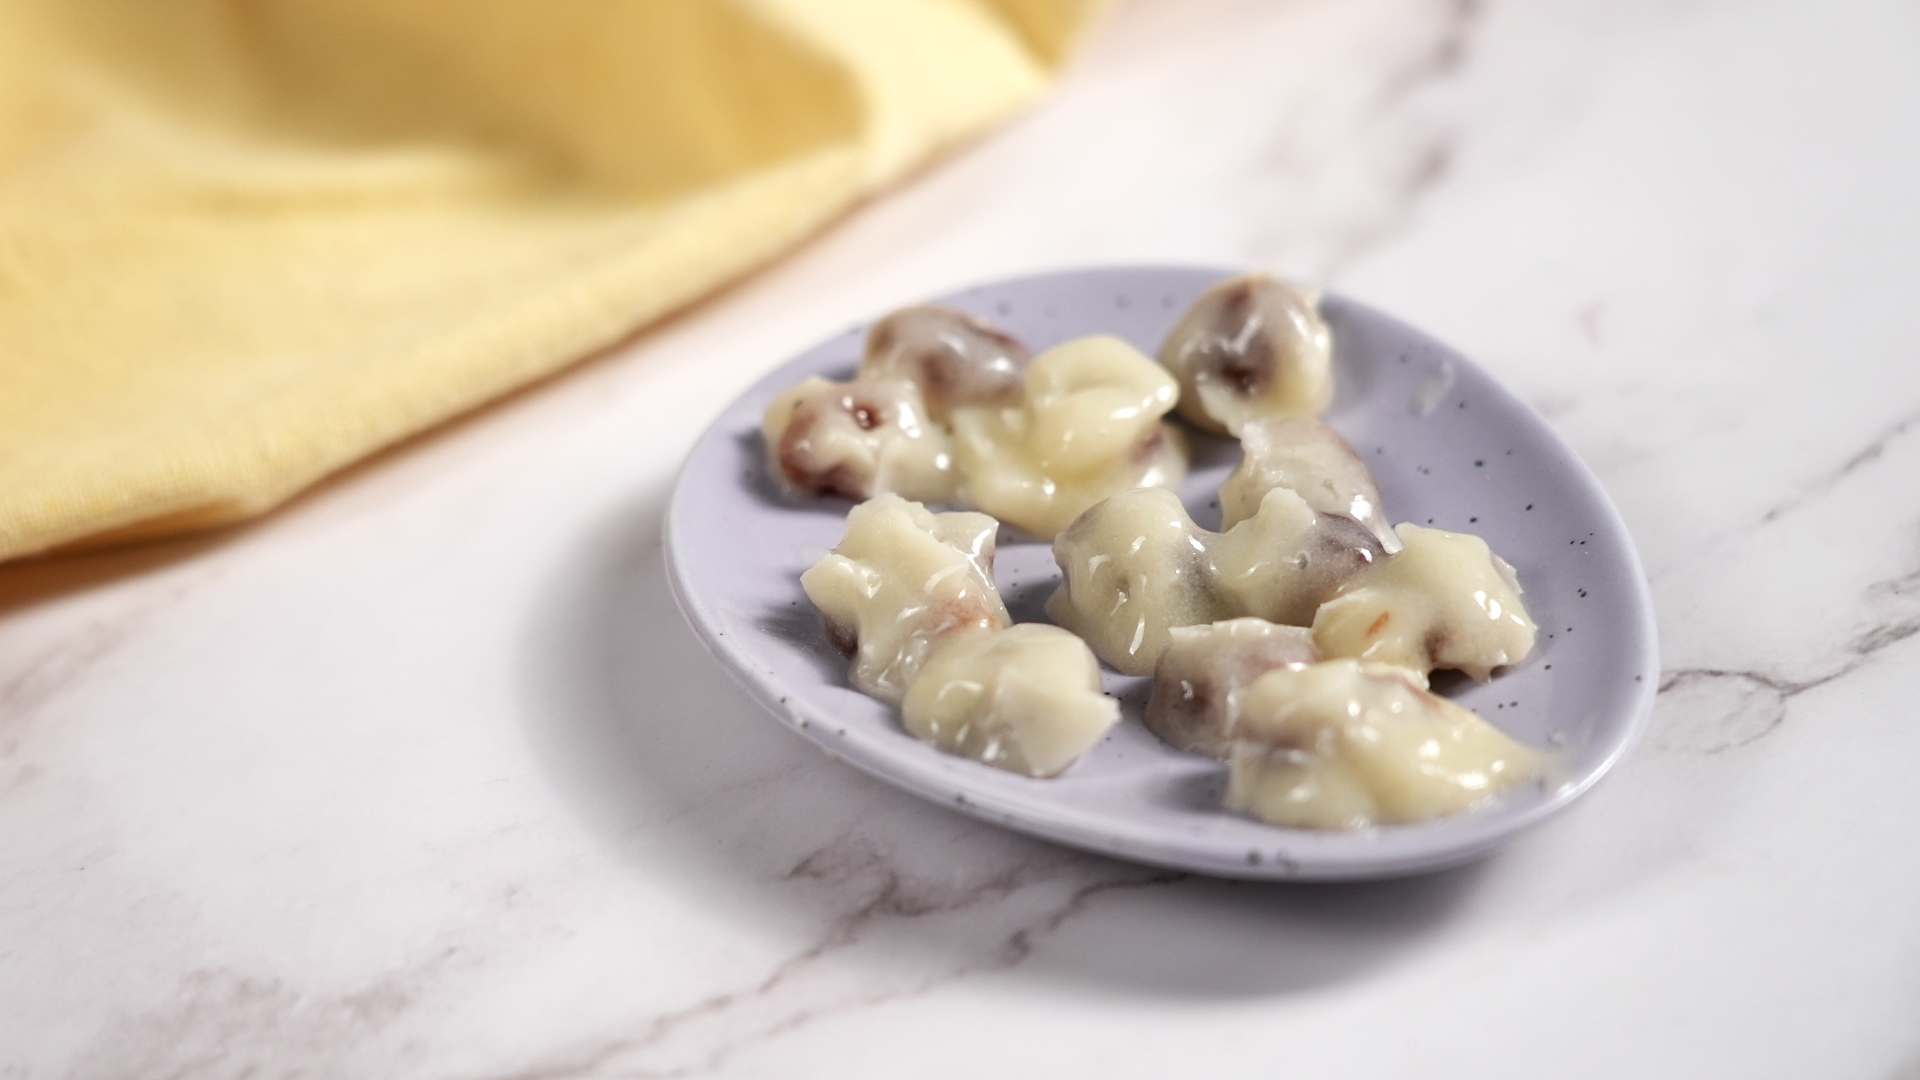
If you have ever opened a box of yogurt-covered raisins and somehow blacked out until the box was empty, welcome. You are among friends. The good news is that you can make a homemade version at home that tastes fresher, tangier, and a little less like it was engineered in a secret snack laboratory. The trick is getting the coating to actually harden instead of turning into a sticky yogurt puddle with raisins trapped inside like tiny edible fossils.
This guide walks you through a practical, home-kitchen method for making hardened yogurt raisins in 13 steps. It uses a thick yogurt base, a little gelatin for structure, powdered sugar for body, and cold temperatures to help everything set. You will also get troubleshooting tips, storage advice, flavor ideas, and a real-world section on what usually happens when actual humans make these for the first time. Spoiler: the first batch is often a little ugly, but still extremely snackable.
Why Homemade Yogurt Raisins Are Worth It
Store-bought yogurt raisins are sweet, creamy, and convenient, but homemade ones have a few advantages. First, you control the sweetness. Second, you can choose a tangier yogurt flavor instead of ending up with something that tastes like vanilla candy wearing a dairy costume. Third, you can customize the texture, from lightly coated clusters to thicker candy-like shells. And finally, there is the small but deeply satisfying joy of saying, “Oh these? I made them,” while pretending you are a snack artisan with a secret workshop.
The main challenge is texture. Raisins are dry enough to coat well, but yogurt itself is soft and full of moisture. So if your goal is a hardened yogurt raisin rather than a chilled yogurt blob, you need a thick mixture and a cold setting method. That is the whole game.
What You’ll Need
Ingredients
- 2 cups seedless raisins
- 1/2 cup plain whole-milk Greek yogurt
- 1 teaspoon vanilla extract
- 1 to 2 teaspoons honey or maple syrup
- 1/2 teaspoon unflavored gelatin
- 1 teaspoon warm water
- 1 to 1 1/2 cups powdered sugar, sifted
- Pinch of fine salt
- Optional: 1/4 teaspoon cinnamon or a little lemon zest
Equipment
- Large plate, tray, or sheet pan
- Parchment paper
- Mixing bowls
- Whisk or spoon
- Fork or slotted spoon
- Freezer or refrigerator
- Optional: food dehydrator
How to Make Hardened Yogurt Raisins: 13 Steps
Step 1: Choose raisins that are plump but not wet
Start with good raisins. They should be soft and chewy, not bone-dry, but they also should not be oily or sticky on the outside. If they feel tacky, spread them on a paper towel and blot them gently. The drier the outside surface, the better the yogurt coating will cling.
Step 2: Line a tray and make room in the fridge or freezer
Line a tray or plate with parchment paper before you mix anything. This is not the glamorous part, but it is the part that keeps you from frantically searching for parchment while holding a bowl of dripping yogurt-coated raisins like a panicked game show contestant. Clear a flat space in your freezer or fridge now.
Step 3: Chill the raisins for 10 to 15 minutes
Cold raisins help the coating grab faster. Pop them into the freezer for a short chill, not a deep freeze. You want them cool, not rock hard. This small step makes a surprisingly big difference, especially if your kitchen is warm or humid.
Step 4: Bloom the gelatin
In a tiny bowl, stir the gelatin into 1 teaspoon of warm water and let it sit for a minute or two. This helps it hydrate evenly. Gelatin acts like the quiet overachiever of this recipe. It does not demand attention, but it helps the coating set up with more structure.
Step 5: Make the yogurt base
In a medium bowl, whisk together the Greek yogurt, vanilla, honey, salt, and the bloomed gelatin. If you want a cinnamon-vanilla version, add the cinnamon here. If you want a brighter flavor, add a tiny bit of lemon zest. The mixture should taste a little sweeter than you think it needs to, because the powdered sugar and cold temperature will mute the flavor slightly.
Step 6: Add powdered sugar until the coating is thick
Whisk in the powdered sugar gradually. Start with 1 cup, then add more as needed. You are aiming for a consistency that is thicker than pancake batter and closer to soft frosting. If it runs off the spoon like a dairy waterfall, keep going. A thicker coating is what makes hardened yogurt raisins possible in a home kitchen.
Step 7: Test one raisin before coating the whole batch
Drop in one raisin, coat it, lift it out, and place it on the lined tray. If the coating slides off immediately, your mixture is too thin. Add another tablespoon or two of powdered sugar and test again. This tiny trial run can save the whole batch from becoming yogurt-raisin gravel.
Step 8: Coat the raisins in small batches
Add only a handful of raisins to the bowl at a time and stir gently. Working in small batches keeps them from clumping into one mega-sphere of raisin destiny. You want each raisin to get coated, not swallowed by the group project.
Step 9: Lift them out and separate them on the tray
Use a fork or slotted spoon to lift out the raisins. Tap off excess coating, then place them on the parchment with a little space between them. You can make neat individual pieces or small clusters if you like that snack mix look. Just do not pile them all together unless you enjoy peeling apart cold sugary rubble later.
Step 10: Chill until the coating firms up
Place the tray in the freezer for 20 to 30 minutes, or in the refrigerator for 45 to 60 minutes. The freezer is faster and gives a more solid shell. The refrigerator works too, but the coating will stay softer. At this stage, you will already have a good snack. But if you want a drier outer finish, keep going.
Step 11: Harden the exterior even more
For a firmer, less tacky finish, you have two options. Option one: leave the raisins in the freezer for another 20 to 30 minutes. Option two: transfer the chilled raisins to a dehydrator set around 135 to 140 degrees Fahrenheit for 30 to 60 minutes, just until the outside feels drier. This does not make them shelf-stable like factory-made candy, but it can improve the surface texture. Let them cool completely before storing.
Step 12: Store them the right way
Transfer the finished raisins to an airtight container. Store them in the refrigerator if you want a softer bite, or in the freezer if you want them firmer and easier to keep separated. Layer parchment between batches if needed. These are homemade dairy-coated snacks, so they are happiest when kept cold.
Step 13: Serve, snack, and customize the next batch
Once you make one batch, the second batch gets easier. Try a dusting of cinnamon, a tiny pinch of cardamom, a bit of lemon zest, or even a cocoa version for a chocolate-adjacent twist. You can also use golden raisins for a sweeter flavor. Just be warned: “I’ll only have a few” is not a strategy. It is a fairy tale.
Troubleshooting Your Yogurt Raisins
The coating is too runny
This usually means the yogurt was too loose or there was not enough powdered sugar. Greek yogurt is the better choice here because it is thicker. Add more powdered sugar one tablespoon at a time until the mixture holds its shape better.
The coating slides off the raisins
Your raisins may be too warm, too sticky, or too oily on the outside. Chill them first and blot them dry. Also make sure the coating is thick enough before you start.
The raisins clump together
You probably coated too many at once. Work in smaller batches and place them farther apart on the tray. A cold tray helps too.
The finished raisins are still tacky
That is common in humid kitchens. Freeze them longer, or use the short dehydrator step for a drier shell. You can also dust your fingers very lightly with powdered sugar when handling them.
The coating tastes too sweet
Use plain Greek yogurt, reduce the honey, and add a tiny pinch more salt or a little lemon zest. That balance makes the flavor taste more grown-up and less like it borrowed a birthday cake’s personality.
Flavor Variations That Actually Work
- Vanilla Cinnamon: Add 1/4 teaspoon cinnamon for a cozy, snack-mix-friendly flavor.
- Lemon Yogurt Raisins: Add a little lemon zest to brighten the coating.
- Maple Yogurt Raisins: Swap honey for maple syrup for a warmer sweetness.
- Golden Raisin Version: Use golden raisins for a lighter, fruitier taste.
- Cluster Style: Drop 3 or 4 coated raisins together for bite-size clusters.
Are Homemade Yogurt Raisins a Good Snack?
They can be a smart little snack when you want something sweet but not wildly over-the-top. Raisins bring concentrated fruit sweetness and chew, while yogurt adds tang and some protein. That said, this is still a sweet snack, not a magical health halo in raisin clothing. Portion matters. A small handful is satisfying. Half the container while standing at the counter with the freezer door open is more of a life event.
What homemade yogurt raisins do especially well is portion control and customization. You can make them less sweet, more tangy, thicker, thinner, softer, firmer, or clustered. That flexibility is the biggest win.
Storage, Freshness, and Food-Safety Notes
Because these use yogurt, they are not the same as long-shelf-life commercial candy-coated raisins. Keep them in an airtight container and store them cold. In the refrigerator, they are best within about a week. In the freezer, they hold up well for around a month and can be eaten straight from the freezer after a brief rest at room temperature. Do not leave them sitting out for hours on a party table unless you enjoy giving bacteria a networking opportunity.
Experiences From Real Kitchens: What Happens When You Actually Make These
The most common first-time experience with hardened yogurt raisins is optimism followed by surprise. People assume yogurt behaves like melted chocolate. It does not. Chocolate sets with drama and confidence. Yogurt sets like it needs encouragement, clear instructions, and maybe a blanket. That is why the first batch often teaches the biggest lesson: thickness matters more than speed. If your coating is too loose, the raisins will wear it for about twelve seconds before gravity steps in and ruins the mood.
Another very real experience is discovering how much the weather matters. On a cool, dry day, the coating behaves beautifully. On a humid afternoon, everything can feel stickier, softer, and slightly more chaotic. Home cooks often think they did something wrong when the yogurt raisins stay tacky, but sometimes the kitchen is simply working against them. That is where the freezer becomes your best friend and the dehydrator becomes your overqualified backup plan.
Texture is another thing people notice right away. Homemade yogurt raisins do not taste exactly like the store-bought kind, and that is not a failure. It is the point. Store versions are usually sweeter, smoother, and more candy-like. Homemade ones tend to be tangier and fresher, with a coating that tastes more like actual yogurt. Many people end up preferring that flavor once they get over the fact that it is less “movie theater candy box” and more “snack someone who owns a nice cutting board would serve.”
Then there is the issue of batch size. Small batches almost always turn out better. When people try to coat all the raisins at once, they get clumps, uneven shells, and one giant yogurt-raisin planet forming in the bowl. Small batches give you better coverage, cleaner shapes, and less frustration. They also make it easier to experiment. One part of the batch can be cinnamon-vanilla, another can be lemony, and another can be left plain for the purists in the room.
Parents and snack planners often report that these work best when made ahead and frozen in portions. That way, you can grab a few for lunchboxes, after-school snacks, or a quick sweet bite after dinner. They also hold up better this way, since the coating stays firmer and the raisins do not stick together as much. A piece of parchment between layers is one of those tiny tricks that makes you feel wildly competent.
Finally, almost everyone who makes these has one funny realization: the “ugly” batches still disappear first. Perfectly round yogurt raisins are nice for photos, but lumpy clusters are what people reach for. There is something charming about homemade snacks that look a little imperfect. They taste like effort, curiosity, and the kind of kitchen confidence that comes from being willing to make a mess once so you can make it better next time. That is really the experience of homemade hardened yogurt raisins in one sentence: slightly fussy, totally fixable, and very worth it.
Final Thoughts
If you want a homemade sweet snack that feels nostalgic but a little more interesting, hardened yogurt raisins are absolutely worth making. The method is simple once you understand the texture game: use thick yogurt, make a sturdy coating, chill aggressively, and store them cold. From there, it is just snack strategy. Keep them classic, make them citrusy, turn them into clusters, or stash them in the freezer for emergency dessert situations. However you make them, they are proof that sometimes the best kitchen projects are the small ones that vanish faster than you expected.