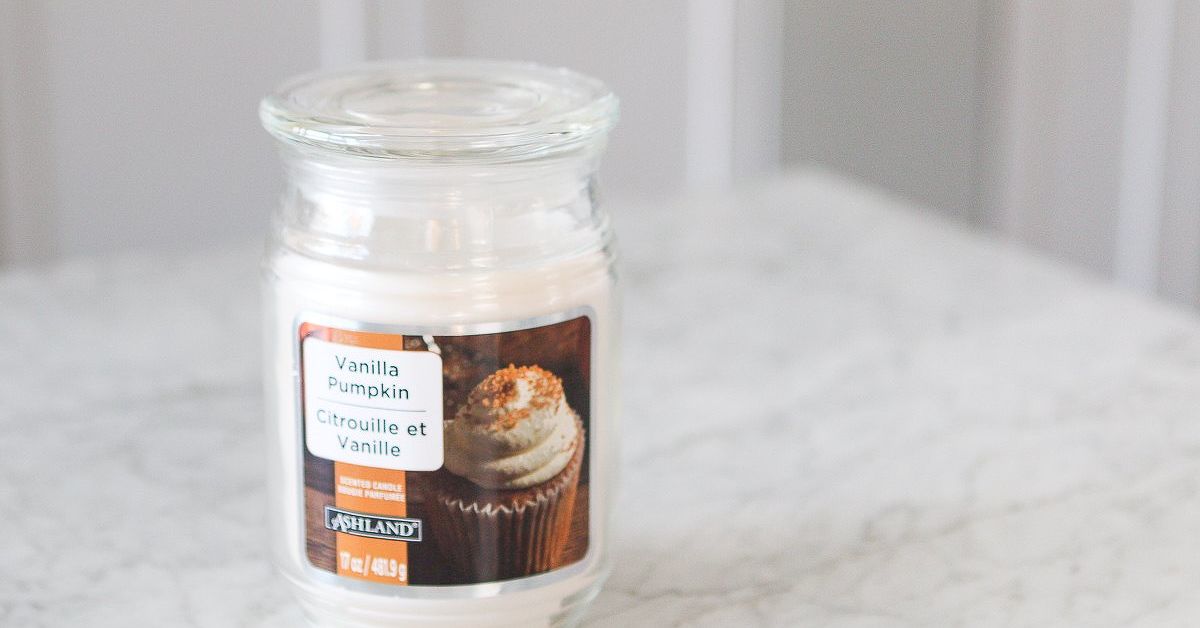
Some candles smell like a peaceful cabin in the woods, a bakery at sunrise, or a spa that somehow knows your tax stress. Then you turn the jar around andbamthere it is: a loud, crooked, neon, aggressively branded label shouting over your carefully styled coffee table. The good news? You do not need a Cricut, a craft degree, or a mysterious drawer full of decorative twine to fix it. You need a sock.
Yes, a sock. Preferably clean. Preferably cute. Definitely not the one that has been living under the bed since last winter. This simple DIY candle cover is one of the easiest ways to hide ugly candle labels, upgrade basic candle jars, and add cozy texture to your home decor in less than ten minutes. It is budget-friendly, renter-friendly, beginner-friendly, and deeply satisfying in the way only a tiny home improvement hack can be.
In this guide, you will learn how to turn an ordinary sock into a stylish candle sleeve, what materials work best, how to keep the project looking polished, and how to use this trick safely. Because yes, we are hiding the labelnot auditioning for a fire-safety blooper reel.
Why Use a Sock to Cover a Candle Label?
Candle jars are everywhere: on nightstands, kitchen counters, bathroom shelves, bookshelves, entry tables, and the occasional “I cleaned for five minutes, reward me with ambiance” corner. But many candle labels are designed for store shelves, not your living room. They may be too bright, too promotional, too seasonal, or simply not match your style.
A sock candle cover solves the problem instantly. It slips around the jar like a mini sweater and hides the label without scraping, soaking, peeling, or fighting with adhesive residue. It also adds soft texture, which is especially useful in fall and winter decor. A ribbed cream sock can make a cheap grocery-store candle look boutique. A patterned sock can turn a plain jar into a cheerful centerpiece. A chunky knit sock can give your candle that “expensive cabin weekend” energy, minus the cabin and the expensive weekend.
This project also fits perfectly into the upcycling trend. Instead of buying another decorative candle holder, you reuse something you already have. Single socks, outgrown socks, socks with stretched-out cuffs, or seasonal socks that never see daylight can all become candle decor. Finally, justice for the lonely sock population.
Important Safety Note Before You Start
A sock is fabric, and fabric is flammable. That means the sock should never reach the flame, wick, wax pool, or top opening of the candle. The sleeve must stay around the lower outside of the jar only. Leave plenty of exposed glass at the top, place the candle on a stable heat-safe surface, and never leave a burning candle unattended.
For the safest version of this craft, use it with flameless LED candles, battery-operated candles, or unlit decorative candles. If you use a real burning candle, keep the sock low on the jar, away from heat, and remove it if the jar becomes hot. Candle safety basics still apply: keep candles away from curtains, paper, books, bedding, pets, kids, and anything that can catch fire. Cozy is good. Surprise flames are not part of the aesthetic.
Materials You Need
This is a wonderfully low-maintenance DIY project. You do not need fancy supplies, but choosing the right sock makes a big difference.
Basic Supplies
- One clean sock, preferably thick, ribbed, or patterned
- A glass candle jar
- Sharp scissors
- Measuring tape or ruler
- Optional: fabric glue, hot glue, ribbon, buttons, lace, twine, or a small charm
Choose a sock that fits snugly around the candle jar without stretching so tightly that it distorts the pattern. Crew socks, boot socks, and cozy winter socks usually work best. Thin athletic socks can work too, but they may look more “laundry day” than “designer home decor.”
How to Hide Ugly Candle Labels Using a Sock
The process is simple: measure, cut, slip, style. That is the whole magic trick. The candle label disappears, the jar looks intentional, and you get to feel smug about spending zero dollars.
Step 1: Choose the Right Candle Jar
Start with a jar candle that has straight or slightly curved sides. Cylindrical jars are easiest because the sock sleeve sits evenly around them. Square jars can work, but the fabric may bunch around the corners. Very small votives may be too narrow unless you use a baby sock or a narrow fuzzy sock.
Make sure the candle jar is clean and dry. If the label is glossy or textured, do not worry. The sock will cover it. If the label is peeling, trim any loose corners so they do not create bumps under the fabric.
Step 2: Pick a Sock That Matches Your Decor
The sock is now a design material, so judge it with the same energy you would bring to throw pillows. A cream ribbed sock looks clean and minimalist. A gray knit sock feels rustic and cozy. A red plaid sock adds holiday charm. A black sock can look sleek, especially on a white or amber candle jar. A striped sock brings playful color to a kids’ bathroom shelf or casual kitchen display.
For fall decor, try warm neutrals such as oatmeal, camel, rust, olive, charcoal, or deep burgundy. For a farmhouse look, choose cable knit or waffle texture. For modern decor, stick with solid colors and simple ribbing. For holiday styling, fair isle patterns, red-and-white stripes, or fuzzy cuffs can look charming without screaming “clearance aisle.”
Step 3: Cut the Sock
Lay the sock flat and cut off the foot portion, leaving the tube-shaped ankle or calf section. For most candle jars, you only need a sleeve that covers the label area. Measure the height of the label and add about half an inch so the edges look intentional.
If the sock has a finished cuff, use that as the top or bottom edge because it will look neat without extra work. If both edges are raw after cutting, fold one edge under or secure it with a tiny line of fabric glue. You can also let the raw edge roll slightly for a casual handmade look.
Step 4: Slip the Sock Sleeve Over the Candle
Slide the cut sock tube up from the bottom of the jar. Adjust it until the label is fully hidden. Keep the top edge of the sock well below the rim of the jar. A good rule is to leave at least the upper third of the glass exposed, especially if you plan to light the candle.
If the sleeve feels too loose, tuck a small fold at the back and secure it with fabric glue. If it feels too tight, use a stretchier sock or cut the sleeve shorter. The best candle sock cover hugs the jar gently without squeezing it like it owes money.
Step 5: Add Decorative Details
This step is optional, but it can make the project feel finished. Tie a narrow ribbon or piece of twine around the sock sleeve. Add a small wooden button for a cozy cabin look. Use lace for cottage style. Attach a tiny dried orange slice, cinnamon stick, or faux greenery sprig for seasonal decor. Just keep all decorations low and away from the flame.
If you love a clean look, skip embellishments completely. A simple ribbed sock in the right color can look surprisingly high-end. Sometimes the best DIY projects are the ones that do not announce, “Hello, I was made at midnight with scissors and optimism.”
Design Ideas for Different Rooms
Living Room Candle Styling
For a living room, use neutral socks that coordinate with your throw blankets, pillows, or rug. Place the covered candle on a tray with books, a small vase, and a decorative object. The sock sleeve adds texture without clutter. If your home leans modern, choose a solid black, beige, or gray sock. If your style is cozy and layered, go for cable knit or soft heathered fabric.
Bathroom Candle Upgrade
Bathrooms often benefit from softer styling because many surfaces are hard: tile, glass, metal, mirror. A sock-covered candle adds warmth to the vanity or shelf. Choose white, spa-blue, sage, or oatmeal tones. Avoid placing burning candles near towels, tissue, curtains, or hair products. For bathrooms, flameless candles are often the smartest option.
Bedroom Candle Decor
In the bedroom, candles should feel calm and uncluttered. A soft ribbed sock sleeve can hide a busy label and make the nightstand feel more peaceful. However, never fall asleep with a candle burning. Use the sock cover mainly for display, or choose a battery-operated candle for nighttime ambiance.
Holiday Candle Covers
This hack shines during the holidays. Use red plaid socks for Christmas, orange or rust socks for fall, pastel socks for spring, and navy or silver-gray socks for winter. You can swap the sock sleeve seasonally without buying new candle jars. One candle, many outfits. Honestly, it may have a better wardrobe than some of us.
What Types of Socks Work Best?
The best socks for hiding candle labels are thick enough to cover the print underneath but stretchy enough to slide onto the jar. Ribbed socks are excellent because the vertical lines look tidy and help the sleeve grip the glass. Cable-knit socks add texture and look especially good on large candles. Fuzzy socks are cute, but they can shed fibers, so use them only for display or flameless candles.
Avoid socks with plastic grips on the bottom unless you cut that section away. Avoid overly thin socks if the label is dark or colorful because the design may show through. Also avoid synthetic fabric that feels delicate near heat. When in doubt, treat the sock sleeve as removable decor, not a permanent candle holder.
Can You Remove the Label Instead?
Yes, and sometimes label removal is the right choice. Many glass jar labels can be removed with warm soapy water, oil, adhesive remover, rubbing alcohol, or careful scraping. Some candle jars can also be cleaned and repurposed after the wax is gone. People commonly reuse empty candle jars as pencil cups, makeup brush holders, mini vases, plant propagation jars, craft supply containers, or decorative catchalls.
However, removing labels can be annoying. Some labels peel off in one satisfying sheet. Others cling to the glass like they signed a lifetime lease. The sock method is perfect when you want an instant fix, do not want to deal with sticky residue, or plan to change the look later.
How to Make the Sock Cover Look Expensive
The difference between “cute DIY” and “wait, where did you buy that?” is usually in the finishing. First, choose a sock color that matches your room instead of a random novelty pattern. Second, cut straight and use the finished cuff whenever possible. Third, keep the sleeve height proportional to the jar. Cover the label, but do not cover the entire candle.
Try styling the covered candle in a group of three objects: one candle, one small plant or vase, and one stack of books or a tray. This classic styling trick makes the candle look like part of a design moment rather than a jar wearing laundry. Also, repeat the sock color somewhere else in the room, such as a pillow, blanket, napkin, or artwork. Repetition makes DIY decor feel intentional.
Common Mistakes to Avoid
Covering Too Much of the Jar
If the sock reaches near the rim, it is too high. Keep fabric low and far from the flame. The goal is to hide the label, not create a fabric chimney.
Using a Dirty or Worn-Out Sock
Upcycling is charming. Mystery stains are not. Wash the sock first and avoid fabric with holes, heavy pilling, or stretched-out elastic unless that distressed look is truly part of the plan.
Ignoring Heat
Some candle jars become warm during use. If the glass feels hot, remove the sleeve after extinguishing the candle and once it is safe to touch. For long burns, skip the sock cover or use a flameless candle.
Choosing a Sock That Clashes
A bright cartoon sock might be fun, but it may not create the calm, stylish result you want. Unless your goal is “guest bathroom with personality,” choose colors and textures that fit your decor.
Budget-Friendly Variations
This candle label cover idea can be adapted in many ways. Use the cuff of a sweater sleeve for larger jars. Try a leg warmer for oversized candles. Use baby socks for mini jars. Cut strips from old knit scarves for a rustic wrap. You can even layer a plain sock sleeve under a ribbon wrap for extra polish.
For a gift idea, cover a candle label with a pretty sock sleeve, tie it with ribbon, and add a handwritten tag. This is useful when the candle smells wonderful but the label does not match the occasion. It also makes inexpensive candles feel more personal. Nobody has to know the luxury-looking candle started life next to the checkout line.
Experience Notes: What This DIY Hack Teaches You
One of the funniest things about this project is how quickly it changes the way a candle feels in a room. A candle with a loud label can make a shelf look busy, even when everything else is calm. Once the label is covered, the same candle suddenly blends into the space. It is like giving the jar a tiny sweater and a better attitude.
In real home-decor situations, the sock method is especially helpful when decorating on a budget. Maybe you bought a candle because it smelled like vanilla, cedar, pumpkin, or clean laundry floating through a dream, but the label looks like it was designed during a caffeine emergency. Instead of hiding the candle in a cabinet, you can cover it and actually enjoy it. The trick is fast enough to do before guests arrive and simple enough that even people who “do not craft” can succeed.
Another experience-based lesson: texture matters more than people think. Smooth glass is pretty, but too much smooth glass in a room can feel cold. A knit sock sleeve adds softness. In fall, that cozy texture pairs well with wood trays, ceramic mugs, dried flowers, and plaid blankets. In winter, it works beautifully with pinecones, evergreen sprigs, and warm metallic accents. In spring, a lightweight pastel sock can soften a bright bathroom shelf or bedside table. The same basic method changes personality depending on the sock.
There is also something satisfying about using a lone sock. Most households have at least one sock that lost its partner in the laundry wilderness. Instead of throwing it away, this project gives it a second life. That tiny act of reuse feels good, especially when the result is actually attractive. Not every upcycling project deserves a permanent spot in your home, but this one can. It is practical, reversible, and forgiving.
The biggest lesson is restraint. The best sock candle covers usually look simple. A neutral color, a clean edge, and one small accent are enough. When too many decorations are addedribbon, button, charm, greenery, glitter, and a tiny sign that says “cozy vibes”the candle starts looking like it is wearing a parade float. Let the texture do the work.
Safety is the other lesson. A candle can be beautiful and still needs respect. Fabric should stay low, flames should stay watched, and the candle should sit away from anything flammable. The safest way to enjoy the sock-cover look is with flameless candles or with the sleeve used only while the candle is unlit. A good DIY project should make your home prettier, not more dramatic in the emergency-services sense.
Finally, this hack proves that decorating does not always require buying more stuff. Sometimes the solution is already in a drawer. With one clean sock and a few minutes, an ugly candle label disappears, a plain jar becomes decor, and your home gets a little cozier. It is low effort, low cost, and oddly delightfulwhich is exactly the kind of DIY that deserves a permanent place in the “why didn’t I do this sooner?” category.
Conclusion
Learning how to hide ugly candle labels using a sock is one of those tiny home-decor tricks that feels almost too easy. You cut a sock, slide it over a candle jar, adjust the fit, and suddenly a label you disliked is gone. The result can be cozy, modern, rustic, seasonal, or playful depending on the sock you choose.
This DIY candle cover is affordable, beginner-friendly, and perfect for upcycling single socks or refreshing candles you already own. Just remember the golden rule: keep fabric away from flame and heat. For maximum peace of mind, use this idea with flameless candles or decorative unlit candles. Stylish and safe is always the winning combination.