If your kitchen feels a little tired but your budget is giving “absolutely not,” there is one upgrade that punches way above its price tag: paint the kitchen island. Not the whole room. Not every cabinet door until you question your life choices. Just the island.
It works because the island is usually the visual anchor of the kitchen. It sits in the middle, catches the eye, and naturally acts like the room’s unofficial host. Change its color, and the whole space feels more intentional, more current, and a lot more expensive than it really was. It is the decorating equivalent of getting bangs, but with fewer long-term consequences.
For homeowners who want a kitchen refresh for less, painting the island is one of the smartest ways to update the room without touching the layout, replacing cabinetry, or signing up for a renovation that somehow turns one weekend into three months. It gives you contrast, character, and a fresh focal point while leaving the rest of the kitchen alone.
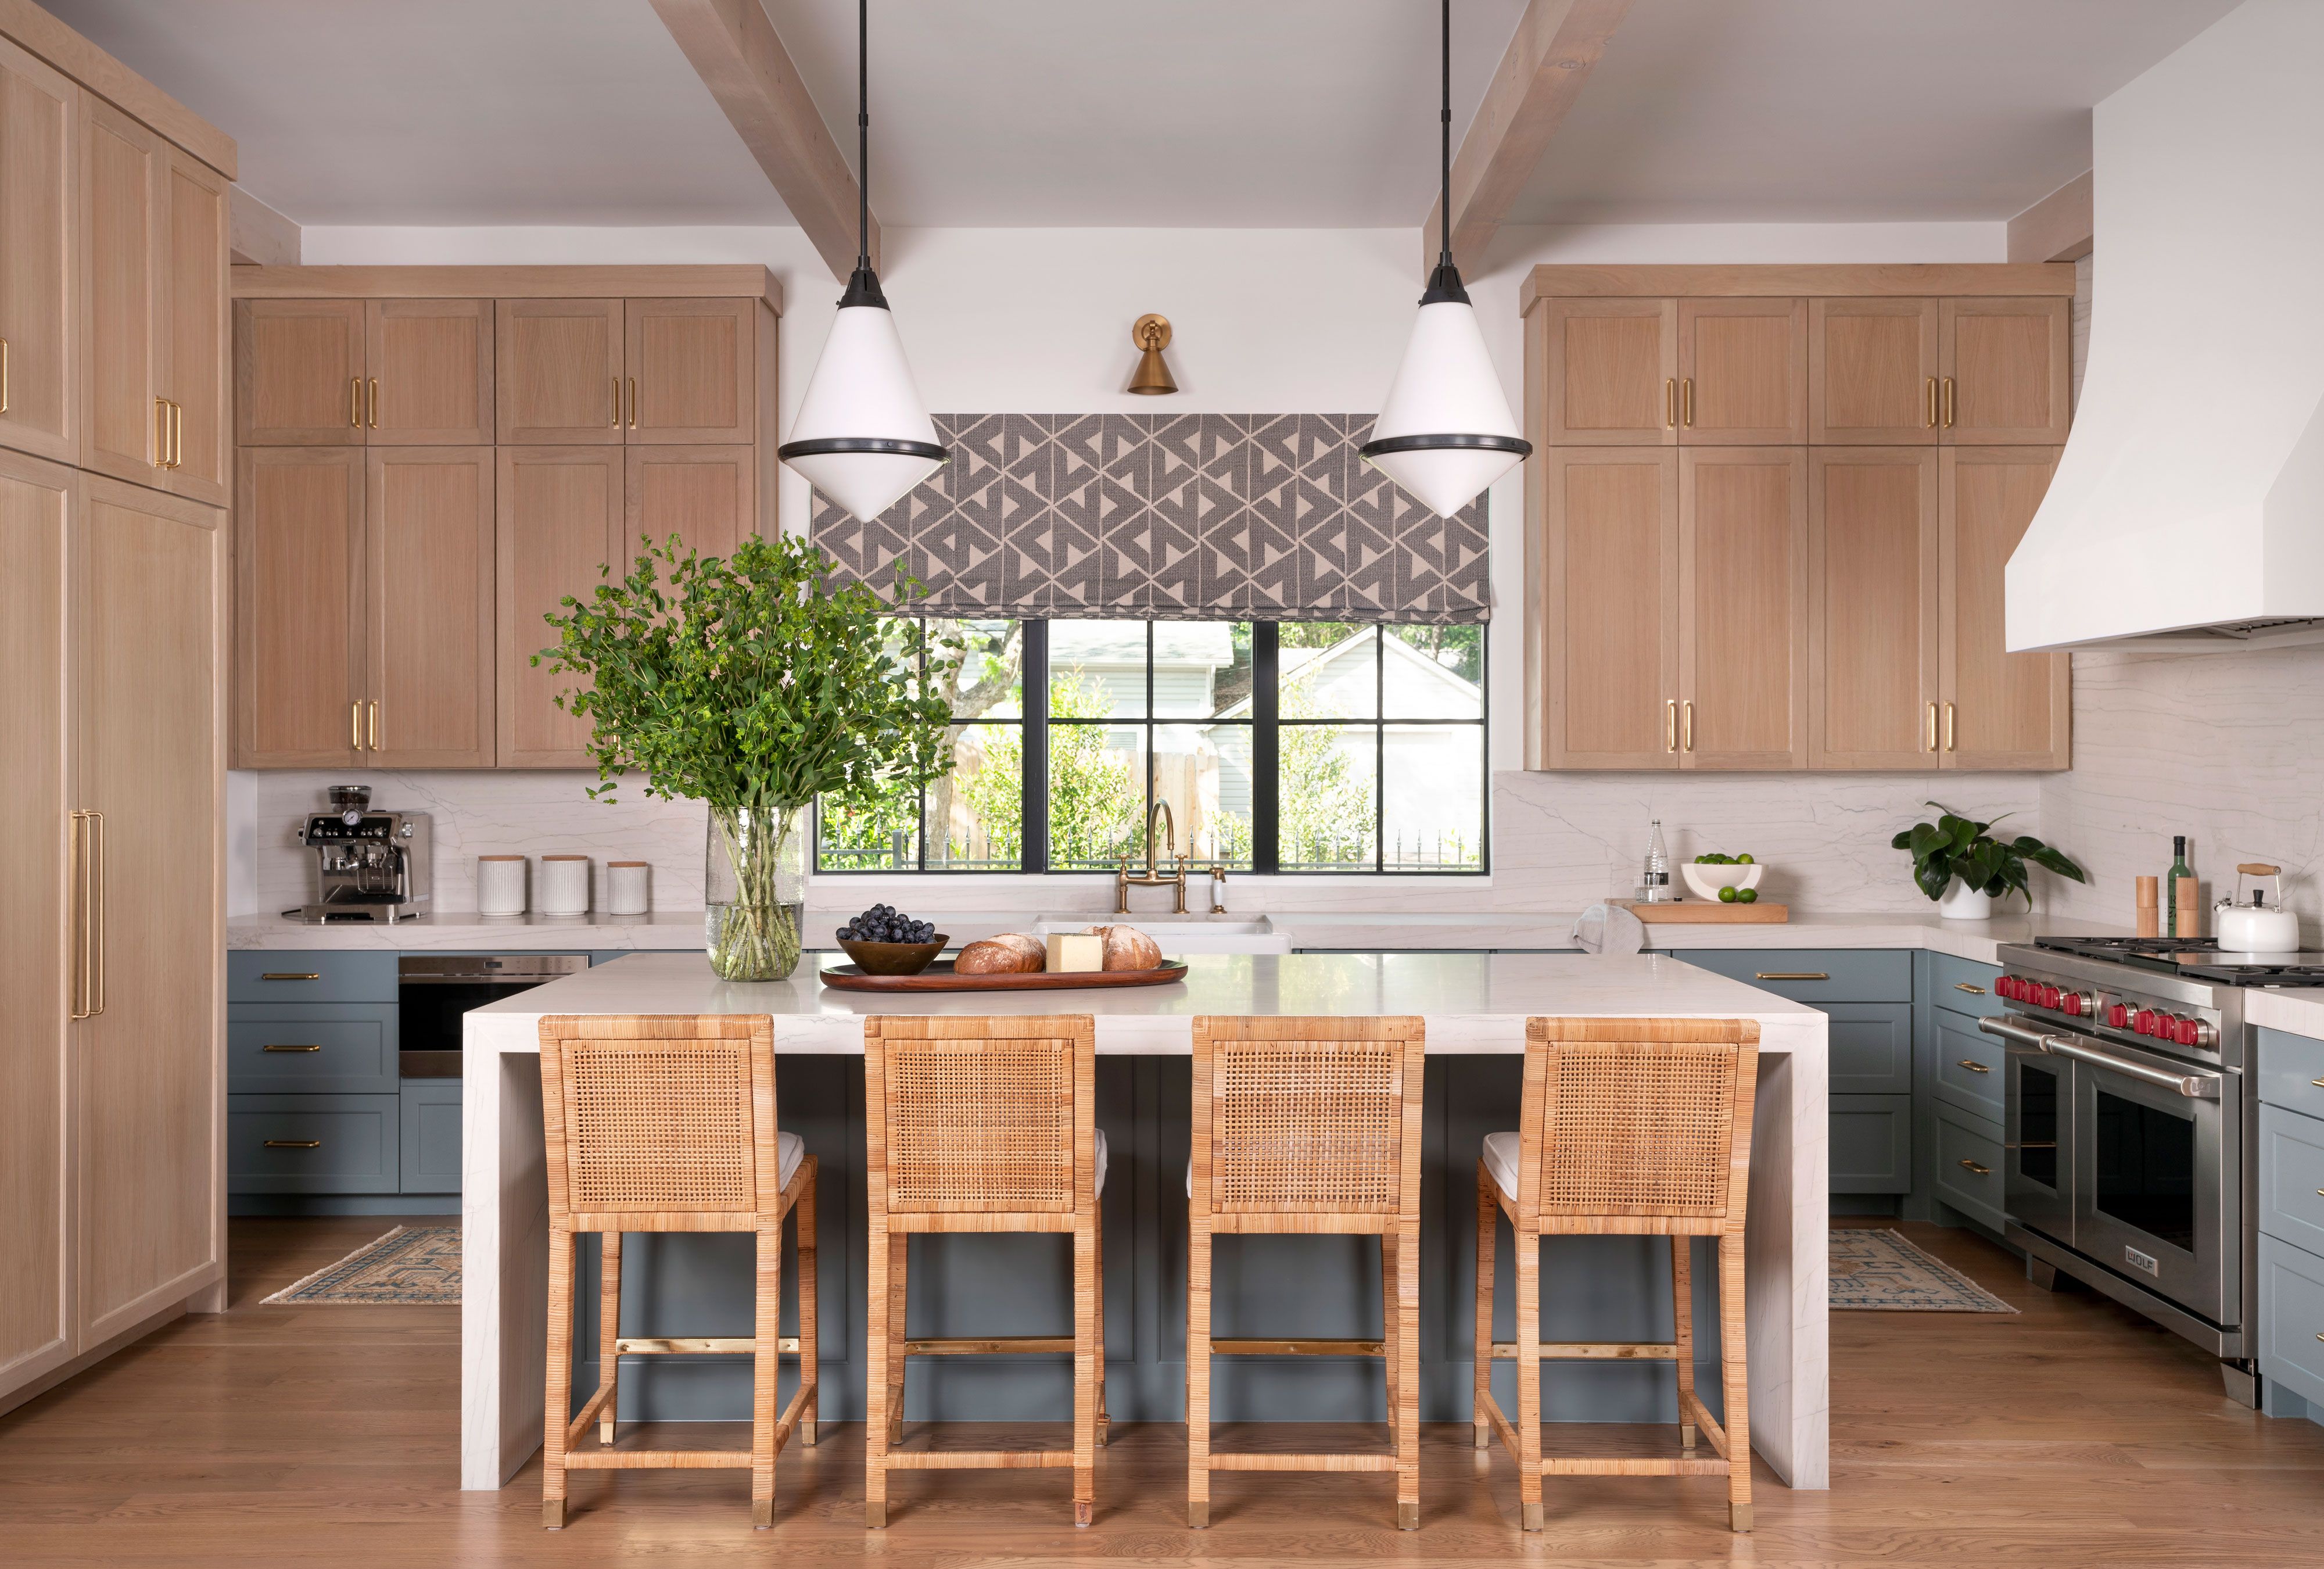
That is especially true in kitchens with wood cabinets, white cabinets, or neutral finishes. A painted island brings in color and depth without overwhelming the room. It creates that sought-after two-tone kitchen look that designers love, but it does it in a way that feels practical rather than precious.
Why the kitchen island is the best single spot to paint
It changes the room without changing everything
The island has a big visual footprint, so even one new color can shift the mood of the entire kitchen. Paint it a deep navy, and the room feels more tailored. Paint it a soft sage, and the space feels calmer and more relaxed. Go with a warm greige or creamy taupe, and suddenly the kitchen feels more layered and custom instead of flat and builder-basic.
Because the island is usually separate from the perimeter cabinets, it can handle contrast. That makes it the ideal candidate for a budget kitchen makeover. You get a fresh design moment without committing to repainting every cabinet box, drawer front, and door in sight.
It is more affordable than a full cabinet repaint
Painting a whole kitchen can be time-consuming, messy, and expensive if you hire it out. Painting only the island is much more manageable. There is less surface area, fewer doors to remove, less prep work, and lower material cost. That means you can often spend more on better primer and better paint while still keeping the overall project affordable.
In other words, this is not the “cheap shortcut that looks cheap.” It is the strategic shortcut that makes people ask whether you remodeled.
It adds personality without overwhelming the space
One of the biggest design mistakes in a kitchen refresh is trying to force drama everywhere at once. Bold backsplash, bold lighting, bold hardware, bold walls, bold cabinets. Suddenly the room is not refreshed; it is yelling.
A painted island solves that problem beautifully. It gives the eye one main place to land. The rest of the kitchen can stay classic and calm while the island does the stylish heavy lifting. It is contrast with manners.
It works especially well with wood cabinets
Plenty of people want to update a kitchen with stained wood cabinets but do not want to paint over them. Fair enough. Good wood can add warmth, texture, and depth that paint simply cannot fake. Painting only the island lets you keep that warmth while still introducing a fresher color story.
The trick is choosing a paint color that respects the wood tone instead of fighting it. Warm woods usually look best with warm-leaning colors. Cooler woods tend to pair better with grayer or more muted shades. Once you understand the undertones, the entire project gets easier.
How to choose the right island paint color
Start with the undertones in your cabinets
Before you choose a paint chip that makes your heart race in the store, look at your existing kitchen. Are your wood cabinets orange, honey, red, golden, or brown? Those are warm undertones. Are they ashy, beige-gray, pale taupe, or slightly weathered? Those lean cool.
Warm wood cabinets tend to pair well with deep green, warm navy, muted teal, creamy beige, and earthy charcoal. Cooler wood cabinets usually look better with smoky blue, soft green-gray, mushroom, slate, and crisp but not icy neutrals.
The goal is not to create a perfect match. The goal is harmony. Your island does not need to blend in, but it should look like it belongs to the same kitchen and not like it wandered in from another zip code.
Let the countertop help make the decision
Your countertop is often the peacemaker between the island and the perimeter cabinets. If your stone has veining, flecks, or warm beige movement, use those cues. Pull a subtle color from the countertop and let that guide the island paint. This is one of the easiest ways to make the finished kitchen feel polished instead of random.
For example, a quartz or quartzite top with warm cream and taupe notes can support a painted island in soft mushroom or balanced beige. A cooler white surface with gray veining can handle slate blue, deep gray, or muted blue-green. Countertops are already doing design work in your kitchen, so let them earn their keep.
Think about contrast level
You do not need a dark island for the look to work. A high-contrast island is dramatic and memorable, but a low-contrast island can feel elegant and timeless. A creamy off-white island against bright white cabinetry adds softness. A dusty olive against light oak feels grounded. A charcoal island under white countertops gives the room a tailored edge.
If you are nervous, start with a color that is deeper or richer than your cabinets but still neutral enough to live with every day.
Choose the right finish
Kitchen islands take a beating. They get bumped by stools, kicked by shoes, swatted by backpacks, and wiped down after everything from pancake batter to coffee spills. That means wall paint is not your friend here.
Use cabinet paint or a durable enamel finish made for trim and cabinetry. Satin and semi-gloss are popular because they are easier to clean and more resistant to wear than flatter sheens. They also help the island feel a little more finished and furniture-like.
Best kitchen island color ideas for a budget refresh
Deep navy
Navy is a classic for a reason. It adds contrast, looks sharp with brass or black hardware, and plays well with white countertops and wood tones. It reads bold but still familiar, which makes it ideal for homeowners who want a noticeable change without stepping too far outside the comfort zone.
Muted sage
Sage green has become a modern favorite because it feels calm, organic, and livable. In a kitchen, it can soften hard surfaces and bring a more collected look to the room. Paired with oak, walnut, or white cabinets, it feels current without chasing trends too hard.
Blue-green or smoky teal
This color family is excellent for kitchens that need personality but not chaos. Blue-green shades can bridge warm and cool elements, which makes them especially helpful in kitchens with mixed finishes. They also look surprisingly elegant with marble-look counters and brushed metal hardware.
Warm greige or mushroom
Not everyone wants a colorful island. A warm neutral can still create enough contrast to freshen the kitchen while keeping the look subtle. These tones are especially good in homes where the kitchen opens to living spaces and you want the palette to feel connected.
Soft charcoal
If black feels too severe, charcoal is the grown-up compromise. It delivers definition, hides scuffs better than lighter colors, and gives an island real presence. In the right kitchen, it can make builder-grade cabinetry nearby look much more intentional.
How to paint a kitchen island the right way
1. Clear the area and label what comes off
Remove stools, unplug nearby appliances, and clear the countertop. If your island has doors, drawers, or hardware that will be removed, label everything before you start. Future you will be extremely grateful and far less likely to end the project with one mysterious hinge and a personal crisis.
2. Clean like you mean it
Kitchens collect grease even when they look clean. Wash every paintable surface thoroughly so the primer and paint can actually stick. This is one of the least glamorous parts of the project and one of the most important. A beautiful color on a dirty surface is just a pretty future failure.
3. Scuff sand and repair flaws
Lightly sanding gives the new finish something to grip. Fill dents, old hardware holes, or chips before priming. The smoother the surface, the more custom the result will look. A painted island only feels high-end when the finish looks deliberate and not like a rushed Saturday experiment.
4. Prime for adhesion
Do not skip primer, especially on previously finished wood, laminate, or slick surfaces. A good bonding primer helps the topcoat lay down more evenly and last longer. This step is not exciting, but neither is watching paint peel after a few months of normal kitchen life.
5. Use the right paint and apply thin coats
Cabinet paint, trim enamel, or another durable cabinetry finish is the right move here. Apply thin, even coats and let them dry properly between applications. Rushing the second coat is how you end up with drips, drag marks, and a finish that looks more “craft fair” than “custom kitchen.”
6. Let it cure before heavy use
Dry and cured are not the same thing. Your island might feel dry to the touch fairly quickly, but the finish often needs more time to harden fully. Be gentle for the first several days and avoid bumping stools, reinstalling hardware too fast, or scrubbing aggressively.
Small extras that make the painted island look even better
A fresh paint color does plenty on its own, but a few inexpensive supporting upgrades can stretch the effect even further. New hardware can make the island feel more custom. Counter stools with wood or woven textures can reinforce the color story. A simple runner, a bowl of lemons, or a new pendant can make the update look even more intentional.
The key is restraint. Let the island be the main character. Everything else should act like a very supportive supporting cast.
Common mistakes to avoid
Picking a color in isolation
That beautiful paint sample under store lighting may turn muddy, icy, or oddly purple in your kitchen. Test samples near your cabinets, counters, and flooring before committing. Kitchens have a lot of competing materials, and color always behaves differently once the whole cast is on stage.
Ignoring the countertop undertones
A gorgeous island color can still look wrong if it fights the countertop. Warm stone and cool paint can clash fast. Use the countertop as a guide, not an afterthought.
Using the wrong product
Regular wall paint may look fine for a week. After that, the scratches, smudges, and wear usually begin to tell on it. Choose a product intended for cabinets or trim so the finish can stand up to real kitchen life.
Skipping prep because the island is “small enough”
Small project does not mean no-prep project. The reason painted islands look expensive is not only the color. It is the smooth, durable finish. Prep is what gets you there.
Real-life experiences: what this kind of kitchen refresh actually feels like
One of the most interesting things about painting a kitchen island is how often the change feels bigger in real life than it does in photos. In pictures, it looks like a nice color update. In everyday use, it can completely change how people experience the room.
Homeowners often say the kitchen starts to feel more finished, almost like the room finally decided what kind of outfit it wanted to wear. A kitchen that once looked flat and overly matched suddenly has some depth. The island becomes a visual pause in the middle of the cabinetry, which helps the room feel more designed and less like a box full of storage.
There is also the emotional side of it. Kitchens are workhorse spaces. They collect groceries, bills, lunch boxes, water bottles, homework, and the occasional mystery crumb that appears to have signed a long-term lease. Because the room gets so much use, even a small design improvement can feel surprisingly energizing. People often describe the freshly painted island as the thing that makes them want to wipe down the counters at night, light a candle, or actually enjoy standing in the kitchen again. That is a strong return for a few cans of paint.
Another common experience is that guests notice it immediately, even when they cannot identify exactly what changed. They walk in and say the kitchen looks brighter, more updated, or more expensive. That response makes sense because the island usually sits in the center of the room and catches both natural light and movement. When its color changes, the whole rhythm of the space changes with it.
People with wood cabinets often have the strongest reaction. Many are hesitant at first because they do not want to ruin the warmth of the original kitchen. After the island is painted, though, the wood often looks better than before. Instead of feeling dated or overly brown, it reads as warm, natural, and intentional. The contrast helps each finish do its job. The wood adds texture, and the painted island adds personality.
There are practical lessons too. Most people who have done this project successfully will tell you the same thing: the prep work matters more than the painting itself. Cleaning, sanding, priming, and giving the finish time to cure are the unglamorous steps that separate a durable island from a chipped disappointment. The second lesson is that sample swatches are worth the effort. A color that feels safe on paper can look dull on a full island, while a shade that feels bold in the store can look perfect once surrounded by stone, wood, and daylight.
Perhaps the best part of this refresh is that it feels achievable. It is not a full kitchen remodel with contractor schedules, layout decisions, and budget creep lurking around every corner. It is a focused update with a clear payoff. For many homeowners, that makes it the rare home project that delivers both design satisfaction and emotional relief. The kitchen looks better, the budget survives, and nobody had to live without a sink for six weeks. Frankly, that is a home-improvement miracle.
Final thoughts
If you want the biggest style shift for the least money, paint the kitchen island. It is the one spot that can change the mood, modernize the room, and create a more custom look without dragging you into a full renovation. Choose a color that works with your cabinets and countertops, use a durable finish, and respect the prep. Done right, this small project can make the whole kitchen feel new again.