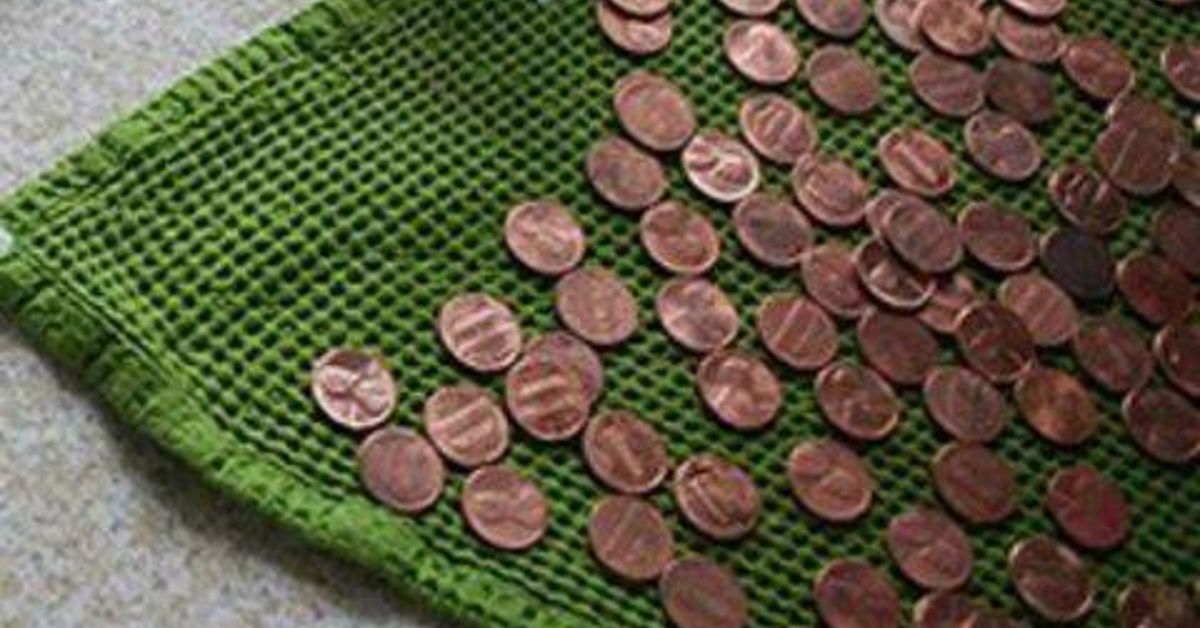
If you’ve got a jar of pennies rattling around in a drawer, congratulations: you’re already halfway to a statement wall piece. A penny starburst mirror combines two things home decorators lovelight-bouncing mirrors and eye-catching sunburst shapeswith one thing almost everyone has too much of: loose change. It’s part DIY project, part conversation starter, and part “Wait… is that made of actual pennies?”
This guide walks you through what a penny starburst mirror is, why it works so well in real homes, how to build one without turning your craft table into a copper tornado, and how to style it so it looks intentionally chic (not “I hot-glued my piggy bank to the wall”). You’ll also get practical tips on cleaning pennies, sealing the finish, and hanging it safely.
What Is a Penny Starburst Mirror?
A penny starburst mirror is a decorative mirror with “rays” radiating from the center, using pennies as the design material. Some versions glue pennies directly onto a round backing in concentric rays. Others combine pennies with wood shims, dowels, or cardboard spokes for extra dimension. The result is a metallic, textured, sunburst-style frame that feels somewhere between vintage glam and clever upcycling.
The idea has been shared for years in DIY communities and roundup posts, often credited to a project known as the “Penny Starburst Mirror” from Real Happy Space. Even when the original tutorial is hard to find, the project keeps showing up in DIY lists because it’s affordable, distinctive, and genuinely fun to make.
Why This Mirror Style Works So Well
1) Sunburst mirrors already have design history on their side
Sunburst mirrors aren’t a random Pinterest invention. The sunburst motif has deep decorative roots and became especially associated with European interiors and later decorative mirrors. That long history is one reason the shape still feels elegant today. In modern homes, it also plays nicely with midcentury-inspired spaces, where sunburst mirrors remain a familiar accent.
2) Pennies add warmth and texture
Copper-toned finishes are naturally warm, which makes a penny mirror especially nice in entryways, bedrooms, dining rooms, or anywhere that feels a little flat. Even better, pennies don’t all match perfectly. You’ll get bright copper, deeper brown, and slightly aged tonesand that variation makes the frame look richer and more custom.
3) It’s budget-friendly, but it doesn’t look cheap
Plenty of DIY wall décor looks like a budget craft project. This one can look surprisingly high-end when the layout is neat and the finish is sealed. You’re working with a small round mirror, a backing board, adhesive, and pennies. The coin material itself is low-cost (and often already sitting in a bowl by your door), so the main “investment” is patience.
Before You Build: Smart Planning Choices
Choose your mirror size first
Most DIY sunburst tutorials start with a round mirror in the 8- to 14-inch range, because it’s easier to handle and easier to hang. A smaller mirror also helps keep the penny count reasonable. If you go bigger, the design gets dramatic fastbut so does the gluing time.
Pick your starburst style
There’s no single “correct” penny starburst pattern. Here are three solid options:
- Flat penny rays: Pennies laid edge-to-edge in radiating rows on a flat backing.
- Layered rays: Alternate penny rows (short/long) to create more depth.
- Mixed-media burst: Wood shims or dowels underneath, pennies on top as accents.
If you’re a beginner, start flat. It’s easier to align, easier to seal, and easier to fix if you make a mistake.
Decide on the finish: bright copper or aged patina
A bright, polished penny look feels crisp and modern. A darker, naturally toned penny look feels vintage and moody. Both are great. The important part is consistency: decide your vibe before you glue.
One more thing: if you’re using pennies for decor, use common circulation coins, not collectible coins. Harsh cleaning and polishing can damage coin surfaces and reduce collector value, so craft with ordinary pennies and save anything potentially collectible for your coin jar (or a collector).
Materials and Tools
Core materials
- Round mirror (8–14 inches is a friendly starting size)
- Backing board (thin plywood, MDF, hardboard, or thick craft board)
- Pennies (sorted and cleaned if needed)
- Strong adhesive (craft glue, jewelry glue, or construction adhesive suitable for the materials)
- Picture hanger hardware or mirror hanging hardware
- Clear sealer (spray or brush-on)
Helpful tools
- Ruler or measuring tape
- Pencil or fine marker
- Painter’s tape
- Scissors or utility knife (for cardboard templates)
- Clamps or heavy books (if your build has layers)
- Soft cloth and small bowl (for coin prep)
- Gloves and good ventilation (especially when sealing)
How to Make a Penny Starburst Mirror
Step 1: Create your layout guide
Place the mirror on your backing board and trace the center area. Then draw guide lines that divide the circle into sectionsnorth/south/east/west first, then diagonals. This trick shows up in sunburst mirror tutorials for a reason: it keeps the design balanced and prevents the “everything looked fine until the last quarter” problem.
If you like precision, mark evenly spaced ray lines. If you prefer a more organic look, use the quadrant lines and eyeball the spacing as you go.
Step 2: Prep the pennies
Sort your pennies into a few groups: bright copper, medium tone, and darker patina. This gives you more control when you design. You can make a smooth gradient, alternate tones for visual rhythm, or keep it mixed for a natural, mottled finish.
If your pennies are dusty or grimy, clean gently. For craft pennies (again, not collectible coins), many makers use a simple vinegar-or-lemon-and-salt method for a brighter copper look. If you’d rather be gentler, a distilled-water soak and soft brushing can remove debris without aggressive scrubbing. Let all coins dry fully before gluing.
Step 3: Attach the mirror to the base
Center the mirror on the backing board and attach it using an adhesive that is compatible with your mirror backing and base material. Some DIY mirror tutorials use combinations like strong glue plus hot glue for positioning, while others use wood glue or jewelry glue depending on the materials.
If your design places pennies right up to the mirror edge, make sure the mirror is secure before you start adding rays. Nothing ruins the mood like your centerpiece drifting half an inch while the glue sets.
Step 4: Build the first ring
Start by laying pennies around the mirror edge without glue (a dry fit). This is your “control ring,” and it determines how neat the rest of the project will look. Adjust spacing until it feels even, then glue each penny in place.
Work in small sections and check alignment frequently. It’s much easier to fix one crooked penny now than to discover a wobbly spiral after 80 coins.
Step 5: Build the starburst rays
From the first ring, extend outward in rays. You can create a clean starburst by alternating lengthsfor example, one short ray, one longer ray, repeating around the circle. This idea shows up in many sunburst mirror builds using wood shims, reeds, or sticks, and it works beautifully with pennies too.
A few design options:
- Single-coin rays: One penny wide, easiest and fastest.
- Double-coin rays: Two pennies wide near the center, tapering to one.
- Layered burst: Add a second penny layer on selected rays for dimension.
Keep rotating your work as you go so your eye doesn’t get “used to” uneven spacing. The best penny starburst mirrors look balanced from every angle.
Step 6: Let it cure fully
Do not rush this part. Give the adhesive enough time to cure according to the product instructions. If you move or hang the mirror too early, the pennies can shift, and you’ll say words that are not suitable for a family craft blog.
Step 7: Seal the finish
Sealing helps protect the look and slows down tarnish or surface wear. A clear craft sealer or clear enamel is a common choice. Many spray sealers are made for use on wood, metal, plastic, and other mixed surfaces, which is handy for projects like this.
Apply several light coats instead of one heavy coat. Heavy coats can pool between pennies and leave drips or cloudiness. Follow the product’s temperature and humidity guidelines, and always spray in a well-ventilated area.
Step 8: Install proper hanging hardware
Mirrors are not the place to gamble. Use real hanging hardware rated for the weight of your finished piece. If you’re mounting into drywall and not hitting a stud, use appropriate anchors. If you’re hanging on masonry, use masonry-appropriate anchors and installation steps.
Avoid adhesive wall hooks for mirrors. Even if the weight seems okay on paper, mirrors are fragile, and adhesive systems can fail over timeespecially with humidity and temperature changes.
Design Tips That Make a Big Difference
Use the “work in quarters” trick
Several popular sunburst tutorials recommend building in quarters (or “working in fours”), and it’s one of the best ways to keep the design symmetrical. Do a few rays at the top, then bottom, then left, then right. Fill in between them instead of going all the way around in one pass.
Mix penny tones on purpose
Random can look good, but intentional random looks better. Try these patterns:
- Ombre glow: Bright pennies near the mirror, darker pennies at the outer edge.
- Vintage blend: Mostly dark pennies with occasional bright highlights.
- Checker shimmer: Alternate bright and dark pennies on every other ray.
Hide messy glue lines with a final edge ring
If the center looks a little uneven where pennies meet the mirror edge, add a clean inner ring (or a thin decorative trim) to tidy it up. This small move can make the entire piece look more polished.
Where a Penny Starburst Mirror Looks Best
- Entryway: It catches light and makes a narrow hall feel more open.
- Bedroom: Great above a dresser or as part of a gallery wall.
- Home office: Adds personality without taking up floor space.
- Dining nook: Warm metallic tones pair nicely with wood furniture.
- Vintage or midcentury rooms: The sunburst silhouette fits right in.
If you’re styling a blank wall, a sunburst mirror can act like art and function at the same time. It reflects light, adds texture, and breaks up flat surfaces better than a plain framed mirror.
Common Mistakes to Avoid
1) Skipping the dry layout
Dry fitting the first ring and a few sample rays saves time. It helps you catch spacing problems early and estimate how many pennies you’ll actually need.
2) Using too much glue
More glue does not equal more strength. It usually equals squeeze-out, sticky fingerprints, and a finish that looks cloudy after sealing.
3) Cleaning coins too aggressively
For craft use, you can brighten penniesbut don’t scrub them like you’re trying to erase history. Abrasive cleaning can leave scratches and an unnatural finish. Gentle methods give you a cleaner look without making every penny look identical.
4) Hanging it with adhesive strips
Repeat after me: mirrors deserve hardware. Use anchors, screws, or studsnot wishful thinking and a sticky tab.
Penny Starburst Mirror FAQ
How many pennies do I need?
It depends on your mirror size and ray pattern. A small 8-inch mirror with a modest burst may use under 150 pennies. A larger, layered design can easily use 250–400+. Dry-fit one quarter of the design, count the pennies, then multiply by four for a decent estimate.
Can I use old pennies?
Yes, but sort first. If a penny looks unusual, rare, or collectible, set it aside. For decor projects, common circulated pennies are the safest choice.
Is it okay to use pennies for crafts?
Using pennies in decor is a common craft practice. Just note that U.S. rules prohibit melting, treating, or exporting pennies for certain purposes, with limited exceptions. If in doubt, use them as-is and avoid any process that alters them beyond normal cleaning and sealing for a craft surface.
Will the pennies tarnish?
Over time, yesespecially if left unsealed. If you love the aged look, that’s a feature. If you want the copper shine to stay brighter, apply a clear sealer and keep the mirror out of damp areas.
Conclusion
A penny starburst mirror is one of those rare DIYs that hits all the sweet spots: inexpensive, creative, useful, and surprisingly stylish. It lets you turn everyday materials into a statement piece with texture, shine, and a little personality. Plus, every penny has a slightly different color and wear pattern, so your mirror ends up looking custom by default.
Whether you go for polished copper glamour, a weathered vintage finish, or a mixed-media version with layered rays, the secret is simple: plan the layout, work in sections, seal the finish, and hang it safely. Do that, and you’ll have a mirror that looks way more expensive than it isand a great story every time someone asks, “Wait… are those pennies?”
Real-World Experiences With a Penny Starburst Mirror
One of the best things about this project is how different the “experience” can be depending on your style. Some people start because they want a budget mirror, and they end up discovering they actually enjoy repetitive detail work (the penny-by-penny gluing becomes weirdly relaxing). Others start because they have a giant coin jar and think, “Finally, a purpose!” and then realize halfway through that sorting pennies by color is the real design superpower.
A common first-time experience is underestimating how much layout matters. At the start, it feels tempting to eyeball everything and trust the process. Then around ray number 17, the spacing starts drifting, and suddenly the starburst looks more like a slightly stressed-out sunflower. Makers who divide the project into quadrants usually have a much smoother build. The mirror stays balanced, and they spend less time pulling off pennies to fix spacing.
Another very common experience: glue experimentation. Many DIYers try hot glue first because it’s fast, but for a permanent wall piece, stronger adhesives usually feel more secure. A lot of people end up using a combination approachposition with one adhesive, reinforce with anotherespecially if they’re attaching pennies to wood, cardboard, or a painted surface. The lesson most people learn is simple: test your adhesive on a small section first, and let it fully cure before judging it.
Cleaning pennies is also a “choose your own adventure” moment. Some makers love the bright copper look and clean a batch so the mirror gleams right away. Others intentionally keep darker pennies because the mixed patina gives the piece depth and character. Interestingly, many people who start out wanting a super-uniform look end up preferring variation once they see the mirror on the wall. The mixed tones catch light in a softer, richer way and make the project look less flat.
Sealing is where the project really transforms. Before sealing, the surface can look crafty. After sealing, it starts looking like décor. People often report that two or three light coats make a huge difference in how “finished” the mirror feels. The biggest regret here is usually spraying too heavily and getting drips or cloudy spots. Light coats win every time.
Then there’s the hanging experiencethe part where people suddenly become very serious adults. A penny starburst mirror may not be huge, but it’s still a mirror, and mirrors deserve proper hardware. DIYers who take the time to use anchors or studs sleep better at night. DIYers who try shortcuts with adhesive hooks usually end up replacing a wall patch kit and making a second trip to the hardware store.
The final experience, almost universally, is surprise at how much attention the mirror gets. Guests notice it immediately. They lean in. They ask if the pennies are real. They ask how long it took. They often assume it was bought from a boutique or artisan market, not made at a table with a coin pile and a glue bottle. That reaction is a big reason this project sticks around in DIY circles: it looks custom, it tells a story, and it turns leftover change into something that feels intentionally designed.
If you’re making one for the first time, expect a little trial and error, a few crooked pennies, and at least one moment where you question your life choices while holding a gluey coin. Then expect the payoff: a bold, reflective, copper-toned piece that looks fantastic on the wall and makes your spare change look like a design decision.