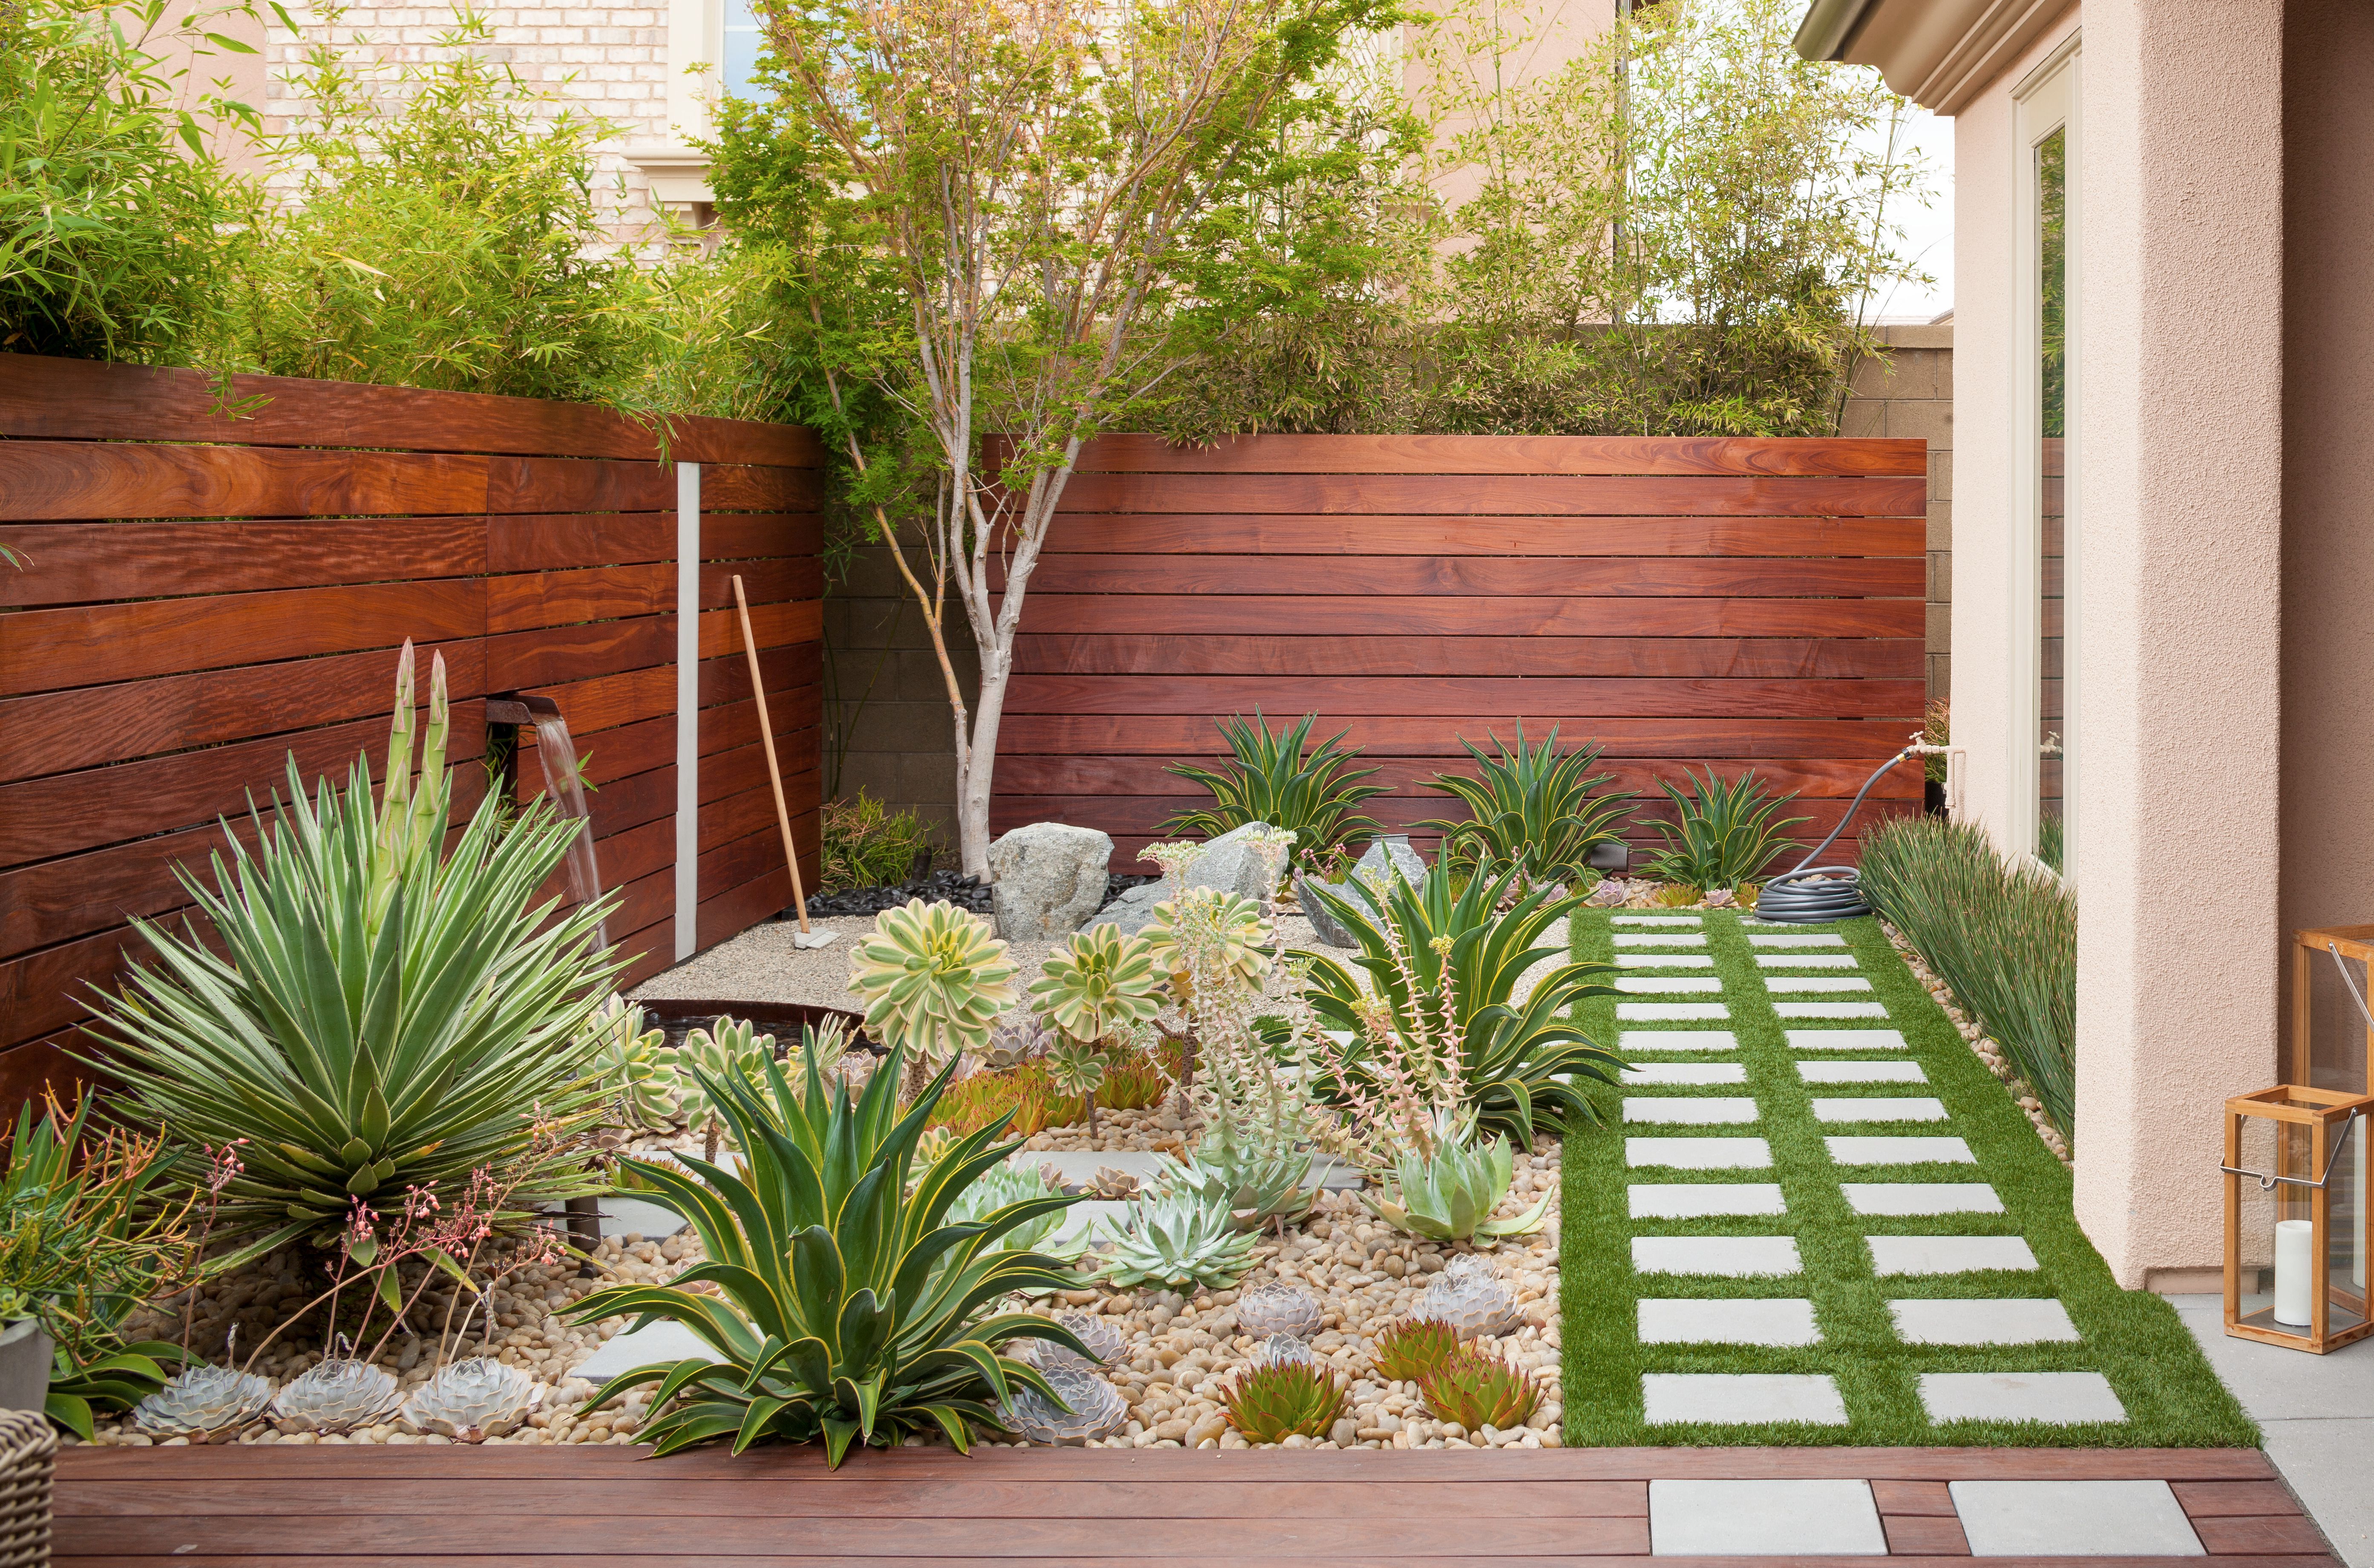
A garden path is basically your yard’s “plot.” It tells people where to go, what to notice, andmost importantlywhere not to step when you’ve just planted something delicate and expensive. Done well, a walkway doesn’t just connect Point A to Point B. It slows you down, guides your eyes, and makes your outdoor space feel like a destination instead of a shortcut.
This guide shares 24 garden path ideas you can steal (politely) for your own backyard oasisplus practical design tips on layout, drainage, comfort underfoot, lighting, and low-maintenance choices. Whether you’re aiming for cottagecore charm, modern minimalism, or “I just need to stop tracking mud into my house,” there’s a path style here for you.
Before You Pick a Path: 6 Design Moves That Make Everything Look Better
1) Start with where you actually walk
Watch your yard for a week. The “desire line” (that informal trail you and your family naturally take) is your best free landscape architect. If people cut across your lawn anyway, your beautiful new path will be ignored like an unread group chat.
2) Choose a width that matches the vibe (and the wheelbarrow)
For a comfortable garden walkway, plan around 36 inches if you want two people to pass without doing the awkward sidewalk shuffle. For a narrow, romantic stroll, 24–30 inches can workjust don’t expect it to play nice with a wheelbarrow or garden cart.
3) Keep water in mind
If your path becomes a tiny river every time it rains, it won’t feel like an oasismore like an outdoor slip-and-slide. Consider grading slightly so water sheds away, and lean toward permeable materials (gravel, decomposed granite, permeable pavers) if runoff is an issue.
4) Build the boring part well
The base is not glamorous, but it’s the reason a path stays level instead of becoming modern art after one freeze-thaw season. A compacted base layer and proper edging prevent shifting, ruts, and gravel migration.
5) Don’t forget edging
Edging is the “good manners” of a path. It keeps loose materials contained, defines the line, and makes the whole design look intentionaleven if you installed it while wearing pajama pants.
6) Make it feel like it belongs
Repeat a material or color from your home (brick, stone tone, fence color, metal finish) so the path looks like part of the landscape, not a leftover weekend project from a different yard.
24 Garden Path Ideas You Can Mix, Match, and Make Your Own
-
Classic Flagstone Walkway
Natural flagstone instantly says “timeless garden.” Use irregular pieces for an organic look, or cut stone for a more tailored feel. Add low groundcovers or gravel between joints to soften edges and reduce weeds.
-
Stepping Stones Through Groundcover
Place large stepping stones over thyme, dwarf mondo grass, or other “steppable” plants so the path feels tucked into greenery. Space stones for a natural stride (test it before committing), and keep edges crisp so it reads as intentional.
-
Gravel Path With Brick Border
This is a favorite for a reason: the gravel drains well and the brick keeps everything neat. The contrast reads charming, especially in cottage-style gardens. Choose a gravel size that’s comfortable to walk on and not prone to rolling underfoot.
-
Pea Gravel “Crunch Walk”
There’s something satisfying about that soft crunch as you walklike your garden is applauding your excellent life choices. Pea gravel looks relaxed and informal, but it needs sturdy edging so it doesn’t wander into beds like it pays rent.
-
Decomposed Granite for a Casual, Park-Like Path
Decomposed granite (DG) gives you a natural look with a firmer feel than loose gravel when compacted properly. It’s a great choice for modern landscapes or Mediterranean-style gardens, and it plays well with steel edging.
-
Brick Walkway in Herringbone Pattern
Brick patterns add instant polish. Herringbone is sturdy and visually rich, while running bond reads more classic and simple. If you love that “old garden” vibe, slightly weathered reclaimed brick is peak romance.
-
Concrete Pavers: Clean, Modern, and Practical
Large-format concrete pavers look sleek and are easy to keep levelespecially when installed over a well-prepped base. For extra style, stagger the pavers or alternate sizes, and fill joints with gravel for a modern grid look.
-
“Pavers + Gravel” Combo Path
Set pavers into a gravel field so you get the best of both worlds: stable stepping points and a permeable, relaxed surround. This style is especially good for side yards where you want a tidy route without a fully “hard” surface.
-
Mulch Path for a Soft, Woodsy Feel
Mulch paths are budget-friendly and cozy underfootperfect for informal gardens and veggie beds. Top up as it breaks down, and consider a thicker layer to reduce weeds. Wood chips also help prevent mud in high-traffic zones.
-
Wood Chip Trail With Log Edging
For a forest-garden look, use arborist wood chips and contain them with log rounds or timbers. It’s casual, natural, and surprisingly effective. Just plan for occasional refreshing as the chips settle and decompose.
-
Stone + Moss “Fairy Garden” Path
In shady or moist areas, moss can soften stone joints beautifully. Choose flatter stones for safer footing and let the greenery do the decorating. This path style is a mood: quiet, lush, and slightly magical.
-
River Rock Border for Texture
Even a simple path gets an upgrade with a river rock edge. Use it to frame pavers, concrete, or DG. The rounded stones add contrast and help define curves, especially along planting beds.
-
Oversized Steppers for a Bold Statement
Large stepping stones (or large-format pavers) create a strong graphic look. Space them evenly for rhythm, and set them into gravel or low groundcover. This works beautifully in modern landscapes and minimalist planting schemes.
-
Stone Mosaic Path (Yes, You Can Be That Person)
If you like detailed projects, create a mosaic-like walkway with mixed stone pieces. Keep a consistent height for safety and comfort, and use a repeated color palette so it looks artful instead of accidental.
-
Boardwalk-Style Path Over Damp Areas
For spots that stay soggy, consider a raised wooden walkway or short boardwalk sections. It protects plants, keeps shoes dry, and gives your garden a “botanical garden tour” vibe. Use slip-resistant surfaces and durable materials.
-
Gravel Path With Steel Edging
Corten or steel edging creates razor-sharp lines that make a simple gravel path feel high-design. The warm rust tone of corten looks especially good with grasses, drought-tolerant plants, and modern desert-inspired landscapes.
-
Stepping Stones in a Lawn (The “Classic Backyard” Route)
Simple, clean, and kid-friendly: stepping stones across turf keep feet out of muddy patches and preserve the lawn. Choose flatter stones for mowing convenienceor set them slightly above grass level if you like a more sculptural look.
-
Shell, Hazelnut Shell, or Specialty Loose Fill (Regional Charm)
In some regions, shell paths (like crushed oyster shell) or other specialty loose materials offer a bright, coastal look and good drainage. If it’s locally available, it can be cost-effective and on-brand with your area’s style.
-
Brick “Ribbons” With Gravel Between
Lay two parallel lines (ribbons) of brick to guide the walk, then fill the center with gravel. It feels tailored but still casual, and it’s a great way to use brick strategically without building a full brick surface.
-
Steppers Set in Gravel for High-Traffic Gardens
If you want stepping stones but also need a path that won’t turn to mud, set the steppers into a compacted gravel or DG base. It’s stable, drains well, and looks polishedideal for frequently used routes.
-
Front-to-Back “Side Yard Saver” Path
Side yards are often narrow, shady, and weirdly neglected. A simple gravel or paver path instantly makes it functional. Add wall-mounted lights or solar stakes to make the space feel intentional instead of “storage corridor.”
-
Garden Path With Low Hedge or Boxwood Edging
For a formal look, pair a straight walkway with clipped hedging or tidy border plants. The geometry makes everything feel refined, even if your backyard is otherwise wild (in a good way). This style also frames focal points beautifully.
-
Stepped Path for Slopes
If your yard has elevation changes, don’t fight gravityuse it. Add stone steps or paver risers so the route is safe and comfortable. Good steps make the garden feel like an experience, not an obstacle course.
-
Solar-Lit Path for Nighttime “Resort Energy”
Lighting turns a daytime garden into an evening retreat. Solar stake lights, low-voltage path lights, or warm downlighting in trees can guide the way and highlight plant textures. Keep it subtlethink “glow,” not “stadium.”
Build Smarter: Quick Tips for a Long-Lasting Garden Walkway
Base layers matter (especially for gravel and pavers)
For many DIY paths, the reliable formula is: excavate, add a compacted base (often crushed stone), use a separator layer when appropriate, then add your top material (gravel, pavers, stone). The more traffic and the wetter your site, the more you’ll appreciate a solid base later.
About landscape fabric: helpful, but not magic
Fabric can help keep gravel from sinking into soil and reduce some weed pressure, but weeds can still sprout in debris that settles on top over time. If you use fabric, plan on occasional raking and topping up materials. If you skip it, plan on thicker layers and more diligent weeding. Either way: you’re in a long-term relationship now.
Choose permeable surfaces when runoff is a concern
Permeable paths (like gravel, DG, or permeable pavers) can help rainwater soak into the ground instead of rushing off to low spots. It’s a practical win and can make your landscape more resilient in heavy rain.
Maintenance Cheat Sheet: Keep Your Path Looking “Wow” With Minimal Drama
- Gravel/DG: Rake occasionally, top up low spots, and keep edging tight.
- Pavers/brick: Sweep joint sand as needed, spot-treat weeds, and re-level any settling areas early.
- Mulch/wood chips: Refresh seasonally or as it breaks down; watch for migration after storms.
- Natural stone: Keep joints clear, reset wobbly stones, and trim encroaching plants for clean edges.
- Lighting: Wipe solar panels clean and reposition fixtures as plants grow.
Conclusion: The “Outdoor Oasis” Is Really a Good Route and a Good Mood
The best garden path designs do two things at once: they solve a practical problem (mud, foot traffic, awkward layout) and they create a feeling (welcome, calm, curiosity, charm). Choose materials that match how you live, build a solid base so it lasts, and add small upgradesedging, curves, lighting, a focal pointso your walkway feels like a destination instead of a necessity.
Real-World Experience: What Building Garden Paths Actually Feels Like (and What You Learn the Hard Way)
I’ve noticed that most “garden path” inspiration photos share a secret: you can’t hear the planning, the shoveling, or the moment someone realizes they made the path 24 inches wide and their wheelbarrow is 26 inches wide. Real life is less glossyand that’s exactly why a good path feels so satisfying when it’s done.
The first lesson is that your feet are honest critics. A path can be gorgeous, but if it wobbles, pinches your stride, or collects water, you’ll avoid it. Before placing anything permanently, it helps to mock up the route with a hose, string line, or even cardboard strips. Walk it at your normal pace, then walk it while carrying something awkward (a watering can, a basket, a toddler who suddenly “can’t walk”). If it feels clumsy, it will stay clumsy.
The second lesson: edging is not optional when you’re using loose material. The first time you install gravel without solid edging, you’ll experience a new emotion: watching tiny rocks migrate into your garden beds like they’ve started their own relocation program. Proper edgingmetal, brick, stone, even thick timberacts like a border fence for your path. It makes the whole thing look cleaner, but more importantly, it keeps maintenance from turning into a weekly “gravel rescue mission.”
Then there’s the “base” reality check. In the excitement of choosing pretty stones, it’s tempting to rush the prep. But the base is what makes a path feel stable years later. You don’t need perfectionthis is a garden, not a NASA launchpadbut you do want it compacted and level enough that stones don’t rock and pavers don’t sink. If you skip that step, the path will still exist… it’ll just develop character in the form of dips, tilts, and ankle surprises.
Weeds are also more persistent than optimism. Even with landscape fabric, weeds can show up in the fine layer of dust and organic debris that settles on top of gravel over time. The good news: maintenance doesn’t need to be intense. A quick rake, a periodic top-up, and pulling tiny weeds before they become confident weeds will keep the path looking crisp. In my experience, the “low-maintenance” win comes from designing the path so maintenance is easy, not from believing maintenance won’t exist.
Finally, the most underrated upgrade is lighting. The first night you see a softly lit garden path, the space feels like a retreateven if the rest of the yard is still a work in progress. A few warm lights can guide the route, prevent trips, and highlight plants you love. It’s the kind of finishing touch that makes you actually want to go outside in the evening instead of staring wistfully at your yard through the window like it’s a reality show you’re not participating in.
In the end, a garden path is one of those projects where the payoff is daily. Every time you step outside and your feet know exactly where to godry, stable, and surrounded by plantsyou feel like you upgraded your whole life, not just your yard. Which is dramatic, sure. But also kind of true.