If your laptop webcam makes you look like you are broadcasting live from a baked potato, good news: a digital camera can usually do much better. A DSLR, mirrorless camera, compact camera, or even certain action cameras can deliver sharper video, prettier color, and that lovely blurred background that makes your messy room look “artistically mysterious” instead of “I forgot laundry exists.”
The trick is knowing how to connect it. Some cameras work directly over USB with official webcam software or built-in USB streaming. Others need an HDMI capture card. Either route can work beautifully if you set it up the right way. Below is a practical, beginner-friendly guide that walks you through the full process in 14 steps, along with real-world tips, common mistakes, and a few sanity-saving lessons learned the hard way by people who have stared into a blinking autofocus box at 8:59 a.m. before an important meeting.
Why use a digital camera as a webcam?
A dedicated camera can upgrade your video quality in ways a standard webcam usually cannot. You get a larger sensor, better low-light performance, interchangeable lenses on many models, more natural skin tones, and more control over how your image looks. That matters for remote work, teaching, streaming, client calls, online interviews, product demos, and content creation.
That said, the best setup is not always the fanciest one. A good webcam is still easier. A camera-as-webcam setup is worth it when image quality matters and you do not mind a few extra cables, menus, and tiny bursts of technical drama.
What you need before you start
- A compatible digital camera
- A USB cable or HDMI cable, depending on your setup
- A computer with Zoom, Microsoft Teams, Google Meet, OBS, Discord, or similar software
- Optional webcam utility software from your camera manufacturer
- Optional HDMI capture card if USB is not ideal
- A tripod or stable mount
- AC power adapter or dummy battery if you plan to use the camera for long sessions
- A separate microphone if you want more reliable audio
How to Use a Digital Camera as a Webcam: 14 Steps
-
1. Check whether your camera supports webcam use
Start with the least glamorous but most important step: compatibility. Look up your camera model and see whether the manufacturer offers webcam software, native USB streaming, or clean HDMI output. If your model supports a direct USB webcam connection, that is usually the easiest path. If it does not, HDMI plus a capture card is often the universal backup plan.
This step saves time, money, and at least one angry sigh. There is no point buying random adapters before you know whether your camera can cooperate.
-
2. Decide between USB and HDMI
USB is usually simpler. You install the manufacturer’s software, connect the camera, choose it inside your meeting app, and get on with your life. HDMI is a little more gear-heavy, but it often gives you broader compatibility and cleaner results, especially on older cameras or more advanced streaming setups.
Think of USB as the “please be easy today” option and HDMI as the “fine, I’ll do it properly” option. If your camera supports native USB streaming well, use it. If the USB feed is unstable, limited, or unavailable, move to HDMI capture.
-
3. Install the manufacturer’s webcam software if needed
Canon, Sony, Nikon, Fujifilm, Panasonic, and others have offered tools or webcam workflows for compatible cameras. If your brand has official webcam software, download the latest version from the support page and install it before plugging everything in. Restart your computer if the installer asks. That is not your computer being dramatic. It actually matters.
Official software is often the easiest way to get recognized by Zoom, Teams, or streaming apps without extra hardware. It can also be the difference between “camera detected” and “why is this app showing me a black rectangle of disappointment?”
-
4. Get the right cable and connection method
If you are using USB, use a data-capable cable, not a charge-only cable pretending to be useful. If you are using HDMI, you may need micro HDMI or mini HDMI on the camera side and standard HDMI on the other end, plus a USB capture device connected to the computer.
Loose, cheap, or incorrect cables cause an absurd number of problems. If the image cuts out when you breathe near the desk, suspect the cable before you assume the camera is haunted.
-
5. Put the camera on stable power
Battery power is fine for a short call, but it is a risky choice for longer meetings, webinars, and livestreams. Use an AC adapter or dummy battery if your camera supports one. This prevents the classic tragedy of looking fantastic for 43 minutes and then vanishing from the meeting because your battery gave up on your career goals.
Stable power is especially important if you stream often, teach online, or record long sessions. It turns your setup from “temporary experiment” into “actually dependable.”
-
6. Disable auto power-off and sleep settings
Many cameras are designed to save power by sleeping after a period of inactivity. That is great for vacation photos, terrible for a two-hour presentation. Go into your camera’s settings and turn off auto power-off, sleep mode, or any display timeout that interrupts the video feed.
If your camera still stops after a while, dig deeper into the power-saving menu. Some models have separate settings for the screen, the body, or the video output. Cameras are wonderful tools, but sometimes their menus are written like a puzzle box designed by an anxious engineer.
-
7. Set the camera to video mode
For the most reliable webcam performance, switch the camera to movie or video mode. This helps the camera prioritize continuous live output rather than behaving like it is waiting for you to snap a still photo of a sandwich.
Video mode also makes it easier to manage exposure, autofocus, frame rate, and HDMI or USB streaming settings. If your camera offers USB streaming settings directly in the menu, this is usually where you will find them.
-
8. Turn on clean output if you are using HDMI
If you connect through HDMI, make sure the camera outputs a “clean” image. That means no icons, no battery symbol, no focus boxes, no giant shutter-speed overlay floating in front of your face like a robotic eyebrow. You want the video feed only.
Most compatible cameras have a menu item for display info, HDMI info display, or output overlays. Turn those off before you assume the capture card is the problem. Many people discover their setup “works” only after realizing the camera is faithfully broadcasting every on-screen icon like it is proud of them.
-
9. Choose flattering camera settings
Now make the image look good. Start with a focal length that feels natural, not too wide and not weirdly zoomed in. Put the camera slightly above eye level if possible. Set white balance so your skin tone does not look orange, blue, or like you just emerged from a submarine.
If you understand manual exposure, great. If not, aperture priority can be a friendly middle ground. A moderately wide aperture can blur the background nicely, while a reasonable ISO keeps the image bright without turning it into digital confetti. This is where your camera starts earning its keep.
-
10. Use separate audio unless your setup handles sound well
Video gets all the glory, but bad audio ruins everything faster than slightly soft focus ever will. In many real-world setups, a separate USB microphone or headset gives you more reliable sound than relying on the camera. Even when a camera can pass audio, people often prefer an external mic for consistency and easier control.
A simple rule: if your audience has to choose between a beautiful face and understandable speech, they will choose understandable speech every time. So should you.
-
11. Mount the camera properly and fix your lighting
Do not balance your expensive camera on a stack of books and emotional optimism. Use a tripod, desk mount, or stable support. Frame yourself so your eyes sit naturally in the upper half of the shot, and give yourself a little headroom.
Lighting matters even more than the camera itself. Face a window or use a soft light in front of you. Backlighting can make even a premium camera struggle. A decent light plus a decent camera beats a fancy camera in bad lighting almost every time.
-
12. Select the camera inside your app
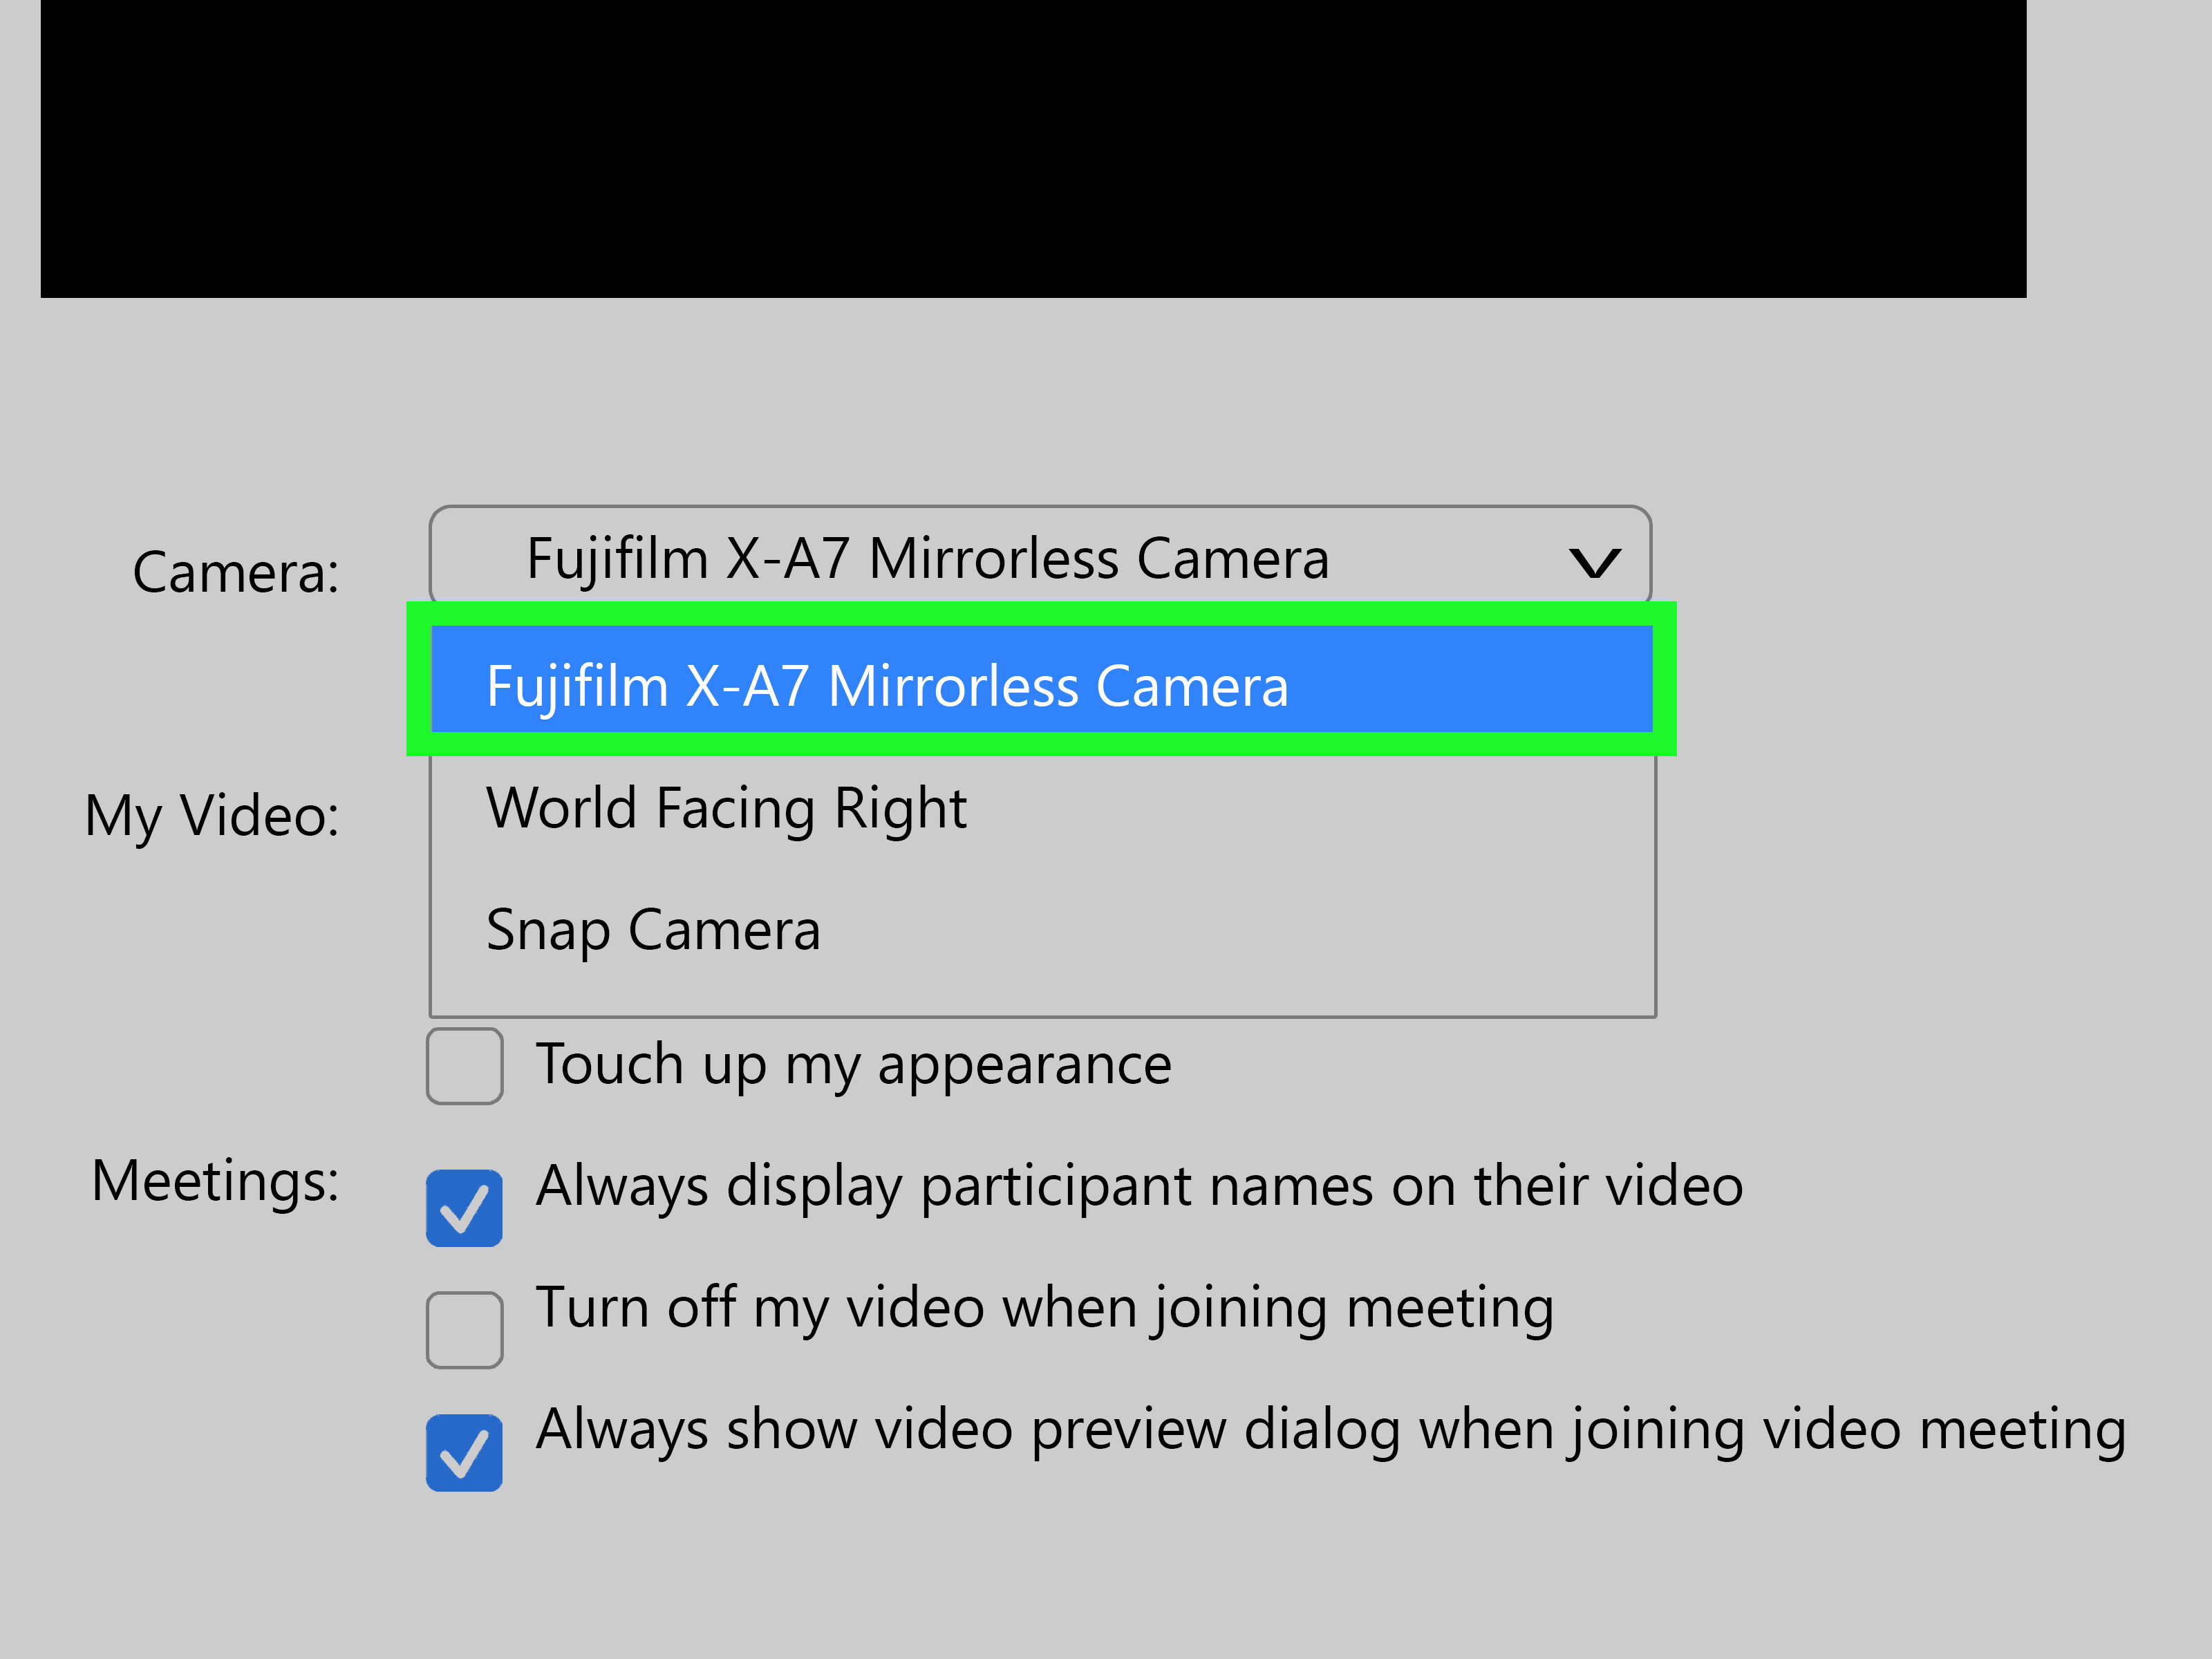
Open Zoom, Teams, Google Meet, OBS, or your preferred app and choose your camera source from the video settings. If you are using a webcam utility, it may show up under the brand name. If you are using HDMI capture, it may appear as the name of the capture device.
If the app does not see the camera, close other software that might be using it. Cameras often do not like being shared. If one app grabs the feed first, the others may just sit there sulking.
-
13. Test before the real meeting starts
Run a test call or preview the image before you go live. Check focus, brightness, framing, lip sync, microphone selection, and whether the camera stays connected for more than a minute without staging a dramatic exit. Move a little, turn your head, and see whether autofocus behaves or starts hunting like it lost its contact lenses.
This small test prevents bigger embarrassment later. It is much nicer to solve problems at 8:40 than at 9:00 while your boss says, “We can hear you, but now you are frozen.”
-
14. Troubleshoot the usual troublemakers
If something goes wrong, work through the basics in order: check the cable, confirm power, verify camera mode, confirm app permissions, close competing apps, restart the software, and reconnect the device. On Windows and macOS, camera privacy permissions can block access even when the hardware is fine.
If the image is black, suspect the cable, software conflict, or input selection. If the image has overlays, fix clean HDMI settings. If the camera drops out after a while, check heat, battery, and sleep settings. And if the app sees the device but the quality looks soft, lighting is usually the hidden villain.
Common mistakes to avoid
- Using a charge-only USB cable instead of a data cable
- Forgetting to disable auto power-off
- Leaving on-screen icons visible in the HDMI feed
- Relying on battery power for long calls
- Ignoring lighting while blaming the camera
- Using the camera’s built-in mic in a noisy room
- Opening multiple apps that fight over the same video source
When this setup is worth it
Using a digital camera as a webcam makes the most sense for streamers, teachers, content creators, consultants, remote workers on frequent client calls, and anyone whose image quality affects trust, professionalism, or presentation. If you only jump into quick calls a few times a month, a decent webcam may be the simpler choice.
But if you are on camera often, the difference is noticeable. You look more polished, more intentional, and far less like you are speaking from inside a dim cereal box.
Final thoughts
Turning a digital camera into a webcam is not magic. It is a system. Once you understand compatibility, power, clean output, audio, and lighting, the setup becomes surprisingly manageable. The first attempt may involve a little menu-diving and a little muttering. After that, it gets easier.
The smartest approach is to keep it simple: use official software when available, switch to HDMI capture when needed, power the camera properly, test the setup before important calls, and let good lighting do half the work. Follow those basics, and your “webcam” can stop looking like an afterthought and start looking like a real camera feedbecause it is one.
Experience Notes: What People Learn After Actually Using a Digital Camera as a Webcam
The first experience most people report is pure delight mixed with mild confusion. Delight, because the image suddenly looks crisp, professional, and flattering. Confusion, because the setup that seemed simple in theory somehow involves one camera menu, one meeting app, one cable that works, one cable that does not, and a moment of staring at the screen asking, “Why can the computer see the camera, but not use the camera?” That is completely normal.
One common experience is that people expect the camera alone to solve everything. Then they turn it on in a dark room and discover that even a great camera cannot perform miracles against a terrible lamp placed somewhere behind their shoulder like a witness-protection spotlight. The real upgrade often comes from the combination of camera and lighting. Once users add a window-facing desk setup or a soft LED light, they usually say the image improves more than expected.
Another real-world lesson is that audio becomes the next obsession. After fixing video quality, people suddenly notice every echo, fan hum, keyboard clack, and neighborhood scooter in the background. That is why many experienced users end up pairing the camera with a separate USB microphone or headset. It is not glamorous, but it works. Great video gets attention; great audio keeps attention.
People who use the setup for work often mention confidence as the biggest hidden benefit. On client calls, interviews, sales meetings, or classes, a sharper image can make them feel more prepared and more professional. It is not about vanity as much as presence. When the picture is clean, the framing is stable, and the lighting is decent, they spend less time worrying about how they look and more time focusing on what they want to say.
Streamers and creators often have a slightly different experience. They love the image quality, but they also learn that convenience matters. If a setup takes ten minutes every single time, it eventually becomes annoying. That is why experienced users simplify over time. They leave the tripod in place, keep the AC adapter connected, label the correct cable, and save camera settings when possible. The goal is not just a beautiful setup. The goal is a repeatable one.
There is also a funny emotional arc to the process. Day one feels like troubleshooting camp. Day three feels manageable. By week two, people start casually saying things like, “Oh, just make sure the HDMI output is clean and the camera doesn’t sleep,” as if that sentence did not once sound like forbidden wizard language. In other words, the learning curve is real, but it is short. Once the setup works, it feels less like a tech experiment and more like part of the desk.
The most practical experience-based advice is this: test once, write down what worked, and resist the urge to keep changing everything. Many headaches come from endless tweaking. When users settle on a stable combination of camera mode, cable, power source, app selection, and lighting, the setup becomes reliable. And reliability is what turns a cool trick into a useful daily tool.