Your toilet tank is probably not the glamorous star of your bathroom cleaning routine. The bowl gets the brush, the seat gets the disinfecting wipe, the mirror gets admired, and the tank? The poor thing sits there under its porcelain lid like a forgotten attic full of mystery water. But learning how to clean and maintain your toilet tank is one of the easiest ways to prevent odors, stains, mineral buildup, weak flushes, phantom running, and those sneaky leaks that quietly inflate your water bill.
The good news: cleaning a toilet tank is not complicated, expensive, or dramatic. You do not need a hazmat suit, a plumbing license, or a motivational playlist titled “Bathroom Battle Anthems.” You need the right supplies, a little patience, and a clear understanding of what not to put inside the tank. That last part matters because many popular drop-in tank tablets, especially chlorine or bleach-based ones, can damage rubber seals, flappers, fill valves, and other internal parts over time.
This guide explains how to clean a toilet tank safely, how often to do it, what products to avoid, how to handle hard water stains, and how to keep the tank working properly between deep cleanings. Think of it as routine maintenance for the quiet machine that makes every flush possible.
Why Cleaning Your Toilet Tank Matters
A toilet tank holds clean water from your home’s supply line, so it usually does not get dirty as fast as the bowl. Still, “clean water” does not mean “maintenance-free forever.” Over time, mineral deposits, rust stains, sediment, mildew, biofilm, and small bits of debris can collect on the tank walls and around the working parts.
If you live in a hard water area, the tank may develop chalky white buildup from calcium and magnesium. Homes with well water may see orange, brown, or black staining from iron, manganese, or other minerals. In humid bathrooms or rarely used toilets, mold and mildew can appear. None of this means your toilet is doomed. It simply means the tank needs occasional attention, just like your showerhead, faucet aerators, and that one drawer full of mystery batteries.
How Often Should You Clean a Toilet Tank?
For most homes, cleaning the toilet tank every six months is a practical schedule. If your water is hard, your toilet is rarely used, or you notice rust, sediment, slime, or odor, clean it every one to three months. A guest bathroom that sits unused for weeks may need more attention than the main bathroom because still water invites buildup.
A simple rule works well: lift the tank lid every month and look inside. If the tank walls look clean and the water is clear, you can wait. If you see staining, grit, slime, or floating debris, schedule a quick cleaning. This monthly peek takes ten seconds and can save you from bigger plumbing headaches later.
Supplies You Need to Clean a Toilet Tank
Before you begin, gather everything so you are not wandering around the house with wet gloves like a confused bathroom surgeon.
- Rubber cleaning gloves
- White vinegar
- Non-abrasive sponge or scrub brush
- Old toothbrush for corners and small parts
- Microfiber cloths or paper towels
- Bleach-free bathroom disinfectant, if desired
- Small cup or sponge for removing leftover water
- Flashlight, optional but helpful
- Towels for the floor in case of splashes
For most toilet tanks, white vinegar is the best first choice. It helps loosen mineral deposits, deodorize mild odors, and break down buildup without being as harsh on rubber and plastic parts as many stronger cleaners. A bleach-free disinfectant can be used carefully, but always read the label first and avoid products that warn against use on rubber, plastic, metal, or plumbing components.
What Not to Use Inside a Toilet Tank
The biggest toilet tank cleaning mistake is dropping in a blue tablet and pretending the job is done. Those tablets may make the water look fresh, but blue water is not a performance review. Many in-tank cleaners contain chlorine or bleach, and when these chemicals sit in the tank constantly, they can shorten the life of flappers, seals, gaskets, and fill valves.
Avoid These Toilet Tank Cleaning Products
- Bleach tablets or chlorine pucks placed directly in the tank
- Harsh drain cleaners
- Ammonia-based cleaners
- Steel wool or abrasive pads
- Boiling water, which may crack porcelain
- Random DIY chemical mixtures
Never mix bleach with vinegar, ammonia, acids, or other cleaners. Mixing cleaning chemicals can create dangerous fumes. If you use any disinfectant, ventilate the bathroom, wear gloves, and follow the product label. When in doubt, keep it simple: vinegar, gentle scrubbing, and a good rinse.
Step-by-Step: How to Clean Your Toilet Tank
This method is safe for most standard gravity-flush toilets. If you have a specialty toilet, pressure-assisted system, smart toilet, or built-in self-cleaning feature, check the manufacturer’s instructions first.
Step 1: Turn Off the Water Supply
Find the shutoff valve behind or beside the toilet near the wall. Turn it clockwise until it stops. Do not force it like you are opening a pickle jar in a rage. If the valve is stuck, stop and consider calling a plumber, because breaking a shutoff valve is a fast way to turn a cleaning project into an indoor water feature.
Step 2: Flush to Empty the Tank
Flush the toilet and hold the handle down to drain as much water as possible from the tank. Some water will remain at the bottom, which is normal. Use a sponge or cup to remove extra water if you want a drier surface for scrubbing.
Step 3: Inspect the Tank Parts
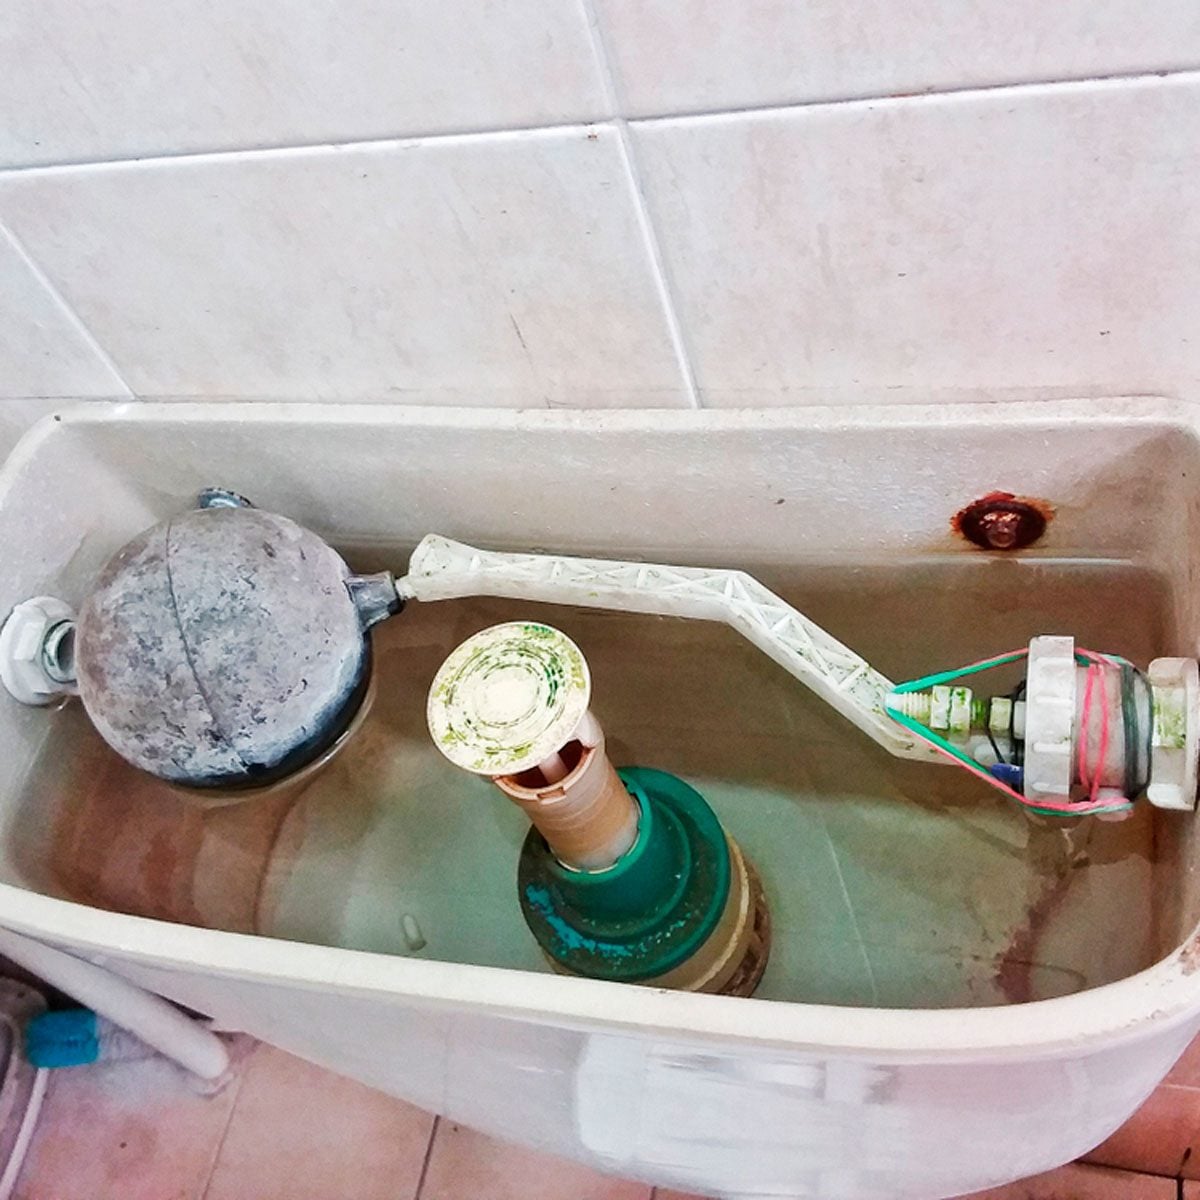
Before cleaning, take a quick look at the flapper, chain, fill valve, flush valve, overflow tube, bolts, and rubber seals. The flapper is the rubber part that lifts when you flush. If it looks warped, cracked, slimy, or brittle, it may need replacement. Check whether the chain has too much slack or is too tight. A chain that is too loose can cause weak flushing; one that is too tight can prevent the flapper from sealing.
Step 4: Add Vinegar for Mineral Buildup
If the tank has hard water stains or mineral deposits, pour white vinegar into the tank until the stained areas are covered or dampened. For light buildup, let it sit for 15 to 30 minutes. For heavier deposits, you can let vinegar sit longer, but avoid soaking rubber parts for extended periods too frequently. Vinegar is mild compared with many cleaners, but it is still acidic.
Step 5: Scrub the Tank Walls
Use a non-abrasive sponge, soft scrub brush, or old toothbrush to scrub the inside walls of the tank. Focus on stained areas, corners, and the waterline. Be gentle around the fill valve, flapper, and seals. You are cleaning the tank, not auditioning for a pressure-washing competition.
Step 6: Clean Around the Working Parts
Use the toothbrush to remove buildup around the flapper seat, flush valve, and bolts. Mineral deposits around the flapper seat can prevent a tight seal, causing the toilet to run. Do not bend or yank parts aggressively. If something looks fragile, it probably is. Toilet parts are inexpensive, but replacing them on a Tuesday night when everyone needs the bathroom is nobody’s dream activity.
Step 7: Turn the Water Back On and Flush
Turn the shutoff valve counterclockwise to restore water. Let the tank refill, then flush two or three times to rinse away loosened residue and vinegar. Watch the tank as it refills. The water should stop at the proper fill line, usually about one inch below the top of the overflow tube.
Step 8: Wipe the Exterior and Lid
While you are there, clean the tank lid, handle, and outside surfaces. The flush handle gets touched often, so it deserves more respect than it usually receives. Use a bathroom-safe cleaner or disinfecting wipe, then dry with a cloth.
How to Maintain Your Toilet Tank Between Cleanings
Toilet tank maintenance is mostly about prevention. A clean tank, healthy flapper, properly adjusted water level, and leak-free seal will keep your toilet flushing efficiently.
Check for Silent Leaks
A silent leak can waste water without making obvious noise. To test for a leak, place a few drops of food coloring in the tank and wait about 10 minutes without flushing. If color appears in the bowl, water is leaking from the tank into the bowl. Usually, the flapper is the culprit. Flush immediately after the test so the dye does not stain.
Listen for Phantom Refilling
If your toilet randomly refills when nobody has flushed, the tank is losing water. This “ghost flush” often points to a worn flapper, mineral buildup on the flush valve seat, or a water level problem. Clean the flapper seat first. If the problem continues, replace the flapper.
Adjust the Water Level
If the water level is too high, it may spill into the overflow tube and cause constant running. If it is too low, the flush may be weak. Most fill valves have an adjustment screw, clip, or float mechanism. Adjust gradually and test the flush after each change.
Replace Worn Parts Early
Flappers, fill valves, and seals do not last forever. If your toilet runs, flushes weakly, leaks, or needs handle-jiggling, inspect the tank parts. Replacing a flapper is one of the easiest toilet repairs and usually costs far less than ignoring a leak for months.
How to Handle Hard Water Stains in a Toilet Tank
Hard water stains are common in many U.S. homes. They usually appear as white crust, gray film, orange streaks, or brownish deposits. Vinegar can help dissolve light mineral buildup. For heavier stains, repeat the vinegar soak and scrub process. Avoid metal scrapers because they can damage porcelain and parts.
If stains return quickly, the issue may be your water supply rather than your cleaning habits. A whole-house water softener or targeted water treatment system may reduce mineral buildup, but that is a larger investment. For many homeowners, regular vinegar maintenance is enough to keep deposits under control.
Can You Use Bleach in a Toilet Tank?
It is better to avoid bleach inside the toilet tank, especially as a standing cleaner or tablet. Bleach can disinfect surfaces when used correctly, but repeated or constant exposure can degrade rubber and plastic components. If you use bleach elsewhere in the bathroom, ventilate the room, follow label directions, and never mix it with vinegar or ammonia.
For the tank itself, choose a gentler approach. Vinegar and manual scrubbing handle most buildup. If you need disinfection, use a bleach-free bathroom disinfectant that is safe for the materials inside your toilet tank.
Toilet Tank Cleaning for Septic Systems
If your home uses a septic system, be especially thoughtful about what goes down the drain. Normal household cleaning in reasonable amounts is generally manageable, but heavy use of harsh disinfectants, antibacterial products, and drain chemicals can interfere with the bacteria that help septic systems work properly. For toilet tank cleaning, use mild cleaners, avoid dumping large quantities of chemicals, and skip in-tank tablets.
Also, remember that “flushable” does not always mean septic-friendly. Toilet paper and human waste are the safest defaults. Wipes, paper towels, cotton swabs, and hygiene products should go in the trash, not the toilet.
Common Toilet Tank Problems and What They Mean
The Toilet Keeps Running
A constantly running toilet usually means the flapper is not sealing, the chain is misadjusted, or the water level is too high. Clean the flapper seat, adjust the chain, and check the fill level. If the flapper looks damaged, replace it.
The Flush Is Weak
A weak flush may come from low tank water, clogged rim jets in the bowl, mineral buildup, or a worn flapper that closes too soon. Check the tank water level first. Then clean the bowl rim openings and inspect the flapper.
The Tank Has Brown or Orange Stains
Brown or orange stains often point to iron in the water or rust from metal parts. Clean the tank with vinegar and inspect bolts and metal components. If metal parts are corroded, replace them before they cause leaks.
The Tank Smells Musty
A musty smell may mean mildew, stagnant water, or buildup inside the tank. Clean the tank, improve bathroom ventilation, and flush rarely used toilets regularly. A bathroom fan can help reduce humidity and slow mildew growth.
Experience-Based Tips for Cleaning and Maintaining Your Toilet Tank
After cleaning plenty of neglected toilet tanks, one lesson becomes obvious: the easiest tank to clean is the one you do not ignore for three years. Toilet tanks rarely go from sparkling to swamp overnight. The trouble builds slowly. First there is a faint ring near the waterline. Then a little grit settles in the corners. Then the flapper gets slimy. Then one day the toilet starts running at 2:00 a.m. like it has joined a tiny marathon. Regular inspection prevents that whole drama.
One practical habit is to connect toilet tank maintenance with another household routine. For example, check the tank when you replace HVAC filters, test smoke alarms, or deep clean the bathroom. Pairing the task with something you already do makes it easier to remember. A phone reminder every three months also works, although naming it “Open the Toilet Tank” may create interesting notifications during dinner.
Another real-world tip: take a photo of the inside of the tank before adjusting or replacing anything. This is especially helpful if you are new to toilet repairs. The photo shows how the chain, flapper, float, and refill tube were positioned before you touched them. If something goes wrong, you have a visual map instead of relying on memory and mild panic.
When cleaning, do not rush the inspection stage. Many people scrub the tank walls but miss the parts that actually affect performance. The flapper should sit flat. The chain should have a little slack but not so much that it tangles. The refill tube should point into the overflow tube without being shoved too far down. The float should move freely. These small checks take less than a minute and can prevent leaks, weak flushes, and constant running.
For hard water homes, vinegar maintenance is more useful when done consistently. Waiting until mineral deposits are thick and crusty makes cleaning much harder. Pouring a few cups of vinegar into the tank occasionally, letting it sit briefly, then flushing can slow buildup. However, do not combine vinegar with other cleaners, especially bleach. The safest cleaning routine is boring, predictable, and chemical-drama-free. In bathroom maintenance, boring is beautiful.
One mistake homeowners often make is trusting blue tank water. Blue water looks clean because it is colorful, but color is not cleanliness. A tank tablet can mask odors and tint the bowl while still allowing mineral buildup and biofilm to remain. Worse, constant chemical exposure may damage parts that were working perfectly. Manual cleaning may feel old-fashioned, but it is still the most reliable method.
Finally, keep a few inexpensive replacement parts on hand if you manage multiple bathrooms or rental properties. A universal flapper, basic fill valve, adjustable wrench, sponge, and gloves can solve many common toilet tank issues quickly. You do not need to become a plumber. You just need to know when the tank is dirty, when a part is worn, and when it is time to stop tinkering and call a professional.
Conclusion
Knowing how to clean and maintain your toilet tank is a small home-care skill with big benefits. A clean tank helps prevent stains, odors, weak flushes, running water, and premature wear on toilet parts. The process is simple: turn off the water, empty the tank, inspect the parts, clean gently with vinegar or a bleach-free cleaner, scrub carefully, rinse, and test for leaks.
The most important maintenance habit is avoiding harsh in-tank tablets that sit in the water for weeks. They may promise convenience, but your flapper, seals, and fill valve may quietly disagree. Clean manually, inspect regularly, and treat the tank like the hardworking plumbing component it is. It may never be the prettiest part of your bathroom, but when it works well, life flows smoothly. Literally.