If your watch fits like it was sized by a raccoon with no measuring tape, don’t panic. A deployment clasp can usually be adjusted without drama, heroics, or sacrificing your thumbnail to the watch gods. Whether you’re working with a leather strap, a metal bracelet, a butterfly clasp, or a foldover style with micro-adjustment holes, the goal is the same: get a fit that feels secure, comfortable, and civilized.
A properly adjusted deployment clasp should sit snugly without pinching, sliding, or leaving your wrist looking like it lost an argument. The trick is knowing which kind of clasp you have and how far that clasp can realistically be adjusted before you need to remove links or add them back. Some clasps offer quick fine-tuning. Others are more like tiny stainless-steel puzzles designed by someone who clearly enjoyed geometry.
This guide breaks the process into 12 practical steps, explains what to do with different clasp styles, and helps you avoid the classic mistakes: crooked clasps, off-center bracelets, scratched lugs, and that deeply annoying “almost fits” feeling.
What Is a Deployment Clasp?
A deployment clasp, also called a deployant clasp, is a folding watch closure that opens wide enough to let you put the watch on without fully undoing the strap every time. On leather straps, it can reduce repeated bending and help the strap last longer. On metal bracelets, it often includes micro-adjustment holes, push buttons, or foldover sections that make the watch safer and easier to wear.
Not all deployment clasps adjust the same way. Some leather versions let you move the strap position inside the clasp. Some bracelet clasps let you shift a spring bar between tiny holes. Mesh bracelets may use a sliding clasp. And if the clasp runs out of adjustment range, you may need to remove or add links. That’s why the first step is not “grab a screwdriver and hope.” The first step is identification.
Before You Start
Work on a soft cloth or watch mat. Good lighting helps. Patience helps more. If your watch is expensive, vintage, sentimental, or finished in polished surfaces that show every mark like a crime scene under fluorescent lights, use painter’s tape on vulnerable areas before you begin.
Step 1: Identify Your Deployment Clasp Type
Look closely at the watch before touching anything. Is it a leather strap with a deployant buckle? A metal bracelet with a foldover clasp? A butterfly clasp that closes from both sides? A mesh bracelet with a sliding mechanism? Or a modern tool-less micro-adjust clasp that gives you several small positions without taking the watch off?
This matters because the adjustment method changes with the hardware. A leather deployant often adjusts where the strap anchors inside the clasp. A traditional bracelet clasp may use micro holes and a spring bar. A mesh clasp usually slides along the bracelet after you lift a locking plate. If you misidentify the clasp, you can waste time, scratch the watch, or force a part that was never supposed to move that way.
Step 2: Gather the Right Tools
For most deployment clasp adjustments, you only need a few small tools: a spring bar tool, a pin pusher, a tiny screwdriver, a soft cloth, and maybe a bracelet holder. If you’re working on screw links, use the correct screwdriver size. If you’re working on pin links, keep a pin pusher and small hammer nearby. If you’re adjusting a clasp with a locking plate, a flat spring bar tool usually does the job.
Do not upgrade this process with a kitchen knife, a bent staple, or a level of confidence unsupported by skill. A proper tool costs less than refinishing a scratched clasp.
Step 3: Protect the Watch and Your Workspace
Lay the watch face-down on a soft microfiber cloth. If you’re adjusting near polished lugs or a shiny clasp, apply a little low-tack tape around the area. Keep tiny parts in a tray or small bowl. Spring bars and screws have an extraordinary talent for disappearing at the exact speed of light.
This is also the moment to clean the clasp area. Dust, lint, dried sweat, and old grime can hide the adjustment holes or make the mechanism feel stiffer than it really is. A quick wipe makes the hardware easier to read and the job easier to finish.
Step 4: Open the Clasp and Inspect the Adjustment Points
Now open the clasp fully and look for the actual adjustment system. On a bracelet, check the inside and sides of the clasp for micro-adjustment holes. On a leather deployant, look for the point where the strap is secured to the clasp. On a mesh bracelet, find the locking plate or little hinged section that keeps the clasp in place.
Take a photo before moving anything. That tiny habit can save you from the classic watch-owner moment: “I was sure it was attached the other way around.”
Step 5: Adjust a Leather Deployment Clasp First
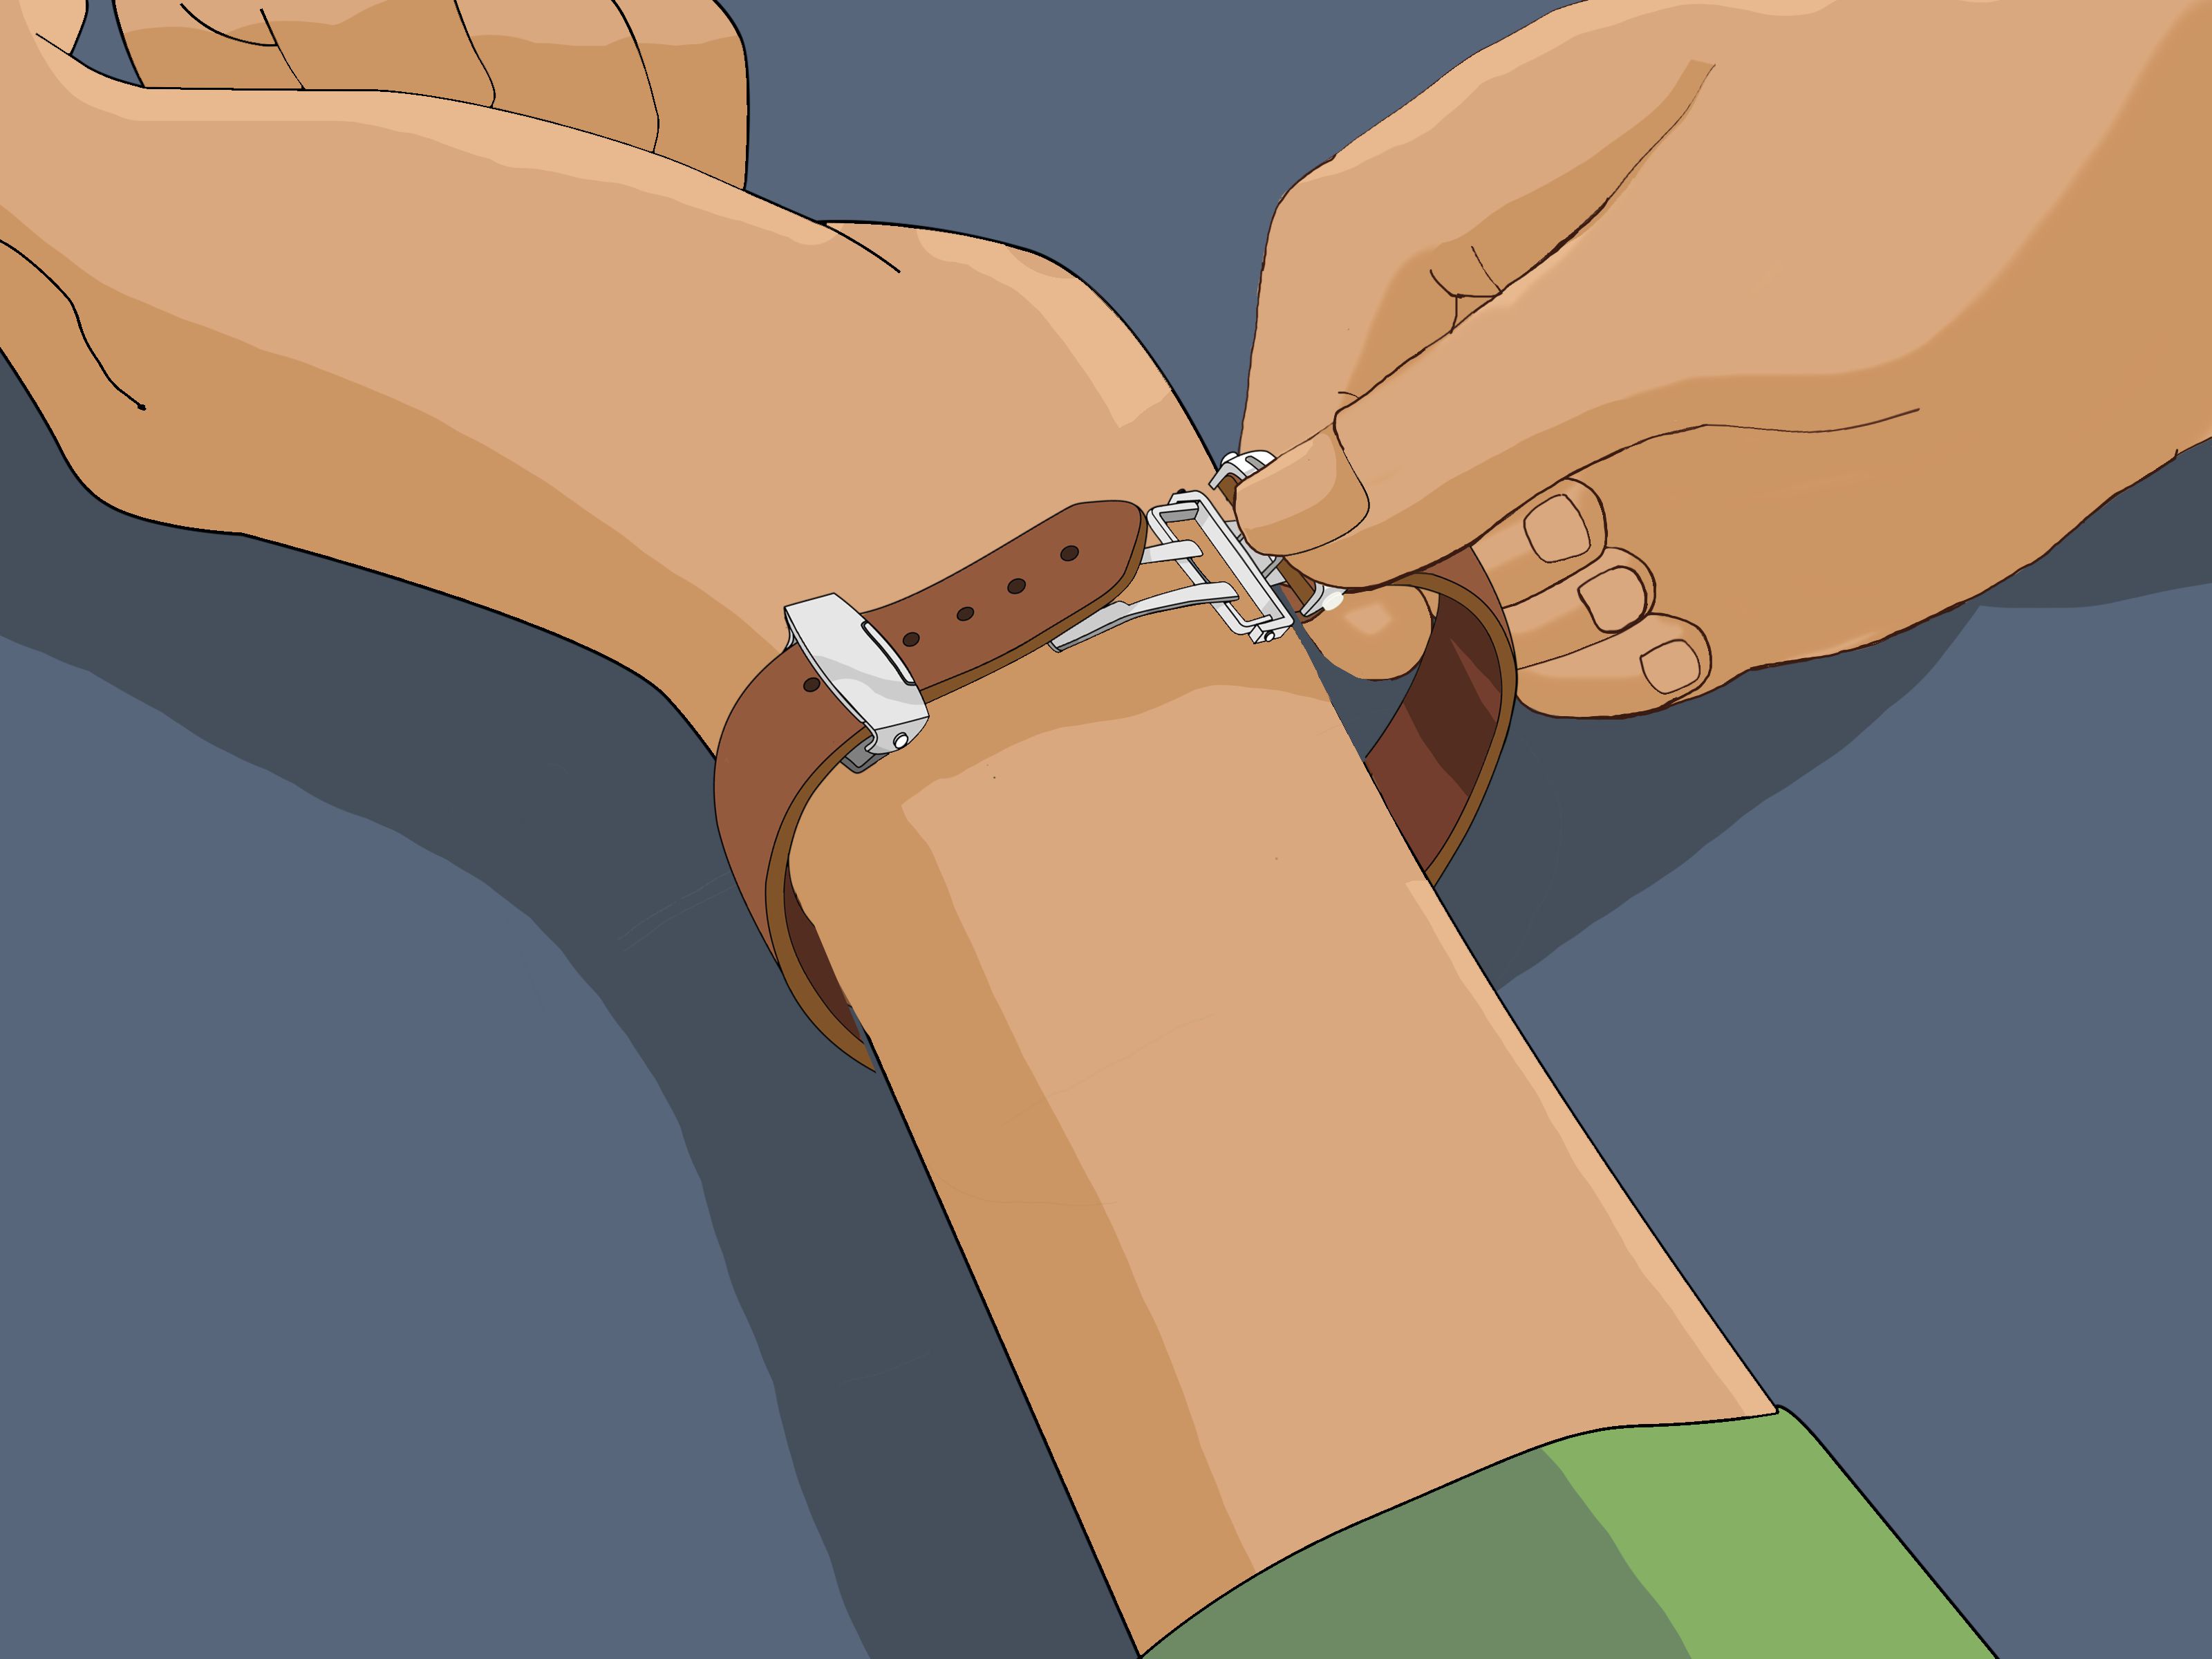
If your watch has a leather strap with a deployment clasp, begin there. Open the clasp and locate the spring bar or anchoring point that secures the strap inside the clasp. In many cases, you can compress the spring bar, reposition the strap, and lock it into a different hole or position. That changes how much strap wraps around your wrist and where the clasp sits underneath it.
This is where fit and comfort finally shake hands. The clasp should sit centered under your wrist, not leaning awkwardly to one side like it missed the bus. If the clasp sits too far toward the edge of your wrist, it may dig in. If it sits too high or too low, the watch head can feel off balance.
Step 6: Use the Clasp Micro-Adjustment on a Metal Bracelet
If you have a metal bracelet, check whether the clasp has micro-adjustment holes. These tiny holes let you move the clasp spring bar forward or backward by a few millimeters. Use the tip of your spring bar tool to compress the bar, shift it to a new hole, and let it click back into place.
This kind of adjustment is great when the watch is just slightly too loose or slightly too tight. Think of it as the fine seasoning after the main cooking is done. If your watch is off by a whole link, micro-adjustment alone usually won’t save the day.
Step 7: Unlock and Slide a Mesh or Sliding Clasp
Some deployment clasps on mesh or Milanese-style bracelets use a sliding mechanism instead of fixed holes. In that case, lift the locking plate, slide the clasp to the desired position, then press the plate back down to lock it.
Be gentle here. If a clasp resists, check whether you’re lifting the correct section. Forcing the wrong part is a fantastic way to turn a simple five-minute fit adjustment into a “Why is this now loose forever?” situation.
Step 8: Decide Whether You Need to Remove or Add Links
If the clasp is still too tight or too loose even after fine adjustment, the bracelet length itself needs changing. That means removing or adding links. This is common with butterfly clasps and certain push-button clasps that don’t offer much micro-adjustment.
Before removing anything, try the watch on and estimate how much correction you need. One full link can make a big difference. A half-link, if your bracelet uses one, can be the sweet spot between “fits well” and “circulation is a privilege, not a right.”
Step 9: Remove Links Evenly From Both Sides
When shortening a bracelet, remove links as evenly as possible from both sides of the clasp. That keeps the clasp centered under your wrist and prevents the watch head from drifting awkwardly off-center. Follow any arrows stamped on the inside of the removable links so you push the pins in the proper direction. If the bracelet uses screws instead of pins, unscrew carefully and keep every tiny part together.
This step is where symmetry matters. Remove too much from one side and the watch may technically fit, but it will wear like it has a personal vendetta against your wrist bone.
Step 10: Reassemble Carefully and Double-Check the Hardware
Once you’ve repositioned the clasp or changed the bracelet length, reassemble everything slowly. Reinsert pins in the opposite direction of the arrows. Tighten screws until secure, but do not overdo it. Confirm the spring bar snaps fully into the new clasp hole. Close and open the clasp a few times to make sure it locks properly.
Nothing ruins a successful adjustment faster than a spring bar that was “probably in there.” Probably is not good enough when gravity is waiting for its turn.
Step 11: Test the Fit the Right Way
Put the watch on and wear it for at least a few minutes. The ideal fit is snug enough that the watch doesn’t spin around constantly, but loose enough that you can move naturally and slip a fingertip under the bracelet or strap. Your wrist changes size throughout the day, especially in heat, humidity, exercise, or travel, so don’t size it like you’re vacuum-sealing your arm.
If the watch feels perfect while you’re standing in a cool room and miserable after ten minutes of normal movement, it isn’t actually perfect. A good deployment clasp adjustment should work in real life, not just in theory.
Step 12: Know When to Stop and Visit a Jeweler
If the clasp feels unusually stiff, the spring bar won’t seat, a screw is stripped, the bracelet has no obvious adjustment system, or the watch is valuable enough to make you sweat during the process, let a jeweler or watchmaker handle it. There is no shame in outsourcing tiny mechanical surgery.
That’s especially true for luxury watches, vintage pieces, proprietary clasps, and bracelets with unusual pin-and-collar systems. Sometimes the smartest adjustment is the one you don’t attempt yourself.
Common Mistakes to Avoid
The biggest mistake is forcing the clasp before understanding how it adjusts. Close behind that are removing too many links at once, taking all the links from one side, using the wrong screwdriver, and forgetting to test the clasp after reassembly. Another common problem is chasing a “perfect” fit that ignores daily wrist swelling. The best watch fit is comfortable for hours, not just for the thirty seconds after you fasten it.
Also, do not assume every deployment clasp gives the same level of precision. Some offer tiny 2 to 4 mm changes. Some rely mostly on link sizing. Some leather deployants improve comfort but still have limited fine-tuning compared with bracelets built around modern on-the-fly micro-adjustment systems.
Example: How the Right Adjustment Changes the Wearing Experience
Imagine a stainless-steel diver that feels a touch loose in the morning and becomes a wrist-hugging boa constrictor after lunch. The fix may not be removing another full link. It may be moving the clasp spring bar one micro-hole out. On the other hand, if the clasp is already in its loosest hole and the watch still leaves marks, you probably need to add a link or reinstall a half-link.
With a leather deployment clasp, the issue is often balance, not just tightness. A strap can technically fit while placing the clasp in an awkward spot that presses into the underside of the wrist. Repositioning the strap inside the clasp can completely change comfort, even when the total circumference changes only a little.
Real-World Experiences With Adjusting a Deployment Clasp
The funny thing about adjusting a deployment clasp is that it rarely feels important until your watch starts behaving like a tiny, stylish nuisance. At first, most people think the problem is the watch itself. Maybe it’s too heavy. Maybe the strap is too stiff. Maybe your wrist is somehow different from every other wrist ever made. Then you make one smart adjustment and suddenly the whole watch feels transformed, like it went from awkward houseguest to perfectly polite roommate.
One of the most common experiences is discovering that “close enough” is not actually close enough. A bracelet that is only a little loose can slide just enough to feel annoying all day. It taps your desk, drifts toward your wrist bone, and reminds you of its presence every time you move your arm. Then you shift the clasp by one micro-adjustment hole, and the difference feels absurdly dramatic. Same watch. Same wrist. Completely different mood.
Leather deployment clasps create a different kind of revelation. Plenty of people switch to a deployant because they want the strap to last longer or they like the cleaner look. What surprises them is how much the position of the clasp affects comfort. If the clasp sits too far to one side, the watch feels weirdly top-heavy. If it sits centered underneath the wrist, the same strap suddenly feels more natural and less fussy. It is one of those tiny mechanical details that sounds boring until your wrist votes very strongly on the matter.
There is also the deeply humbling experience of realizing that your wrist changes more than you thought. A watch that feels perfect in an air-conditioned room can feel tighter after a walk outside, a workout, a salty meal, or a long travel day. That is why experienced watch wearers often stop chasing a mathematically exact fit and start aiming for a practical one. The best adjustment usually leaves a little breathing room for normal life instead of treating your wrist like a fixed-diameter pipe.
And yes, nearly everyone who adjusts a clasp at home has a moment of mild panic. Maybe the spring bar refuses to go back in. Maybe a bracelet pin rolls toward the edge of the table like it has somewhere important to be. Maybe you remove one link too many and have to reverse course with the sigh of someone who briefly overestimated their own genius. That is part of the experience too. The process rewards patience more than force.
Once you get it right, though, you notice the watch less, and that is actually the victory. A well-adjusted deployment clasp disappears into the wearing experience. The watch stays put, opens and closes smoothly, and feels secure without being clingy. You stop fiddling with it. You stop noticing hot spots. You stop doing that little wrist flick every ten minutes. The watch just works, which is exactly what good adjustment is supposed to do.
Conclusion
Adjusting a deployment clasp is mostly about matching the method to the hardware. Identify the clasp style, use the right tool, make small changes, and test the fit like a human being who will actually move, sweat, and exist in weather. Fine adjustment works wonders for small fit issues. Larger problems usually need link changes. And if the clasp starts acting like it has legal counsel, take it to a jeweler.
Once your deployment clasp is set correctly, the watch should feel secure, centered, and easy to wear all day. Which is wonderful, because a watch should tell time, not tell your wrist it has made a terrible life choice.