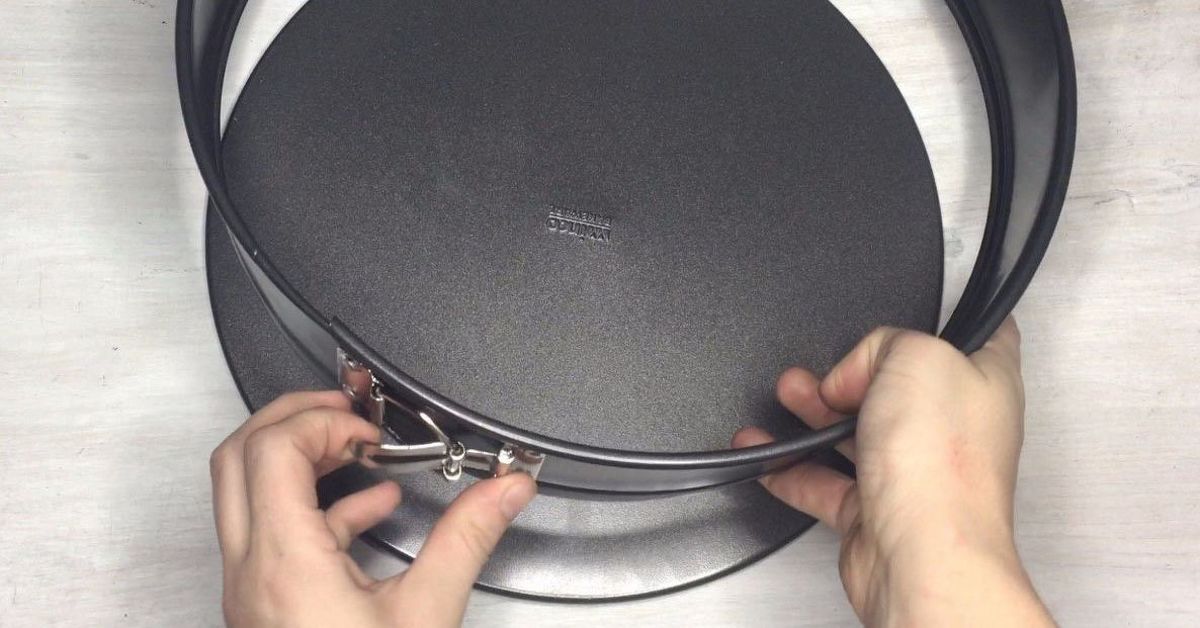
Every once in a while, a DIY idea appears on your screen and produces an immediate reaction: Wait… I already own half the stuff needed to make that. That is the magic behind clever upcycling projects. They do not require a designer budget, a workshop worthy of a television renovation show, or a mysterious uncle who owns seventeen kinds of saws. Often, they begin with something as ordinary as an old cake pan.
The idea of turning a cake pan into a wall shelf perfectly captures why DIY upcycling ideas are so addictive. A familiar object suddenly becomes something completely differentand useful. Add scrap wood, a few fasteners, paint if you want it, and an item headed toward the donation pile can become functional wall storage.
That approach extends far beyond bakeware. Old jars can organize supplies, wooden hangers can become wall hooks, pallets can hold garden tools, baking pans can become organizers, and vintage containers can provide storage with far more personality than another anonymous plastic bin.
Welcome to the dangerous side of DIY inspiration: once you start looking at household objects differently, throwing anything away becomes surprisingly difficult.
Why Upcycling Household Items Feels So Satisfying
There are plenty of reasons to try repurposing household items, but three stand out: cost, creativity, and waste reduction.
Buying a new organizer or decorative shelf is easy. Creating one from something you already own requires more imagination, but the result can feel considerably more personal. You are not merely buying storage; you are solving a problem.
Reuse also makes environmental sense. The U.S. Environmental Protection Agency’s waste-management guidance prioritizes reducing and reusing materials before recycling whenever practical. Keeping an existing object useful for longer can reduce the demand for replacement products while delaying disposal.
And then there is the budget advantage. A cake pan you already own costs exactly zero additional dollars. Scrap lumber may also be sitting in the garage. Even if you need screws, paint, or mounting hardware, a small DIY home decor project can cost considerably less than buying a decorative shelf from scratch.
The Cake Pan Shelf: A Brilliantly Simple Upcycling Idea
The concept is wonderfully straightforward: take a round cake pan or removable pan ring, fit pieces of wood across the interior, secure them, and mount the finished piece to the wall.
Suddenly, the circular metal frame becomes the architectural outline of a shelf.
It works visually because circles naturally contrast with the straight lines found in most shelves, cabinets, doors, and furniture. The wood adds warmth, while metal introduces an industrial or farmhouse element depending on the finish.
What You May Need
- An unused cake pan or suitable metal baking pan
- Wood boards or sturdy scrap lumber
- Tape measure
- Pencil
- Saw appropriate for the wood being used
- Sandpaper
- Drill and drill bits
- Screws or suitable fasteners
- Level
- Wall-mounting hardware
- Paint, stain, or decorative hardware if desired
The exact hardware should depend on the materials, wall construction, and intended load. A shelf displaying a tiny succulent has very different structural requirements from one expected to hold a stack of hardcover cookbooks.
Step 1: Measure Before Cutting Anything
Measure the inside diameter where each wooden shelf will sit. Circular frames become narrower as you move away from the center, so two shelves positioned at different heights may require different board lengths.
This is one of those classic DIY moments where measuring for thirty extra seconds can prevent twenty minutes of staring angrily at a board that is now half an inch too short.
Step 2: Cut and Sand the Shelves
Transfer the measurements to your boards and make clean cuts. Sand the cut edges as well as any rough surfaces.
If the wood is reclaimed, check carefully for old nails, staples, cracks, rot, or other damage before cutting or mounting it.
Step 3: Customize the Finish
This stage transforms the project from "cake pan attached to lumber" into actual decor.
You could leave unfinished wood natural for a rustic look, apply stain for warmth, or paint everything one color for a more modern appearance. A matte black metal frame combined with natural wood creates an industrial look, while distressed paint can push the design toward farmhouse style.
The important lesson is that upcycling does not require hiding the object’s original identity. Sometimes seeing that the frame used to be bakeware is exactly what makes the finished piece interesting.
Step 4: Secure the Wood
Position the boards inside the frame and check that they sit level. Pilot holes can make fastening easier and reduce the chance of damaging the wood.
If drilling through metal, wear appropriate eye protection and secure the piece so it cannot unexpectedly spin or slide. Freshly drilled or cut metal can also produce sharp edges, so inspect and smooth the area before handling the finished shelf.
Step 5: Mount It Properly
The decorative part is fun. The mounting part is what keeps your DIY masterpiece from introducing itself to the floor at 2 a.m.
Whenever possible, secure wall-mounted storage to studs. When studs are unavailable, use wall anchors specifically rated for the wall material and expected combined weight of the shelf and its contents. Established DIY guidance from major home-improvement retailers similarly emphasizes checking load requirements, locating studs, using appropriate anchors, and confirming that shelves are level.
Once mounted, start with lightweight objects and verify that the structure remains secure.
More Clever Repurposing Ideas Worth Stealing
The cake pan shelf is only the beginning. Some of the best upcycled storage ideas come from objects that were designed for entirely different jobs.
Turn Wooden Hangers Into Wall Hooks
Old wooden clothes hangers have curves, hooks, and surprisingly attractive shapes. Sections can be cut and attached to a wooden board to create an entryway rack for keys, hats, scarves, lightweight bags, or accessories.
Sand the cut edges carefully and use mechanical fasteners where the rack will carry meaningful weight rather than relying exclusively on craft adhesive.
Turn Baking Pans Into Drawer Organizers
Old baking pans do not necessarily need to remain on the wall. Shallow pans can organize tools, office supplies, craft materials, or miscellaneous drawer items.
The beauty of this idea is that almost no construction is required. Arrange several small containers inside a drawer like puzzle pieces and suddenly the dreaded "everything drawer" becomes almost civilized.
Build a Tiered Organizer From Bundt Pans
Vintage Bundt pans are practically begging for a second career. Because many already have center openings, they can be stacked around a secure central support to create tiered storage.
The finished organizer could hold craft supplies, wrapped snacks, sewing materials, lightweight bathroom items, or decorative accessories.
Bonus points if someone compliments it and you casually respond, "Oh, that? It used to make cake."
Reuse Glass Jars for Visible Storage
Glass jars remain one of the easiest household objects to reuse. They are useful for organizing screws, buttons, paintbrushes, pencils, craft supplies, pantry ingredients, and dozens of other small objects.
Clear storage has another advantage: you can actually see what you own. That reduces the remarkably common household phenomenon of buying a fourth package of something because the first three disappeared into the back of a cabinet.
Transform Old Cans Into Small Organizers
Clean metal cans can become holders for pencils, utensils, brushes, hardware, or craft tools. Several home-design publications have highlighted variations ranging from decorated countertop containers to wall-mounted organizers.
Any exposed cut edge needs to be completely smooth or safely covered before reuse. This is especially important when children will have access to the organizer.
Give Pallets a Second Life
Wooden pallets can become vertical garage storage, garden-tool racks, rustic shelves, or other utility projects. Their existing slatted design makes them particularly useful for organizing long-handled equipment.
Not every pallet should automatically become furniture, however. Check its condition and markings, avoid questionable or contaminated wood, remove protruding hardware, and sand splintered surfaces thoroughly.
How to Find Great DIY Projects in Ordinary Objects
The best upcyclers develop an unusual habit: instead of asking, "What is this?" they ask, "What shape is this?"
A cake pan is a circle with structural edges.
A drawer is a shallow wooden box.
A ladder is a tall framework with horizontal supports.
A jar is a transparent container.
A suitcase is a portable box with a lid.
A picture frame is a decorative border.
Once you stop defining objects entirely by their original purpose, possibilities multiply rapidly.
Use the Function-First Test
Before starting a project, identify a real problem you want to solve.
Maybe your entryway needs a place for keys. Perhaps the bathroom counter is crowded. Maybe your craft supplies have established their own independent government inside a kitchen drawer.
Then look through unused household items for a shape that can solve that problem.
This approach is usually better than making something simply because it looks cute online. Useful DIY projects tend to survive much longer than decorative experiments with nowhere to live.
Avoid the Biggest Upcycling Mistake: Creating Better-Looking Clutter
Upcycling is wonderful, but there is one important limitation: not everything deserves a second life inside your house.
If you save every bottle, jar, board, broken chair, coffee can, cardboard box, and lonely drawer because it "might become a project someday," you have not defeated clutter. You have simply given clutter an inspirational Pinterest board.
Keep objects when you have a realistic plan for them. Donate usable pieces that someone else can enjoy. Recycle appropriate materials according to local guidelines, and dispose of unsafe materials correctly.
A practical rule is simple: upcycle with purpose, not guilt.
Design Tips That Make Repurposed Projects Look Intentional
Repeat Colors
If your room contains black hardware, painting the metal portion of an upcycled shelf black helps visually connect the piece to the surrounding space.
Mix Materials Carefully
Wood and metal work beautifully together. So do glass and wood, woven materials and painted furniture, or vintage objects combined with clean modern finishes.
Leave Some Original Character
Small scratches, aged metal, stamped markings, or worn wood can make an upcycled item feel authentic. You do not necessarily need to sand every object until it has lost all evidence of its previous life.
Keep Displays Simple
A creative shelf is already visually interesting. Covering it with fourteen unrelated objects can bury the design. A small plant, framed photo, candle, or favorite collectible may be enough.
Why DIY Inspiration Spreads So Easily
The phrase "Yes, I want to do this! Thanks so much for the inspiration" describes something important about online DIY culture.
The most successful projects do not merely make people admire the finished photograph. They make people imagine themselves building a version of it.
That difference matters.
An elaborate custom renovation may earn admiration, but a project using a cake pan, two pieces of wood, and ordinary tools produces a more motivating thought: I could actually make that this weekend.
Online DIY communities have amplified that cycle enormously. One person converts an unexpected object into storage. Another changes the dimensions. Someone else paints it differently. A fourth person adapts the same concept for a rental apartment. Eventually the original project becomes less like a fixed set of instructions and more like an idea traveling from home to home.
The Experience of Going From "I Want to Do This" to "I Made This"
Looking across DIY project reports and reader adaptations, one of the most interesting parts of upcycling is how rarely the finished project follows the original idea exactly.
The experience usually starts with confidence. You see a clever transformationa cake pan shelf, repurposed hanger rack, pallet organizer, or vintage-container storage projectand think it looks simple enough.
Then reality joins the project.
Your cake pan is 11 inches across instead of the size used in the inspiration photo. The scrap wood is slightly too thick. Your wall does not have a stud where you desperately want one to exist. The paint color that looked sophisticated on the sample suddenly resembles something from a 1970s refrigerator.
Oddly enough, this is where the project often becomes more rewarding.
DIYers frequently have to modify online tutorials to match their homes. Different wall materials may require different mounting systems. A renter might prefer a project that minimizes permanent alterations. Someone working with leftover lumber may change the number or location of shelves rather than buying new wood.
These adaptations transform copying into problem-solving.
There is also a surprisingly satisfying moment when an object crosses the line from "junk" into "useful." An old baking pan that occupied cabinet space for years suddenly holds plants or craft supplies. A piece of discarded lumber becomes part of an entryway organizer. A forgotten jar becomes the exact container needed for a collection of screws that previously lived in six different places.
Not every attempt works. Sometimes measurements are wrong. Sometimes two materials that looked wonderful separately look bizarre together. Occasionally a project reaches the point where continuing would cost more than simply purchasing the object you originally wanted.
That is useful experience too.
Good DIY judgment develops through small failures. You learn to measure twice, test paint on an inconspicuous section, drill pilot holes, check the condition of reclaimed materials, and decide how something will be mounted before completing the decorative work.
The second project is usually smoother than the first. By the third, you may find yourself walking through a thrift store thinking less about what objects currently are and more about what they could become.
That shift in perspective may be the most valuable result of all.
You begin noticing circular frames, sturdy boxes, old hardware, interesting wood, containers, and unusual shapes. You become more comfortable repairing and modifying things instead of automatically replacing them. You also learn that a beautiful home does not necessarily require buying every component brand-new.
And then, inevitably, someone visits, points at your strange little cake-pan shelf, and asks where you bought it.
That is the moment the slightly crooked first attempt becomes completely worth it.
Conclusion: Inspiration Is Better When It Becomes Action
The best DIY upcycling ideas are not necessarily the most complicated. They are the projects that make ordinary materials useful again while adding personality to a home.
A cake pan can become a shelf. Baking pans can organize drawers. Bundt pans can become tiered storage. Jars and cans can organize small objects. Pallets can move from shipping equipment to garage storage. Old furniture can be repaired, altered, and given an entirely different purpose.
The important part is not recreating someone else’s project perfectly. Use the idea as a starting point. Adapt the dimensions, colors, materials, mounting method, and function to your own space.
So when your first reaction to a project is, "Yes, I want to do this!" pay attention. Measure carefully, work safely, use what you already have, and make your own version.
Just be warned: after your first successful upcycling project, your recycling bin may start looking suspiciously like an arts-and-crafts supply store.