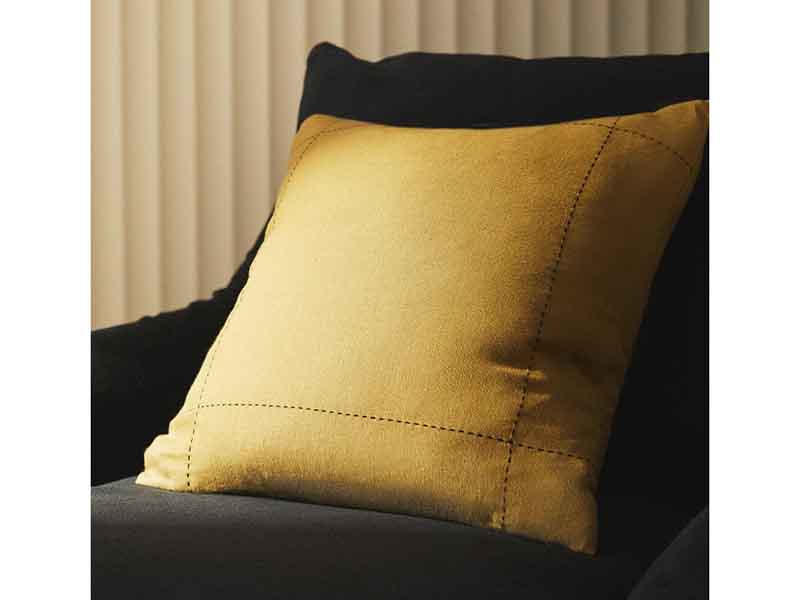
A throw pillow cover with lines is one of those wonderfully sneaky home-decor projects: it looks polished, modern, and suspiciously expensive, yet it can be made with a small amount of fabric and basic sewing skills. Straight lines, narrow stripes, bold bands, or rows of decorative stitching can turn an ordinary square cushion into something that looks right at home on a designer sofa.
Better yet, you do not need to transform your dining room into a professional upholstery studio. A sewing machine, ruler, iron, fabric, thread, and a little patience will get you surprisingly far. The key is precision. A floral print can occasionally hide a wandering seam. A straight line has no such generosity. It will point at your mistake like an enthusiastic witness in a courtroom.
This guide explains how to make a throw pillow cover with lines, including fabric selection, measurements, pattern alignment, envelope and zipper closures, decorative line techniques, styling ideas, and the small construction details that make a homemade cushion cover look professionally finished.
What Is a Throw Pillow Cover With Lines?
The term can describe several different designs. You might use fabric already printed or woven with stripes, piece together contrasting strips of fabric, or create the lines yourself with rows of topstitching. All three approaches produce a graphic design that works especially well in modern, farmhouse, coastal, minimalist, Scandinavian, and transitional interiors.
Lines also influence how a pillow looks visually. Horizontal stripes can make a rectangular lumbar pillow appear wider, while vertical lines emphasize height. Diagonal lines create movement, and irregular hand-drawn lines give the pillow a relaxed, artistic personality.
Popular line designs include:
- Thin black lines on cream or white fabric
- Classic navy-and-white stripes
- Wide color-blocked horizontal bands
- Parallel rows of decorative machine stitching
- Vertical linen stripes for a relaxed farmhouse look
- Diagonal geometric lines
- Uneven hand-painted or stamped lines
If this is your first pillow project, wide straight stripes or evenly spaced topstitched lines are particularly forgiving. Tiny complicated patterns can wait until you and your sewing machine have established a more trusting relationship.
Choose the Right Fabric
Fabric choice affects both appearance and durability. For decorative pillows that receive normal indoor use, medium-weight cotton, cotton-linen blends, canvas, twill, or home-decor fabric are dependable choices. They are generally easier to cut accurately than very slippery fabrics and provide enough structure for crisp lines.
Linen creates a softer, slightly relaxed look, while canvas produces a more structured cushion. Velvet can look luxurious, but beginners should remember that directional pile adds another alignment challenge. Lightweight quilting cotton can also work, especially for pillows that are primarily decorative, though adding lightweight interfacing may give very thin material additional body.
If you choose striped fabric, examine the relationship between the printed lines and the fabric grain before cutting. Woven fabric has lengthwise and crosswise grain directions, and keeping your pieces properly aligned helps the finished cover stay square instead of gradually developing the personality of a parallelogram. Prominent woven stripes can sometimes help identify a straight cutting line, while printed stripes should be checked carefully because printing and fabric grain are not always perfectly aligned.
How Much Fabric Do You Need?
The exact amount depends on pillow size, fabric width, stripe direction, and closure style. For many common 16-inch to 20-inch square pillows, roughly one-half to one yard of standard-width fabric is enough for a simple cover. Buy additional material when working with large stripes because pattern matching may require moving your pieces around instead of squeezing them together for maximum fabric efficiency. Pattern-matching guidance commonly recommends allowing extra material when stripes, plaids, or large motifs must line up accurately.
Before buying fabric, decide which direction the lines should run. Rotating a striped pattern 90 degrees may substantially change how efficiently pieces fit across the fabric width.
Measure the Pillow Insert First
Never assume an old pillow insert is exactly the size printed on its tag. Measure its height and width. Square inserts are easy, but the same principle applies to rectangular lumbar pillows.
For a basic sewn cover, one common method is to cut the front and back pieces approximately one inch larger than the insert dimensions, creating room for a half-inch seam allowance around the edges. For example, two 19-by-19-inch pieces can be used as a starting point for an 18-inch pillow when working with a half-inch seam allowance. Other pillow-making methods intentionally use slightly different dimensions to create a tighter or fuller appearance, so consistency with your chosen construction method matters more than chasing one universal formula.
Tools and Materials
- Pillow insert
- Medium-weight fabric
- Coordinating or contrasting thread
- Sewing machine
- Fabric scissors or rotary cutter
- Cutting mat
- Long ruler or quilting ruler
- Fabric marker or tailor’s chalk
- Straight pins or sewing clips
- Iron and ironing board
- Zipper, if making a zippered cover
- Optional piping or decorative trim
A rotary cutter and quilting ruler are especially helpful for a project built around straight lines because they allow precise rectangular cuts. Accurate cutting makes every later step easier.
How to Make a Throw Pillow Cover With Lines
Step 1: Prewash and Press the Fabric
If the fabric is washable and you expect to wash the finished pillow cover, prewash it according to the manufacturer’s care recommendations. This helps deal with potential shrinkage before the cover is sewn.
Once dry, press the fabric thoroughly. Trying to measure straight lines across wrinkled fabric is like attempting architectural drafting on a rumpled bedsheet. Possible? Technically. Wise? Absolutely not.
Step 2: Square the Fabric
Lay the material completely flat. Use the selvage and grain direction as references whenever appropriate. Check that the corners of your proposed pillow panels form true right angles.
This step becomes especially important with striped designs because even a small cutting error becomes more noticeable when the lines reach the finished edges.
Step 3: Plan the Line Pattern
If your fabric already has stripes, decide which stripe should appear at the center of the pillow. A balanced front panel usually looks more intentional than cutting randomly and discovering that one giant stripe is hugging the left edge for emotional support.
When matching striped fabric across seams, focus on the actual seamline rather than simply matching the raw cut edges. Sewing references for patterned fabrics emphasize careful cutting and aligning visible stripes at important seams.
If you are creating lines with stitching, use washable fabric chalk or a temporary fabric marker to draw guidelines. A practical pattern might use parallel lines every one or two inches.
Step 4: Create Decorative Lines
For stitched lines, place the front panel under the presser foot and sew slowly along each guideline. Straight-stitch guides or presser-foot guides can help maintain consistent spacing. Sewing machine manufacturers specifically offer guides designed to keep seam allowances and topstitching straight and uniform.
Try contrasting thread for visible graphic lines. Black thread on natural linen creates a modern handmade look, while matching thread creates texture that appears more subtle from across the room.
Another technique is fabric piecing. Cut several strips in contrasting colors and sew them together lengthwise. Press each seam carefully before attaching the next strip. JOANN’s color-block pillow construction uses this same basic principle: separate fabric strips are joined to create a graphic front panel before the pillow is assembled.
Step 5: Choose the Back Closure
You have three practical options.
Envelope closure: Two overlapping back panels create an opening without buttons or a zipper. It is beginner-friendly and makes the cover removable. Hem the overlapping edges before attaching them to the front panel. Envelope pillow tutorials commonly use overlapping finished back sections sewn around the perimeter of the pillow front.
Zipper closure: A zipper creates a cleaner fitted appearance and is useful for frequently washed covers. An invisible zipper positioned along the bottom edge keeps the hardware discreet.
Hand-sewn opening: The simplest construction is to sew most of the perimeter, insert the pillow form, and close the opening using a ladder stitch. This looks neat but makes removing the insert less convenient.
Step 6: Sew the Pillow Perimeter
Place the front and back with right sides facing each other. Pin or clip around the perimeter, paying particular attention to the striped edges.
Sew using a consistent seam allowance. When approaching a corner, stop with the needle down, raise the presser foot, rotate the fabric 90 degrees, lower the foot, and continue sewing.
Consistency matters more than speed. The sewing machine is perfectly comfortable reaching the finish line five minutes later.
Step 7: Reduce Bulk at the Corners
Trim excess fabric diagonally near each corner without cutting into the stitching. Removing this bulk helps produce cleaner corners after the cover is turned right side out. Pressing finished seams also contributes greatly to a crisp professional appearance.
Some fitted pillow-making techniques taper the corners slightly to reduce the empty pointed corners sometimes called “dog ears.” This subtle shaping can create a fuller-looking finished cushion.
Step 8: Turn, Press, and Insert the Pillow
Turn the cover right side out and gently shape the corners. Do not attack them with scissors. Sharp tools have an unfortunate habit of turning “almost finished” into “new ventilation feature.”
Press the edges before inserting the pillow form. Work each corner of the insert into place, close the envelope or zipper, and distribute the filling evenly.
Should the Pillow Insert Be Larger Than the Cover?
A slightly generous insert often creates a plumper decorative pillow. Some decorators use inserts larger than the finished cover to avoid a loose, under-filled appearance. However, the ideal difference depends on the insert material, pillow size, cover fabric, and desired firmness. A thick feather-down insert behaves differently from rigid polyester stuffing.
For a first project, test the fit before committing to an aggressively oversized insert. The goal is “inviting and full,” not “fabric experiencing structural emergency.” The broader decorating principle is simple: scale the pillow appropriately to the furniture and use enough fullness to maintain its intended shape.
How to Style a Pillow With Lines
Striped and linear pillows are useful because geometric patterns mix easily with solids, florals, and textured fabrics. Designers frequently combine a geometric or striped pillow with an organic pattern and a solid textured cushion to keep a sofa arrangement interesting without making every pillow compete for attention.
Try these combinations:
- Black-and-cream lines with camel leather and a rust velvet pillow
- Navy stripes with white linen and a blue floral print
- Gray linear stitching with charcoal and oatmeal boucle cushions
- Terracotta bands with ivory and olive-green pillows
- Thin beige stripes with natural wood furniture and woven throws
Changing pillow covers is also an inexpensive way to refresh a room seasonally. Keeping the inserts and rotating removable covers reduces storage space and makes it easier to deal with stains or changing decor.
Common Mistakes to Avoid
Cutting Before Planning Stripe Placement
Never cut expensive striped fabric immediately after taking measurements. First identify the center and decide which lines should appear at each edge.
Ignoring Fabric Grain
A perfectly measured rectangle can still behave poorly if it is significantly off grain. Check alignment before cutting, particularly with prominent linear patterns.
Skipping the Iron
Press seams as construction progresses. Sewing gives the pillow structure; pressing makes it look finished.
Pulling Fabric While Topstitching
Guide the fabric rather than stretching it. Allow the feed dogs to move the material naturally while you concentrate on keeping the guideline straight.
Using Too Many Competing Patterns
A striped pillow already provides strong geometry. If every neighboring cushion contains a different loud pattern, your sofa may begin resembling a fabric store during an earthquake. Use solids and textures to create visual breathing room.
Adding Piping for an Upgraded Finish
Piping can transform a simple DIY pillow into something that looks considerably more tailored. Ready-made piping is pinned around the front panel before the front and back are sewn together. Corners require careful positioning so the cord curves smoothly rather than bunching.
A zipper foot can help stitch close to the piping cord, and small clips in the piping seam allowance allow it to move around corners more easily.
If your pillow design already contains several bold lines, keep the piping simple. Solid black, cream, navy, or another color borrowed from the main fabric can frame the design without overwhelming it.
Care and Maintenance
The greatest practical advantage of a removable throw pillow cover is easy maintenance. Follow the care instructions for the specific fabric you used rather than assuming every cover belongs in a hot washer and dryer.
Vacuum or shake off surface dust periodically. Address stains promptly. If the fabric allows machine washing, close zippers before laundering and consider a gentle cycle. Reshape the cover while damp when appropriate and press it according to the fiber content.
For seasonal decorating, wash and completely dry covers before storing them. Fold them flat rather than storing entire pillows whenever possible. A stack of covers occupies dramatically less closet space than an army of fully stuffed decorative cushions.
Practical Experiences and Lessons From Making Line-Pattern Pillow Covers
Line-pattern pillow covers are excellent teachers because they expose small construction mistakes immediately. That may sound intimidating, but it is actually useful. After making a few, you begin to understand that professional-looking sewing usually comes from careful preparation rather than advanced equipment.
One common experience is discovering that cutting deserves almost as much attention as sewing. Imagine making an 18-inch pillow with broad horizontal stripes. You accurately cut two squares, sew them perfectly, turn the cover right side out, and then notice the stripes lean slightly downhill. Nothing is technically broken, but the pillow appears to be permanently sailing toward the lower-right corner.
The lesson is to treat the visual pattern as part of the measurement process. Before cutting, spread the fabric on a large flat surface and identify one dominant line. Use it as a reference while checking the grain, center, and finished seam locations.
Another useful lesson comes from topstitched designs. Beginners often watch the sewing-machine needle intensely while trying to keep a straight line. Surprisingly, it is usually easier to watch a guide farther in front of the needle. A marked guideline, seam guide, or edge of the presser foot gives you an earlier warning when the fabric begins drifting. Small corrections remain small instead of turning into dramatic zigzags.
Pressing is another step whose importance becomes obvious after comparing two completed covers. Construct one without pressing between steps and another while carefully pressing every seam. Even if both were sewn accurately, the pressed version normally looks sharper. The seams lie flatter, corners behave better, and pieced fabric strips look deliberate instead of slightly inflated.
Envelope closures are especially useful while learning. They remove the challenge of zipper installation and allow the cover to come off easily. The main lesson is to create enough overlap. A shallow overlap may gape when a plump insert pushes against it. For a heavily used sofa pillow, a generous overlap provides better coverage.
Zippers become worthwhile once you are comfortable with basic construction. They can create a neat edge and work well when both sides of the pillow deserve to be displayed. The first zipper may involve a little muttering at the sewing machine. By the second or third pillow, the process usually feels far less mysterious.
Pattern mixing offers another practical discovery: a line-pattern pillow rarely needs an identical partner. Two perfectly matching striped cushions can create symmetry, but pairing one with a solid textured pillow often makes the entire arrangement feel more relaxed. Add an organic floral, abstract, or curved motif and the straight lines suddenly become an anchor rather than the entire show.
Scrap fabric can also become surprisingly useful. Narrow leftovers can be joined into stripes across the pillow front, allowing small pieces from previous projects to become a coordinated design instead of permanent residents of the mysterious scrap-fabric box. Patchwork and embellished pillow projects are frequently recommended as practical ways to reuse leftover fabric.
The final lesson is not to chase mathematical perfection so aggressively that the project stops being enjoyable. Straight lines should look intentional, seams should be secure, and the cover should fit well. A handmade pillow can tolerate a tiny imperfection. In fact, that small variation is often what keeps it from looking mass-produced.
Conclusion
A throw pillow cover with lines combines one of the easiest home sewing projects with a design that can look sophisticated in almost any room. Start with stable fabric, measure the insert carefully, plan the line placement before cutting, and keep the fabric square and properly aligned. Whether the lines come from printed stripes, pieced fabric bands, or decorative topstitching, precision during cutting and pressing will have a larger effect on the finished result than fancy equipment.
For maximum practicality, choose an envelope or zipper closure so the cover can be removed for washing or replaced when you want a quick decor update. Once you have mastered one version, experiment with diagonal lines, contrasting thread, oversized bands, piping, linen textures, or unexpected color combinations.
Best of all, this project provides the rare home makeover that does not require moving furniture, hiring contractors, or explaining a mysterious hardware-store receipt to anyone. One pillow, a few straight lines, and your sofa gets a surprisingly convincing promotion.