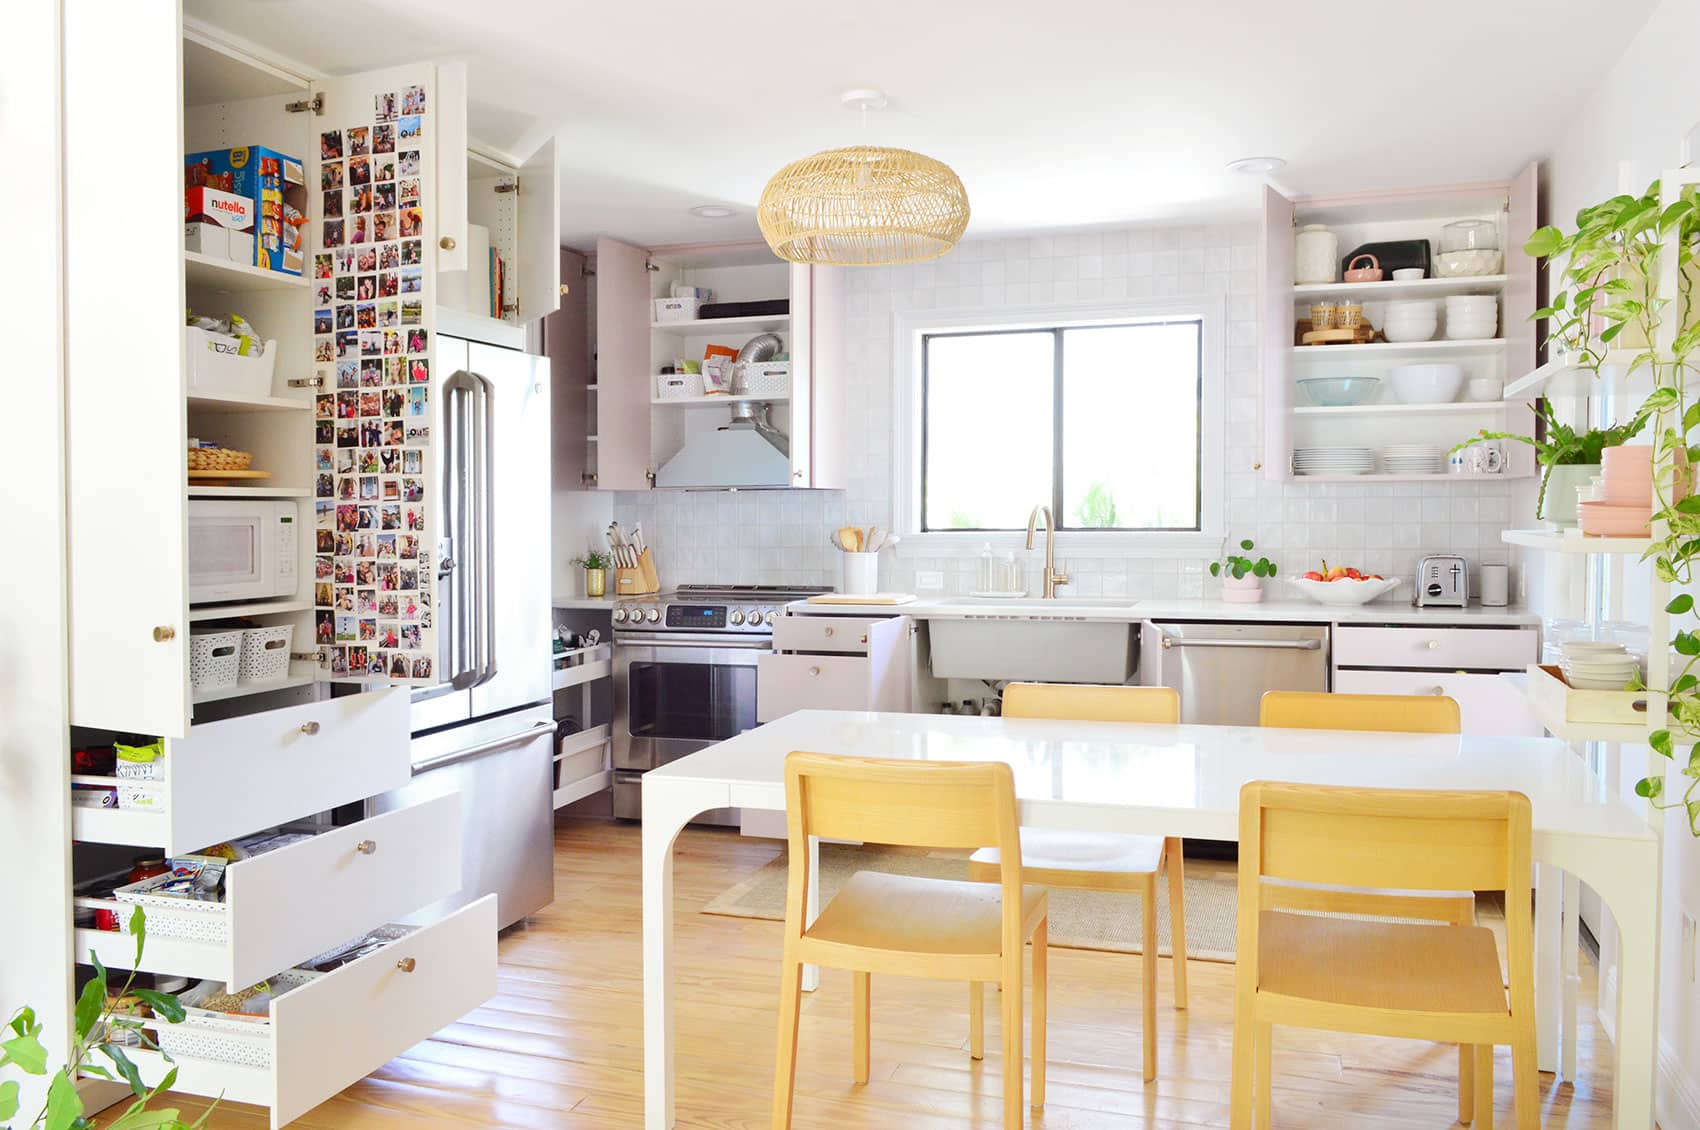
A small kitchen can look peaceful at breakfast and resemble a yard sale by dinner. One cutting board lands on the counter, then the toaster joins it, followed by three mugs, a bag of onions, and a lid that fits absolutely nothing. Our compact IKEA kitchen was no exception. The cabinets were sleek and efficient on paper, but everyday life kept testing every drawer.
The answer was not buying dozens of matching bins or turning the room into a showroom. We learned to use the modular IKEA kitchen storage we already had, place items according to how we cooked, and create rules simple enough to survive a busy Tuesday night. The result holds more, works faster, and stays reasonably tidy without requiring a full-time organizing staff.
Start With a Small-Kitchen Reality Check
Before adding organizers, we emptied every cabinet and drawer. Small kitchens punish duplication. Two peelers seem harmless, but add extra mugs, water bottles, novelty gadgets, chipped bowls, and five nearly identical spatulas, and an entire cabinet disappears.
We divided everything into four groups: daily, weekly, occasional, and rarely used. Daily items earned the easiest locations. Weekly items stayed nearby. Seasonal platters and specialty tools moved to high cabinets. Broken, redundant, or untouched items had to justify their continued residency.
Measure Before Buying
IKEA cabinets are modular, but useful interior dimensions vary around hinges, plumbing, shelves, and drawer hardware. We measured width, depth, height, and door clearance before shopping. This prevented the classic organizing mistake: buying a beautiful bin that is one-quarter inch too wide and spending the afternoon negotiating with plastic.
Every accessory also needed a specific job. A shelf riser, pullout basket, turntable, or divider should fix a real problem. If it merely occupies space while looking organized, it is decorative clutter wearing a name tag.
Organize the Kitchen by Work Zones
The biggest improvement came from organizing around activities instead of object types. We created zones for preparation, cooking, coffee, cleanup, food storage, and pantry supplies. This reduced unnecessary movement and made putting things away more intuitive.
Preparation Zone
Cutting boards, knives, mixing bowls, measuring tools, and frequently used utensils belong near the main prep surface. We stored cutting boards vertically so each one could slide out without disturbing the rest. Knives went into a drawer insert rather than a bulky counter block, protecting the blades while freeing valuable workspace.
The shallow top drawer became our everyday tool drawer. Adjustable dividers created sections for peelers, whisks, thermometers, and measuring spoons. We deliberately left breathing room. A drawer packed to maximum capacity is not organized; it is a puzzle with consequences.
Cooking Zone
Pots, pans, lids, oven mitts, and cooking utensils stayed near the range. Deep IKEA drawers work especially well because cookware can be viewed from above. We nested only pieces that separated easily and used a vertical divider for lids. Heavy cookware went low, while lighter bowls and colanders went higher.
Oils and everyday seasonings stayed close to the cooking area but away from direct heat. A small tray contained the bottles, caught drips, and made the cabinet easier to clean.
Cleanup Zone
Plates, bowls, glasses, and food containers were positioned near the dishwasher or drying rack. This shortened unloading and reduced the chance of crossing the kitchen with a tower of plates like an underqualified circus performer.
Under the sink, a removable caddy holds daily cleaners, while backup supplies sit farther back in a washable tray. Hooks on the door hold gloves and a brush. We selected short containers so plumbing remained visible and accessible.
Coffee and Breakfast Zone
Our coffee supplies had colonized three cabinets. We consolidated mugs, filters, beans, tea, sweeteners, and the grinder near the coffee maker. Breakfast bowls and cereal moved nearby. Mornings became smoother, and sleepy people stopped opening every door before finding a spoon.
Make IKEA Drawers Work Harder
Drawers are one of the best features of an IKEA kitchen because they bring their contents toward you. Fixed shelves often hide forgotten items in the back, while full-extension drawers keep almost everything visible.
We gave each drawer one main purpose: everyday utensils, cooking tools, food wraps, cookware, containers, or pantry staples. Clear categories made the system easier for everyone to maintain.
Use an Inner Drawer
A shallow inner drawer above a deeper one creates storage without adding visual clutter. Flat tools, trivets, and utensils occupy the upper level, while bowls or cookware sit below. Small objects no longer sink into a deep drawer like lost treasure.
Store Containers as a Complete System
We reduced food containers to compatible sizes, nested them by shape, and stored lids vertically beside them. Containers without lids and lids without containers were released from service. The remaining pieces stack neatly in the cabinet and in the refrigerator.
Use Vertical Kitchen Storage With Restraint
When floor space is limited, walls become useful. We installed one rail for frequently reached tools, a few hooks for towels and oven mitts, and a narrow shelf for attractive everyday items.
We resisted covering every open wall. Too many exposed objects create visual noise and collect grease. Open storage works best for items used and washed often. Rarely used gadgets and mismatched packaging are happier behind closed doors.
Claim Narrow Surfaces
The side of a cabinet or refrigerator can support a slim magnetic rack, grocery pad, timer, or lightweight organizer. These surfaces are ideal for small tools, provided the setup remains restrained enough that the kitchen does not begin resembling a hardware aisle.
Reserve High Cabinets for Occasional Items
Holiday serving pieces, specialty bakeware, extra vases, and occasional appliances live on the highest shelves in lightweight labeled bins. A compact step stool stays nearby because kitchen organization should not include an emergency-room subplot.
Fix Awkward Cabinets
Corner cabinets, deep shelves, and the space beneath the sink can waste surprising amounts of room. Pullouts, carousels, shelf risers, removable bins, and door-mounted racks can help, but the hardware should match the cabinet and the weight of its contents.
In our deepest cabinet, we grouped items into removable categories rather than letting them drift into darkness. Baking supplies went in one bin, small appliances in another, and entertaining pieces in a third. Pulling out an entire category is easier than reaching behind a blender while hoping nothing falls on your head.
Divide Vertical Space
Shelf risers created separate levels for plates, bowls, mugs, and canned goods. Vertical dividers gave cutting boards, baking sheets, and pot lids individual slots. We also used the inside of one cabinet door for lightweight measuring tools, checking hinge and shelf clearance before mounting anything.
Protect the Countertop Like Prime Real Estate
Clear counter space improves both appearance and function. Only appliances used almost every day remained out. The coffee maker stayed. The toaster earned its spot. The stand mixer moved into a lower cabinet, where it waits patiently for weekends and unrealistic baking ambitions.
Small countertop groups sit on trays. A tray creates a visual boundary, catches drips, and lets us move several objects at once when cleaning or preparing a large meal.
Create a Non-Kitchen Landing Zone
Mail, keys, chargers, and sunglasses naturally migrate toward the kitchen. Instead of pretending this would stop, we created a shallow basket and a few hooks at the edge of the room. Household clutter now has a destination away from the food-prep surface.
Build a Compact Pantry System
We do not have a walk-in pantry, so several drawers and one tall cabinet perform pantry duty. Food is grouped by function: breakfast, snacks, baking, grains, canned goods, and quick dinners.
Clear containers are reserved for staples we buy repeatedly, including rice, flour, oats, and pasta. Occasional ingredients remain in their original packaging; decanting every cracker is not a moral achievement. New purchases go behind older ones, and a small “use first” bin holds open packages or ingredients approaching their best-by dates.
Favor Visibility Over Perfect Symmetry
Short bins, tiered shelves, and pullouts make supplies easier to see. Deep opaque containers can hide food and encourage duplicate purchases. A running grocery list near the pantry lets us record an empty staple immediately rather than remembering it halfway home from the store.
Choose Organizers That Can Change
A kitchen is not static. Cooking habits change, new appliances arrive, children grow, and somebody eventually becomes interested in sourdough. We favored adjustable dividers, movable bins, hooks, and modular inserts instead of highly specialized organizers.
Flexible storage also makes seasonal resets easier. Baking tools can move forward during the holidays, while reusable bottles and picnic supplies take priority in summer.
Create Rules That Survive Real Life
The most attractive system will fail if it is annoying to maintain. Our rules are simple:
- Store items near the place where they are used.
- Keep daily tools between knee and eye level.
- Leave some empty space in every major cabinet.
- Return items to their category, not the nearest open shelf.
- Remove an unused item whenever a category becomes crowded.
We also do a ten-minute reset after dinner. Counters are cleared, stray objects return home, and the dishwasher is loaded. The routine is short enough to feel manageable and strong enough to keep minor clutter from becoming a weekend project.
Our Experience Organizing a Small IKEA Kitchen
The first version of our organization system looked impressive and worked terribly. We arranged spices in perfect rows, decanted dry goods into matching containers, and fitted nearly every cabinet with an insert. For about three days, the kitchen looked ready for a photo shoot. Then real life arrived carrying groceries.
Our biggest mistake was organizing for appearance rather than movement. The flour looked lovely in a high cabinet, but we baked often and needed a step stool every time. Everyday mugs were stacked behind glasses because the arrangement looked balanced. The frying pan lived across the room from the stove. Nothing was technically disorganized, yet cooking felt like a scavenger hunt designed by a very tidy villain.
We started again by watching what happened during an ordinary week. We noticed where groceries landed, which drawers opened most often, and which items never returned to their assigned homes. That last clue was especially useful. When an object repeatedly ends up in the “wrong” place, the household may not be lazy; the assigned place may simply be wrong.
Moving the plates closer to the dishwasher saved only a few steps, but the improvement was immediate. Putting cooking tools beside the range stopped utensils from accumulating on the counter. Storing lunch containers near the refrigerator made packing leftovers quicker. None of these changes was dramatic alone, yet together they made the room feel larger because we stopped crossing paths and opening unnecessary cabinets.
The deep drawers became our favorite feature. At first, we treated them like traditional cabinets and stacked cookware into tall piles. That produced noise, scratches, and frustration. Low dividers and dedicated spaces for the most-used pans made the drawer faster and quieter. We could remove one skillet without reconstructing an aluminum mountain.
We also learned that empty space is not wasted space. Our original goal was to fill every inch, leaving no room for groceries, guests, or changing habits. Now we intentionally keep part of one pantry shelf and one section of a deep drawer open. That buffer absorbs temporary clutter and prevents the system from collapsing when we buy a large bag of rice or receive an unexpected serving bowl.
The wall rail taught us restraint. We initially hung nearly every utensil we owned. The display looked busy, and several tools collected cooking residue. We reduced it to six items used almost daily. The wall looked calmer, cleaning became easier, and the rail finally served a practical purpose instead of performing as kitchen jewelry.
Our most useful habit is the evening reset. It is not a deep clean. We simply return tools, wipe the main counter, check the sink, and place tomorrow’s coffee supplies together. Waking up to a clear prep surface makes the kitchen feel ready rather than already behind schedule.
Most importantly, organizing our small IKEA kitchen taught us that capacity is not the same as convenience. A cabinet may physically hold twenty mugs, but that does not mean it should. The goal is not to prove how much the kitchen can contain. It is to make cooking, cleaning, and daily life easier. Once we stopped maximizing every cubic inch and started protecting the flow of the room, the kitchen became calmer, faster, and far more enjoyable.
Conclusion
Organizing a small IKEA kitchen is less about buying more storage and more about making better decisions. Declutter first, arrange items around real work zones, use drawers and vertical surfaces wisely, and reserve countertops for true daily essentials. Pullouts, shelf risers, rails, dividers, and labeled bins can make a major difference when each solves a genuine problem.
The best system is logical, flexible, and forgiving enough for daily life. Give important items an easy home, leave room for the kitchen to change, and reset the space in small bursts. A compact kitchen may never feel enormous, but it can feel calm, capable, and surprisingly generous.
SEO Tags
Editorial note: This article synthesizes practical guidance from IKEA and established U.S. home organization, remodeling, and retail publications.
Research basis: IKEA, Apartment Therapy, The Kitchn, Better Homes & Gardens, HGTV, Good Housekeeping, This Old House, Real Simple, Bob Vila, Family Handyman, The Home Depot, and Lowe’s.