Homemade yogurt sounds like one of those kitchen projects that requires a lab coat, a clipboard, and the emotional stability of a NASA engineer. Good news: it does not. At its core, yogurt is simply warm milk plus live cultures plus a little patience. The tricky part is not making yogurt. The tricky part is incubating yogurt at home without accidentally turning your kitchen into a dairy-themed science fair.
That is exactly where most home cooks get stuck. They know how to heat the milk. They know they need starter culture. But then comes the big question: Where does the yogurt go for the next several hours? In the oven? In a cooler? In an Instant Pot? Wrapped like a sleepy burrito in towels? The answer is delightfully flexible.
If you want to learn multiple ways to incubate yogurt at home, this guide walks through the most practical methods, what temperature range matters, how long to incubate, what works best for thick yogurt, and how to avoid a batch that looks more like confused milk than breakfast. Grab a thermometer and a spoon. Things are about to get cultured.
Why Yogurt Incubation Matters So Much
Incubation is the stage where warm milk mixed with starter culture sits at a steady temperature long enough for beneficial bacteria to do their thing. Those bacteria consume lactose, produce lactic acid, and gradually turn the milk into yogurt with its familiar tang and gentle thickness. In other words, incubation is where the magic happens. Or, if you prefer less whimsy, it is where controlled fermentation happens.
When the incubation temperature is too low, the culture works slowly and the yogurt may stay thin or fail to set. When the temperature is too high, the bacteria can weaken or die, and the result can be grainy, separated, or just plain disappointing. So the goal is not fancy equipment. The goal is stable warmth.
For classic thermophilic yogurt, most home methods aim for a warm zone of roughly 100 to 115 degrees Fahrenheit, with many recipes hovering near 110 degrees. Once the yogurt sets, chilling it promptly helps stop the fermentation and lock in the texture.
Before You Incubate: Get the Basics Right First
Before comparing yogurt incubation methods, it helps to build a solid foundation. A few smart prep choices make every method more reliable.
Use the right milk
Whole milk usually makes the creamiest homemade yogurt. Low-fat and nonfat milk can also work, but the texture may be lighter and less luxurious. If you want a firmer set without straining, adding a little nonfat dry milk before heating can help boost milk solids. Some home cooks also use a small amount of gelatin for extra body, though plenty of people prefer to keep it simple and skip that step.
Choose a fresh starter
Your starter can be plain yogurt with live active cultures or a packaged starter culture. Freshness matters. A tired starter is like a sleepy employee on Monday morning: technically present, not especially effective. If you are reusing homemade yogurt as starter, use a recent batch, not something that has been hanging out in the back of the fridge since another season of your favorite show started.
Heat, then cool
Most reliable homemade yogurt methods heat milk first, usually to around 180 to 185 degrees Fahrenheit, then cool it to roughly 110 to 115 degrees before adding the starter. This step helps improve texture and gives the culture a better working environment. Do not add the starter when the milk is too hot, or you risk knocking out the very bacteria you are counting on.
Keep everything clean
Yogurt is friendly. Random kitchen microbes are not. Clean pots, jars, spoons, and thermometers thoroughly before starting. Sanitation sounds boring until it saves you from a weird-smelling batch.
10 Practical Ways to Incubate Yogurt at Home
Now for the fun part. There is no single best yogurt incubation method for everyone. The right one depends on your kitchen, your climate, your budget, and how many countertop gadgets you are willing to tolerate.
1. Use a Dedicated Yogurt Maker
A yogurt maker is the easiest, most foolproof option for many beginners. It is built for one job: holding yogurt at a stable temperature. If you make yogurt often, this can be wonderfully convenient. Pour the inoculated milk into the machine or jars, set the timer if your model has one, and let it work.
The downsides are obvious. It is another appliance, and it is not exactly pulling triple duty like a Dutch oven. Still, for consistency and low stress, a yogurt maker is hard to beat.
2. Incubate Yogurt in the Oven With the Light On
This is one of the most popular ways to incubate yogurt at home without a yogurt maker. The basic idea is simple: warm the oven briefly if needed, then turn it off and let the oven light provide a gentle, enclosed heat source. The jars or pot rest inside undisturbed while the culture sets.
This method works especially well in cooler homes because the oven creates a draft-free little cocoon. It is also wonderfully low-tech. The biggest caution is memory. Put a note on the oven door so nobody preheats it for pizza while your yogurt is inside. That would be an exciting day, but not in a good way.
3. Use an Insulated Cooler
An insulated cooler is a surprisingly effective yogurt incubator. Pre-warm the cooler, then place jars of inoculated milk inside with warm water around them or nearby hot-water jars to help maintain the temperature. Close the lid, wrap the cooler in a towel if needed, and let insulation do the heavy lifting.
This method is great for larger batches and for anyone who wants a no-frills solution. It is also handy when oven space is spoken for or when you do not want an appliance running for hours. Just make sure the warmth stays in the right range and does not drift too far downward.
4. Make Yogurt in an Instant Pot or Electric Pressure Cooker
If your electric pressure cooker has a yogurt function, congratulations: you own a very smug piece of equipment. It knows exactly what it is doing here. These machines can simplify both heating and incubation, and many people love them because they take a lot of guesswork out of the process.
For classic plain yogurt, an incubation window of about 8 hours is common, though shorter times can produce a milder flavor and longer times can create a tangier result. This is one of the easiest ways to get reliable texture with minimal babysitting.
5. Use a Slow Cooker as a Warm Water Bath
A slow cooker can help incubate yogurt even if it is not technically a yogurt maker. Some people place the yogurt mixture in jars, set the jars in warm water inside the slow cooker, and use the residual heat. Others cycle the cooker on briefly when needed to maintain warmth. It can work well, but it requires a little attention because some slow cookers run hot.
If you go this route, use a thermometer and think of yourself as the yogurt’s friendly lifeguard. You do not need to hover dramatically, but you do need to keep an eye on the temperature.
6. Pour It Into a Thermos
A thermos is one of the simplest small-batch yogurt incubation methods around. Pre-warm the thermos, pour in the inoculated milk, close it, and leave it alone. The insulation helps keep the culture cozy for hours.
This method is ideal if you make smaller amounts of yogurt or want a setup with almost zero counter clutter. The main catch is that it is not as easy to check visually, and very wide thermoses are generally more convenient than narrow ones.
7. Try a Sous Vide or Immersion Circulator
If precision makes your heart happy, this may be your favorite method. Place jars in a water bath controlled by an immersion circulator and hold them at a consistent temperature for the full incubation period. It is accurate, repeatable, and excellent for texture consistency.
It is also a little extra, in the best possible way. If you already own a sous vide device, using it for yogurt is smart. If you do not, this is not a reason to buy one unless you also enjoy steak that behaves itself.
8. Use a Dehydrator or Folding Proofer
Many dehydrators and proofing boxes can maintain low, steady temperatures suitable for yogurt. If your model runs cool enough, it can double as a very reliable yogurt incubator. This is especially useful for people who already bake bread or dry produce and want their equipment to earn its shelf space.
As always, check the actual temperature inside before committing a whole batch. Yogurt likes warm, not tropical.
9. Use a Heating Pad or Seedling Mat
This is one of the more clever DIY yogurt incubation ideas. Place the yogurt jars in a small cooler or insulated container and use a heating pad on low, or rest the jars on a seedling mat, to maintain warmth. It is a flexible setup for people who do not have specialized kitchen equipment but do have a bit of ingenuity.
This method works best when you test the setup first with water and a thermometer. Yogurt is forgiving, but it still appreciates not being treated like a mystery experiment.
10. Use Room Temperature for Heirloom Mesophilic Cultures
Here is the plot twist: not all yogurt needs classic warm incubation. Some heirloom mesophilic cultures ferment at normal room temperature, usually around 70 to 77 degrees Fahrenheit. That means you can culture them on the counter without chasing the usual 110-degree target.
This approach can be wonderfully easy in mild weather and for people who want a more relaxed routine. The texture and flavor may differ from standard store-style yogurt, often in a good way. If you have ever wanted yogurt making to feel less like a project and more like a gentle kitchen habit, this route is worth exploring.
How Long Should You Incubate Yogurt?
There is no universal answer because starter strength, milk type, batch size, and temperature stability all influence the clock. In general, classic yogurt often incubates for about 4 to 8 hours, while some methods or flavor preferences stretch longer. Eight hours is a common sweet spot for balanced flavor and decent thickness.
Longer incubation usually makes yogurt tangier and more acidic. It can also reduce lactose further because the bacteria have more time to work. That sounds great until you cross the line into overly tart, separated yogurt with a puddle of whey on top that says, “You got ambitious.”
The best strategy is to pick a method, keep notes, and adjust on your next batch. Yogurt rewards people who pay attention.
How to Tell When Homemade Yogurt Is Done
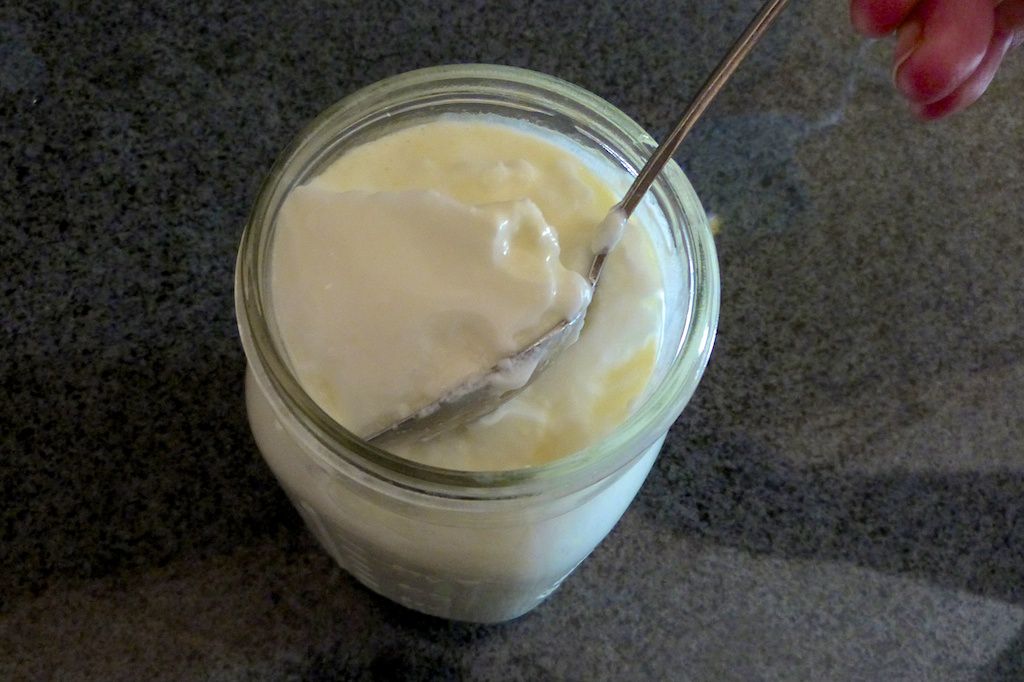
Finished yogurt should look softly set and no longer resemble plain milk. When you gently tilt the jar, it should move as one mass rather than slosh like a dairy smoothie. Some whey on top is normal. A lot of whey can mean it incubated too long, was bumped around while setting, or started with milk that needed more solids.
Once the yogurt has set, move it to the refrigerator promptly. Chilling helps it firm up more and slows further acid development. Homemade yogurt often tastes even better after a good cold rest.
Common Yogurt Incubation Problems and How to Fix Them
The yogurt is too thin
This usually points to low incubation temperature, weak starter, or not enough milk solids. Next time, verify your thermometer, keep the temperature steadier, and consider using whole milk or adding a little nonfat dry milk before heating.
The yogurt is too tart
That usually means it incubated too long. Shorten the time on your next batch. Refrigerate promptly once it sets instead of letting it keep fermenting while you answer “just one email” and return three hours later.
The yogurt separated
Excess whey separation can happen from over-incubation, overheating, or jostling the jars while the yogurt is setting. Let it sit undisturbed, and remember that yogurt prefers a calm life.
The yogurt tastes off
That can mean contamination, an old starter, or poor sanitation. When in doubt, throw it out. Heroism has no place in questionable dairy decisions.
Experience Section: What Home Yogurt Incubation Really Feels Like in Real Kitchens
One of the most helpful things to understand about multiple ways to incubate yogurt at home is that the “best” method often changes with the season, the house, and your mood. In winter, an oven with the light on can feel like a miracle because the kitchen is chilly and the counters seem to suck warmth out of everything. In summer, that same oven setup can feel unnecessary, and a cooler or countertop method may suddenly become the easy winner.
A lot of home cooks start with the method they already have the equipment for, not the method that wins a kitchen beauty pageant. Someone with an Instant Pot tends to become an Instant Pot yogurt person very quickly because the process feels tidy and repeatable. Someone without one may discover that a thermos or cooler works shockingly well and costs essentially nothing. That is part of the charm. Homemade yogurt is oddly democratic. Fancy setup, simple setup, improvised setup with three towels and stubborn optimism; they can all work.
There is also the very real experience of learning how your house behaves. A yogurt batch that sets beautifully in one kitchen may struggle in another because of drafts, room temperature, or the personality of the oven light. Some ovens run warmer than expected. Some slow cookers run hot enough to make yogurt bacteria deeply uncomfortable. Some coolers are insulation champions. Others are just plastic boxes with confidence issues. The first batch teaches you more about your equipment than any manual ever will.
Texture preferences also shape the experience. Many people start out wanting thick, Greek-style yogurt immediately, then realize that plain homemade yogurt often sets more softly before chilling. That is normal. A batch can look loose while still warm, then turn into something rich and spoonable after refrigeration. If you want it thicker, straining becomes part of the adventure. The first time you strain yogurt and end up with creamy labneh-style goodness, it feels like you have unlocked a bonus level in the dairy game.
Another common experience is discovering that yogurt responds to routine. Once you use the same milk, the same starter, and the same incubation method a few times, your results usually become far more predictable. The process starts to feel less like guessing and more like rhythm. Heat, cool, inoculate, incubate, chill. After a while, it becomes one of those deeply satisfying kitchen habits, like baking bread or making soup before the weather turns cold.
And then there is the flavor. Homemade yogurt has a freshness that store-bought versions often lose in the march from factory to fridge shelf. It can taste cleaner, milkier, tangier, or more delicate depending on how you incubate it and for how long. That is why people keep experimenting. One week, you may want a mild breakfast yogurt with fruit and granola. The next week, you may want a tangier batch sturdy enough to dollop onto roasted vegetables or swirl into soup. The method you choose affects not just whether the yogurt sets, but the kind of yogurt life you want to live. That may sound dramatic for fermented milk, but once you make a batch that comes out exactly right, you will understand.
Conclusion
The beauty of homemade yogurt is that you do not need a single perfect system. You need a reliable warm environment, a good starter, clean equipment, and a little curiosity. Whether you use an oven, cooler, Instant Pot, thermos, dehydrator, heating pad, or room-temperature heirloom culture, the principle stays the same: keep the culture comfortable and let time do the work.
If you are just starting out, choose the incubation method that fits your current kitchen instead of chasing the most impressive one online. The easiest method is often the one you will actually use again next week. Once you get comfortable, experiment with batch size, milk type, incubation time, and thickness. Homemade yogurt has plenty of room for personal preference, which is excellent news for people who like breakfast with a little personality.
In the end, learning multiple ways to incubate yogurt at home is less about memorizing rules and more about understanding the warm, cozy conditions that let live cultures thrive. Once you get that part down, the rest is just delicious follow-through.