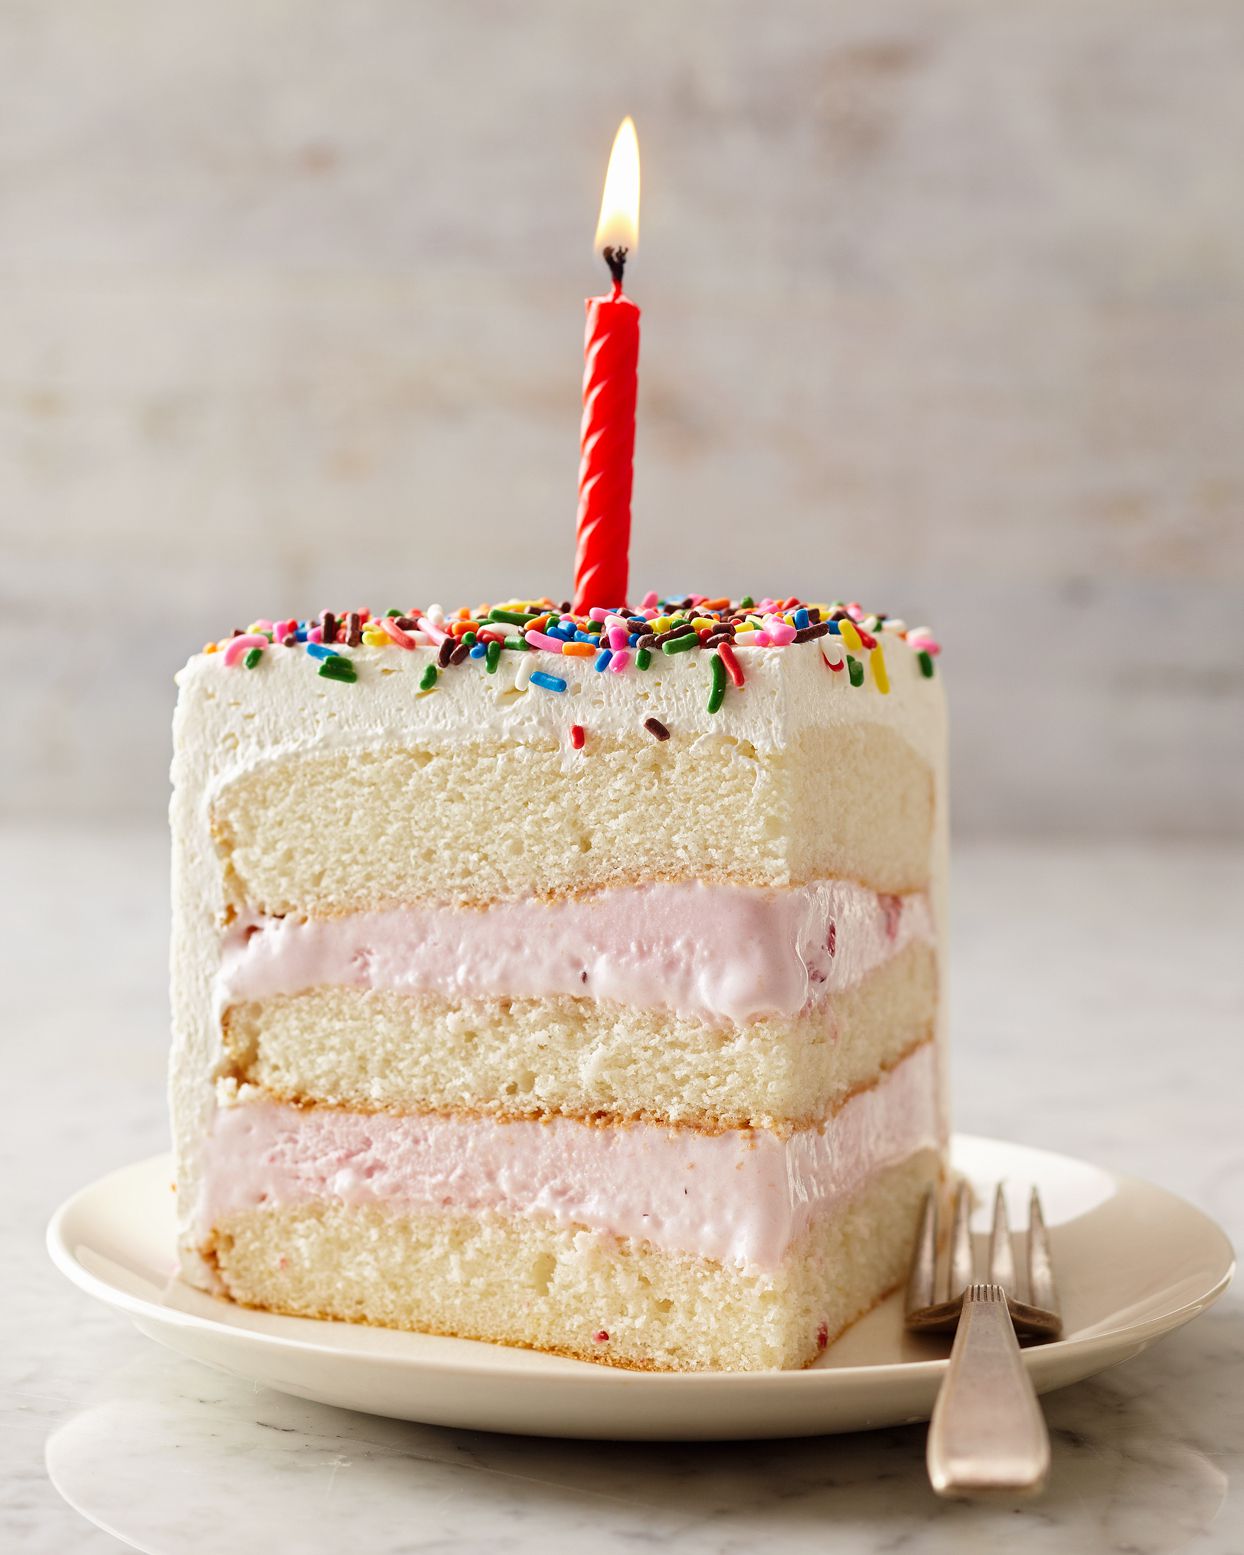
A layered ice cream cake is what happens when birthday cake, a sundae bar, and a freezer decide to become best friends. It is cold, creamy, crunchy, dramatic, and somehow easier than baking a traditional layer cake from scratch. No stressful crumb coat. No leaning tower of frosting. No pretending your piping skills belong on a baking show. This dessert is built in patient, delicious stages: a cookie crust, a smooth ice cream layer, a fudge-and-crunch middle, another ice cream layer, and a fluffy whipped topping that makes the whole thing look party-ready.
This homemade layered ice cream cake recipe is designed for real kitchens and real schedules. You do not need fancy equipment, professional pastry training, or a freezer the size of a walk-in closet. What you do need is a springform pan, softened ice cream, a little freezer patience, and the emotional strength not to eat the cookie crumble before it becomes the middle layer. That last part is harder than it sounds.
The beauty of this recipe is flexibility. Vanilla and chocolate are classic, but strawberry, coffee, mint chip, cookies and cream, peanut butter cup, caramel, raspberry sorbet, or birthday cake ice cream all work beautifully. The structure stays the same, while the flavors can match a summer cookout, a child’s birthday party, a holiday dinner, or a Tuesday night when everyone deserves something spectacular.
Why This Layered Ice Cream Cake Works
The secret to a great ice cream cake is contrast. Ice cream alone is delicious, of course, but it can feel one-note after a few bites. A proper layered ice cream cake gives you creamy, crunchy, fudgy, soft, and fluffy textures in one slice. The cookie crust adds structure, the fudge layer keeps the center rich, crushed cookies bring that nostalgic ice cream shop crunch, and whipped cream lightens the top so the cake does not feel too heavy.
Freezing between layers is the other important trick. If you rush the process, the layers blur together like a dessert that lost its GPS signal. If you freeze each layer until firm, every slice shows clean stripes and tastes intentional. The cake becomes easier to cut, easier to serve, and much more impressive when placed on the table.
Recipe Overview
- Prep time: 35 minutes active time
- Freeze time: 6 to 8 hours, or overnight
- Total time: About 8 hours 35 minutes
- Servings: 12 slices
- Best pan: 9-inch springform pan
- Skill level: Easy, with patience required
Ingredients for Layered Ice Cream Cake
For the Cookie Crust
- 28 chocolate sandwich cookies or vanilla wafer cookies
- 5 tablespoons unsalted butter, melted
- 1 pinch fine salt
For the Ice Cream Layers
- 1 1/2 quarts chocolate ice cream, softened until spreadable
- 1 1/2 quarts vanilla ice cream, softened until spreadable
- 1 cup crushed chocolate sandwich cookies, wafer cookies, or brownie pieces
For the Fudge Crunch Center
- 3/4 cup hot fudge sauce, slightly warmed but not hot
- 1 cup crushed cookies, crisp rice cereal, chocolate wafers, or toffee bits
- 1/4 teaspoon salt, optional but recommended
For the Whipped Topping
- 1 1/2 cups cold heavy whipping cream
- 1/3 cup powdered sugar
- 1 teaspoon vanilla extract
- 2 tablespoons instant vanilla pudding mix, optional for a more stable topping
For Decorating
- Sprinkles
- Chocolate curls
- Mini cookies
- Chopped nuts
- Maraschino cherries
- Drizzled fudge or caramel sauce
Equipment You Will Need
A 9-inch springform pan is the easiest choice because it releases the frozen cake cleanly. You will also need parchment paper or plastic wrap, a food processor or zip-top bag for crushing cookies, a mixing bowl, an offset spatula or rubber spatula, and enough freezer space for the cake to sit level. That last detail matters. A tilted ice cream cake is still tasty, but it may look like it survived a tiny dessert earthquake.
How to Make a Layered Ice Cream Cake
Step 1: Prepare the Pan
Line the bottom of a 9-inch springform pan with parchment paper. For extra insurance, line the sides with a strip of parchment or plastic wrap. This makes it easier to remove the cake later and helps the sides look smooth. Place the pan on a small baking sheet so it can move in and out of the freezer without wobbling.
Step 2: Make the Cookie Crust
Crush the cookies into fine crumbs. You can use a food processor or place the cookies in a zip-top bag and crush them with a rolling pin. Mix the crumbs with melted butter and a pinch of salt until the texture resembles wet sand. Press the mixture firmly into the bottom of the pan. Use the bottom of a measuring cup to compact the crust evenly.
Freeze the crust for 15 to 20 minutes. This helps it firm up before the first ice cream layer goes on. A firm crust gives the cake a clean base and prevents cookie crumbs from sliding around while you spread the ice cream.
Step 3: Add the First Ice Cream Layer
Let the chocolate ice cream soften at room temperature for about 10 to 15 minutes, depending on your kitchen temperature. It should be spreadable, like thick frosting, but not melted. If it turns soupy, return it to the freezer for a few minutes. Melted ice cream refreezes with an icy texture, and nobody invited ice crystals to this party.
Spoon the softened chocolate ice cream over the chilled crust. Spread it into an even layer with a spatula. Tap the pan gently on the counter to remove air pockets. Freeze for 45 to 60 minutes, or until firm.
Step 4: Build the Fudge Crunch Center
Stir the hot fudge sauce until smooth. It should be pourable but not hot enough to melt the ice cream. Spread the fudge over the frozen chocolate ice cream layer. Sprinkle crushed cookies or crisp rice cereal over the fudge, then press lightly so the crunch layer sticks.
This middle layer is the “wait, did you make this yourself?” moment. It adds the texture people expect from an ice cream shop cake. The salt is optional, but it sharpens the chocolate flavor and keeps the cake from tasting overly sweet.
Freeze the cake again for 30 minutes, just long enough for the fudge and crunch layer to set.
Step 5: Add the Second Ice Cream Layer
Soften the vanilla ice cream until spreadable. Spoon it over the fudge crunch layer and gently smooth it to the edges. Work quickly but calmly. There is no need to panic-spread like you are defusing a dessert bomb. If the ice cream begins to melt too much, place the pan back in the freezer for 10 minutes, then continue.
Once the top is smooth, cover the pan with plastic wrap and freeze for at least 4 hours. Overnight is even better. A fully frozen cake slices cleanly and holds its shape longer at the table.
Step 6: Make the Whipped Cream Topping
In a cold mixing bowl, beat the heavy cream, powdered sugar, vanilla extract, and instant pudding mix, if using, until soft-to-medium peaks form. The pudding mix helps stabilize the whipped cream, which is helpful if the cake needs to sit out briefly during decorating or serving.
Remove the frozen cake from the springform pan. Peel away the parchment or plastic wrap. Place the cake on a serving plate or cake stand. Spread whipped cream over the top and sides. You can keep the finish rustic and swoopy, or smooth it like a bakery-style cake.
Step 7: Decorate and Freeze Again
Add sprinkles, cookie crumbs, chocolate curls, fudge drizzle, or cherries. Freeze the decorated cake for 30 to 60 minutes before serving. This final chill helps the whipped topping firm up and keeps the decorations in place.
How to Slice Ice Cream Cake Cleanly
Remove the cake from the freezer 8 to 12 minutes before serving. Dip a sharp knife in hot water, wipe it dry, and cut one slice at a time. Rewarm and wipe the knife between slices for the cleanest results. This simple step makes the layers look sharp instead of smeared.
If the cake is very firm, do not force the knife straight down. Let it sit for a few more minutes. Ice cream cake should be sliceable, not a strength test.
Flavor Variations
Cookies and Cream Ice Cream Cake
Use cookies and cream ice cream for both layers, chocolate sandwich cookies for the crust, and extra cookie crumbs in the center. Finish with whipped cream and mini cookies around the top edge.
Strawberry Shortcake Ice Cream Cake
Use strawberry ice cream and vanilla ice cream. Replace the chocolate cookie crust with vanilla wafer crumbs. Add crushed freeze-dried strawberries to the middle layer for bright flavor and color.
Peanut Butter Cup Ice Cream Cake
Use chocolate ice cream and peanut butter ice cream. Add chopped peanut butter cups to the crunch layer and drizzle the top with chocolate sauce and warmed peanut butter.
Mint Chocolate Chip Ice Cream Cake
Use mint chip ice cream with a chocolate cookie crust and fudge center. Decorate with chocolate curls and chopped mint chocolate candies.
Neapolitan Layered Ice Cream Cake
Use strawberry, vanilla, and chocolate ice cream in thinner layers. Freeze each layer until firm before adding the next. This version looks especially pretty when sliced.
Best Tips for Homemade Ice Cream Cake
First, soften the ice cream correctly. The ideal texture is thick, smooth, and spreadable. If you stir it in a bowl before adding it to the pan, it will spread more evenly and create fewer air pockets.
Second, freeze between layers. This is the difference between a polished layered ice cream cake and a delicious but chaotic frozen puddle. Each layer needs time to firm up so it can support the next.
Third, balance sweetness with texture. Ice cream, fudge, cookies, and whipped cream are all sweet, so a pinch of salt in the crust or crunch layer makes the flavors taste more rounded.
Fourth, decorate after the cake is fully frozen. If you decorate while the ice cream is soft, toppings may slide down the sides. Give the cake a solid freeze, then add the whipped cream and final decorations.
Make-Ahead and Storage Instructions
Layered ice cream cake is an excellent make-ahead dessert. You can assemble the cake up to one week before serving. Once frozen solid, wrap it tightly in plastic wrap and then foil to protect it from freezer odors. Add the final whipped cream topping and decorations the day you plan to serve it, or freeze the fully decorated cake for up to 24 hours.
Leftover slices can be wrapped individually and stored in an airtight freezer-safe container. For the best texture, enjoy leftovers within two weeks. Technically, they may last longer, but freezer flavor has a sneaky way of making dessert taste like last month’s frozen peas if the cake is not well wrapped.
Common Mistakes to Avoid
Using Melted Ice Cream
Softened ice cream is helpful. Melted ice cream is trouble. Once ice cream melts completely and refreezes, it can become icy and less creamy. Aim for a thick, spreadable consistency.
Skipping the Freeze Time
The freezer does most of the work in this recipe. Give it time. Rushing the process can cause layers to blend, slide, or collapse when sliced.
Adding Hot Fudge While It Is Too Warm
Warm fudge spreads well, but hot fudge melts ice cream. Let it cool slightly before adding it to the cake.
Overloading the Middle
Crunch is wonderful, but too many chunky add-ins can make the cake hard to slice. Keep the center layer generous but even.
What to Serve With Layered Ice Cream Cake
This cake is already a complete dessert, but you can make it even more fun with a small toppings bar. Offer warm fudge, caramel sauce, sliced strawberries, chopped nuts, whipped cream, and sprinkles. For a birthday party, serve it with hot coffee for adults and cold milk for kids. For a summer barbecue, pair it with fresh berries to keep the plate bright and refreshing.
Nutrition Notes
This is a celebration dessert, not a salad wearing a party hat. A moderate slice is satisfying because the cake is rich, cold, and full of texture. You can lighten it slightly by using frozen yogurt, reduced-sugar ice cream, or a thinner whipped topping layer. You can also add fruit between layers, but avoid watery fruit unless it has been well drained or frozen first.
Conclusion
A layered ice cream cake recipe is one of the easiest ways to make a dessert that looks dramatic without requiring professional baking skills. The method is simple: build a sturdy cookie crust, spread softened ice cream in even layers, add a fudge crunch center, freeze patiently, and finish with whipped cream and decorations. The result is creamy, crunchy, festive, and endlessly customizable.
Whether you are making a birthday cake, a summer party dessert, or a freezer-friendly treat for family night, this homemade layered ice cream cake delivers big flavor with very little stress. It is playful enough for kids, nostalgic enough for adults, and impressive enough to earn that magical question every home cook loves: “Wait, you made this?”
Experience Notes: What Making Layered Ice Cream Cake Teaches You
Making a layered ice cream cake feels less like baking and more like assembling a tiny frozen architecture project. The first time you make one, you may wonder if all the freezing steps are really necessary. Then you try to rush a layer, watch vanilla ice cream slide into fudge like a slow-motion dessert landslide, and suddenly you become a very patient person. This recipe rewards calm energy. It does not ask for difficult techniques, but it does ask you to respect temperature.
One of the best experiences with this cake is how forgiving it is. A traditional cake can overbake, sink in the middle, or cling to the pan like it has personal issues. A layered ice cream cake is more relaxed. If a layer looks uneven, you smooth it. If the ice cream gets too soft, you freeze it. If a cookie crust cracks, nobody will know once the cake is sliced. Even the decorations are flexible. Sprinkles make it cheerful. Chocolate drizzle makes it dramatic. Cookie crumbs make it look intentional, even if you are secretly covering a whipped cream smudge.
The recipe also teaches you how much flavor comes from texture. A slice with only ice cream would taste good, but the cookie crust and fudge crunch center make it memorable. That crisp middle layer is the part people notice first. It breaks up the creaminess and gives every bite a little surprise. In my experience, guests usually ask about the crunch before they ask about the ice cream flavors. It is the hidden pocket of joy, like finding fries at the bottom of the takeout bag.
Another useful lesson is that homemade does not always mean complicated. You can use store-bought ice cream, store-bought cookies, and jarred fudge sauce and still create something that feels special. The homemade part is not about churning your own ice cream or baking every component from scratch. It is about choosing flavors, building the layers, and making the dessert fit the occasion. A child might want cookies and cream with rainbow sprinkles. A coffee lover might prefer espresso ice cream with chocolate wafers. A summer dinner might call for strawberry and vanilla with fresh berries on the side.
Serving the cake is its own small event. When you bring it out, people tend to lean in. Ice cream cake has a way of making adults behave like excited children for a moment, and honestly, that is part of its charm. The clean slice, the frozen layers, the whipped topping, the colorful decorationsit all feels celebratory before anyone even takes a bite.
The most practical experience tip is to make the cake the day before you need it. Overnight freezing gives the layers time to settle and firm up. It also removes last-minute stress. On party day, all you need to do is decorate, slice, and accept compliments with the humble confidence of someone who knows the freezer did half the work.