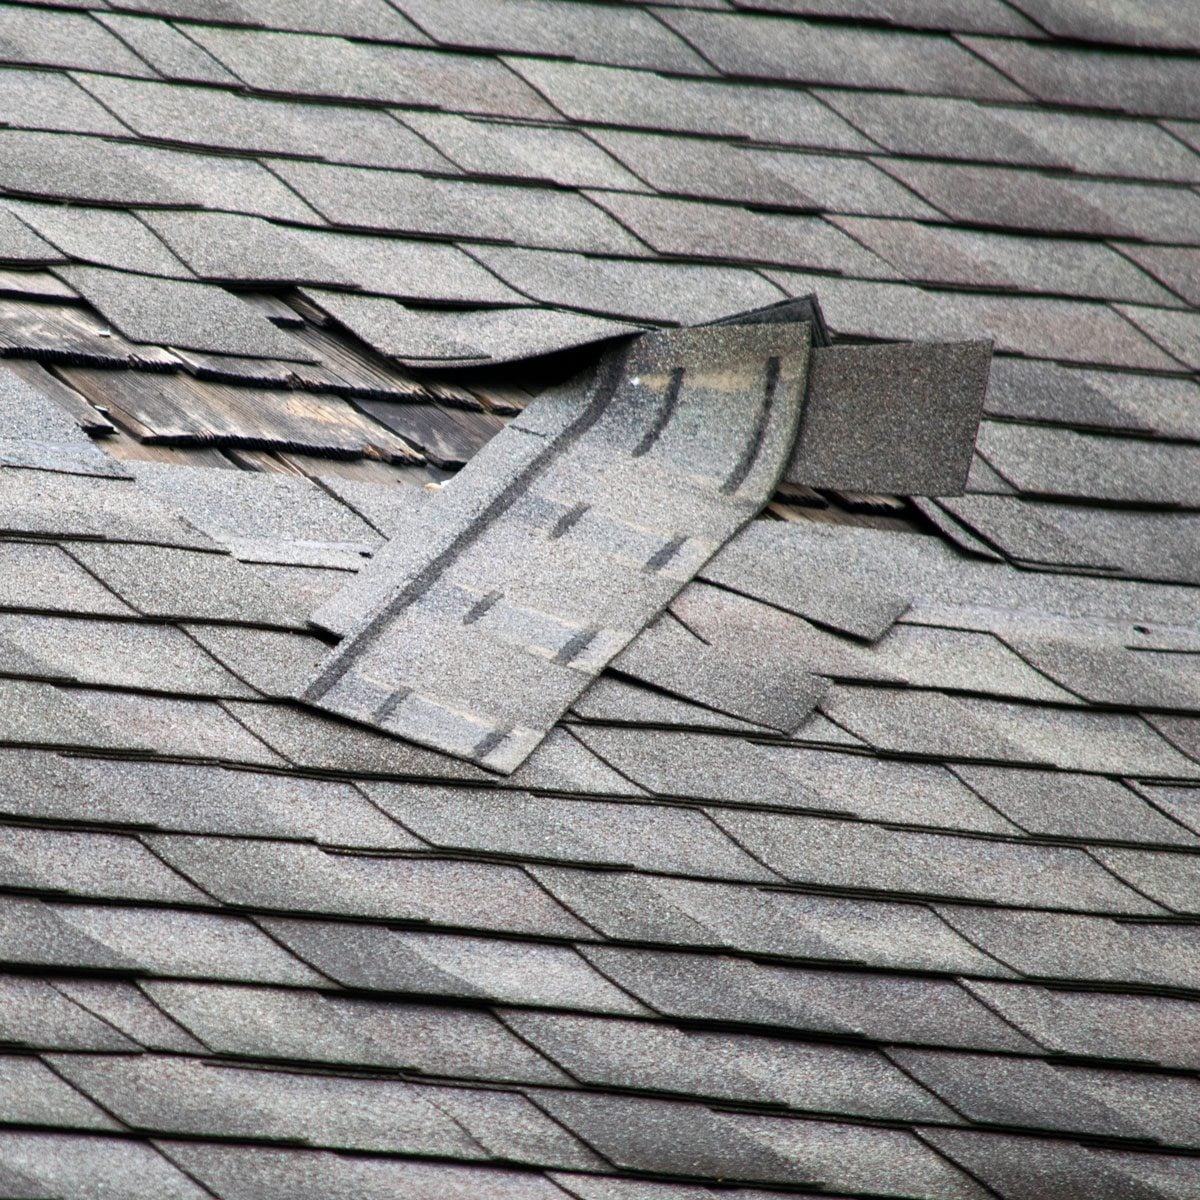
A damaged roof shingle can look wonderfully unimpressive. One cracked tab, one curled corner, or one bald-looking patch may seem like the roofing equivalent of a chipped fingernail. Unfortunately, water has a talent for turning small roofing problems into expensive indoor surprises.
Missing, cracked, lifted, and wind-damaged shingles can expose vulnerable areas of a roof system to moisture. Prompt repairs may help prevent further deterioration, while widespread damage, repeated shingle loss, structural problems, or ongoing leaks can indicate that a larger repair or roof replacement deserves professional evaluation.
Learning how to replace damaged shingles is useful for experienced DIY homeowners dealing with a small, accessible area of an asphalt-shingle roof. The basic process involves breaking the adhesive seals, carefully removing roofing nails, sliding out the damaged shingle, positioning a matching replacement, fastening it correctly, and resealing the surrounding shingles. Simple in theory. In practice, your roof gets the final vote.
This guide explains the process step by step, highlights common roof repair mistakes, and covers the situations in which putting down the pry bar and calling a roofing contractor is the smartest move.
First, Decide Whether a Shingle Repair Is Appropriate
Before gathering tools, inspect the problem from a safe location. A small number of damaged asphalt shingles may be repairable individually. Damage spread over a large section, extensive granule loss, buckling, a sagging roofline, recurring leaks, or shingles repeatedly blowing away may point to a broader roofing problem. Roofing manufacturers and home-improvement specialists generally recommend having substantial or aging-roof damage professionally assessed rather than endlessly patching symptoms.
Signs an individual shingle may need replacement
Common visible problems include a completely missing shingle, a shingle torn by wind, a deep crack through the asphalt material, broken tabs, severe curling, or impact damage concentrated in a small area. Lifted shingles may also indicate a failed seal or fastening problem.
Do not assume the shingle directly above a ceiling stain is automatically the culprit. Roof leaks can involve flashing, pipe boots, vents, chimneys, valleys, or other penetrations, and water may travel before becoming visible indoors.
When you should call a roofing professional
DIY shingle replacement is not appropriate for every house or every homeowner. Avoid climbing onto a steep, wet, icy, unstable, or storm-damaged roof. Roofing work presents serious fall hazards even for experienced workers because of loose material, sudden wind, uneven surfaces, and slippery conditions. OSHA specifically identifies roof repair and reroofing as work involving significant fall risk.
A professional inspection is also wise when you discover soft roof decking, widespread hail damage, multiple leaking areas, damaged flashing, a sagging roof, or a repair area near complicated roof transitions. Homeowners with steep or slippery roofs should assess visible damage from a safer position rather than walking directly onto the roof.
No roof patch is worth auditioning for an unscheduled gravity experiment.
Tools and Materials for Replacing Damaged Shingles
For a localized asphalt-shingle repair, you may need replacement shingles, a flat pry bar, a hammer, appropriate roofing nails, roof-compatible sealant or roofing cement, work gloves, eye protection, and proper fall-protection equipment. A caulking gun may be useful if your roofing sealant is sold in a cartridge.
Your replacement shingle should match the existing roof as closely as practical in type, size, profile, and color. Asphalt shingles are installed as part of an overlapping system, so using the correct shape and dimensions matters for more than curb appeal. Manufacturer-specific installation and fastening requirements should always take priority over a generic DIY rule.
Try to locate leftover shingles
Check the garage, attic, basement, or storage shed for shingles left from the original roofing project. An original shingle is often your best match. Even an identical new product may look slightly different because years of sunlight and weathering have changed the appearance of the existing roof.
If you do not have extras, take accurate product information or a safe sample to a roofing supplier. Do not casually rip off a healthy shingle for a shopping trip. Your roof does not appreciate being used as a paint swatch.
Choose the Right Weather for Roof Shingle Repair
Plan the repair for dry, calm weather. Asphalt shingles are generally easier to manipulate when they are pliable. This Old House recommends a warm, dry day for replacement work, while IKO cautions that shingles are stiffer in cool conditions and can be distorted or damaged when lifted excessively.
Do not perform the work during rain or strong wind. Wet roofing surfaces can become dangerously slick, and loose materials can shift unexpectedly. Home-improvement safety guidance also advises against roof tarping or similar work while a storm is actively producing rain or wind.
Extreme heat deserves respect as well. Hot shingles can become very soft, and rooftop temperatures can be punishing. Choose a comfortable part of the day and keep the work area organized.
How To Replace Damaged Shingles Step by Step
Step 1: Identify the exact damaged shingle
Inspect the affected area and mark the shingle that must be removed. Look at the courses immediately above it. Asphalt roof shingles overlap, which means the fasteners holding your damaged shingle are normally concealed beneath shingles in the next course.
Check surrounding tabs for cracks, torn edges, lifted corners, or exposed fasteners. If five shingles are damaged, replacing only the ugliest one is not efficiency. It is denial with a hammer.
Step 2: Carefully break the adhesive seal
Slide a flat pry bar beneath the lower edge of the shingle immediately above the damaged shingle. Work gently along the edge to separate the self-sealing bond without creasing or tearing the material.
You will also need to release the seal around the target shingle as necessary. Because successive courses are offset, accessing all fasteners may require loosening more than one overlying tab. IKO’s replacement guidance specifically describes breaking the target shingle’s seal and then releasing adjacent or overlying seals to expose the fastening area.
Patience matters here. Aggressively folding an older shingle upward can turn a one-shingle repair into a three-shingle repair faster than you can say, “Well, that’s new.”
Step 3: Lift the roofing nails
Once the overlying shingles are loosened, slide the pry bar toward each roofing nail securing the damaged shingle. Rather than attacking the nail head and scraping across the shingle surface, carefully lift the shingle and fastener from underneath. IKO notes that prying from below can help avoid unnecessary damage to the granular surface.
Raise the nail enough to access it, then remove it with the pry bar or hammer. Repeat the process for each fastener securing the target shingle.
Some nails from the next course may also pass through the upper portion of the damaged shingle because of the overlapping installation pattern. Those fasteners must be released before the old shingle can slide out cleanly. This overlapping-nail issue is a key part of the replacement process described by professional DIY guides.
Step 4: Remove the damaged shingle
After the fasteners are free, carefully slide the damaged shingle downward and out of its position. If it resists, stop and look for another nail or an area of adhesive that is still holding.
Do not yank it like you are starting a lawn mower. Force can tear neighboring shingles or disturb roofing components that were perfectly happy five minutes ago.
Clear loose debris from the repair location and check for protruding fasteners. A straightforward individual-shingle replacement typically involves lifting surrounding shingles, removing the nails, sliding out the damaged piece, and preparing the exposed area for the replacement.
Step 5: Inspect what is underneath
Take a moment to examine the exposed area. Look for obvious moisture damage, torn underlayment, deteriorated wood, unusual staining, or signs that the problem is larger than one broken shingle.
Underlayment and roof-deck protection are important parts of a roofing system because they help protect the deck from moisture infiltration. A replacement shingle can cover an area visually, but it cannot magically restore rotted decking or solve a major waterproofing failure underneath.
If the roof deck feels soft or appears badly deteriorated, stop the cosmetic repair and have the roof evaluated. The shingle may have been the messenger, not the problem.
Step 6: Slide the replacement shingle into position
Position the new shingle beneath the course above and slide it upward until it aligns with the neighboring shingles in the same course. Check both the horizontal exposure and the side alignment.
Lowe’s replacement guidance describes lifting the shingles above, sliding the upper part of the replacement underneath, and making sure the new shingle moves smoothly into an aligned position.
Do not nail anything until the replacement looks correct. Step back to a safe viewing position if possible and compare its edge with the surrounding course. A crooked shingle is much easier to adjust before it has developed a close personal relationship with four roofing nails.
Step 7: Fasten the new shingle correctly
Secure the replacement with roofing nails in the appropriate fastening zone for that specific shingle. Nail quantity and placement can vary by product, roof conditions, and manufacturer requirements, so follow the installation instructions for the shingle you are using.
Replacement guides commonly describe fastening the new shingle after it is correctly positioned. Lowe’s notes four to six nails in its general repair process, while detailed installation requirements should always be checked against the specific roofing product.
Drive nails straight and flush. A nail left sticking up can interfere with the overlying shingle. An aggressively overdriven fastener can damage the roofing material. This is roofing, not a carnival strength test.
Step 8: Refasten any lifted overlying shingles
If you removed or lifted fasteners from the course above to release the damaged shingle, properly refasten those shingles as required. Confirm that every disturbed shingle is lying flat and that no exposed nail heads have been accidentally left in vulnerable locations.
Keep your attention on the entire repair zone rather than celebrating the instant the replacement shingle is nailed down. Most DIY mistakes happen because the homeowner mentally finishes the project three steps before the roof does.
Step 9: Reseal the lifted shingles
Apply an appropriate roof-compatible sealant or roofing cement beneath tabs whose original adhesive seal was deliberately broken during removal. Press the shingles gently back into position.
Both IKO and This Old House include resealing as part of the replacement process, and GAF discusses hand-sealing unsealed shingles in the context of damaged or blown-off shingle remedies.
Use the sealant according to product and shingle-manufacturer instructions. More goo is not automatically more waterproof. A giant visible blob of roof cement may merely announce, from the street, that Saturday got complicated.
Step 10: Inspect the completed repair
Before leaving the work area, check that the new shingle sits flat, aligns with neighboring shingles, and is securely fastened. Confirm that lifted tabs have been returned to position and that tools, nails, and debris are removed from the roof.
After future rainfall, monitor the attic and nearby ceilings for moisture or staining. If a leak continues, the original diagnosis may have been incomplete. Flashing, roof vents, pipe boots, and other details are common areas that deserve inspection when water intrusion persists.
Common Mistakes When Replacing Roof Shingles
Damaging healthy shingles while lifting them
Older asphalt shingles can be brittle. Lift them only as much as necessary to reach the fasteners. DIY repair instructions consistently emphasize careful handling of surrounding shingles because damaging adjacent material expands the repair.
Replacing a shingle without investigating a leak
A cracked shingle is visible. A failed pipe boot or damaged flashing may be less obvious. If the repair began because of an indoor water stain, investigate the actual moisture path instead of assuming the nearest ugly shingle committed the crime.
Using the wrong replacement shingle
Shingles differ in dimensions, design, performance features, and installation instructions. A visually similar shingle is not automatically a perfect substitute. Match the roofing product closely and verify its fastening requirements.
Ignoring widespread damage
A few slipped, torn, or missing shingles may justify a localized repair. Widespread deterioration, repeated blow-offs, large damaged areas, or an aging roof with multiple warning signs can shift the decision toward broader repair or replacement.
Working in unsafe conditions
This is the mistake with the highest stakes. Wind, rain, slippery roofing, difficult roof pitches, unstable decking, and inadequate fall protection create genuine hazards. When safe access is questionable, hire a qualified roofer.
How To Help Prevent Future Shingle Damage
Roof maintenance is significantly less exciting than emergency leak repair, which is exactly why it is preferable.
Inspect the roof from a safe location after major storms and watch for missing, loose, cracked, or lifted shingles. CertainTeed recommends regular professional roof inspections, noting that annual inspectionsand ideally twice-yearly inspectionscan help identify issues such as loose shingles or failing flashing before they become larger problems.
Pay attention to changes inside the house as well. Water stains, peeling paint, unexplained moisture, and visible attic leaks deserve investigation. Also monitor flashing and penetrations, because asphalt-roof maintenance problems frequently develop around areas where vents, pipes, metal flashing, and sealants interact.
After severe weather, document visible damage before temporary repairs when it is safe to do so. Photos can be useful when discussing damage with a roofing contractor or insurance professional. Lowe’s specifically recommends photographing storm-damaged areas before tarping.
Field Experience: Lessons Learned From Real-World Shingle Repairs
The “one damaged shingle” is sometimes not alone
One of the most common practical lessons from localized roof repair is that the obvious damage attracts all the attention. A homeowner spots one missing tab from the driveway, climbs up expecting a five-minute project, and then discovers two adjacent shingles have cracked seals and another has a torn edge.
The useful habit is to inspect the surrounding courses before removing anything. Look uphill, downhill, and sideways from the original damage. Wind does not always select one shingle with the precision of a restaurant reservation. Nearby shingles may have been lifted without completely blowing away.
Planning for a slightly larger repair area also prevents the frustrating trip back to the store while a section of roofing is partially disturbed.
Old shingles and cold mornings demand patience
Another recurring repair experience involves shingles that look flexible from the ground but behave like crackers once a pry bar arrives. Age and cool temperatures can make asphalt shingles less cooperative. This is why careful seal separation matters.
A rushed DIYer may lift an overlying shingle too sharply, hear a faint crack, and immediately gain a second repair project. The better approach is slow pressure across the sealed edge rather than bending one corner aggressively.
When the material feels unusually stiff, reconsider the timing of the job. Waiting for more suitable dry conditions may be inconvenient, but replacing shingles that you broke while replacing another shingle is an impressive way to achieve negative productivity.
Nail removal is often the fussiest part
People frequently imagine that sliding the new shingle into position will be the difficult step. In many small repairs, accessing and removing concealed fasteners requires more patience.
The overlapping roof courses do their waterproofing job by hiding vulnerable areas, including the fasteners. That means the repairer must gently release the shingles above the target. A stubborn nail may lift partway, sit crooked, or refuse to leave the deck cleanly.
Trying to solve every nail problem with a harder hammer swing usually makes matters worse. A thin flat bar, careful leverage, and a clear understanding of how the overlapping courses are fastened are far more valuable than enthusiasm.
A color mismatch can make a correct repair look wrong
New replacement shingles often appear darker, cleaner, or more strongly colored than the surrounding roof. Homeowners sometimes look at a technically sound repair and assume something has gone terribly wrong because the new shingle can be spotted from the driveway.
Weathering changes roofing appearance. Even a close product match may not blend perfectly with shingles that have spent years under ultraviolet light, rain, airborne dirt, and seasonal weather.
Using leftover original shingles can help. When those are unavailable, matching the manufacturer, product line, dimensions, and color as closely as possible generally produces a better result than buying whatever brown bundle happens to be closest to the hardware-store register.
The repair should solve a cause, not just improve the picture
Perhaps the most important roof-repair lesson is that replacing a damaged shingle is successful only when the shingle was actually the relevant problem.
Imagine a homeowner notices a ceiling stain and finds one cracked shingle nearby. The shingle is replaced beautifully. The next storm arrives, and the ceiling stain grows. Further inspection reveals deteriorated flashing around a vent several feet uphill.
The original repair was not necessarily performed badly. The diagnosis was incomplete.
That experience is why persistent leaks deserve broader investigation. Water can enter through flashing, penetrations, damaged seals, or roofing components beyond the most obvious shingle. When a repair does not stop moisture intrusion, resist the temptation to add random tubes of roofing cement until the house resembles a frosted cake. Find the source or hire a professional who can.
Conclusion: Replace Damaged Shingles Carefully and Promptly
Knowing how to replace damaged shingles can help an experienced DIY homeowner handle a small, accessible asphalt-roof repair before localized damage grows into a more serious concern. The basic sequence is straightforward: inspect the roof, break the necessary shingle seals, expose and remove the fasteners, slide out the damaged shingle, check the underlying area, align and nail the replacement, and reseal the disturbed tabs.
The details, however, matter. Careless prying can crack nearby shingles. Incorrect fastener placement can compromise the repair. A replacement shingle cannot fix rotten decking, failed flashing, or widespread roof deterioration. And no DIY savings justify working on a roof when access or weather conditions are unsafe.
Repair small problems promptly, inspect more than the single obvious shingle, follow the roofing manufacturer’s instructions, and recognize when the roof is asking for professional help rather than another weekend experiment.
Note: This guide focuses primarily on localized repairs to asphalt roofing shingles. Tile, slate, wood shake, metal, and specialty roofing systems can require different tools, attachment methods, repair techniques, and professional expertise.