Installing a 3 piece shower enclosure is one of those home improvement projects that looks simple in the box and suddenly feels like a geometry exam once the walls are open. The good news? A prefabricated shower surround is designed to make bathroom remodeling faster, cleaner, and less grout-filled than building a fully tiled shower from scratch. The not-so-good news? The enclosure will only behave if your walls are plumb, your shower base is level, your measurements are accurate, and your caulk bead does not look like it was applied during a small earthquake.
This guide walks you through how to put a 3 piece shower enclosure in, including preparation, tools, dry-fitting, cutting holes for plumbing, fastening panels, sealing seams, and checking for leaks. The steps below are based on common U.S. installation practices for direct-to-stud and glue-up shower wall kits, but your specific kit’s manual is still the boss. Think of this article as the friendly neighbor who explains the process; the manufacturer’s instructions are the building inspector with a clipboard.
What Is a 3 Piece Shower Enclosure?
A 3 piece shower enclosure usually includes one back wall panel and two side wall panels. Some kits are made for alcove showers, while others are designed for corner shower bases. Many are acrylic, fiberglass, composite, or high-gloss plastic materials that are lighter than tile and easier to clean because there are fewer grout lines collecting soap scum like tiny museum exhibits.
There are two common installation styles:
Direct-to-Stud Shower Enclosures
A direct-to-stud shower surround fastens directly to exposed wall studs using flanges along the edges of the panels. These kits are common in full remodels or new construction because you remove drywall or old wall material first, then attach the enclosure to the framing.
Glue-Up Shower Enclosures
A glue-up shower surround attaches to a flat, approved wall surface using construction adhesive designed for wet locations. Some glue-up systems can go over water-resistant wallboard or existing tile if the surface is sound, clean, flat, and compatible with the adhesive. Never assume regular drywall is acceptable inside a wet shower zone unless your product instructions specifically allow it.
Before You Start: Measure Like Your Shower Depends on It
Before buying or installing a 3 piece shower enclosure, measure the width, depth, height, drain location, and plumbing wall location. Check whether your shower base has a left, right, or center drain. A beautiful new wall kit will not save the day if the drain is three inches off and your shower valve lands behind a built-in shelf. That is not “custom.” That is a weekend emergency.
Measure the opening at the top, middle, and bottom because bathroom walls are often not perfectly square. If the measurements vary, you may need to shim studs, adjust framing, or choose a kit that allows trimming. Also confirm ceiling height, door clearance, and whether the enclosure is compatible with your shower base. Some wall sets are designed to pair with a specific base, and mixing brands can create gaps, misalignment, or sealing problems.
Tools and Materials You May Need
The exact tools depend on your shower enclosure model, but most installations require a similar setup. Gather everything before you begin so you do not have to wander through the house holding a half-installed side panel and questioning your life choices.
- Tape measure
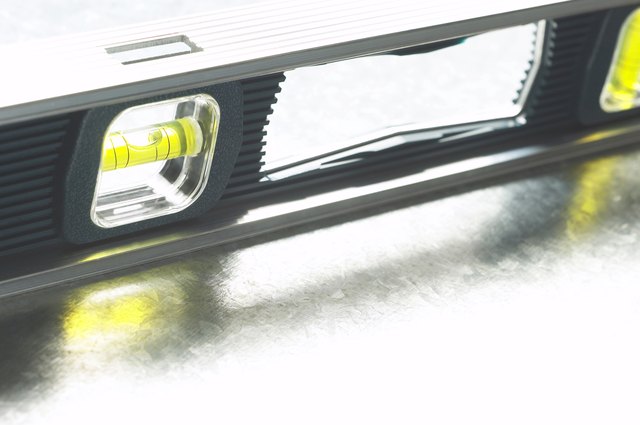
- Level, preferably 4-foot
- Stud finder
- Pencil or marker
- Drill and driver bits
- Hole saw for valve and shower arm openings
- Utility knife
- Caulk gun
- 100% silicone sealant or manufacturer-approved sealant
- Construction adhesive for wet areas, if required
- Shims
- Screws recommended by the manufacturer
- Masking tape
- Safety glasses and work gloves
- Clean rags and denatured alcohol or approved cleaner
Step 1: Remove the Old Shower or Wall Material
Shut off the water before removing plumbing trim. Take off the showerhead, escutcheon plate, valve handle, and any old doors or tracks. If you are replacing an old surround, cut away caulk lines carefully and remove panels without damaging the studs or plumbing.
For a direct-to-stud shower enclosure, remove wallboard down to the studs in the installation area. Cut cleanly above the future top flange so new drywall can later overlap or meet the enclosure neatly. Inspect everything behind the wall. If you find mold, rot, soft subfloor, damaged studs, or questionable plumbing, stop and fix it before installing the new enclosure. Covering damage with shiny acrylic is like wearing a tuxedo over muddy boots. It may look fine for a minute, but the problem is still there.
Step 2: Check the Studs, Corners, and Subfloor
The secret to a good shower enclosure installation is not the caulk. It is the framing. Use a level to check whether studs are plumb and whether the back wall and side walls are square. If the studs bow, twist, or lean, the panels may not lock together properly. Direct-to-stud shower kits need solid backing along the flanges, and some also require extra blocking for shelves, door jambs, or future grab bars.
If you plan to install a shower door now or later, add wood blocking where the door frame will attach. Many homeowners skip this step because the door is “future me’s problem.” Future you will not appreciate it. A door mounted into weak material can loosen, leak, or shift out of alignment.
Step 3: Install or Verify the Shower Base
If your 3 piece shower enclosure sits on a shower pan or base, the base must be installed first. Dry-fit the base in the opening, confirm the drain lines up, and check it front-to-back and side-to-side with a level. Some shower bases require a mortar bed underneath for support; others rely on built-in support ribs and may only need shims or fasteners. Follow the base instructions exactly.
A level base matters because water needs to flow toward the drain, not toward the bathroom floor. If the base rocks, flexes, or sits out of level, the walls may crack, seams may open, and the finished shower may squeak like an old porch. Secure the drain assembly according to the drain manufacturer’s instructions, using the correct gasket, putty, or silicone method for your materials.
Step 4: Dry-Fit the Three Wall Panels
Dry-fitting means assembling the shower enclosure without adhesive or final fasteners. This is the rehearsal before opening night. Set the back wall in place first, then position the side panels. Some systems use interlocking tabs, channels, tongue-and-groove joints, or overlapping seams. Make sure the pieces seat fully and sit flat against the studs or wall surface.
During the dry-fit, check these details:
- The panels sit level and plumb.
- The bottom edges rest correctly on the shower base.
- The seams lock or overlap as designed.
- The flanges land on studs or solid backing.
- The plumbing wall panel lines up with the valve and shower arm.
- There are no large gaps at corners or along the base.
If something does not fit, do not force it. Shower wall panels are not stubborn dogs; pushing harder usually makes things worse. Adjust framing, trim only where allowed, or correct the base before proceeding.
Step 5: Mark Plumbing Openings Carefully
The plumbing wall panel usually needs openings for the shower valve, shower arm, and possibly a tub spout if you are installing a tub-shower surround. Measure from fixed reference points, such as the back wall, base, or panel edge. Transfer those measurements to the finished side of the panel, then double-check them. Better yet, triple-check them. A hole saw is confident, permanent, and not known for forgiveness.
Use a hole saw sized according to the valve trim instructions. The hole must be large enough for service access and trim installation but not so large that the escutcheon plate fails to cover it. Drill from the finished side if your manufacturer recommends it, using steady pressure and backing support if needed to reduce chipping.
Step 6: Attach the Back Wall Panel
For many 3 piece shower enclosure kits, the back wall goes in first. On a direct-to-stud model, position the panel on the base and fasten through the flange into the studs using the recommended screws. Do not overdrive fasteners; the flange should be held securely without cracking or distorting the panel. Fasten only where the manual says to fasten.
For a glue-up kit, apply adhesive in the pattern required by the manufacturer. Some call for vertical beads, others for dots, serpentine lines, or specific spacing. Press the back panel firmly into position, then pull it away briefly if the adhesive instructions require “venting” before final placement. Use a level and tape to keep the panel aligned while the adhesive begins to set.
Step 7: Install the Side Panels
After the back wall is secure, install the plumbing-side panel and the opposite side panel. If the system has interlocking edges, make sure they engage fully. For direct-to-stud panels, fasten the flanges to the studs in the specified sequence. For glue-up systems, apply adhesive to the wall or panel as directed, then press the panel into place evenly.
Pay close attention where the side panels meet the base. Some shower enclosure designs are caulkless at certain internal seams, while others require sealant in very specific areas. More caulk is not always better. Applying sealant in the wrong channel can trap water instead of directing it back into the shower. When in doubt, read the diagram, not your instincts. Your instincts may be brave, but the diagram knows where the water goes.
Step 8: Seal the Right Seams
Once the panels are installed, clean all surfaces that will receive silicone. Dust, plastic shavings, adhesive residue, and moisture can prevent a good bond. Use 100% silicone sealant or the product recommended by your shower kit. Apply a smooth bead along required seams, usually where the wall panels meet the shower base, at vertical joints if specified, and around plumbing trim.
Use masking tape on both sides of the seam if you want a crisp caulk line. Tool the bead with a caulk tool or a gloved finger, then remove the tape before the silicone skins over. A neat silicone bead is not just about looks; it helps prevent water from sneaking into the wall cavity.
Step 9: Reinstall Plumbing Trim
Install the shower valve trim, handle, shower arm, showerhead, and escutcheon plates according to the faucet manufacturer’s instructions. Use plumber’s tape only where it is recommended, usually on threaded shower arm connections. Do not bury the valve too deep behind the wall panel; trim kits are designed for specific rough-in depths.
Before closing up surrounding drywall, turn the water back on and test the valve. Check behind the access wall if you have one. Look for drips around supply connections, the shower arm, valve body, and drain. A leak found now is a repair. A leak found three months later is a small indoor weather system.
Step 10: Finish the Walls Around the Enclosure
After the enclosure is secure and sealed, install moisture-resistant wallboard or other approved material around the outside edges. The finished wall should cover or neatly meet the enclosure flange according to the kit design. Use trim pieces if supplied. Avoid leaving exposed flanges or gaps that can catch water.
If you are painting nearby walls, choose bathroom-rated paint with good moisture resistance. If installing a shower door, follow the door manufacturer’s instructions and avoid drilling into the shower curb or base unless the product specifically allows it. Many leaks begin when someone drills a “tiny harmless hole” in exactly the wrong place.
Common Mistakes to Avoid
Skipping the Dry-Fit
Dry-fitting catches problems before adhesive, screws, and panic enter the room. Never skip it.
Installing Over Damaged Framing
Rotten studs, moldy wallboard, and soft subfloors must be repaired before the enclosure goes in. A shower is only as good as what supports it.
Using the Wrong Adhesive
Some adhesives can damage acrylic or fiberglass. Use only adhesives approved for shower surrounds and compatible with your wall surface.
Overtightening Screws
Fasteners should hold the flange, not crush it. Overtightening can crack the panel or create waves in the wall.
Caulking the Wrong Places
Follow the manufacturer’s sealant map. Certain channels are designed to drain. Blocking them with silicone can cause hidden water problems.
How Long Does It Take to Install a 3 Piece Shower Enclosure?
For an experienced DIYer, installing a 3 piece shower enclosure may take a full day after demolition and plumbing prep are complete. For a first-time homeowner, plan for a weekend. Adhesive and silicone often need 24 hours to cure before the shower can be used, so do not schedule the first test shower five minutes after caulking unless you enjoy suspense and regret.
The total timeline depends on whether you need to move plumbing, repair framing, replace the shower base, install a door, or finish drywall around the enclosure. The fastest installations happen when the base is level, the studs are straight, the plumbing is correctly placed, and all parts are present before the box is cut open.
When to Call a Professional
Installing a shower enclosure is a reasonable DIY project for someone comfortable with measuring, drilling, cutting, basic plumbing trim, and light framing. However, call a licensed professional if you need to move supply lines, reroute a drain, repair structural damage, deal with electrical wiring near the shower, or meet strict local permit requirements.
You should also call for help if the shower base will not sit level, the drain connection is inaccessible, or the wall panels do not fit after reasonable adjustments. There is no shame in calling a pro. There is only shame in pretending a half-inch gap is “probably fine” while holding a tube of silicone like a magic wand.
Extra Experience: Practical Lessons From Installing a 3 Piece Shower Enclosure
One of the biggest lessons from installing a 3 piece shower enclosure is that the project is less about strength and more about patience. The panels are usually lightweight, but they are awkward. They catch on studs, bump into doorways, and somehow become twice as large when you are standing in a small bathroom. Having a second person nearby makes the job easier, especially when dry-fitting the side panels or lowering a back wall panel into a narrow alcove.
Another real-world tip is to treat the floor like a workbench. Lay down cardboard, a moving blanket, or clean foam before setting panels down. Acrylic and fiberglass can scratch, and the finished surface should never be dragged across screws, tile chips, or the mysterious bathroom grit that appears during demolition. Keep all hardware in labeled cups or bags. The screw you lose will, naturally, be the one the instructions describe as “critical.”
Dry-fitting deserves more time than most people give it. During one typical installation, the back wall may seem perfect until the side panel reveals that one stud is proud by a quarter inch. That small bump can stop the corner seam from closing. Fixing it before adhesive goes on may take ten minutes with a planer, shim, or framing adjustment. Finding it after adhesive is on the wall feels like wrestling an octopus in a phone booth.
Cutting plumbing holes is another moment where calm wins. Make a cardboard template if you are nervous. Measure from the same reference points twice, transfer marks carefully, and hold the trim plate over the mark before drilling. The escutcheon can hide a normal opening, but it cannot hide a hole that wandered off like it had vacation plans. Drill slowly, support the panel, and avoid splintering or chipping the finished surface.
Caulking is where many otherwise solid installations start to look messy. The trick is preparation. Clean the surface, keep the bead small and steady, and use painter’s tape if your hand is not naturally gifted with silicone poetry. Tool the bead once, not seven times. Overworking caulk usually makes it uglier. Also, respect cure time. Silicone may look dry on the outside long before it is ready for water. Waiting a full day can prevent leaks, smears, and the sad discovery that your beautiful bead has turned into a sticky river.
Finally, do not rush the leak test. Run the shower, aim water at seams, check the valve trim, and inspect the drain area. Use a flashlight. Look from below if there is access. A shower enclosure should be boring after installation. Boring means dry walls, steady panels, clean seams, and water going exactly where water is supposed to go: down the drain, not into the framing. In home improvement, boring is beautiful.
Conclusion
Learning how to put a 3 piece shower enclosure in can save time, reduce tile maintenance, and give your bathroom a clean, modern upgrade. The key is not rushing the fundamentals: measure accurately, repair the framing, level the shower base, dry-fit every panel, cut plumbing holes carefully, fasten or glue according to the manufacturer’s instructions, and seal only the seams that require sealant. A shower enclosure is a system, not just three panels and a dream.
If your walls are square, your base is solid, and your caulk is neat, the finished shower can look professional without turning your bathroom into a month-long construction zone. Respect the instructions, use the right materials, and remember: water is patient. Your installation should be even more patient.
Note: Always follow the installation manual for your specific shower enclosure and check local building and plumbing codes before starting. Hire a licensed professional for structural repairs, drain relocation, supply-line changes, or any issue that could affect safety or waterproofing.