A tired end table is one of the friendliest DIY projects around: small enough to move, forgiving enough to practice on, and much less scary than painting kitchen cabinets. With sound prep, thin coats, and a little patience, a scratched or dated table can look intentionally stylish instead of mysteriously inherited from a rental hallway.
This guide shows how to paint an end table for a durable, polished finish. You will learn how to identify the surface, choose paint and sheen, prepare it correctly, avoid brush marks, and protect the tabletop from cups, keys, and overly ambitious houseplants. The real secret is not a magic brush. It is the unglamorous prep that makes the color stay beautiful.
Why Give an End Table a Painted Facelift?
Painting an end table is an affordable way to refresh a room without buying a new furniture set. A soft neutral can quiet a busy space; a bold blue, green, or black can work like a pocket-size accent wall. It also gives beginners useful practice with flat tops, narrow legs, drawers, and hardware.
Paint will not repair a wobbly table or turn particleboard into walnut. It can, however, make a sturdy piece feel newly at home. It is a smart fix for dark wood beside a light sofa, an outdated orange stain, or a laminate table that still carries faint dorm-room energy.
Before You Paint: Identify the Surface
Check the underside, drawer interiors, and edges. Solid wood is easiest to repair and paint. Veneer is a thin wood layer over another material, so sand it gently; heavy sanding can cut through it. Laminate is slick and needs cleaning, light scuffing, and a bonding primer. MDF often has smooth faces but thirsty, fuzzy edges that need filler or sealer.
Inspect the existing finish too. Flaking paint, waxy polish, grease, and loose varnish must be addressed before painting. If an older painted table could contain lead-based paint, do not dry-sand it casually. Test it or seek qualified advice first. A weekend makeover should not become an unwanted science project.
Supplies for a DIY End Table Makeover
Have your materials ready before you start. Searching for a tack cloth with wet paint on your hands is a very particular form of character building.
- Drop cloth or cardboard, screwdriver, and containers for hardware
- Mild cleaner or degreaser, clean rags, vacuum, and tack cloth
- Wood filler and a putty knife for chips, dents, or rough MDF edges
- Sandpaper or sanding sponges in medium and fine grits
- Appropriate primer: bonding, stain-blocking, or multipurpose
- Furniture paint, cabinet-and-trim enamel, acrylic paint, or chalk-style paint
- Angled brush, small foam or microfiber roller, tray, and optional clear topcoat
- Painter’s tape, gloves, eye protection, dust mask, and good ventilation
Choose the Right Paint and Sheen
For a table used every day, choose a durable furniture paint or cabinet-and-trim enamel. Water-based acrylic or acrylic-alkyd products are popular because they clean up easily and often level well. Satin is the practical middle ground: softly reflective, reasonably durable, and more forgiving than semi-gloss. Semi-gloss is tough and washable but highlights every dent, drip, and impatient sanding decision.
Chalk-style paint delivers a velvety, vintage look and works well on detailed pieces, but tabletops usually benefit from a compatible protective finish. Spray paint can look very smooth on a simple table, but it requires ventilation, masking, and several light passes. For most first projects, a quality brush plus mini roller is easier to control.
How to Paint an End Table: 10 Steps
1. Remove Hardware and Prepare the Area
Remove knobs, pulls, drawers, and removable shelves. Label anything that could cause confusion later. Cover the floor and work in a clean, ventilated place away from hard sun, wind, and pet hair. Paint attracts fuzz with the dedication of a tiny magnet.
2. Clean Thoroughly
Wash the whole table, including the underside of the top and drawer fronts. Use a mild cleaner or degreaser as directed, then let the piece dry completely. Furniture polish, oils, and residue can prevent primer from bonding even when the surface looks clean.
3. Repair Damage and Loose Joints
Tighten screws and glue loose joints before painting. Fill chips, dents, nail holes, and rough MDF edges. Let filler dry, then sand it flush. Paint is fashionable, not structural; it cannot hide a crater.
4. Scuff Sand for Adhesion
On sound painted or varnished wood, lightly sand with roughly 120- to 180-grit abrasive until the shine disappears. Do not strip to bare wood unless the finish is failing or badly damaged. Sand with the grain where possible. For veneer and laminate, use a light hand: the goal is to dull the slick surface, not dig through it.
Vacuum the dust, then wipe with a tack cloth or barely damp microfiber cloth. Dust left behind becomes tiny pebbles under the paint, a texture nobody puts on a mood board.
5. Prime the Surface
Apply a thin coat of the primer suited to the table. Use bonding primer for laminate or glossy finishes. Use stain-blocking primer when knots, dark stain, or tannins could bleed through pale paint. Brush grooves and corners, then roll flat areas. When dry, lightly sand any roughness with a fine sanding sponge and remove dust.
6. Apply the First Thin Paint Coat
Stir the paint thoroughly. Brush edges and details, then roll flat panels with a mini foam or microfiber roller. Paint in the wood-grain direction when applicable, working from top to bottom. Keep coats thin and do not repeatedly brush an area once it starts to set; overworking paint creates drag marks and orange-peel texture.
7. Let It Dry, Then Sand Lightly
Follow the can’s recoat instructions. Once dry enough, gently sand with a fine sponge to remove dust nibs and brush ridges. You are not undoing the coat; you are giving the next one a smoother runway. Wipe away all residue.
8. Apply the Second Coat
Add a second thin, even coat. Bold colors, light paint over dark finishes, and highly used tabletops may need a third. Check the table in strong light from several angles for thin spots, missed edges, or drips below the top. The piece will not become less honest after it moves beside the sofa.
9. Protect the Tabletop When Needed
Some furniture paints are designed to stand alone, while chalk-style or ultra-matte finishes often need a compatible clear topcoat. Use a topcoat recommended for your paint system, apply it thinly, and follow its directions exactly. Do not mix products casually just because their labels look friendly together.
10. Allow Full Cure Time
Dry paint is not always cured paint. Give the finish the full recommended cure period before returning heavy lamps, trays, and drink glasses to the top. Handle the table gently while it hardens, then use coasters. This is the moment your end table learns boundaries, and you do too.
How to Get a Smooth Painted Finish
Good results come from small habits: quality tools, clean surfaces, thin coats, and a gentle sand between coats. Maintain a wet edge rather than painting a few strokes, taking a long break, and returning to half-dry paint. Follow the label’s temperature and humidity limits as well; extreme heat, cold, or moisture can make paint level poorly.
If you use a sprayer, test on cardboard first, keep it moving, and overlap passes lightly. A sprayed finish can be lovely, but cleaning a sprayer is a commitment, not a personality trait.
Common Problems and Simple Fixes
Peeling usually means poor cleaning, insufficient sanding, or the wrong primer. Remove failed paint, clean and scuff the surface, then prime correctly before repainting. Brown or yellow marks that appear through fresh paint are often stain bleed-through; let the area dry, use a suitable stain-blocking primer, and repaint.
Avoid thick coats, rushing recoat times, and reassembling too early. Also do not paint hinges, screw threads, drawer runners, or surfaces that rub together unless you enjoy creating a very colorful mechanical problem.
Easy End Table Makeover Ideas
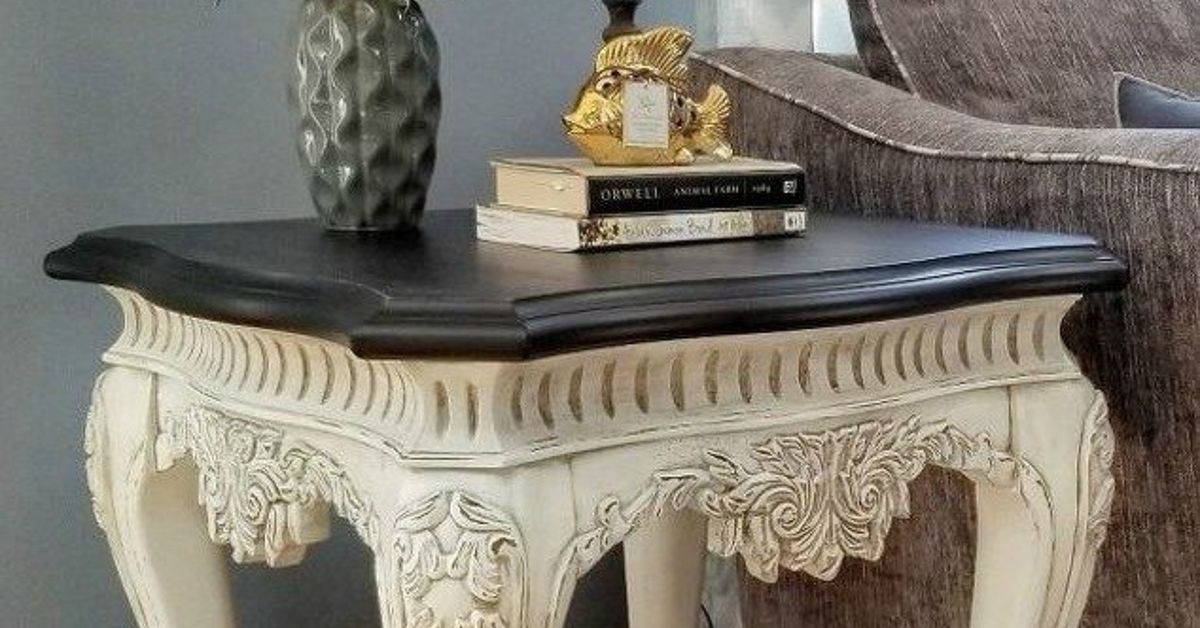
For a classic finish, paint the whole piece warm white, charcoal, navy, or soft black and update the hardware. For a modern contrast, keep the top natural or stain it dark while painting the base a color. A bright drawer interior or patterned drawer liner adds personality without turning the room into a crayon box.
Real-World Experience: What a DIY End Table Facelift Teaches You
The first end table I painted taught me that a project can be small and still contain an entire emotional arc. At first, the piece seemed like an easy win: one square top, four straight legs, one little drawer. By lunchtime, I had discovered a ring of furniture polish around the top, a shiny finish that laughed at my first paint coat, and one drawer pull that had apparently been installed by a very determined blacksmith. It was humbling. It was also exactly why end tables are such good practice pieces.
The turning point came when I stopped treating preparation as a delay. Cleaning, scuff sanding, vacuuming, priming, and waiting are not the boring prologue to furniture painting. They are the project. Once the surface was clean and dull, the primer looked even. Once the primer was lightly sanded, the paint stopped catching on tiny rough spots. The second paint coat went on with far less drama, and suddenly the table looked like it belonged in the room rather than in a before photo.
Another lesson is that color behaves differently on furniture than it does on a tiny paper chip. A soft gray that seemed calm in the store looked faintly lavender near a warm lamp. A dark green looked elegant in daylight and nearly black after sunset. Testing a sample on the underside of the tabletop or a hidden back edge saved me from a full-table identity crisis. It also helped me decide on sheen. Satin gave the table enough wipeability for daily use without turning every imperfection into a spotlight.
I have also learned not to judge paint too early. The first coat is frequently streaky, thin, and deeply unphotogenic. It is the awkward middle-school picture day of a furniture makeover. A second thin coat, followed by a gentle sanding and a little cure time, can change everything. Conversely, a thick first coat rarely becomes better through optimism. It usually becomes a drip with a long-term lease.
The most useful habit is keeping a small labeled jar of leftover paint. Weeks later, when a lamp base scrapes an edge or a vacuum gets a little ambitious, a tiny touch-up is much easier than trying to match the color again. I also keep felt pads under lamps, trays, and anything that will sit on the new surface permanently. Protecting a painted table is not precious; it is practical.
Finally, the best end table facelifts are not necessarily the most elaborate. Some of the most successful projects involve one timeless color, fresh hardware, a smooth finish, and enough patience to let the paint cure. The goal is a table that works harder for the room, not a table that begs every guest to ask what happened to it. When it looks polished, useful, and completely at home beside the sofa, that is the real DIY victory. Add patience, good light, and a clean brush, and even a modest thrifted table can become a confident little showpiece.
Note: Test your cleaner, primer, paint, and topcoat on a hidden area. Follow each product label for ventilation, recoat, and cure instructions, and treat suspected lead-based coatings as a safety issue before sanding.