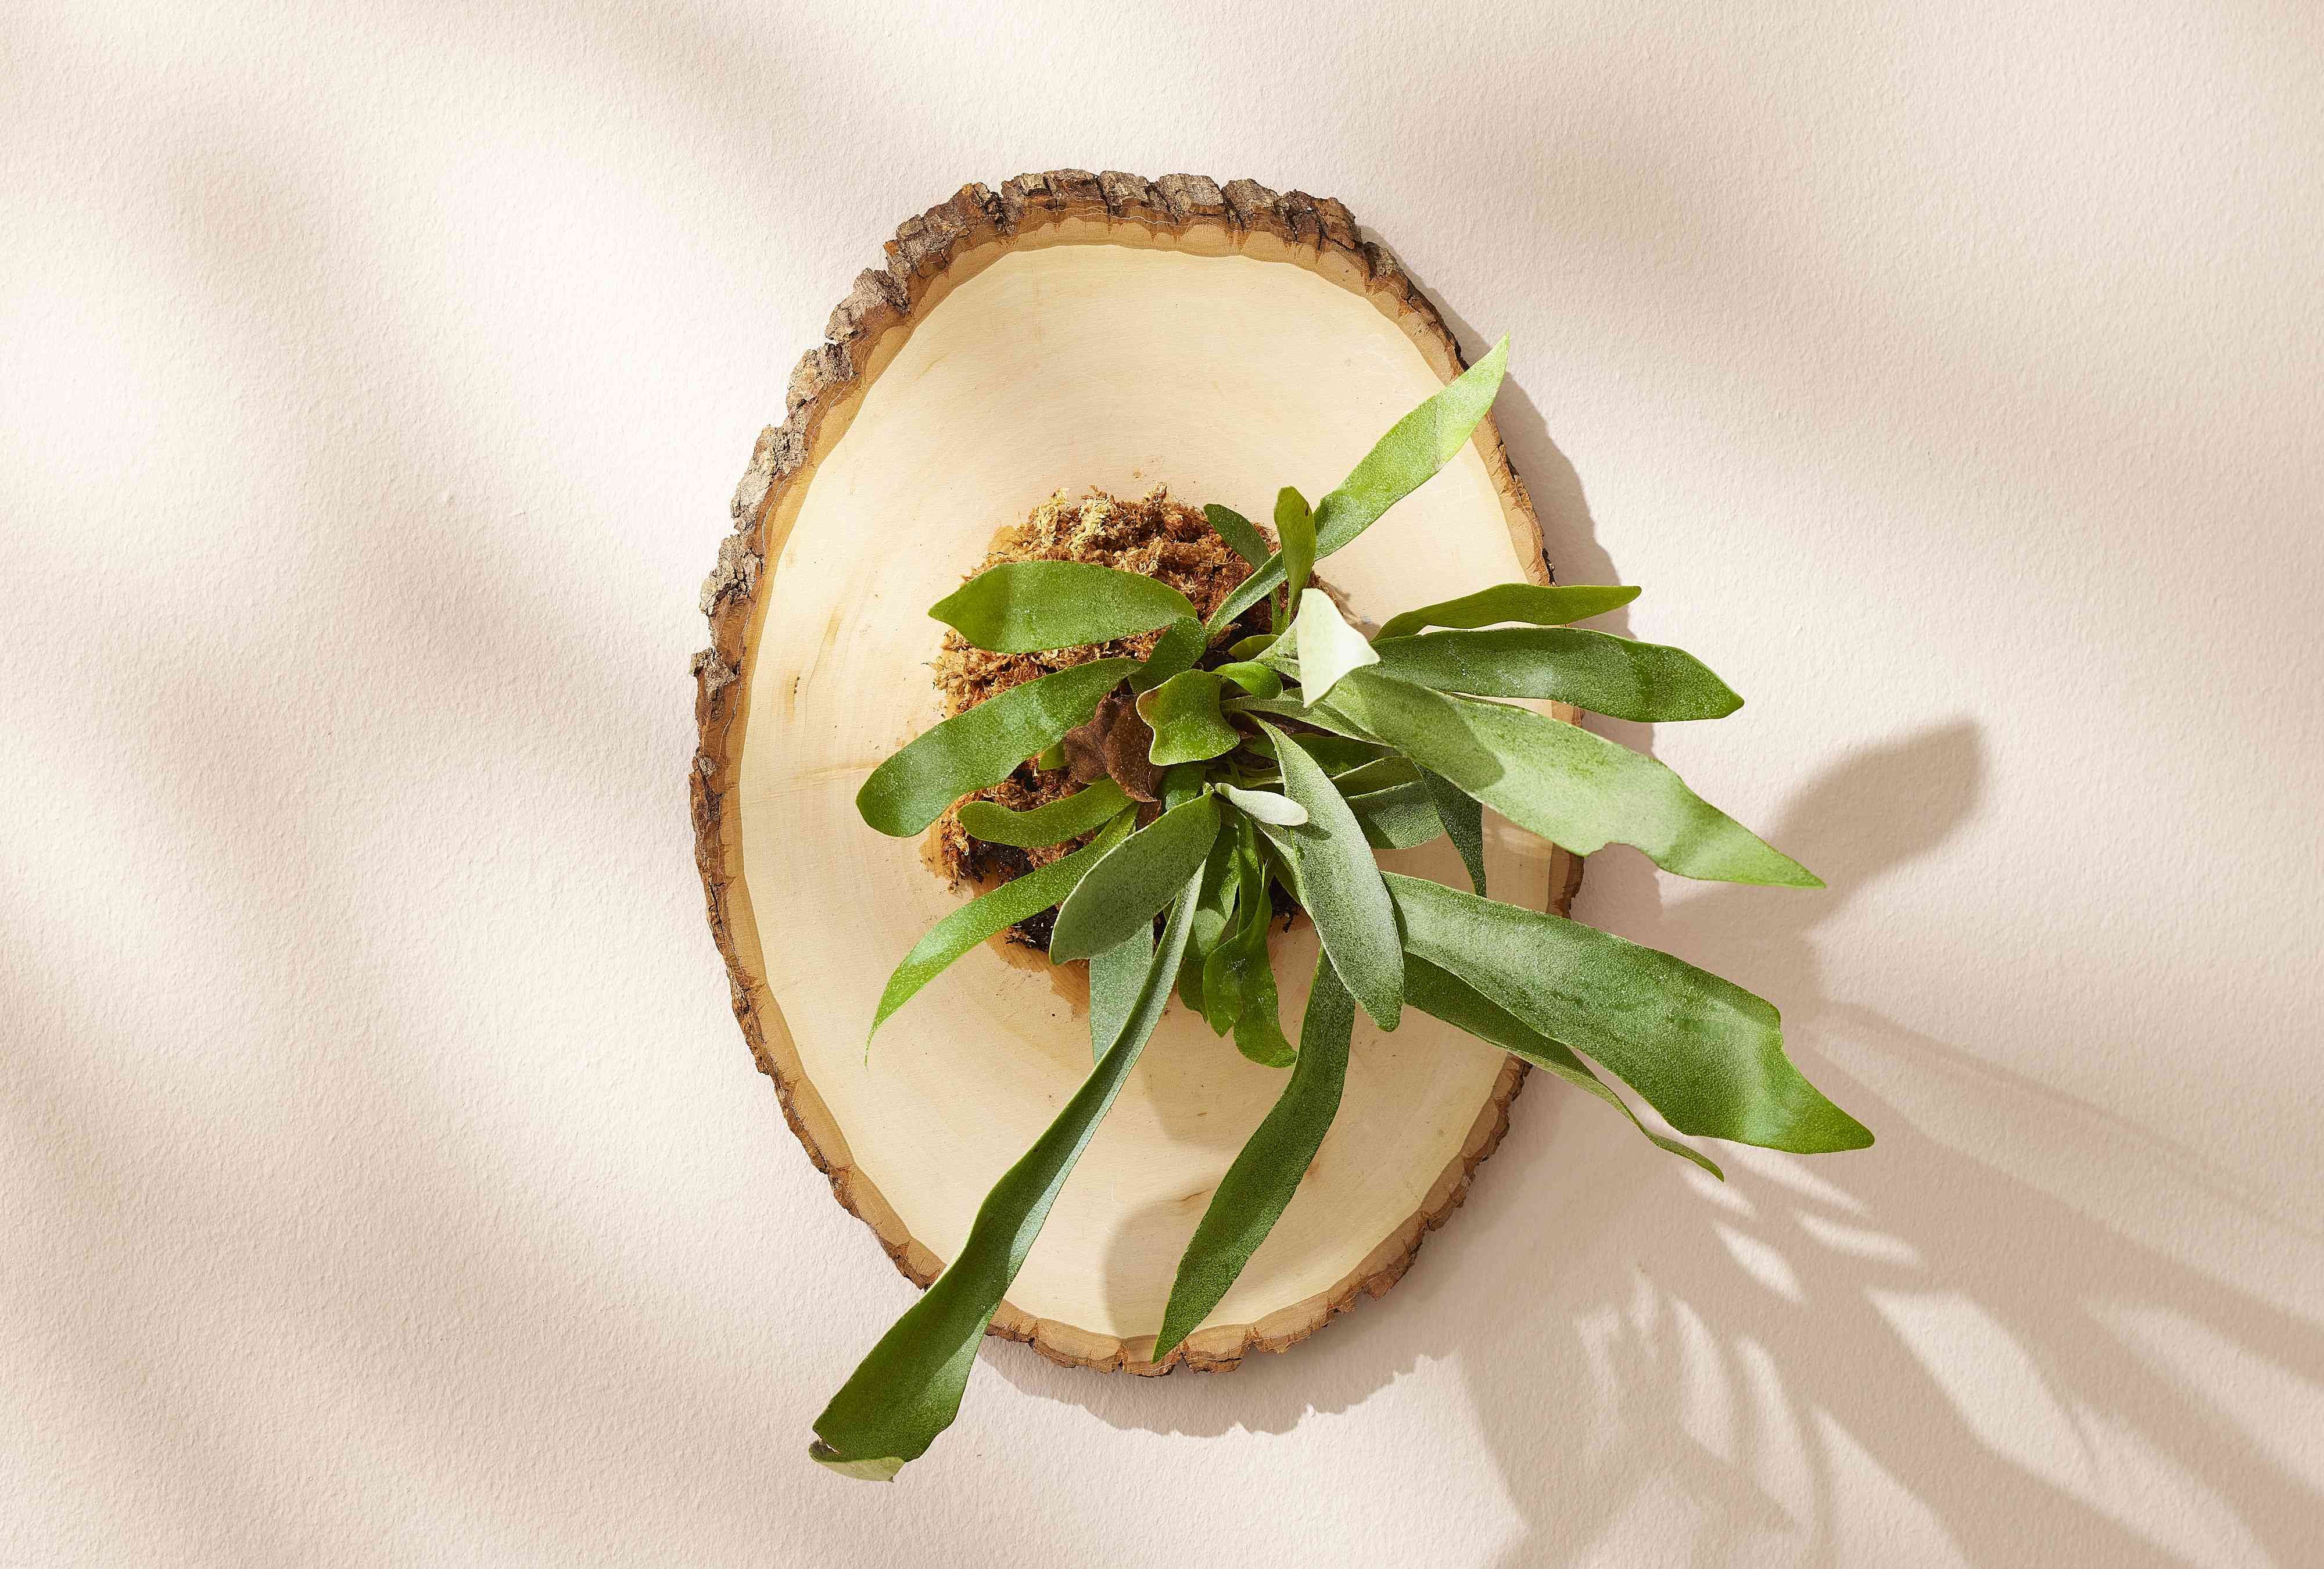
Staghorn ferns are the houseplant equivalent of wall art that’s also alive and slightly dramatic.
They don’t want a pot. They don’t want “regular plant soil.” They want to hang out like a tiny
botanical chandeliermounted to wood, nestled in a basket, lashed to a tree, or displayed on a wall
like they pay rent.
The good news: once you understand how staghorns actually live in nature (spoiler: clinging to
trees and catching moisture and debris), mounting them becomes less “craft project panic” and more
“I am an elegant rainforest curator.” This guide breaks down mounting methods for basically any
surface you can safely hang something onplus the care routine that keeps those antler fronds lush
instead of crispy.
Staghorn Fern 101: Why Mounting Works
They’re epiphytes, not “soil plants”
Most staghorn ferns (genus Platycerium) are epiphytic ferns, meaning they naturally grow on
trees and branchesnot in the ground. Their roots mainly anchor them; the plant also takes in
moisture and nutrients from rain, humid air, and the organic “crumbs” that collect around it.
That’s why mounting is so effective: it mimics their normal lifestyle.
Two frond types, two jobs (and one major mistake to avoid)
Staghorns produce:
- Shield fronds (basal fronds): round/heart-shaped fronds that hug the mount and protect roots. They often turn brown with agethis is normal.
- Antler fronds (fertile fronds): the dramatic branching “antlers” that make the plant famous.
The classic rookie mistake is peeling off brown shield fronds because they look “dead.” Don’t.
Those older shields help protect roots and hold onto moisture and nutrients. Think of them as the
plant’s built-in mulch blanketugly-cute, and extremely useful.
Choosing a Mount: “Any Surface” (Within Reason)
A staghorn fern doesn’t care if its mount is farmhouse chic or space-age modern. It cares about
three things: support, airflow, and water behavior (drains well, dries a bit between waterings).
Choose your surface based on where the fern will live and how you plan to water it.
Best classic mounts
- Wood boards or plaques: cedar, cypress, teak, or any rot-resistant, untreated wood.
- Cork bark slabs: lightweight, natural-looking, and great airflow.
- Wire baskets: excellent drainage and easy watering (dunk-and-drain friendly).
“Anything” mounts (with a smart workaround)
If you want a staghorn on tile, concrete, brick, metal, glass, or a fence, the easiest approach is
to mount the fern to a carrier board (wood/cork) and then attach that board to your
target surface using appropriate hardware. It’s safer for the plant and easier for you to remove
laterespecially if you rent or like to rearrange your life every 3.7 months.
Tools and Materials Checklist
Here’s what you’ll typically need. You won’t always need everything, but this covers most mounting
situations.
- Mount surface: board, plaque, cork slab, or wire basket
- Long-fiber sphagnum moss (soaked and squeezed damp)
- Fastener: fishing line, nylon cord, soft wire, or plant-safe mounting straps
- Anchors on the mount: screws, small nails, or staples (for boards)
- Hanging hardware: D-rings, picture wire, eye bolts + chain, or a French cleat
- Scissors/hand pruners and optionally a drill
- Gloves (sphagnum moss is awesome, but it’s also… mossy)
How to Mount a Staghorn Fern (Step-by-Step)
Step 1: Hydrate and inspect the plant
If your fern is potted, water it first so it’s hydrated and flexible. Then gently remove it from
the pot. Brush away loose potting material from the root ball without ripping roots apart. You’re
not exfoliating; you’re just reducing the stuff that stays soggy.
Step 2: Prep your mount
On a board or plaque, install 3–6 screws or nails in a rough circle where the fern will sit. These
act like “tie-down points.” Add hanging hardware nowbefore there’s a fern in the way.
Step 3: Make a moss “nest”
Soak long-fiber sphagnum moss, then squeeze it so it’s damp but not dripping. Create a mound or
donut-shaped pad on the mount. This pad holds moisture around the roots while still letting air
circulate.
Step 4: Position the fern correctly
Place the fern so the shield frond area is against the moss and mount, and the
antler fronds can grow outward/upward. If there’s a clear “top,” aim it slightly upward to help
the plant catch water and debris the way it would on a tree.
Step 5: Secure it (snug, not strangled)
Wrap fishing line/cord/wire around the screws or nails and over the root ball and moss to hold it
firmly in place. Your goal is “secure enough that gravity loses” but not “corset training.”
The plant should not wobble.
Step 6: Hide the mechanics
Tuck extra moss around exposed roots or fasteners. Over time, new shield fronds typically expand
and cover the tie-downs, so it’ll look cleaner with agelike a fine wine, but with fronds.
Mounting on Any Surface: Real-World Setups That Actually Work
1) Drywall or plaster (indoor wall mount)
Use a carrier board and hang it like art:
- Lightweight fern: heavy-duty picture hook into a stud (best) or a rated drywall anchor (okay)
- Heavier fern: French cleat into studs (highly recommended)
Pro tip: plan for watering. If you dunk the mount, you’ll want a setup that lifts off easily.
2) Tile, glass, or “please don’t put holes in this” surfaces
Skip adhesives on the plant itself. Instead:
- Mount the fern to a board.
- Hang the board from an existing fixture, a freestanding plant stand, a ceiling hook (if allowed), or a sturdy over-the-door hanger.
This approach keeps water, humidity, and plant weight from turning your design dream into a physics
lesson.
3) Brick or concrete
Use masonry anchors and a carrier board. If you’re outdoors, think about weather:
a mount that dries too slowly invites rot; a mount that dries too fast needs more frequent soaking.
Under a porch or eave often hits the sweet spot.
4) Wire basket (the “easy mode” mount)
Wire baskets breathe, drain, and hang beautifully. Line lightly with coco coir or similar, then
pack sphagnum moss around the root ball. Many people love baskets because watering can be as simple
as dunking the whole thing, letting it drain, and rehanging.
5) Outdoors on a tree (warm climates)
In frost-free or mostly frost-free areas, you can attach a staghorn directly to a tree trunk.
Use damp sphagnum moss behind the root mass and secure it with soft ties (old stockings/tights are
commonly used because they’re gentle and stretch as the plant grows). Place it in bright shade or
filtered light and protect it from cold snaps.
Staghorn Fern Care: Keep the Mount, Lose the Stress
Light
Aim for bright, indirect light or filtered sun. Morning sun is often tolerated;
harsh afternoon sun can scorch fronds, especially indoors behind glass. Too little light can lead
to weak growth and more issues with pests or disease. A bright room near an east or north window,
or a shaded porch, is usually a win.
Watering (the part everyone overthinks)
The mounting medium should get thoroughly wet, then dry a bitnot bone dry, not soggy forever.
The most reliable method for mounted staghorns is:
- Dunk/soak: remove the mount and soak the moss/root area in water for several minutes (or longer if it’s very dry).
- Drain: let it drip until it’s not actively leaking.
- Rehang: good airflow helps it dry at a healthy pace.
Frequency depends on your home’s humidity, temperature, airflow, and mount size. In many homes,
weekly soaking is common; in hot/dry conditions you may water more often. When in doubt, check the
moss: if it feels almost dry and the mount feels lighter, it’s probably time.
Humidity and airflow
Staghorns appreciate moderate to higher humidity, but they also need air circulation.
If your home is dry (winter heat, desert climate, strong AC), run a humidifier nearby or group
plants together. Misting can help in dry spells, but it’s not a full watering replacementthink of
it as “refreshment,” not “meal.”
Temperature
Most common staghorns prefer warm, stable temperatures. Protect from cold drafts indoors and from
freezes outdoors. If you summer your fern outside, bring it in before cold nights become routine.
Fertilizing (lightly, like seasoning)
Staghorns are not heavy feeders, but they do benefit from gentle fertilizing during active growth
(typically spring and summer). Use a balanced, water-soluble fertilizer diluted to a weak strength
and apply during a watering/soak. Back off in fall and winter. Overfeeding can burn roots and fronds,
and salt buildup is more likely if you use hard tap water.
Water quality
If your tap water is very hard or heavily treated, consider rainwater or filtered water occasionally.
Many growers notice happier fronds when mineral buildup is minimized.
Troubleshooting: What Your Fern Is Trying to Tell You
Brown shield fronds
Usually normal aging. Don’t remove them unless they’re mushy and clearly rotting (rare indoors if
watering is balanced). Dry, papery shields are doing their job.
Wilting or crispy tips on antler fronds
Often thirst or low humidity. Increase soaking frequency, improve humidity, and make sure the moss
is actually getting saturated during watering.
Black spots or mushy base
This can signal rot from staying too wet. Improve airflow, let the mount dry more between waterings,
and reduce how long the moss stays saturated. Also confirm the plant isn’t in a dark corner where
it never dries.
Pests (scale and mealybugs are the usual suspects)
Check fronds (especially undersides and crevices) for bumps, cottony clusters, or sticky residue.
For early infestations:
- Physically remove pests with a cotton swab and rubbing alcohol (spot-test first).
- Rinse with a gentle shower of water to dislodge stragglers.
- Use insecticidal soap or horticultural oil if needed, and keep the plant out of direct sun afterward to prevent leaf burn.
When to Remount or Divide
A happy staghorn eventually outgrows its mountthis is a good problem. You may want to remount when:
- The fern is top-heavy and the board flexes or the hanger hardware feels sketchy.
- The moss has broken down into a dense, soggy mat that never dries well.
- You want to divide pups (baby plants) once they’re large enough to have their own roots.
Remounting is basically the same process as mounting: hydrate, gently lift the root mass, refresh
moss, and secure on a larger surface. Go slowstaghorns are tougher than they look, but they don’t
appreciate being speed-run like an IKEA bookshelf.
Conclusion
Mounting a staghorn fern is part horticulture, part sculpture, and part learning how water behaves
in your specific home. Once you nail the basicssecure support, airy moss, thorough watering with
some drying time, and bright indirect lightyou’ll have a living statement piece that gets better
with age. And when someone asks, “Wait, is that plant… on the wall?” you can casually say, “Yes,”
like this is a totally normal thing you do now.
Extra Field Notes: The Stuff You Only Learn After Actually Mounting One
There’s the “official” method, and then there’s the version that happens in real homes with real
schedules, real HVAC, and at least one curious pet. Here are experience-based lessons that come up
again and again for people learning how to mount and care for staghorn ferns on basically any
surface.
1) Your first mount will feel too loose… until it’s suddenly too tight. Most
beginners either tie the fern down timidly (it wobbles, the moss slumps, the whole thing looks like
it’s sliding off the board) or they overcorrect and cinch the line like they’re lashing cargo to a
pirate ship. The sweet spot is firm support without crushing the crown. A good test: pick up the
board and tilt it slightly. If the fern shifts, tighten. If the line bites hard into the plant,
loosen. Remember, new shield fronds will eventually cover your “training wheels” tie-downs.
2) Watering is less about a schedule and more about “how fast does this mount dry?”
Two staghorns can sit in the same room and need different watering because one is on thick moss on a
dense board and the other is in a wire basket that dries in a day. People who succeed long-term
learn to judge by weight and touch: the mount feels lighter, the moss feels nearly dry, and the fern
looks perky rather than limp. If you’re guessing, lift the mount right after a soak (heavy) and
then lift it again a few days later (lighter). That “feel difference” becomes your cheat code.
3) “Any surface” is totally possible if you think like a builder. When someone
wants a staghorn on brick, concrete, tile, or a fence, the winning move is almost always a carrier
board. Mount the plant properly on wood or cork, then attach that board to the target surface with
the correct hardware. That way, the fern still gets airflow and a breathable base, and you’re not
trying to invent a new glue-based horticulture trend that ends in heartbreak (and possibly repair
bills).
4) The bathroom is a luxury spa… but only if there’s enough light. Many people move
staghorns into a bathroom for humidity and then wonder why the plant stalls. Humidity helps, but
staghorns still need bright, indirect light. If the bathroom has a bright window, fantastic. If it
doesn’t, the fern may be happier in a brighter room with a humidifier nearby. One common “aha”
moment is realizing that a brighter location with slightly lower humidity can outperform a dim,
steamy room where the plant never really dries.
5) Brown shields are not a crisisthey’re the plant’s “infrastructure.” People
often panic when the base looks brown and papery, especially after mounting. But older shield
fronds turning brown is typically normal. In fact, some folks learn the hard way that peeling
shields exposes tender roots and makes the plant harder to keep hydrated. The better habit is to
leave shields alone and focus on balanced watering. If something at the base is black, soft, and
smelly, that’s differentthat’s when you troubleshoot excess moisture and airflow.
6) Pests love “plant crevices,” and staghorns have many. Scale and mealybugs often
show up where fronds overlap or where the shield meets the mount. People who catch infestations
early usually do quick spot-cleaning (swab, rinse, repeat) rather than nuking the whole plant with
heavy treatments. The practical tip: set a monthly reminder to inspect the underside of fronds and
the crown area. It takes two minutes, and it saves weeks of annoyance later.
7) You’ll eventually remount. That’s normal, not failure. A staghorn that’s
thriving grows, gains weight, produces pups, and eventually outmuscles its original board. Many
growers treat remounting as a “repotting equivalent” and even make it a routine upgrade: bigger
board, fresh moss, stronger hanging hardware. The happiest staghorns you’ll see are often the ones
that have been remounted once or twice over the years as they level up from “cute wall plant” to
“botanical deer head trophy (but greener).”
Bottom line: mounting and care get easier once you stop chasing perfection and start observing how
your plant and mount behave in your space. If you can keep the root area evenly moist (not soggy),
give it bright indirect light, and let it breathe, your staghorn will do what it’s built to do:
grow into a living, slightly ridiculous masterpiece.