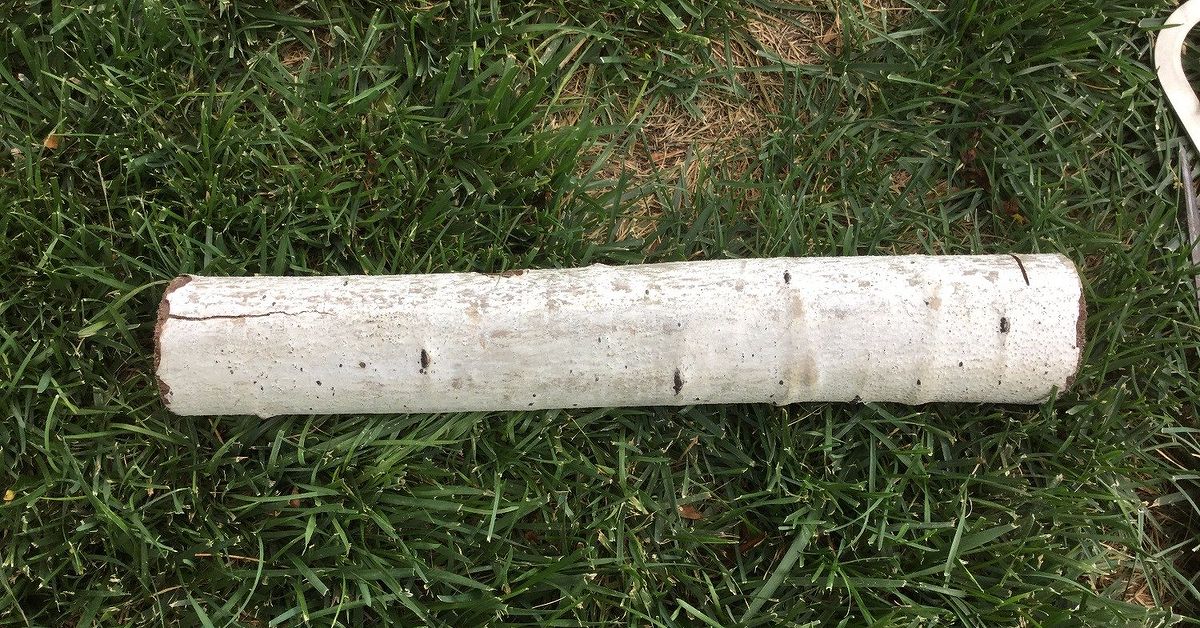
There is something unfairly charming about a candle holder made from a real tree branch. It looks rustic, a little woodsy, and just polished enough to make guests think you casually own a cozy cabin somewhere with a soup pot always simmering. In reality, you can make one on a weekend with a few basic tools, a sturdy branch, and the kind of determination usually reserved for assembling furniture without arguing.
This DIY project works because it mixes natural texture with useful design. A real branch already brings knots, grain, bark, and organic curves to the table, so your job is mostly to clean it up, make it stable, and create safe spaces for candles. The result can feel farmhouse, Scandinavian, woodland, minimalist, or “I absolutely do buy overpriced seasonal decor, but only after I make a version first.”
In this guide, you’ll learn how to make real tree branch candle holders DIY style, from choosing the right wood to drilling neat recesses, sanding the surface, adding a finish, and styling the final piece. You’ll also get safety tips, design ideas, and practical advice from the kind of trial-and-error that usually begins with, “That looked straighter before I drilled it.”
Why Real Tree Branch Candle Holders Are So Popular
DIY tree branch candle holders hit a sweet spot that many home decor projects miss. They are affordable, highly customizable, and rich in texture. Unlike mass-produced holders, every real branch candle holder comes with built-in personality. One may be sleek and modern with pale bark and clean lines. Another may be gnarly, chunky, and dramatic enough to deserve its own zip code.
They also work in almost any season. In fall, they look amazing with dried leaves, amber glass, and cozy throws. In winter, they pair beautifully with evergreen sprigs and metallic accents. In spring and summer, the same holder can sit on a table with wildflowers, linen runners, and a relaxed outdoor-dinner vibe. That kind of versatility is rare in decor, and frankly, rare in life.
Best of all, this is one of those DIY candle holder ideas that can look expensive without acting expensive. You are using a found natural material, basic woodworking steps, and simple finishing techniques to create something that feels thoughtful and handmade rather than crafty in the glitter-glue sense of the word.
Choose the Right Branch Before You Start Drilling Heroically
The branch you choose will determine how easy this project feels and how polished the final result looks. A good branch makes you feel like a genius. A bad one makes you question your life choices and your drill bit.
What to Look For
- Dry wood: Choose a branch that feels dry, not freshly cut, damp, or sappy.
- Solid structure: It should be firm and dense, not rotten, crumbly, or punky.
- A stable shape: Look for a branch that can lie flat or be flattened easily on one side.
- Enough diameter: A branch around 2 to 5 inches thick is usually ideal for tealights or small inserts.
- Interesting bark or grain: Birch, maple, oak, ash, and similar woods often look great, but many species can work if the wood is sound.
What to Avoid
- Wood with visible mold, insect damage, or soft spots
- Fresh green branches that are likely to shrink, twist, or crack badly as they dry
- Branches with deep splits where drilling could cause more breakage
- Pieces so round that they wobble like a log auditioning for a comedy sketch
If you are collecting branches from your yard, choose only fallen or properly pruned wood that is healthy enough to use. Clean tools matter here too. A clean saw and pruners give you better cuts and a tidier project from the beginning.
Tools and Materials You’ll Need
- One dry tree branch or log section
- Hand saw, miter saw, or pruning saw
- Power drill
- Forstner bit or spade bit sized to your candle insert
- Sandpaper in coarse, medium, and fine grits
- Safety glasses
- Dust mask or respirator rated for fine particles
- Measuring tape or ruler
- Pencil
- Small brush or cloth for dust removal
- Optional wood stain
- Optional clear protective finish
- Metal tealight cups, glass votive inserts, or flameless candles
- Felt pads for the underside if needed
A quick but important note: if you are making a wooden candle holder for real flame, use inserts that help separate the hot candle vessel from the wood. Metal tealight cups or glass votive holders are a much smarter move than dropping a naked candle directly into a drilled hole and hoping for the best. Hope is lovely. It is not a fire-safety plan.
Step-by-Step: How to Make Real Tree Branch Candle Holders DIY Style
Step 1: Cut the Branch to Length
Decide how long you want your candle holder to be. A piece between 10 and 20 inches long works well for a table centerpiece. Shorter sections make nice single or double candle holders, while longer branches allow you to space out multiple candles for a more dramatic look.
Cut both ends as square as possible. If you want a more natural look, one end can stay slightly irregular, but the base still needs to sit securely.
Step 2: Clean and Inspect the Wood
Brush away loose bark, dirt, moss, and debris. You can wipe the branch with a barely damp cloth, then let it dry thoroughly. If the bark is beautiful and stable, keep it. If it is flaky and messy, peel it away for a cleaner, smoother look.
Now inspect the branch closely. Look for hidden cracks, bug holes, or weak points where drilling might cause the wood to split. Small imperfections are part of the charm. Structural problems are part of the headache.
Step 3: Make the Bottom Stable
This step matters more than people think. Your rustic candle holder should look natural, not precarious. Use a saw, sander, or careful hand planing to flatten one side enough that the branch sits firmly on a table without rolling. Add felt pads later if the surface still needs a little leveling.
If the branch already has a flat side, congratulations. The tree did some of the work for you.
Step 4: Plan the Candle Placement
Use a ruler and pencil to mark where each candle will sit. For a balanced look, keep equal spacing between the centers. For a more organic design, vary the spacing slightly while making sure the candles still look intentional rather than random.
A branch centerpiece with three to five candles usually feels balanced. Leave enough wood around each hole so the branch stays strong. Crowding the candles can make the piece look busy and weaken the wood.
Step 5: Drill the Recesses
This is the moment when your branch officially becomes a candle holder instead of “a stick on the counter.” Clamp the branch if possible, then drill shallow recesses using a Forstner bit or spade bit sized for your insert or candle cup.
Drill slowly and steadily. If you are using tealight cups or glass inserts, test the fit as you go. The insert should sit snugly without forcing it. Go too small and you will be muttering at the wood. Go too large and the candle may wobble.
Do not drill too deep. You want a secure recess, not a tunnel to the earth’s core. A shallow, neat seat is enough.
Step 6: Sand the Surface
Sand any rough ends, splinters, and sharp edges. If you are keeping the bark, sand only the cut ends and any exposed wood. If you removed the bark, sand the whole piece from medium grit to fine grit until it feels smooth but still natural.
Always remove sanding dust before finishing. Dust left behind can make stain or clear coat look blotchy, dull, or oddly gritty, which is not the vibe.
Step 7: Finish or Leave It Natural
You have two good options here.
Option one: leave it natural. This works beautifully if the wood has attractive bark or a lovely pale color. A natural finish keeps the project rustic and understated.
Option two: stain and protect it. If you want a richer, darker, more polished look, apply a wood stain lightly and wipe off the excess. Then add a clear protective finish in thin coats once the stain is dry. Satin and matte finishes usually look best for rustic wood decor because they protect the surface without making it look plastic or overly glossy.
Test stain on a scrap piece or hidden area first. Real wood can surprise you. Sometimes in a good way. Sometimes in a “why does this look orange” way.
Step 8: Add Inserts and Final Details
Set metal tealight cups or glass inserts into the drilled recesses. Add felt pads underneath if the holder rocks even slightly. Then style it with your candles of choice.
If you are giving the holder as a gift, include a few candles and a note that says whether the piece is best for flameless candles, metal-cup tealights, or glass-protected votives. That small detail makes the gift feel extra thoughtful and saves the recipient from guessing.
The Safest Candle Choices for a Branch Candle Holder
Not every candle is equally suited to a wooden project. The best choice depends on the look you want and how cautious you want to be.
Best overall for peace of mind
Flameless LED candles. They are especially smart if the holder will sit near fabric, books, holiday decor, kids, pets, or the general chaos of real life.
Best for a real flame look in a rustic centerpiece
Metal-cup tealights or glass votives. These help contain wax and provide a more controlled burn than setting candle wax directly against wood.
Best for dramatic styling
Tapers only if you add proper metal candle cups or holders. Tapers can look beautiful, but they need a snug, upright fit. A wobbly taper is decorative in the same way a loose ladder is exciting.
Common Mistakes to Avoid
- Using wet wood: Fresh wood often cracks, shifts, or loosens as it dries.
- Skipping stability checks: A branch that rolls is not decor. It is a problem with bark.
- Drilling holes too close together: This weakens the wood and looks cramped.
- Ignoring dust safety: Wood dust is not a seasoning. Wear proper protection while cutting and sanding.
- Using bare flame directly against wood: Always create some barrier with inserts or use flameless candles.
- Over-finishing the piece: Too much stain or gloss can hide the beauty that made you pick the branch in the first place.
Easy Design Ideas for Real Tree Branch Candle Holders
1. Minimalist Rustic
Keep the bark, drill three evenly spaced holes, and use plain white tealights. Simple, clean, and timeless.
2. Winter Centerpiece
Add evergreen clippings, pinecones, dried orange slices, and warm brass accents around the holder on a tray.
3. Wedding or Dinner Table Style
Use pale branches, soft neutral candles, and linen runners for a romantic natural look that feels elevated without trying too hard.
4. Modern Organic
Remove the bark, sand the wood smooth, stain it walnut or weathered gray, and pair it with black candle cups for contrast.
5. Giftable Small Holders
Cut short individual sections and make one-candle holders as holiday gifts, favors, or stocking stuffers that people actually keep.
What Making These Candle Holders Is Actually Like
The experience of making real tree branch candle holders DIY style is strangely satisfying because it feels less like manufacturing and more like collaborating with the wood. You are not forcing a perfect shape out of a blank board. You are looking at what the branch already wants to be and nudging it in a more useful direction. That sounds poetic, and it is, but it is also practical. Every curve, knot, and bit of bark changes your decisions. One branch might become a sleek three-candle centerpiece. Another might clearly want to be a chunky single votive holder that belongs on a side table next to a stack of books and a blanket nobody folds correctly.
The first time you make one, you notice how much of the project is visual judgment. You turn the branch over in your hands, testing which side should face up and which side should become the base. You step back. You squint at it. You set it on the table, walk away, come back, and suddenly realize the “front” was the other side all along. That is part of the fun. It feels creative in a loose, low-pressure way because wood is already doing half the decorating for you.
There is also a real tactile pleasure in the process. Brushing off loose bark, smoothing a rough cut end, and watching the grain appear under sandpaper feels rewarding in a very immediate way. Stain can deepen the character dramatically, but even unfinished wood often looks beautiful once it is cleaned and shaped. The project teaches patience too. If you rush the drilling, the holes can look messy. If you skip the test fit, the candle insert might sit crooked. If you ignore wobble because “it seems fine,” the branch will wait until dinner guests arrive to prove that it is absolutely not fine.
What surprises many people is how personal the finished holder feels. Even when the steps are simple, the final piece rarely looks generic. It reflects your taste in a way that store-bought decor often does not. Maybe you prefer bark-on, wild, and rugged. Maybe you like smooth surfaces and a quiet matte finish. Maybe you go full woodland drama with moss, pinecones, and amber glass, and your dining table starts looking like it has a backstory.
Another nice part of the experience is that the imperfections often improve the result. A slight bend in the branch can make the arrangement more dynamic. A knot near one candle recess can create visual interest. Tiny cracks, as long as they are stable, can make the piece look older and more natural. This is not the kind of project where machine-level perfection is the goal. It is the kind where character wins.
By the end, you usually come away with more than a candle holder. You get a better eye for natural materials, more confidence with simple tools, and a strong urge to inspect every fallen branch in your yard like it might be the next great centerpiece. That may sound dramatic, but once you make one good rustic candle holder, the world really does become full of possibilities and suspiciously useful sticks.
Conclusion
Learning how to make real tree branch candle holders DIY style is one of those rare projects that is simple enough for a weekend and stylish enough to look custom. The key is picking dry, solid wood, making the piece stable, drilling carefully, sanding thoughtfully, and using candle inserts or flameless options with common-sense fire safety. From there, the branch does what nature does best: it makes everything look a little richer, warmer, and more interesting.
Whether you are decorating for the holidays, building a rustic centerpiece, making handmade gifts, or just trying to turn a nice branch into something more impressive than “yard debris with potential,” this project delivers. It is affordable, flexible, and full of personality. In other words, it is exactly the kind of DIY that earns compliments without requiring a full workshop or a dramatic montage.