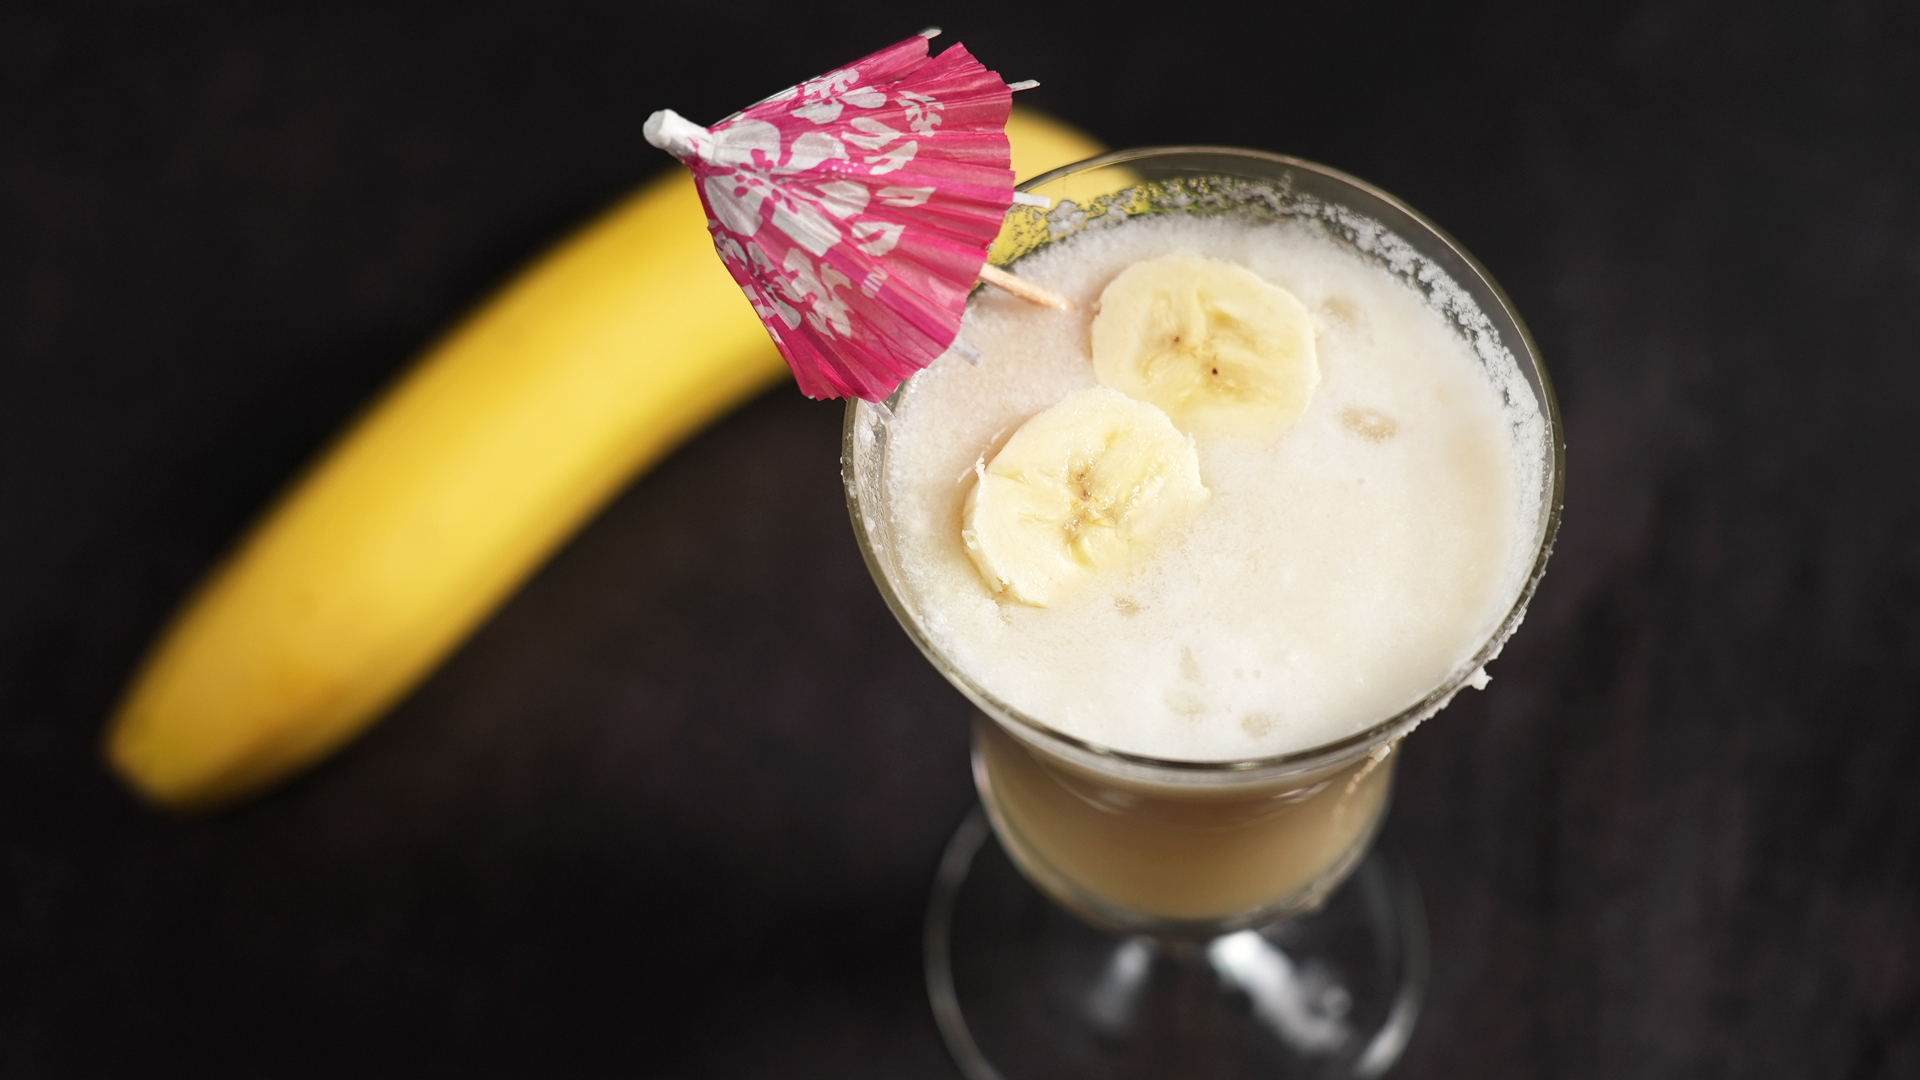
Note: This is an alcohol-free pitcher piña colada recipe, made as a creamy pineap coladas is basically a tiny vacation with better parking. It brings together sweet pineapple, creamy coconut, bright lime, and enough frosty texture to make a regular Tuesday feel suspiciously beachy. Better still, making a pitcher instead of individual glasses means less blender babysitting and more time enjoying your backyard, pool party, barbecue, birthday, or aggressively tropical movie night.
The secret to a great pitcher of piña coladas is not buying every neon-colored bottle in the drink aisle. It is using cold ingredients, frozen fruit, and the right balance of pineapple sweetness, coconut richness, and lime acidity. This recipe keeps the flavor fresh rather than syrupy, creamy rather than heavy, and slushy rather than oddly chunky. Nobody wants to sip a tropical snow shovel.
This seven-step guide makes about eight servings of a nonalcoholic piña colada pitcher. It also includes useful substitutions, blender tips, serving ideas, make-ahead advice, and a few lessons learned from the wonderful chaos of serving frozen drinks to a crowd.
Why a Pitcher of Pina Coladas Is Perfect for a Group
Making a pitcher of piña coladas is one of the easiest ways to serve a crowd without becoming a full-time beverage technician. Instead of blending the same drink eight times while guests stare at you like thirsty vacationers at a resort bar, you can prepare two blender batches, combine them in one chilled pitcher, and serve right away.
A pitcher recipe also gives you more control. You can taste the mixture before serving, adjust the sweetness, add a little more lime for brightness, or make the drink thicker with extra frozen pineapple. That is much easier than trying to rescue a single glass after it has already become a watery pineapple puddle.
Frozen pineapple is especially useful because it gives your pitcher piña coladas a thick, creamy texture while reducing the need for huge amounts of ice. Coconut cream provides richness, while coconut milk helps the drink pour smoothly instead of sitting in the blender like tropical cement. Fresh lime juice adds enough tartness to keep the pineapple and coconut from becoming overly sweet.
Ingredients for One Pitcher of Nonalcoholic Pina Coladas
This recipe makes approximately eight 8-ounce servings. Use a large blender, or divide the ingredients into two batches if your blender is on the smaller side.
- 4 cups frozen pineapple chunks
- 2 cups chilled 100% pineapple juice
- 1 can full-fat coconut milk, well shaken
- 3/4 cup unsweetened coconut cream, stirred until smooth
- 3 tablespoons fresh lime juice
- 2 to 4 tablespoons simple syrup, maple syrup, or honey, to taste
- 4 cups ice cubes
- 1 small pinch of salt
- Pineapple wedges, maraschino cherries, toasted coconut, or lime slices for garnish
Coconut Cream vs. Cream of Coconut
These two ingredients sound like they were named during a very confusing family reunion, but they are not the same. Unsweetened coconut cream is thick, rich, and naturally coconut-forward. Cream of coconut is usually sweetened and much more dessert-like. Either can work, but they need different handling.
If you use unsweetened coconut cream, keep the sweetener listed in the recipe and add it gradually. If you use sweetened cream of coconut, begin with 1/2 cup and skip the added syrup at first. Taste the mixture before adding more sweetness. Pineapple can vary a lot, and no one needs a drink that tastes like a coconut candy factory had a power surge.
How to Make a Pitcher of Pina Coladas: 7 Steps
Step 1: Chill Everything Before You Start
Cold ingredients are the fastest route to a thicker frozen drink. Chill the pineapple juice, coconut milk, coconut cream, lime juice, and pitcher for at least 30 minutes before blending. A cold pitcher helps the finished piña coladas stay frosty a little longer, especially if you are serving them outside.
Frozen pineapple does a lot of the heavy lifting here. It creates a silky, slushy texture without forcing you to use so much ice that the flavor gets diluted. Fresh pineapple is delicious, but freezing it first is a smart move when you want a thicker pitcher drink.
Step 2: Prepare Your Garnishes and Glasses
Before the blender starts roaring like it has a personal grievance, prep your glasses and garnishes. Slice pineapple wedges, set out cherries, cut lime wheels, and fill a bowl with extra ice. You can also chill the glasses in the freezer for 10 to 15 minutes. Frosty glasses are not mandatory, but they make the drink look impressive with almost zero effort, which is the best kind of impressive.
For a simple garnish, use a pineapple wedge and a cherry. For a more polished party look, rim the glasses with finely shredded coconut. Brush the rim with a lime wedge, dip it into toasted coconut, and prepare to receive compliments you absolutely earned.
Step 3: Divide the Ingredients Into Two Blender Batches
Unless you own a blender the size of a small washing machine, make this recipe in two batches. Divide the frozen pineapple, pineapple juice, coconut milk, coconut cream, lime juice, sweetener, ice, and salt evenly between the batches.
Putting too much into a blender at once can leave you with an uneven drink: liquid at the bottom, stubborn fruit chunks near the top, and one ice cube somehow bouncing around like it has escaped the laws of physics. Smaller batches blend more smoothly and give you a better final texture.
Step 4: Blend Until Smooth and Creamy
Add the liquid ingredients first, followed by the pineapple and ice. Start blending on low speed for a few seconds, then increase to high. Blend until the mixture looks creamy, thick, and evenly combined. Depending on your blender, this may take 30 to 60 seconds.
Pause once or twice to scrape down the sides with a spatula if needed. Do not keep blending endlessly. Overblending can melt the ice and turn a thick frozen piña colada into something closer to pineapple soup. Delicious pineapple soup has its place in the world, but this is not that place.
Step 5: Taste and Adjust the Flavor
Pour a small spoonful into a glass and taste it before combining both batches in the pitcher. This is where the recipe becomes yours. If it tastes too sweet, add a little more fresh lime juice. If it tastes too tart, add a teaspoon of syrup at a time. If it seems thin, blend in a handful of frozen pineapple or a few extra ice cubes.
A tiny pinch of salt can help the pineapple and coconut flavors taste fuller and more balanced. It should not make the drink salty. Think of it as the quiet supporting actor who makes the tropical stars look even better.
Step 6: Combine the Batches in a Chilled Pitcher
Pour both blended batches into your chilled pitcher and stir gently with a long spoon. Do not add a large amount of extra ice directly into the pitcher unless you plan to serve immediately. Ice in the pitcher melts faster than you think, and it can thin out the drink before the first refill arrives.
For the best texture, place ice in individual glasses instead. Then pour the frozen piña colada mixture over the ice. This keeps the pitcher flavorful and gives each guest a cold drink from the first pour to the final tropical encore.
Step 7: Garnish, Serve, and Enjoy Right Away
Pour the pitcher piña coladas into chilled glasses. Add pineapple wedges, cherries, lime slices, toasted coconut, or colorful paper straws. Serve immediately while the drink is thick and frosty.
Frozen drinks are happiest when they are fresh. If the mixture starts to separate or soften before serving, stir it well. If it becomes too loose, return it to the blender with a small handful of frozen pineapple or ice and blend briefly. Consider this a quick tropical tune-up, not a culinary emergency.
Easy Variations for Your Pina Colada Pitcher
Strawberry Pina Coladas
Add 1 to 1 1/2 cups frozen strawberries to the blender. The berries bring a rosy color, a little tartness, and the sort of bright, cheerful personality usually associated with vacation postcards. You may need an extra tablespoon of sweetener depending on the berries.
Mango Pina Coladas
Replace half the frozen pineapple with frozen mango. Mango creates a softer, almost buttery fruit flavor that works beautifully with coconut. Keep some pineapple in the recipe so the drink still has that recognizable piña colada character.
Banana Pina Coladas
Add one sliced frozen banana to the pitcher recipe. Banana makes the drink thicker and creamier, almost like a tropical smoothie. This version is especially good for brunches, hot afternoons, or anyone who believes a blender is just an appliance for making happiness louder.
Less-Sweet Pina Coladas
Use unsweetened pineapple juice, unsweetened coconut cream, and only 1 tablespoon of sweetener. Add extra lime juice to brighten the flavor. This version tastes fresher and more fruit-forward, with less of a dessert-drink vibe.
Common Pitcher Pina Colada Problems and Simple Fixes
The Drink Is Too Thin
Blend in more frozen pineapple first. It adds body without watering down the flavor. If needed, add a few ice cubes and blend only until smooth.
The Drink Is Too Thick
Add pineapple juice one tablespoon at a time, then blend briefly. A little liquid goes a long way, so avoid pouring in half a cup unless you are ready to transform your frozen drink into a tropical beverage lake.
The Coconut Flavor Is Too Strong
Add more pineapple juice or frozen pineapple. Pineapple is the lead singer in a piña colada, while coconut should be the smooth backup vocalist. Both matter, but one should not drown out the other.
The Drink Is Too Sweet
Add more lime juice and a pinch of salt. Acidity gives pineapple flavor more definition and can make the entire pitcher taste brighter without adding more sugar.
Make-Ahead Tips for a Party
You can prepare the fruit and liquid ingredients ahead of time, but wait to blend the ice until close to serving. Measure the pineapple, juice, coconut milk, coconut cream, lime juice, and sweetener into containers, then refrigerate them until party time.
For an even easier setup, place the frozen pineapple in labeled freezer bags with the correct portion of coconut cream. Keep the pineapple juice and coconut milk cold in the refrigerator. When guests arrive, blend, pour, garnish, and pretend you planned the entire event weeks ago.
If you need to hold the drink briefly, keep the pitcher in the freezer for about 15 to 20 minutes. Stir before serving. Avoid freezing it for hours after blending because the mixture can become too firm and separate as it thaws.
Serving Ideas That Make the Pitcher Feel Special
A pitcher of piña coladas works beautifully with grilled fruit, tacos, barbecue dishes, coconut shrimp alternatives, salty snacks, spicy chips, fresh salsa, or simple cheese and fruit platters. The drink’s sweet-tart flavor pairs well with salty and spicy foods, which is useful because people tend to get mysteriously hungry around a blender.
Set up a small garnish station with pineapple wedges, cherries, lime slices, toasted coconut, paper umbrellas, and colorful straws. Guests can customize their drinks, and you get the appearance of a carefully planned tropical beverage bar without needing a resort manager’s badge.
Experiences and Lessons From Making a Pitcher of Pina Coladas
The first real lesson of making a pitcher of piña coladas is that frozen drinks are more about timing than difficulty. The ingredients are simple, but the moment you blend ice, the clock begins. A pitcher that looks thick and glorious in the blender can become noticeably softer after sitting on a warm kitchen counter for 20 minutes. This does not mean you have failed. It simply means frozen drinks have the attention span of a puppy in a fireworks store.
That is why preparation matters so much. When the glasses are chilled, garnishes are sliced, and the pitcher is ready before blending begins, serving becomes easy. You are not racing around trying to find cherries while the drink slowly turns from frosty paradise into a mildly tropical puddle. A little organization makes the whole experience feel relaxed instead of chaotic.
Another useful discovery is that flavor balance changes when the drink is very cold. A piña colada mixture may taste perfectly sweet before blending but become less intense once the ice and frozen pineapple enter the scene. Tasting after blending is important. A squeeze of lime or spoonful of syrup can make a surprisingly big difference. This is one reason homemade pitcher drinks usually taste better than bottled mixes: you can adjust them for the actual fruit you have, rather than trusting a mysterious factory formula.
Making a large batch also teaches you that texture is personal. Some people love a very thick, spoonable slush. Others prefer a smoother, more pourable drink. There is no single correct answer. Frozen pineapple creates body, pineapple juice loosens the blend, and ice controls the frostiness. Once you understand those three roles, you can make the drink exactly how your group likes it.
The garnish experience is more important than it seems, too. A simple pineapple wedge makes the drink feel festive. A cherry adds a cheerful retro touch. Toasted coconut around the rim makes the whole glass look as though it arrived from a beach café that charges extra for the view. These little details are inexpensive, fast, and capable of making an ordinary gathering feel memorable.
Finally, a pitcher of piña coladas has a way of creating a pause in the day. People gather around the blender, ask what is in the drink, request extra fruit, and suddenly linger a little longer. It is not just about pineapple and coconut. It is about making something cold, colorful, and shareable enough to turn a regular afternoon into an occasion. That is a lot of work for a blender, but fortunately, blenders do not complain much.
Conclusion
Learning how to make a pitcher of piña coladas is easy once you focus on the right ingredients and a simple blending routine. Use frozen pineapple for body, coconut cream for richness, coconut milk for smoothness, lime juice for balance, and just enough ice to create a frosty texture without weakening the flavor.
Make two blender batches, taste before serving, keep the pitcher chilled, and garnish each glass with something cheerful. Whether you are hosting a summer party, a family movie night, a barbecue, or simply trying to make your kitchen feel less like a kitchen, this alcohol-free pitcher piña colada recipe brings bright tropical flavor to the table in seven easy steps.