Fall decorating does not require a wagon full of heirloom gourds, a boutique budget, or a minor degree in interior design. Sometimes it just requires a quick stop at the dollar store, a roll of burlap ribbon, and the confidence to glue something without accidentally attaching it to your dining table.
A dollar store DIY burlap pumpkin is one of those rare crafts that looks warm, textured, and surprisingly polished without demanding advanced sewing skills. It works on a mantel, entryway table, tiered tray, bookshelf, or Thanksgiving centerpiece. Better yet, it can be reused year after year, unlike the real pumpkin on your porch that eventually starts looking like it has seen things.
This easy fall craft uses inexpensive materials to turn a plain foam pumpkin into rustic seasonal decor. The final look can be farmhouse-inspired, neutral and modern, cozy and traditional, or slightly spooky for Halloween. The method is flexible, forgiving, and ideal for beginners.
Why a Burlap Pumpkin Works So Well for Fall Decor
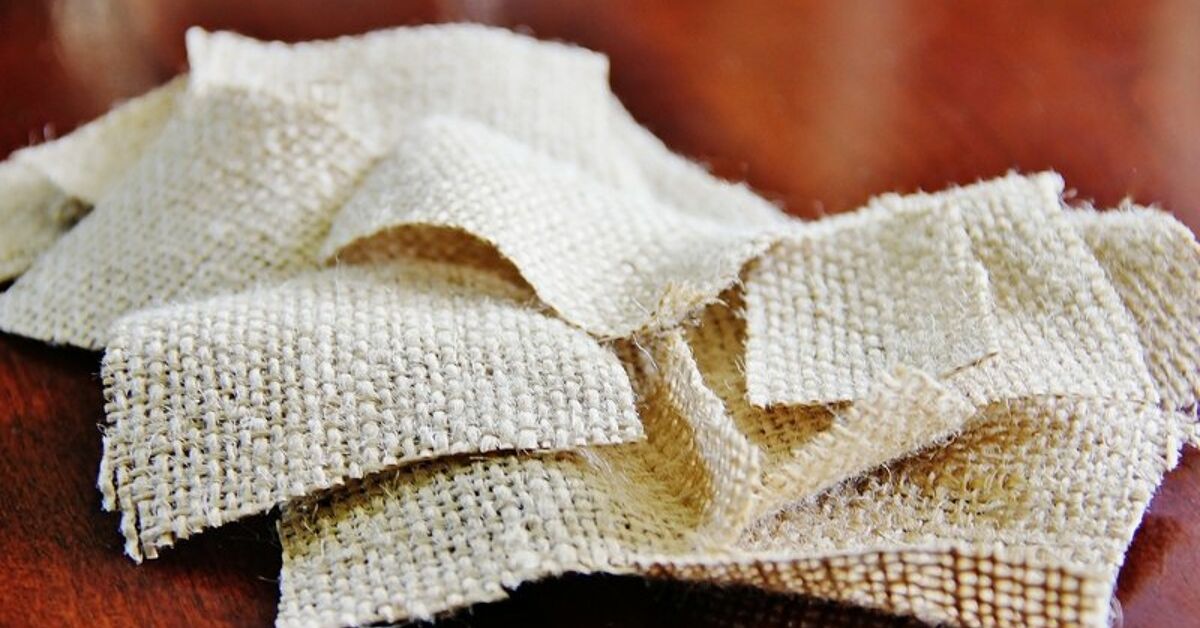
Burlap has a naturally loose weave and earthy texture, which gives a pumpkin an instantly rustic look without much extra decoration. It pairs especially well with wood, jute twine, faux leaves, dried florals, plaid fabric, galvanized metal, and baskets. Seasonal decorating ideas often combine pumpkins with natural textures and layered materials because the mixture creates visual warmth without needing bright colors everywhere.
The appeal of this craft is that it does not need to look perfectly smooth. In fact, tiny wrinkles, visible weave, slightly frayed edges, and uneven folds help the finished pumpkin feel handmade. This is not a project where perfection wins. Texture wins. Personality wins. The tiny glue string hanging from your sleeve does not win, but it is practically part of the experience.
Supplies for a Dollar Store DIY Burlap Pumpkin
Most of these materials can be found at a dollar store, discount craft aisle, thrift shop, or already hiding in a drawer labeled “miscellaneous things I will definitely use someday.”
- One small foam, plastic, or paper-mâché pumpkin
- Burlap ribbon, burlap fabric, or a burlap gift bag
- Jute twine, hemp cord, or thin rope
- A small piece of wood, wine cork, cinnamon stick, or faux pumpkin stem
- Faux fall leaves, berries, moss, floral picks, or raffia
- Scissors
- Low-temperature hot glue gun and glue sticks
- Optional: acrylic paint, stain, metallic wax, ribbon, fabric scraps, or a small tag
Choosing the Right Pumpkin Base
A foam pumpkin is the easiest option because it is lightweight, easy to cover, and simple to glue. A small plastic pumpkin also works well, especially if it has a rounded shape with visible ridges. Do not worry if the original pumpkin is orange, glittery, or covered in a face that looks like it belongs in a haunted cereal commercial. Burlap is wonderfully forgiving and covers a multitude of decorative crimes.
For a standard small pumpkin, plan on using six to eight strips of burlap. More strips create stronger pumpkin sections and a fuller look. Wider burlap ribbon creates a faster project, while narrow ribbon gives a more detailed, layered result.
How to Make a Dollar Store DIY Burlap Pumpkin Step by Step
Step 1: Prepare Your Work Area
Cover your work surface with cardboard, kraft paper, or an old placemat. Plug in your glue gun and allow it to heat according to the manufacturer’s directions. Keep the glue gun upright on its stand, avoid touching the metal nozzle, and unplug it when the project is finished. Hot glue guns can cause burns and fire hazards when they overheat or are handled carelessly, so adult supervision is important when children are crafting.
If your pumpkin has a removable stem, pull it out gently and save it for later. If it does not come out, you can wrap burlap around it and add a new stem on top.
Step 2: Cut Your Burlap Strips
For a small pumpkin, cut six to eight burlap strips that are about 2 to 3 inches wide and long enough to travel from the bottom of the pumpkin, over the top, and back to the bottom. The exact length will depend on your base, so do a quick test before cutting every strip.
Do not panic if the burlap begins to fray. A little fraying adds texture and makes the project look more relaxed. If it starts shedding like a golden retriever in spring, trim the loosest threads with scissors before gluing.
Step 3: Glue the First Burlap Strip
Place a small dot of hot glue on the bottom center of the pumpkin. Press one end of a burlap strip into the glue. Pull the strip up and over the pumpkin, then secure the other end at the bottom.
Do not stretch the burlap tightly. It should sit against the pumpkin but still have a little softness. A burlap pumpkin needs folds and movement. If the fabric is pulled too tight, the pumpkin can look less like cozy fall decor and more like a tiny upholstered bowling ball.
Step 4: Create Pumpkin Sections
Add the remaining burlap strips one at a time. Space them evenly around the pumpkin, allowing each strip to slightly overlap the previous one. As you work, gently pinch the burlap near the top and bottom so the strips create natural pumpkin ridges.
The goal is not to hide every inch of the base immediately. Instead, use the strips to build visible sections. Think of a real pumpkin: it has rounded ribs rather than a perfectly smooth surface. The small gaps and overlaps make your burlap version look more dimensional.
Step 5: Cover Any Bare Spots
Once all strips are attached, inspect the pumpkin from every angle. If orange foam or plastic is peeking through in an awkward place, add a narrow scrap of burlap, a small folded patch, or a dab of moss. This is where embellishments become more than decoration. They become craft camouflage.
You can also wrap a thin length of jute twine around the pumpkin’s middle to emphasize the sections. Tie it gently rather than pulling hard, especially if your base is lightweight.
Step 6: Add the Stem
A good stem can take a burlap pumpkin from “cute craft” to “why does this look like something from an expensive fall display?” Use a small branch, wine cork, cinnamon stick, cork stopper, or faux stem. Glue it firmly into the top center.
For extra texture, wrap the stem with jute twine or lightly dry-brush it with brown acrylic paint. A little uneven paint is ideal. Real pumpkin stems are not polished furniture legs, and yours does not need to be either.
Step 7: Finish With Leaves and Texture
Glue one or two faux leaves near the stem, then add a small curl of twine, raffia, faux berries, moss, or a mini floral pick. Keep the decoration concentrated near the top so the burlap remains the star of the project.
When styling pumpkins, varying sizes and textures usually creates a more layered display than lining up identical pieces like they are waiting for attendance. Pair your burlap pumpkin with a smaller painted pumpkin, a wood bead garland, pinecones, candles, or a woven tray for a cozy autumn arrangement.
Easy Style Ideas for Your Burlap Pumpkin
Classic Farmhouse Pumpkin
Use natural tan burlap, a dark wood stem, jute twine, and faux greenery. Place it beside a small wood sign or inside a basket with pinecones. This version works from early fall through Thanksgiving.
Neutral Modern Pumpkin
Choose cream, ivory, gray, or black burlap. Add a whitewashed stem and a small sprig of eucalyptus. Display it on a shelf with ceramic candles, stacked books, and warm wood accents.
Halloween Burlap Pumpkin
Use black, orange, or striped burlap ribbon. Add tiny faux spiders, a black bow, a painted stem, or a small “Boo” tag. Keep it playful rather than overstuffed; one good spooky detail is often more effective than turning the pumpkin into a haunted craft-store clearance bin.
Thanksgiving Table Pumpkin
Use natural burlap with rust-colored leaves, wheat stems, and a tiny name tag. Make several miniature pumpkins and use them as place-card holders. This is an easy way to make a table feel personal without spending an afternoon trying to fold napkins into birds.
Common Burlap Pumpkin Problems and Quick Fixes
The Burlap Is Fraying Too Much
Trim loose strands as you work. You can also fold raw edges under before gluing. For a more rustic look, leave a little fraying visible but remove long strings that distract from the pumpkin shape.
The Pumpkin Looks Flat
Add more burlap strips or pinch the fabric more deeply at the top and bottom. A few strategically placed folds create stronger sections and make the pumpkin appear rounder.
The Stem Keeps Falling Over
Use a thicker stem, add more glue at the base, or anchor it with a small amount of floral foam or crumpled burlap tucked into the opening. Let the glue cool completely before moving the pumpkin.
The Glue Is Showing
Hide visible glue with twine, moss, a leaf, raffia, or a tiny floral embellishment. Every experienced crafter has a favorite phrase for this technique: “planned design detail.”
How to Display Your DIY Burlap Pumpkin
Your finished pumpkin is best used indoors or on a covered porch. Burlap can absorb moisture, and repeated rain can cause it to sag, stain, or lose its shape. For an outdoor display, place it under a covered entry and bring it inside during heavy rain.
Try grouping three pumpkins in different sizes. Use one burlap pumpkin, one painted pumpkin, and one natural or faux pumpkin. Add a lantern, basket, wooden crate, plaid scarf, or faux mums nearby. Pumpkin displays generally look fuller when they combine different heights, shapes, and materials instead of relying on one matching set.
For a budget-friendly fall mantel, place your burlap pumpkin on a stack of old books with a small candle holder and a few faux leaves. For a kitchen table, set it in a wooden bowl with pinecones and dried orange slices. For a tiered tray, make a mini version using a small foam ball or tiny decorative pumpkin.
Real-Life Experiences With Dollar Store DIY Burlap Pumpkins
The first time I made a burlap pumpkin, I expected a quick, tidy little fall project. What I actually got was burlap fuzz on my sweater, hot glue strings across the table, and a pumpkin that initially looked like a sad potato wearing a scarf. That is the moment most people are tempted to give up. Do not. Burlap crafts often look questionable in the middle. They need a stem, a leaf, and about two minutes of patience before they become charming.
One of the best lessons from making dollar store pumpkins is that inexpensive supplies do not have to create cheap-looking decor. The difference is usually in the details. A plain foam pumpkin wrapped in burlap can look simple, but when you add a realistic stem, a small piece of twine, and one textured leaf, it suddenly feels intentional. The goal is not to make people believe it came from a luxury home store. The goal is to make them wonder why their own dollar-store supplies are still sitting in a bag under the kitchen sink.
Another useful experience is learning when to stop decorating. It is very easy to keep adding leaves, berries, bows, glitter, buttons, signs, tiny crows, and whatever else is on the table. Before long, the pumpkin is carrying more accessories than a holiday parade float. Burlap already has visual texture, so it does not need much help. A wooden stem and a couple of leaves are usually enough.
Making several pumpkins at once is often easier than making just one. Once the glue gun is hot and the burlap is cut, it makes sense to create a small family of pumpkins. Use different sizes of bases, vary the stem styles, and mix natural burlap with cream or orange ribbon. A trio looks especially good on a mantel or front-entry table because it creates height and makes the display feel collected rather than lonely.
These projects also make good casual group crafts. They work for a fall gathering, classroom activity with adult glue-gun help, craft night, or family weekend. Everyone can start with the same basic pumpkin base and end up with something completely different. One person will make a clean neutral pumpkin worthy of a catalog photo. Another will attach a plaid bow the size of a satellite dish. Both can be adorable.
The most satisfying part is how reusable the finished decor becomes. Unlike carved pumpkins, a burlap pumpkin does not collapse, smell strange, or develop suspicious fuzzy spots after a week. Pack it carefully in tissue paper or a storage bin after Thanksgiving, and it can return next fall ready for another season of compliments. That kind of durability makes the craft feel even more worthwhile.
In the end, a dollar store DIY burlap pumpkin is not about having perfect materials or copying a photo exactly. It is about turning simple supplies into something personal, textured, and cheerful. The tiny imperfections are part of the charm. The uneven burlap folds, crooked stem, and slightly rebellious twine are proof that it was made by a real person and not assembled by a fall-decor robot in a warehouse.
Final Thoughts
Making a dollar store DIY burlap pumpkin is an easy way to add handmade fall style without overspending. With a basic pumpkin form, burlap, twine, and a few inexpensive embellishments, you can create rustic autumn decor that works in nearly any room.
Keep the process simple: build soft pumpkin sections with burlap strips, add a sturdy stem, use just enough decoration to create texture, and let the warm neutral fabric do the heavy lifting. Your finished pumpkin may not be identical to anyone else’s, and that is exactly why it will look great.