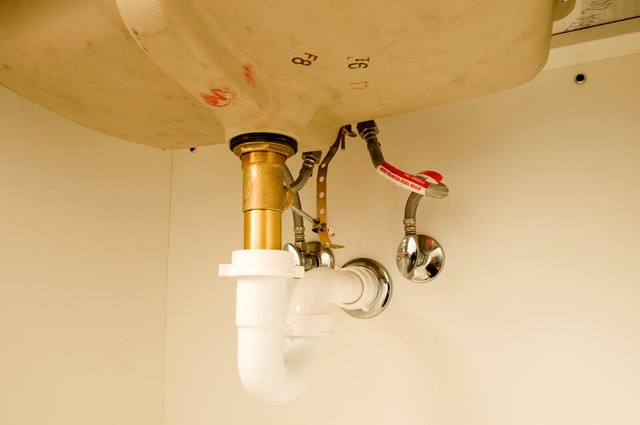
A tiny P-trap gasket can cause a surprisingly large amount of drama. Install it backward, pinch it against the pipe, or tighten the nut as though you are wrestling a submarine hatch, and that harmless-looking connection may drip all over the cabinet floor.
Fortunately, learning how to install P-trap gaskets is straightforward. The essential rules are simple: select the correct gasket size, position it in the right direction, align the pipes without strain, and tighten the slip-joint nut without overdoing it. No advanced plumbing degree is required, and your sink cabinet does not need to become an indoor swimming pool.
This guide explains how P-trap washers work, how to identify the correct orientation, how to replace worn seals, and how to fix common leaks under bathroom and kitchen sinks.
What Is a P-Trap Gasket?
A P-trap gasket, often called a slip-joint washer, is the sealing component inside a tubular drain connection. It fits around a pipe and is compressed by a threaded slip nut. As the nut tightens, the washer is pressed into the receiving fitting, forming a watertight seal around the pipe.
The curved P-trap below a sink holds a small amount of water after the fixture drains. That water creates a barrier between the room and the drainage system, helping prevent sewer gases from entering the home. Modern plumbing codes generally require plumbing fixtures to be protected by a liquid-seal trap.
On a typical sink drain assembly, slip-joint gaskets may appear at several connections:
- Between the sink tailpiece and the trap bend
- Between an extension tube and the tailpiece
- Between the trap arm and a trap adapter
- At certain connections between the J-bend and trap arm
Although many people use the words gasket and washer interchangeably, plumbing product packaging most commonly describes these parts as slip-joint washers.
How a Slip-Joint Gasket Creates a Seal
A slip-joint connection has three basic components:
- A threaded slip-joint nut
- A gasket or tapered washer
- A tubular pipe inserted into a receiving fitting
The nut does not seal the connection by itself. Its job is to push the gasket into the fitting. The compressed gasket grips the pipe and closes the space through which water might escape.
This is why adding thread-sealing tape to ordinary plastic slip-joint threads usually does not solve a leaking P-trap. Those threads provide compression rather than the actual watertight seal. The Home Depot specifically advises against using PTFE tape on white plastic trap threads and warns that overtightening can crack plastic slip nuts.
Common Types of P-Trap Gaskets
Tapered Plastic Washers
Hard or semi-flexible tapered washers are common in white polypropylene and PVC tubular drain kits. One side is broad and relatively flat, while the other narrows into a beveled or cone-shaped edge.
In a standard slip-joint connection, the broad side faces the nut, and the narrow beveled side points toward the fitting receiving the pipe. When the nut is tightened, it drives the tapered edge into the fitting.
Rubber Slip-Joint Washers
Rubber washers are more flexible and can conform well to older or slightly imperfect drain tubing. Depending on the product, a rubber washer may be tapered, rounded, or nearly flat. Examine its profile before installation rather than assuming every washer faces the same way.
When a rubber washer has a clear taper, install its narrower side toward the receiving fitting. For a flat or product-specific gasket, follow the instructions supplied with the trap kit.
Reducing Washers
A reducing slip-joint washer connects pipes of different diameters. A common example connects a 1-1/4-inch bathroom sink tailpiece to a 1-1/2-inch trap.
Many 1-1/2-inch P-trap kits include a 1-1/2-by-1-1/4-inch reducing washer for this purpose. The inner opening fits the smaller tube, while the outside fits the larger trap connection.
Which Way Does a P-Trap Gasket Face?
For the most common tapered slip-joint washer, remember this rule:
The flat or wide side faces the slip nut. The narrow beveled side faces the fitting.
The installation order on the pipe is therefore:
- Slip-joint nut, with its threads facing the pipe end
- Washer, with its broad side facing the nut
- Receiving P-trap fitting
Another way to remember the orientation is that the taper should point in the direction the pipe is being inserted. The tapered end enters the fitting and is compressed around the tubing.
Manufacturer and retailer instructions consistently describe placing the nut on the tube first, followed by the washer, with the beveled or smaller end facing the trap fitting rather than the nut.
Tools and Materials You Will Need
Most P-trap gasket replacements require only basic supplies:
- Replacement slip-joint washer in the correct size
- Replacement slip nut, if the old one is cracked or stripped
- Bucket or shallow pan
- Old towel or absorbent rags
- Channel-lock or slip-joint pliers
- Small nylon brush or old toothbrush
- Measuring tape or ruler
- Flashlight
Do not automatically reach for plumber’s putty, silicone caulk, pipe dope, or thread-sealing tape. A properly assembled tubular slip joint normally seals through gasket compression. Sealants can hide alignment problems, make future disassembly unpleasant, and turn a five-minute repair into an archaeological excavation.
How to Install P-Trap Gaskets Step by Step
Step 1: Identify the Leaking Connection
Dry the P-trap and surrounding pipes thoroughly. Run a small amount of water and observe where the first droplet forms. Water can travel along the outside of a pipe, so the wettest point is not always the source.
Wrap a dry paper towel around each connection if the leak is difficult to locate. The first towel showing moisture identifies the joint that needs attention.
Step 2: Place a Bucket Under the Trap
Set a bucket or shallow container beneath the P-trap before loosening anything. The trap holds water by design, and that water will leave the moment you remove the bend. Gravity has excellent attendance and never takes a day off.
You generally do not need to shut off the fixture’s water-supply valves because you are working on the drain side. However, make sure nobody uses the faucet while the trap is disconnected.
Step 3: Loosen the Slip-Joint Nut
Try loosening the nut by hand first. Turn it counterclockwise while supporting the P-trap with your other hand.
If the nut is stuck, use slip-joint pliers carefully. Grip the nut without crushing it. Plastic nuts can crack, while thin metal tubing can bend if treated like gym equipment.
Step 4: Remove and Inspect the Old Gasket
Slide the nut away from the connection and remove the gasket. Inspect it for:
- Cracks or splits
- Flattened edges
- Hardening or brittleness
- Distortion from overtightening
- Mineral deposits
- Incorrect sizing
Also inspect the nut, pipe, and receiving fitting. A new gasket cannot repair a cracked trap bend or a split slip nut. If the trap itself is damaged or corroded, replacement is usually more reliable than attempting to patch it.
Step 5: Clean the Pipe and Fitting
Wipe the pipe clean with a damp rag. Remove grease, soap residue, hair, old sealant, and mineral buildup from the area where the gasket will sit.
Clean the inside lip of the receiving fitting as well. Even a small piece of debris can prevent the gasket from seating evenly. Avoid aggressively sanding plastic tubing because deep scratches can create new leak paths.
Step 6: Confirm the Gasket Size
Match the new gasket to both the pipe diameter and the receiving fitting. Common residential tubular drain sizes include:
- 1-1/4 inch: frequently used for bathroom lavatory drains
- 1-1/2 inch: frequently used for kitchen sinks and larger drain assemblies
- 1-1/2 by 1-1/4 inch reducing washer: used when a smaller tailpiece connects to a larger trap
The gasket should slide onto the tube without being stretched excessively. It also should not wobble loosely around the pipe.
Step 7: Install the Nut
Slide the slip-joint nut onto the pipe first. The threaded opening must face the end of the pipe and the receiving fitting.
This step sounds painfully obvious until the nut is installed backward and you realize it only after carefully assembling everything else. Plumbing has a talent for teaching patience through repetition.
Step 8: Position the New Gasket
Slide the gasket onto the pipe after the nut. For a conventional tapered washer:
- Place the broad, flat side toward the nut.
- Point the narrow, beveled side toward the P-trap fitting.
Leave enough pipe exposed to enter the receiving fitting securely. Do not force the gasket deeply into position before the pipes are aligned.
Step 9: Insert and Align the Pipes
Insert the tailpiece or trap arm into the receiving fitting. The pipe should enter straight rather than at an angle.
Before tightening, adjust the P-trap so the joints meet naturally. The trap bend and wall arm should not be pulled sideways, twisted, or suspended under tension. Slip-joint fittings allow some adjustment, but they are not intended to drag badly misaligned plumbing into submission.
If the pipes do not overlap sufficiently, use the proper extension tube or replace an incorrectly sized component. Do not rely on the nut to hold together a connection that barely reaches.
Step 10: Hand-Tighten the Nut
Slide the washer toward the fitting, bring the nut forward, and thread the nut onto the connection. Make sure it starts straight. Cross-threading can damage the nut and prevent even compression.
Hand-tighten the nut firmly while holding the pipes in alignment. For many plastic tubular connections, hand-tightening is enough.
Step 11: Snug the Connection Only if Necessary
If the manufacturer permits tool tightening, use pliers to turn the nut only slightly beyond hand-tight. Avoid squeezing the nut aggressively.
Overtightening can deform the gasket, push it out of position, crack the nut, or split a plastic fitting. More force does not automatically produce more sealing. At some point, you are no longer fixing plumbing; you are manufacturing replacement-part sales.
Step 12: Test the Installation
Begin with a low-flow test. Run the faucet for approximately 30 seconds while watching every connection. Wipe the joints with a dry paper towel to detect small amounts of moisture.
Next, close the sink stopper and fill the basin with several inches of water. Release the stopper and allow the water to drain at once. This higher-volume test puts more demand on the connections and can reveal weaknesses that a small stream misses.
Check the installation again after several minutes and once more after normal sink use. Professional and DIY plumbing guidance commonly recommends testing the completed trap under a larger drainage load and inspecting all joints for leaks.
How to Fix a P-Trap That Still Leaks
Loosen and Realign the Connection
If the joint leaks immediately, do not keep tightening until something cracks. Loosen the nut, support the trap, and align the pipe more carefully. A gasket cannot compensate for a tube entering the fitting at a sharp angle.
Check the Gasket Direction
Remove the nut and verify that the broad side of a tapered washer faces the nut while the narrow side faces the fitting. A backward gasket may appear tight but fail to seat inside the connection.
Look for a Pinched Washer
A washer can fold, twist, or ride up the pipe when the nut is tightened. Remove it and check for uneven marks around its circumference. Replace a permanently distorted washer rather than trying to persuade it back into shape.
Verify the Pipe Size
A 1-1/2-inch gasket will not properly seal directly around a 1-1/4-inch tube unless it is specifically designed as a reducing washer. Measure the tubing instead of relying on visual estimates.
Inspect for Cracks and Corrosion
Examine the threads, nut, trap bend, and trap arm under bright light. Fine cracks in white plastic can be difficult to see until the fitting is gently flexed. Metal traps may develop corrosion or pinholes that resemble a leaking slip joint.
Replace Mismatched Components
Mixing old metal tubing, damaged plastic nuts, improvised adapters, and mystery washers from a kitchen drawer can produce unreliable connections. Use components designed to work together whenever possible.
Common P-Trap Gasket Installation Mistakes
Installing the Washer Backward
This is the classic mistake. The tapered side belongs toward the receiving fitting, not toward the nut.
Using the Wrong Washer Diameter
A washer must match the tube and fitting. Use a purpose-made reducing washer when connecting different sizes.
Applying PTFE Tape to Slip-Joint Threads
Ordinary tubular slip joints seal at the washer, not at the threads. Tape may make the nut feel tighter without addressing the actual problem.
Overtightening Plastic Nuts
Plastic slip nuts need compression, not punishment. Excessive tool pressure can crack a perfectly good fitting.
Leaving the Trap Under Sideways Pressure
If the trap must be pushed or pulled continuously to stay connected, the layout needs adjustment. Add the correct extension or reposition the trap arm instead of forcing the joint.
Reusing a Hardened Gasket
An old washer may look acceptable but no longer conform to the fitting. Replacing inexpensive gaskets during trap reassembly can prevent repeat leaks.
When Should a P-Trap Gasket Be Replaced?
Replace a slip-joint gasket when it is cracked, brittle, distorted, badly flattened, chemically damaged, or unable to reseal after the connection has been cleaned and aligned.
It is also sensible to install new washers when replacing an old trap assembly. Gaskets are inexpensive, and using fresh sealing components reduces the chance that the cabinet floor will request another meeting next week.
When to Call a Plumber
A gasket replacement is usually a manageable DIY sink repair, but professional help may be appropriate when:
- The drain pipe inside the wall is loose or damaged.
- The trap and wall connection cannot be aligned properly.
- The sink repeatedly backs up after the P-trap is cleaned.
- There is significant corrosion on metal drain piping.
- The installation appears to contain an improper trap configuration.
- Sewer odors continue after the trap is assembled and filled with water.
- Multiple fixtures are draining slowly or backing up.
Those symptoms can indicate problems beyond a simple gasket, including damaged drain piping, inadequate venting, or a blockage farther inside the drainage system.
Practical Experiences From Installing P-Trap Gaskets
After working with under-sink connections, one lesson becomes obvious: most leaking P-trap gaskets are not defective. They are victims of poor alignment, incorrect orientation, or enthusiastic tightening.
Experience 1: Alignment Matters More Than Muscle
A bathroom sink connection may look perfectly aligned from the front while sitting slightly crooked from the side. The nut threads on normally, but the gasket is compressed more heavily on one edge. Water then appears as a slow drip several minutes after the faucet is turned off.
The reliable solution is to loosen both ends of the trap, align the entire assembly, and tighten the connections gradually. Supporting the J-bend with one hand while tightening with the other helps keep the tubing centered.
Experience 2: Photograph the Assembly Before Disassembly
Before removing an existing P-trap, take two or three clear photographs. Capture the washer positions, pipe overlap, trap-arm angle, and order of the nuts.
This simple habit is especially useful when several washers fall into the bucket simultaneously. Without a photograph, three nearly identical plastic rings can suddenly feel like pieces from an advanced engineering examination.
Experience 3: Keep Several Washer Sizes Available
A replacement gasket labeled for a kitchen sink may not fit a bathroom tailpiece. Likewise, an older installation may contain a reducing connection that is not obvious until the trap is removed.
An inexpensive assortment containing 1-1/4-inch, 1-1/2-inch, and reducing washers saves extra hardware-store trips. Compare the replacement directly with the pipe and old gasket before beginning final assembly.
Experience 4: Clean Surfaces Reveal the Real Problem
Grease and soap residue can make a leak look worse while hiding its exact source. Cleaning and drying every component before reassembly makes troubleshooting much easier.
A clean pipe also lets the gasket slide and compress evenly. If water still appears, a dry paper towel wrapped around each joint quickly identifies where the first drop forms.
Experience 5: Replace Questionable Nuts Along With Washers
A new gasket will not help if the slip nut has damaged threads or a hairline crack. Plastic nuts are inexpensive, so replacing a questionable nut at the same time is often the practical choice.
This is particularly important when a previous repair left deep plier marks around the nut. Those marks suggest that someone already attempted the traditional “tighten it until it becomes someone else’s problem” method.
Experience 6: Test With a Full Basin
A connection may remain dry while the faucet runs gently but leak when a full sink drains. The sudden volume of water exposes weak seals and marginal pipe overlap.
After the initial low-flow test, fill the basin and release the stopper. Watch the trap throughout the discharge, dry the joints, and inspect them again several minutes later.
Experience 7: Avoid Temporary Sealant Fixes
Wrapping tape around the outside of a leaking joint or coating it with silicone may stop visible dripping briefly, but it does not correct a backward washer, cracked fitting, or misaligned pipe.
A slip-joint connection is designed to be removable and serviceable. Taking it apart, cleaning it, and installing the correct gasket usually produces a cleaner and more dependable repair.
Experience 8: Do Not Cut Pipe Until the Entire Trap Is Dry-Fitted
When replacing more than the gasket, assemble the complete trap loosely before cutting an extension or wall tube. Confirm that the bend sits directly beneath the tailpiece and that the trap arm reaches the wall adapter with adequate overlap.
A pipe cut too short may appear to connect, yet leave too little tubing inside the fitting for the gasket to grip reliably. Measure twice, dry-fit once more, and then make the cut.
Conclusion
Installing a P-trap gasket correctly comes down to size, direction, cleanliness, and alignment. Place the nut on the pipe first, position the broad side of a tapered washer toward the nut, point the beveled side toward the fitting, and assemble the pipes without sideways tension.
Hand-tighten the connection before reaching for pliers, and test it with both a gentle stream and a full-basin discharge. When a joint continues leaking, disassemble it and inspect the gasket, nut, pipe, and fitting rather than applying more force or covering the connection with sealant.
Done properly, this small repair can stop cabinet damage, eliminate persistent drips, and restore a reliable drain connection without requiring a major plumbing project.