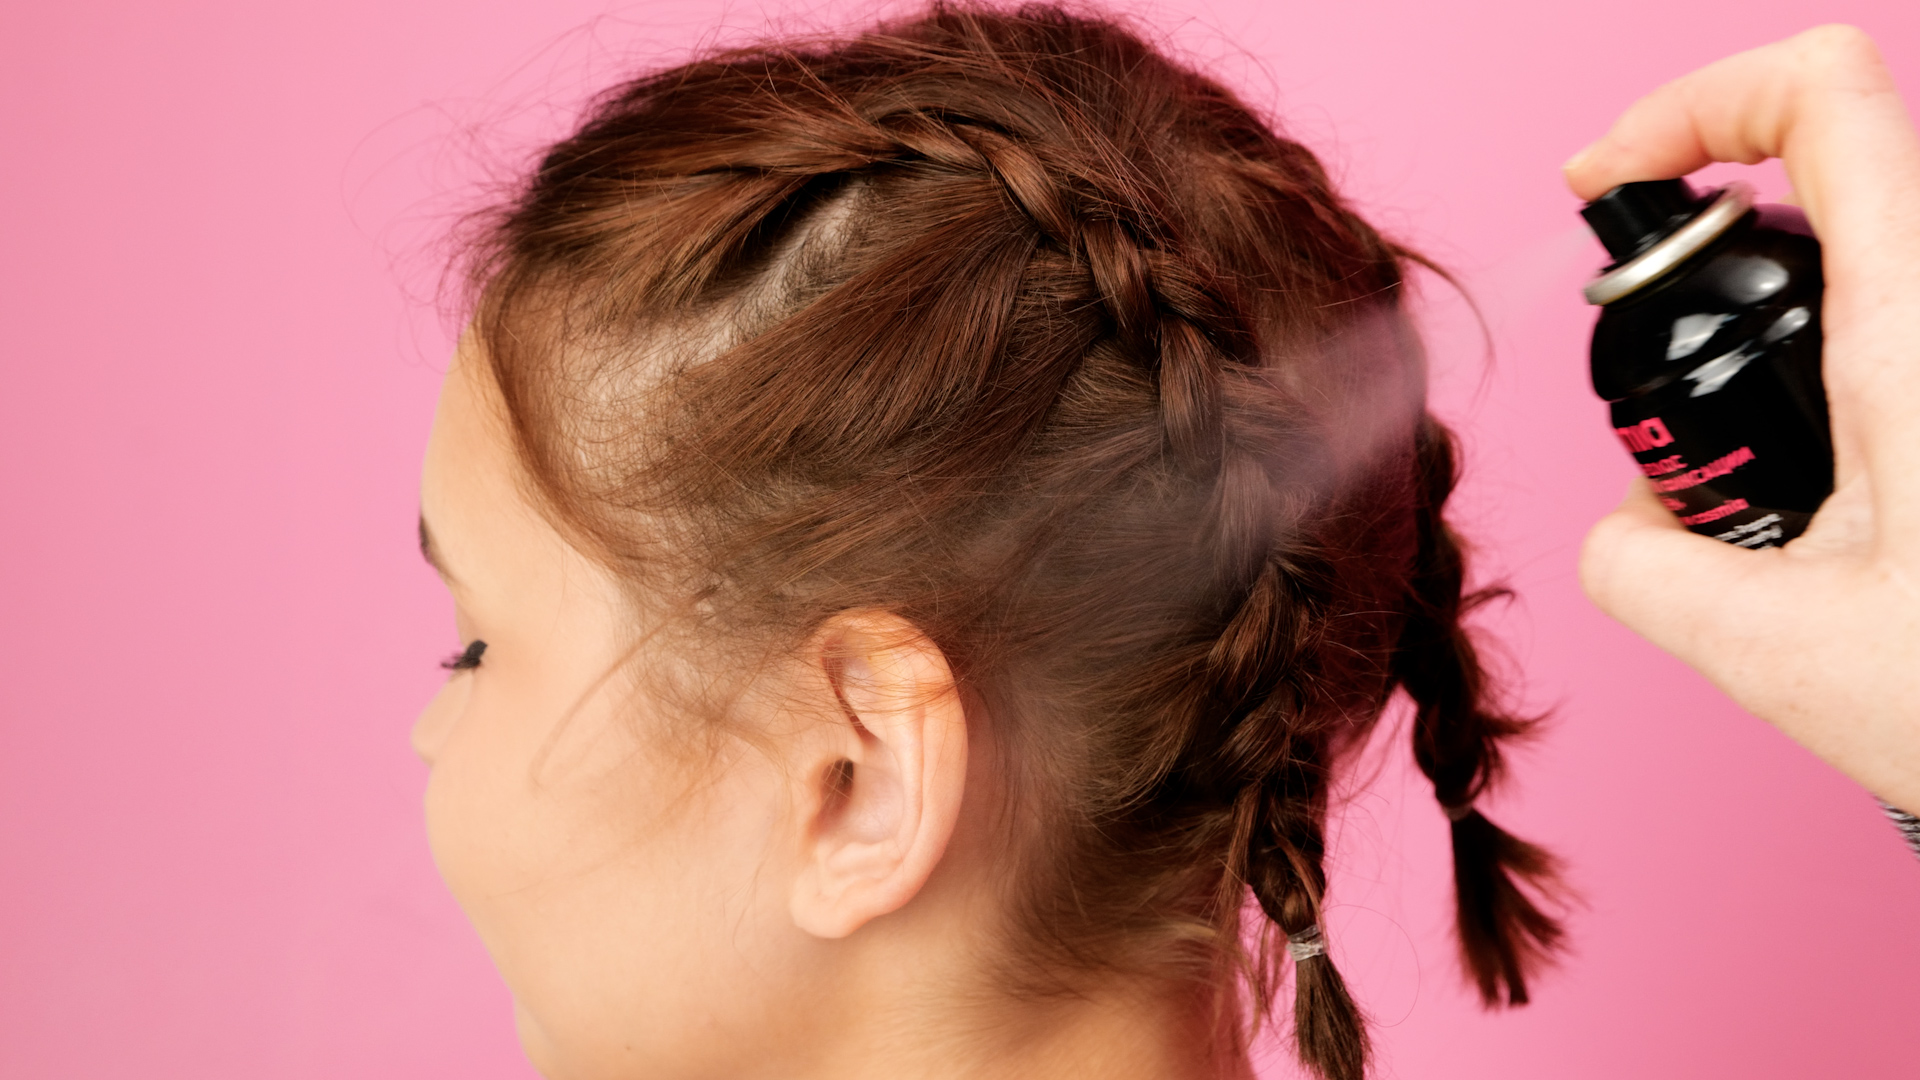
If you’ve ever looked at your bob, lob, or pixie and thought, “Cute, but absolutely not braidable,” I’m here with good news: your hair is lying to you. Short hair can absolutely be French braided. It just needs a slightly different game plan, a little patience, and the emotional stability to restart one side at least once. (Twice is still normal. Three times? You’re learning.)
This guide breaks down exactly how to French braid short hair step by step, plus the tricks that make the biggest difference when you’re working with layers, flyaways, and sections that seem determined to escape. You’ll also get troubleshooting tips, styling variations, and a long-form experience section at the end to help you understand what the process actually feels like in real lifenot just in perfect tutorial lighting.
Can You French Braid Short Hair?
Yesabsolutely. In fact, French braids can look especially cool on short hair because they create texture, shape, and structure quickly. The key is adjusting your expectations and your technique. A short French braid may not always become one long, dramatic braid down your back. Instead, it might become:
- A single crown-area French braid
- Two tight French braids (pigtail style)
- A side French braid
- A mini hairline braid
- A braid that starts French and finishes as a regular three-strand braid or pinned style
That last one is especially important for short layered cuts: sometimes the smartest move is to French braid as long as your layers cooperate, then switch to a regular braid, bun, or pinned finish. That’s not “cheating.” That’s styling.
What You’ll Need
You don’t need a salon cart full of tools. You do need a few basics that make short hair much easier to control:
- Brush or comb (for detangling and sectioning)
- Fine-tooth comb or rat-tail comb (optional, for cleaner parts)
- Small elastics (clear or hair-color matched)
- Bobby pins (short hair’s backup dancers)
- Texture spray, dry shampoo, or mousse (for grip)
- Gel, pomade, or edge control (for flyaways and sleek parts)
- Hairspray (to lock in shape)
- Mirror setup (ideally one front mirror + one hand mirror)
Before You Start: Prep Rules That Make or Break the Braid
1) Detangle first, braid second
French braiding on short hair is a lot like assembling tiny furniture with slippery screws: if you begin with tangles, everything takes longer and gets messier. Brush through your hair and remove knots before you touch a section.
2) Dry hair is usually the safest starting point
For most people, dry hair is easier to section and less fragile than wet hair. It also helps prevent breakage while you’re repeatedly crossing and adding strands. That said, some very short cuts (especially layered or freshly washed hair) can be easier to manage with a light mist of water or product for control. Think “slightly damp and workable,” not “just got out of the shower.”
3) Give clean hair some grip
If your hair is super soft, fine, or slippery, French braiding gets harder fast. Add a little texture spray, dry shampoo, mousse, or a small amount of styling product to create grip. This helps the sections stay separated and keeps the braid from loosening as you go.
4) Decide the style before you start
Short hair rewards planning. Choose one braid, two braids, or a side braid before you begin. The number of braids changes section size, tension, and how likely your shorter pieces are to stay put. In general:
- One braid: cleaner look, more classic, may expose short layers at the nape
- Two braids: easier to control on short hair, more secure, great for active days
- Side braid: ideal for uneven layers or grow-out stages
How to French Braid Short Hair: Step-by-Step
Step 1: Part your hair
Use your fingers for a softer look or a comb for a crisp part. For two French braids, part your hair straight down the middle (or slightly off-center if that flatters your cut more). For one braid, part or brush your hair in the direction you want the braid to travel.
Step 2: Start with a small section near the front
Gather a section near your hairline or crown and divide it into three equal strands: left, middle, and right. With short hair, smaller starting sections are often better because they’re easier to control and create tighter structure.
Step 3: Do the first braid stitch
Cross one outer strand over the middle, then cross the other outer strand over the middlejust like a regular three-strand braid. For a French braid, you’ll keep using the overhand pattern (outer strands cross over the center). If you go under, you’re making a Dutch braidwhich is also cute, but not the assignment.
Step 4: Add a small piece of hair from one side
Before crossing the next outer strand, pick up a small section of hair from the same side and add it to that strand. Then cross it over the middle. Keep the added sections small and fairly even so the braid doesn’t get lopsided.
Step 5: Repeat on the other side
Now add a small section from the opposite side, combine it with the outer strand, and cross over the middle. Repeat this pattern: add hair, cross over, add hair, cross over.
Step 6: Keep your sections consistent
This is where short-hair braiding either becomes art or chaos. Try to grab similar-size sections each time. Tiny uneven grabs can create bumps, sagging, or gaps. If your braid starts drifting, pause and realign before continuing.
Step 7: Stay close to the scalp
French braids look best when your hands stay close to the head, especially with short hair. If you pull the braid away from the scalp too early, you’ll lose tension and short layers will start popping out like they’re late for another appointment.
Step 8: Adjust hand position instead of fighting it
The hardest part for beginners is usually hand placement, not the braid pattern itself. If possible, transfer all three strands into one hand for a moment to free the other hand to pick up clean sections. It feels awkward at first. That’s normal. Your fingers are learning choreography.
Step 9: Switch to a regular braid (or pinned finish) when needed
Once you run out of hair to addor your shortest layers stop reaching the braid cleanlycontinue with a regular three-strand braid. If the remaining length is too short, secure the braid with a small elastic and pin loose ends into place. This is a great move for bobs and layered cuts.
Step 10: Secure and finish
Use a small elastic to secure the end. Add bobby pins anywhere short pieces stick out. Then choose your finish:
- Sleek: smooth flyaways with gel/pomade + light hairspray
- Textured: gently pull the braid edges (a.k.a. “pancake” the braid) for fullness
- Edgy/messy: leave a few pieces out intentionally and soften the shape
Short-Hair Tricks That Make a Huge Difference
Use smaller sections than you think you need
Short hair responds better to smaller additions, especially around the temples and nape. Large grabs can overwhelm the braid and cause slipping. Small sections create better texture and make the braid look more intentional.
Start with the shortest layers first
If your haircut has a lot of layers, begin on the side or area where the shortest pieces live. This helps you catch them early and braid them into the structure before they can escape.
Match your pins to your hair color
Visible bobby pins can be a style choice, but if you want a cleaner finish, use pins that blend in. Short hair often needs a few strategic pins, and color-matching keeps the style polished.
Don’t over-tighten for “security”
A braid can look neat without being painfully tight. Too much tension can make your scalp sore, flatten volume, and make braiding harder. Aim for controlled tension, not a full medieval helmet situation.
Messy can look better on short hair
This is not an excuse. It’s a strategy. Ultra-clean braids on very short hair can look stiff, while a slightly lived-in texture often looks more modern and flattering. If a few wisps stay soft around your face, that can actually improve the finish.
Common Mistakes (and Fast Fixes)
Problem: The braid gets loose at the bottom
Fix: Keep adding enough hair as you move down the head and maintain tension near the nape. Short-hair braids often loosen there first.
Problem: One side looks thicker than the other
Fix: Your add-in sections are probably uneven. Slow down and take similarly sized pieces from each side.
Problem: Flyaways everywhere
Fix: Use a bit more product at the top for short braids, smooth with hands before each crossover, and pin the stubborn pieces after securing.
Problem: I can braid other people’s hair, but not my own
Fix: Completely normal. Braiding your own hair reverses your angles and hand positions. Practice on one side only for a few sessions before trying a full style.
Problem: My hair is too short for one big braid
Fix: Try two smaller braids, a side braid, a mini hairline braid, or a crown-style braid. Short hair can still be braidedit just may need a scaled-down design.
Best French Braid Styles for Short Hair
1) Double French Braids (Best for Security)
Great for workouts, humid days, or when your hair refuses to behave. Two braids distribute the hair more evenly and usually work better than one braid on chin-length hair.
2) Side French Braid (Best for Layers)
If one side of your cut has awkward grow-out pieces, this style lets you “collect” them early and hide them in the braid.
3) Crown or Hairline French Braid (Best for Pixies and Crops)
You don’t need full-length hair to braid. A small French braid along the hairline, temple, or crown can add major style with very little length.
4) French Braid into a Bun or Pin-Up (Best for Bobs)
Start as a French braid, then switch to a regular braid or pinned bun once the layers get too short. This is one of the smartest, most flattering options for short cuts.
How to Make It Last All Day
- Use grip products before braiding (especially on fine hair)
- Keep sections even and tension consistent
- Secure with a tight small elastic
- Pin short pieces after you finish (not while panicking halfway through)
- Finish with a light mist of hairspray
- If desired, smooth edges and flyaways with a tiny bit of gel or wax
What I’ve Learned From Real-Life French Braiding on Short Hair (Experience Notes)
The biggest surprise with French braiding short hair is that success has less to do with “talent” and more to do with rhythm. The first few times, it feels like your fingers are doing taxes in the dark. You know what the braid is supposed to look like, but your hands are somehow inventing a completely different art form. Then, usually around attempt four or five, your fingers start to understand the pattern. Not perfectly, but enough that the braid begins to look intentional instead of accidental.
Another thing people don’t tell you: short hair teaches you to stop chasing perfection. With longer hair, you can hide a lot of beginner mistakes because the braid has length and weight. With short hair, every tiny inconsistency is visible. At first that feels annoying. Later, it becomes freeing. You realize a slightly imperfect French braid on short hair often looks coolermore textured, more modern, more “I know what I’m doing” than a super-tight, overworked braid.
I’ve also noticed that product placement matters way more on short hair than on long hair. If you put all your product on the ends out of habit, the top can unravel quicklyespecially with fine or layered cuts. But if you focus a little grip product near the roots and crown (where the braid starts and where tension matters most), the whole style behaves better. It’s a small adjustment that makes a huge difference.
The mirror setup is another underrated factor. Trying to learn in one bathroom mirror while twisting your neck like a confused owl is a terrible strategy. A second mirroror even using your phone camera briefly to check the backcan save you from redoing an otherwise solid braid. Short hair tends to expose the nape area, so seeing what’s happening back there really helps.
And then there’s the emotional journey of the “bad side.” Most people have one side that braids beautifully and one side that looks like it got dressed in a moving car. This is not a personal failing. It’s normal. If you’re practicing, braid your easier side first to build confidence, then do the harder side while your hands remember the motions. Over time, the gap gets smaller.
My favorite short-hair lesson, though, is this: finishing styles are your secret weapon. A French braid doesn’t have to be a full traditional braid to count. On short hair, some of the best looks happen when you French braid only partway and then pin, twist, or bun the rest. That hybrid approach is practical, flattering, and often more secure than forcing a full braid out of hair that simply isn’t long enough today. In other words, short hair doesn’t limit French braidsit just makes you more creative. And honestly, that creativity is half the fun.
Final Thoughts
If you’re learning how to French braid short hair, start small: one side braid, one clean section, one good attempt. Focus on grip, section size, and staying close to the scalp. Once your hands learn the rhythm, the style gets dramatically easier. And if your braid is a little messy the first few times? Congratulations. That’s called texture, and it’s very in.