Stainless steel is the overachiever of the kitchen. It looks sleek, plays nicely with almost every design style, and somehow manages to collect fingerprints faster than a detective at a crime scene. The good news is that cleaning stainless steel with vinegar can be simple, affordable, and surprisingly satisfying. The better news? You do not need a cabinet full of fancy sprays to make your fridge, sink, dishwasher, or range look polished again.
That said, there is one important catch: vinegar is helpful for many traditional stainless steel surfaces, but it is not right for every finish. Some coated appliances, black stainless surfaces, and specialty finishes can react badly to acidic cleaners. So before you go wild with the spray bottle like you are in a cleaning commercial, check your owner’s manual and test a hidden spot first.
This guide walks you through exactly how to clean stainless steel with vinegar in 9 practical steps, plus the mistakes to avoid, extra tips for stubborn grime, and real-world lessons that make the process easier. Let’s make your stainless steel look less “toddler touched everything” and more “magazine kitchen on a Tuesday.”
Before You Start: Know What Vinegar Can and Cannot Do
White vinegar works well because its mild acidity helps cut through greasy fingerprints, sticky residue, and hard-water film. It is especially handy on refrigerator doors, dishwasher fronts, microwave panels, stainless backsplashes, and many sinks. Used correctly, it can leave a nice, streak-free finish.
But vinegar is not a universal pass for every metal surface. If your appliance has a protective coating, fingerprint-resistant finish, black stainless coating, or manufacturer instructions that say “no acidic cleaners,” skip the vinegar. In those cases, stick with warm water, mild dish soap, and a soft microfiber cloth.
In other words, vinegar is the useful friend who can help you move a couch, but not the one you ask to rewire the whole house.
What You Need
- Distilled white vinegar
- Water
- 1 clean spray bottle
- 2 to 3 microfiber cloths
- A soft dry towel for buffing
- Mild dish soap for heavy grease, if needed
Optional extras for tougher messes include a little baking soda for stuck-on grime and a tiny amount of mineral oil or food-safe oil for polishing after the surface is fully clean and dry.
How to Clean Stainless Steel with Vinegar: 9 Steps
Step 1: Check the Finish and the Owner’s Manual
Before you spray anything, confirm that your stainless steel surface is safe to clean with vinegar. This is the most important step, and yes, it is less exciting than the actual wiping, but it matters. Some stainless steel appliances have coatings that can dull, streak, or get damaged when exposed to acidic cleaners.
Look for clues like “black stainless,” “fingerprint-resistant,” “smudge-proof,” or “premium finish.” If you see those words, pause. Check the care guide. When in doubt, use warm soapy water instead.
Example: A plain stainless steel sink can often handle a little more muscle than a coated refrigerator door. Same family, different personalities.
Step 2: Let the Surface Cool and Remove Loose Debris
If you are cleaning a stove, oven front, toaster oven, or any other heat-related appliance, make sure it is completely cool. Never apply vinegar to a hot stainless steel surface. Once it is cool, wipe away crumbs, dust, grease splatters, or loose debris with a dry or lightly damp microfiber cloth.
This prevents you from dragging grit around and scratching the finish while cleaning. Think of it as sweeping the dance floor before the real dancing starts.
Step 3: Mix a Simple Vinegar Cleaner
For routine cleaning, fill a spray bottle with distilled white vinegar. Some people use it straight; others add a small amount of water for a gentler mix. A lightly diluted solution is a safe middle ground for everyday cleaning, especially if you are cautious.
If your stainless steel is very greasy, keep a second cloth nearby with a little warm water and dish soap. Vinegar is great at breaking up residue, but thick cooking grease sometimes needs a soap assist. There is no shame in calling for backup.
Step 4: Spray a Small Section, Not the Whole Appliance
Mist the vinegar onto one small area at a time. Do not soak the entire surface and then answer a text message. Vinegar should not sit on stainless steel any longer than necessary, especially on appliance fronts. Work in manageable sections so the cleaner stays active without drying on the surface.
If you would rather be extra careful, spray the vinegar onto your cloth instead of directly onto the appliance. That method gives you more control and reduces drips around buttons, seams, or control panels.
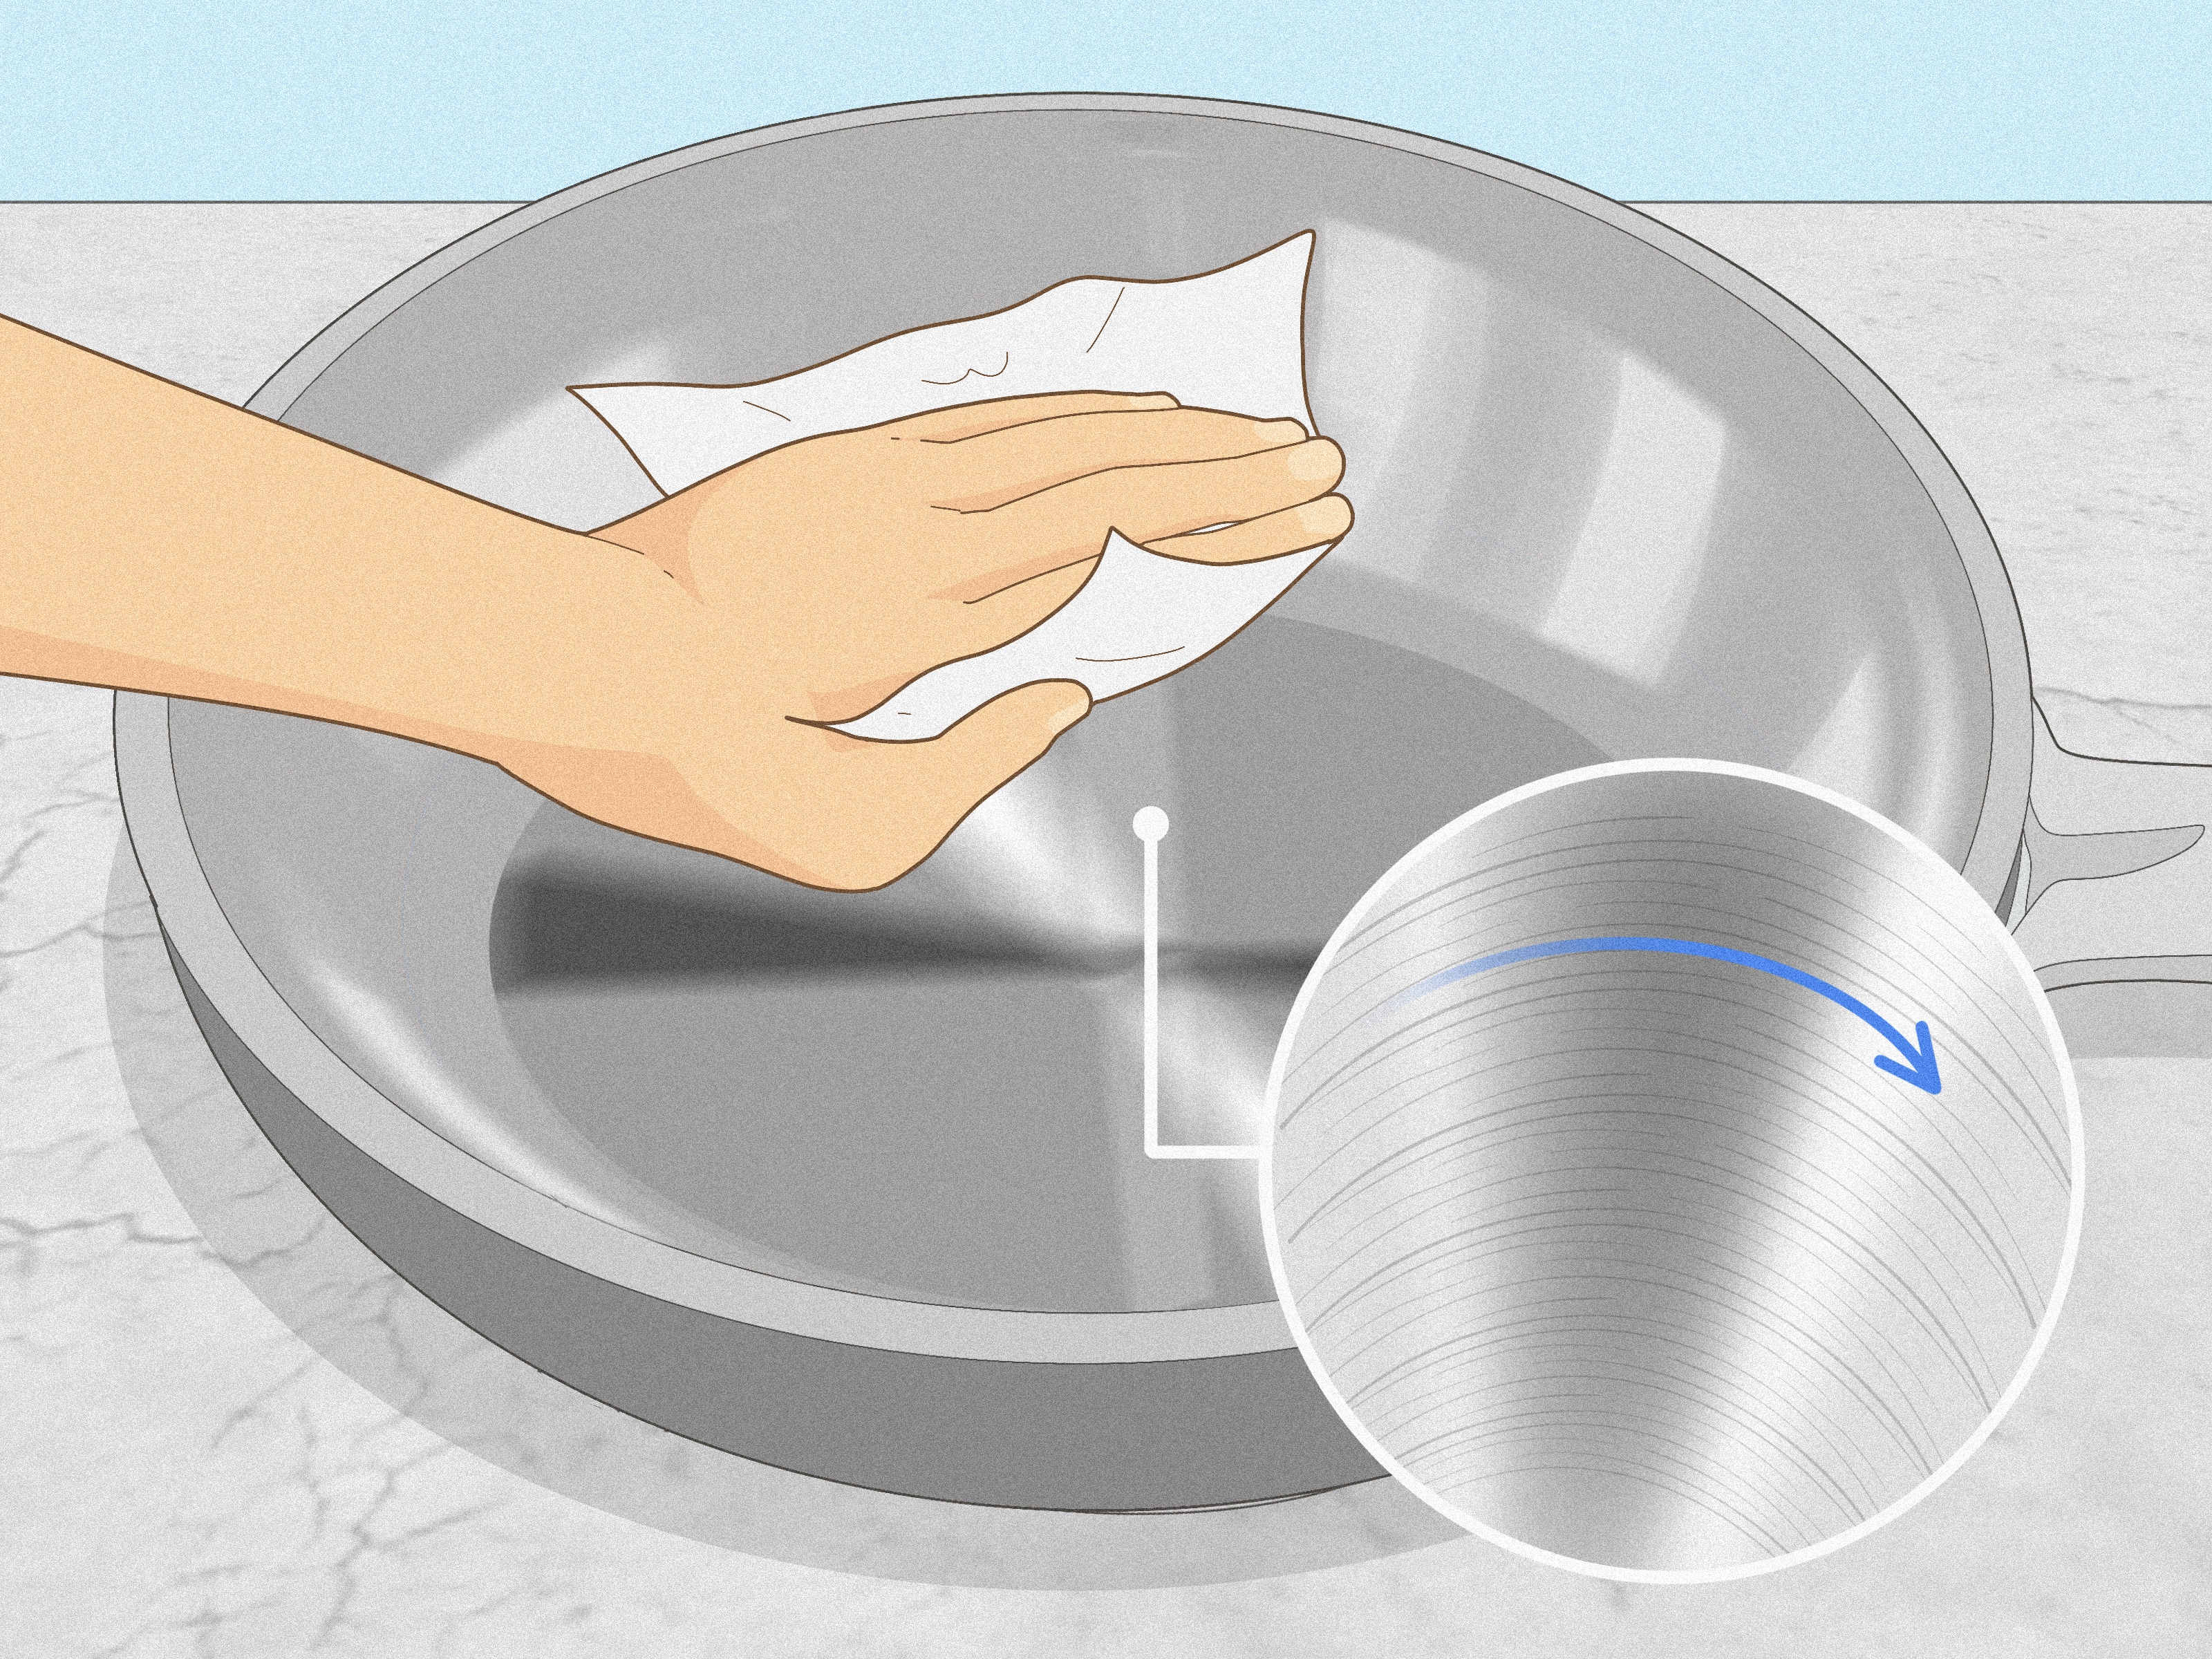
Step 5: Wipe with the Grain
This is where stainless steel gets a little dramatic. It wants to be wiped with the grain, not against it. Look closely and you will usually see faint lines running horizontally or vertically across the surface. Follow those lines as you wipe.
Wiping with the grain helps lift grime while reducing streaks and keeping the finish looking smooth. Wiping against it can leave marks, smears, or that maddening “it somehow looks worse now” effect.
Use a clean microfiber cloth and make long, even passes. No aggressive scrubbing unless you are dealing with a stubborn spot.
Step 6: Treat Stubborn Smudges or Water Spots
If fingerprints laugh in your face or hard-water spots refuse to leave, apply a bit more vinegar and let it work for a brief moment. Then wipe again with the grain. For especially stubborn residue, sprinkle a tiny bit of baking soda onto a damp microfiber cloth and rub gently, still following the grain.
Do not grab steel wool, scouring pads, or harsh powders. That is how a quick cleaning session turns into a “why did I scratch my dishwasher?” support group.
Example: On a stainless steel sink with cloudy mineral spots, vinegar can loosen the buildup. On a greasy refrigerator handle area, you may need a first pass with dish soap and a second pass with vinegar for the final shine.
Step 7: Rinse Away the Vinegar Residue
Once the grime is gone, wipe the area with a clean cloth dampened with plain water. This step matters more than many people realize. Rinsing removes lingering acidity and helps prevent residue, streaks, or long-term dulling.
If you live in a hard-water area, use filtered or distilled water for the rinse if possible. Tap water loaded with minerals can leave spots behind, which is deeply rude after all your hard work.
Step 8: Dry Thoroughly with a Clean Cloth
Now dry the surface completely with a fresh microfiber cloth or soft towel. Do not let the stainless steel air-dry. Water spots love to appear the moment you get comfortable, and dampness can leave a cloudy look that makes you question whether you cleaned anything at all.
Buff in the direction of the grain until the surface feels dry and looks even. This step is the difference between “clean enough” and “why does my fridge suddenly look expensive?”
Step 9: Polish Lightly if You Want Extra Shine
If you want a little extra gleam, add a drop or two of mineral oil or a food-safe oil to a soft cloth and buff very lightly with the grain. Less is more. You are polishing, not marinating.
This step is optional, and it is best for items like fridge doors or decorative stainless surfaces. Do not use oil near hot cooking surfaces, and do not polish over leftover grime. That only seals the mess in place like a tiny shiny monument to bad decisions.
Common Mistakes to Avoid
Using the wrong cloth
Microfiber is your best friend here. Rough towels, abrasive pads, and even some paper towels can leave lint, dull the finish, or create tiny scratches over time.
Letting vinegar sit too long
A quick wipe is helpful. A long soak on appliance finishes is not. If you use vinegar, keep it moving and rinse it off afterward.
Skipping the grain check
If you ignore the grain, you may end up creating streaks while trying to remove streaks, which feels like losing an argument to a refrigerator.
Using bleach, ammonia, or oven cleaner
Harsh cleaners can damage stainless steel, especially on appliance exteriors. Avoid chlorine bleach, steel wool, scouring powders, and ammonia-based products unless your manufacturer specifically says otherwise.
Cleaning black stainless the same way
Black stainless is not just dramatic regular stainless. It often has a special coating that can be dulled or scratched by acidic cleaners and rough cloths. Treat it according to the manufacturer’s instructions.
Where Vinegar Works Best on Stainless Steel
Vinegar cleaning tends to work especially well on:
- Traditional stainless steel refrigerator doors
- Dishwasher fronts
- Microwave exteriors
- Range hoods
- Backsplashes
- Sinks with water spots or light buildup
It is usually less ideal for specialty finishes, coated appliance fronts, and anything your manual warns against.
How Often Should You Clean Stainless Steel?
For best results, wipe high-touch stainless steel surfaces every few days or whenever fingerprints start staging a takeover. Weekly maintenance keeps grime from building into a bigger project. Deep cleaning can be done as needed, especially around handles, stove fronts, and sinks.
A quick dry microfiber wipe between full cleanings can make a big difference. Sometimes the best cleaning trick is simply not letting the mess settle in like it pays rent.
Extra Tips for a Better Finish
- Always start with the gentlest method first.
- Spot-test in a hidden area before cleaning the whole surface.
- Use separate cloths for cleaning, rinsing, and drying.
- For greasy cooking messes, begin with dish soap, then finish with vinegar.
- For hard-water marks, vinegar is more helpful than soap alone.
- Dry immediately to avoid streaks and mineral spots.
Conclusion
Cleaning stainless steel with vinegar is one of those classic household tricks that earns its reputation, as long as you use it wisely. For many traditional stainless steel surfaces, vinegar can loosen smudges, cut through residue, and restore a cleaner, brighter finish without much effort. The real secrets are simple: check the finish, work in small sections, wipe with the grain, rinse away the vinegar, and dry thoroughly.
If your appliance has a special coating or the manufacturer says no acidic cleaners, listen to the manual instead of your inner DIY cowboy. But on the right surface, this method is affordable, practical, and refreshingly low-drama. Your stainless steel may never stop attracting fingerprints altogether, but at least now you know how to fight back.
Extra Experiences and Real-World Lessons from Cleaning Stainless Steel with Vinegar
One of the most common experiences people have when cleaning stainless steel with vinegar is surprise at how fast fingerprints disappear. A fridge door that looked permanently smudged can improve in one pass when the cloth moves with the grain instead of in random circles. People often assume the product matters most, but the wiping direction is usually the secret plot twist.
Another common lesson is that too much cleaner creates more work, not less. Many first-time cleaners soak the whole appliance, only to end up chasing drips, streaks, and drying spots. A light mist on one section at a time usually works better. Stainless steel rewards restraint. It is the cat of kitchen surfaces: helpful on its own terms only.
Hard-water spots are another area where experience teaches quickly. On sinks and dishwashers, many people try soap first and get nowhere. Then vinegar enters the scene and suddenly the cloudy film starts to lift. The difference is especially noticeable in homes with mineral-heavy water. Once people see that, they often start drying sinks and appliance fronts more carefully after each use to prevent the spots from coming back.
There is also a nearly universal microfiber revelation. Plenty of people start with paper towels because they are nearby, then wonder why lint appears or the surface looks streaky. Once they switch to a clean microfiber cloth, the finish usually looks smoother and more polished. It is a small change, but it makes the job easier and the results more consistent.
Then there is the over-polishing problem. After learning that a tiny bit of oil can add shine, some people use far too much and end up with a greasy surface that attracts more dust and fingerprints than before. The better approach is a drop or two on a clean cloth, applied lightly after the surface is fully cleaned and dried. Stainless steel should glow, not feel like salad dressing.
Many homeowners also discover that handles and edges need extra attention. These spots collect skin oils, food residue, and splashes faster than broad flat panels. A refrigerator may look mostly clean from across the room while the handle area tells the true story. Focusing on these high-touch zones makes the whole appliance look cleaner without much additional effort.
Finally, experience teaches caution. Someone eventually tries vinegar on the wrong finish, such as black stainless or a coated panel, and learns that “stainless steel” is not a one-size-fits-all category. That is why the most experienced cleaners nearly always say the same thing: read the manual, test first, and do not assume every shiny metal surface wants the same treatment. It is not the flashiest advice, but it saves a lot of regret.