Wood floors are the quiet celebrities of the home. They make rooms feel warmer, brighter, and more expensive than your grocery receipt suggests. But they also have a dramatic side. Too much water? They sulk. Harsh chemicals? They lose their shine. A gritty shoe parade through the hallway? Suddenly your beautiful floor looks like it survived a tiny sandstorm.
The good news is that learning how to clean a wood floor naturally does not require a cabinet full of mystery sprays or a cleaning routine worthy of a reality show. Natural wood floor cleaning is mostly about using gentle methods, the right tools, and very little moisture. The goal is not to “soak and scrub.” The goal is to lift dust, remove grime, protect the finish, and let your floor continue being the gorgeous background character in your life.
This guide explains how to clean hardwood floors naturally, what ingredients to avoid, how to make a gentle cleaning routine, and how to handle sticky spots, pet messes, dullness, and everyday dirt without damaging your floor’s finish. Think of it as a practical, no-nonsense floor-care plan with a tiny bit of sparkle and zero unnecessary drama.
What “Natural” Really Means for Wood Floor Cleaning
When people search for natural ways to clean wood floors, they often expect a homemade cleaner made from vinegar, lemon juice, essential oils, baking soda, or a cheerful-looking mason jar. That sounds wholesome, but hardwood floors are not kitchen counters. A product can be natural and still be wrong for wood.
For wood floors, “natural cleaning” should mean three things: low moisture, gentle ingredients, and finish-safe methods. The protective finish on a wood floor is what keeps spills and dirt from sinking into the wood itself. If that finish becomes dull, etched, sticky, cloudy, or worn away, the floor becomes harder to clean and more vulnerable to damage.
So, yes, natural matters. But safe matters more. The best natural approach is usually a simple routine: dust often, vacuum correctly, damp mop lightly, spot clean quickly, and avoid acidic or oily mixtures that can leave residue or break down the finish.
Know Your Wood Floor Before You Clean It
Before mixing anything or grabbing a mop, take a minute to understand what kind of floor you have. Not all wood floors respond the same way to cleaning.
Sealed Hardwood Floors
Most modern hardwood floors have a protective surface finish, often polyurethane or a similar sealant. These floors can usually handle a lightly damp microfiber mop and a pH-neutral cleaner designed for hardwood. They should never be soaked, flooded, or steam cleaned.
Unsealed or Waxed Wood Floors
Older wood floors may be waxed, oiled, or unfinished. These floors are more sensitive to water and cleaning products. If you rub a finger across the floor and it leaves a smudgy or waxy mark, or if water darkens the wood quickly, treat the floor with extra caution. Dry cleaning methods and manufacturer-approved products are safest.
Engineered Wood Floors
Engineered wood has a real wood surface layer over a stable core. It looks like hardwood, but too much water can still cause swelling or edge damage. Clean it the same careful way: dry dust first, use a barely damp mop, and never leave puddles behind.
The Golden Rules of Cleaning Wood Floors Naturally
Wood floor care is not complicated, but it is picky. Follow these rules and your floor will reward you by not looking cloudy, sticky, or weirdly tired.
1. Dry Clean First
Dust, grit, crumbs, and pet hair should be removed before any damp cleaning. If you skip this step, your mop can drag tiny particles across the surface like sandpaper in slow motion. Use a microfiber dust mop, a soft broom, or a vacuum set to bare-floor mode.
2. Use Less Water Than You Think
A wood floor is not a tile floor wearing a fancy costume. It does not want a bucket bath. Your mop should be damp, not wet. If you see standing water, streaky puddles, or wet footprints, the mop is too wet. Wring it out until it feels almost rude how little water remains.
3. Avoid Steam Mops
Steam sounds clean, but wood floors and steam are not best friends. Heat and moisture can push into seams, soften finishes, and create long-term damage. Save the steam cleaner for surfaces that are actually designed for it.
4. Skip Vinegar on Hardwood
Vinegar is famous in natural cleaning, but hardwood floors are one place where fame does not equal fitness. Vinegar is acidic, and repeated use can dull or damage certain finishes over time. A floor may look fine after one cleaning, but the finish can slowly lose its glow. For wood floors, choose a pH-neutral cleaner or a very mild soap solution used sparingly.
5. Clean Spills Immediately
Water, juice, coffee, pet accidents, and mystery drops from “someone” should be wiped up right away. Blot, do not smear. Then follow with a slightly damp cloth and dry the area completely.
Natural Tools You Need for Wood Floor Cleaning
You do not need a cleaning closet that looks like a hardware store aisle. A few smart tools will do most of the work.
- Microfiber dust mop: Great for daily dust, pet hair, and crumbs.
- Vacuum with bare-floor setting: Helpful for dirt along baseboards and between boards.
- Microfiber mop pad: Gentle on finishes and effective with minimal moisture.
- Soft cotton cloths: Best for spills and spot cleaning.
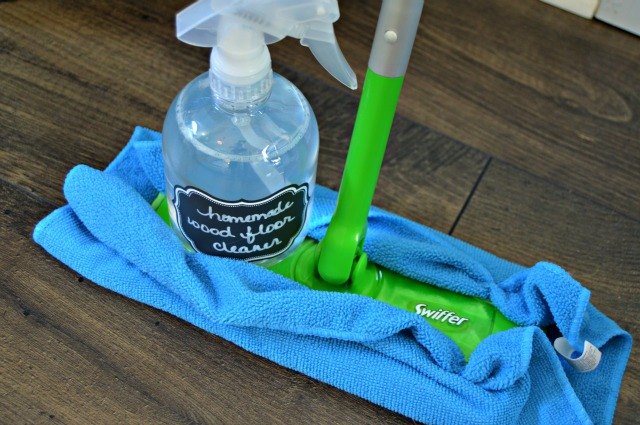
- Spray bottle: Useful because misting controls moisture better than dunking a mop in a bucket.
- pH-neutral wood floor cleaner: Choose a plant-based or low-fragrance option if you want a more natural cleaning routine.
Microfiber is the quiet hero here. It grabs dust and grime without needing harsh cleaners. It also uses less water, which is exactly what a wood floor wants.
How to Clean a Wood Floor Naturally: Step-by-Step
Step 1: Clear the Floor
Move small rugs, chairs, baskets, shoes, toys, and whatever object your household has decided belongs permanently in the hallway. This gives you a clear path and prevents dirt from hiding under furniture legs.
Step 2: Dust Mop Thoroughly
Start with a dry microfiber dust mop. Move with the grain of the wood when possible. Pay attention to corners, under cabinets, entryways, and areas around pet bowls. These spots collect more grit than they care to admit.
Step 3: Vacuum Edges and Gaps
Use a vacuum with the brush roll turned off or a bare-floor setting. A soft brush attachment works well around baseboards and under furniture. Avoid stiff rotating brushes that can scratch the finish.
Step 4: Lightly Mist the Mop or Floor
Instead of soaking a mop in a bucket, lightly mist a microfiber pad with a pH-neutral hardwood cleaner. If you are using a natural cleaner, make sure it is specifically marked safe for sealed wood floors. Do not spray so much that droplets sit on the surface.
Step 5: Damp Mop in Sections
Mop a small section at a time, moving with the wood grain. Use smooth strokes and avoid scrubbing aggressively. If the mop pad becomes dirty, replace it or rinse and wring it extremely well before continuing. A dirty mop pad simply moves grime into a new neighborhood.
Step 6: Dry the Floor
After damp mopping, go over the floor with a clean, dry microfiber pad or soft cloth. This removes leftover moisture and helps prevent streaks. Your floor should dry quickly. If it stays wet for more than a few minutes, you used too much liquid.
A Gentle Homemade Wood Floor Cleaning Option
If you prefer a DIY wood floor cleaner, keep it simple and mild. For many sealed hardwood floors, a tiny amount of gentle, unscented liquid soap in warm water can help lift light grime. The key word is tiny. This is not bubble bath night for your floor.
Simple Mild Soap Solution
Mix one teaspoon of gentle liquid soap with one quart of warm water. Dampen a microfiber cloth or mop pad with the solution, wring it out very well, and clean a small area. Immediately follow with a clean, slightly damp cloth to remove residue, then dry with a soft towel.
Always test this solution in a hidden area first, such as under a large piece of furniture. Wait until the area dries and check for dullness, stickiness, discoloration, or residue. If anything looks off, stop using it.
What Not to Use on Wood Floors
Natural does not always mean harmless. Some popular cleaning ingredients can make wood floors look worse over time.
Vinegar
Vinegar is acidic and can dull or damage the finish on hardwood floors. It may be useful for some household surfaces, but wood floors deserve a gentler plan.
Lemon Juice
Lemon juice has the same basic problem as vinegar: acidity. It may smell fresh, but it can be too harsh for protective wood finishes.
Baking Soda
Baking soda is mildly abrasive. On a wood floor, abrasive powders can create dull spots or fine scratches, especially if rubbed into grit.
Oil-Based Mixtures
Olive oil, coconut oil, and other kitchen oils can leave slippery residue. They may make a floor look shiny for a moment, but they can attract dirt and create a cloudy film. Also, nobody wants to accidentally turn the living room into a low-budget skating rink.
Ammonia and Bleach
These are too harsh for most wood floor finishes. They can discolor, dull, or weaken the protective layer. They also do not belong in a natural wood floor cleaning routine.
Steam Cleaners
Steam forces heat and moisture into seams and surface layers. Over time, that can lead to swelling, cupping, finish damage, or cloudy patches.
How Often Should You Clean Wood Floors?
A natural wood floor cleaning schedule depends on traffic, pets, weather, and whether your family treats the entryway like a shoe museum.
Daily or Every Other Day
Dust mop high-traffic areas such as kitchens, hallways, living rooms, and entryways. This takes only a few minutes and prevents grit from scratching the finish.
Weekly
Vacuum with a bare-floor setting and lightly damp mop if needed. Some homes only need damp mopping every two weeks, especially if shoes stay at the door.
Monthly
Clean under furniture, around rugs, and along baseboards. Inspect for dull areas, sticky residue, and scratches.
Seasonally
Deep clean carefully, wash reusable mop pads, check entry mats, and rotate rugs if sunlight creates uneven fading. Seasonal maintenance keeps small issues from turning into expensive refinishing conversations.
How to Spot Clean Wood Floors Naturally
Spot cleaning is where natural cleaning really shines. You do not need to mop the entire house because someone dropped one blueberry.
Sticky Spills
Place a slightly damp microfiber cloth over the sticky area for a minute to soften the mess. Wipe gently, then dry immediately. For stubborn stickiness, use a tiny amount of pH-neutral cleaner on the cloth.
Pet Paw Prints
Use a damp microfiber cloth and wipe in the direction of the grain. Dry with a second cloth. Keep a small towel near the door during rainy weather to wipe paws before they become floor art.
Scuff Marks
Try rubbing the mark gently with a clean microfiber cloth. If that does not work, use a hardwood-safe cleaner on the cloth. Avoid abrasive scrub pads.
Water Spots
Dry the area first. If the spot remains, clean gently with a barely damp cloth and dry again. Persistent white or dark marks may indicate finish or moisture damage and may need professional attention.
Natural Ways to Prevent Dirt and Damage
The best way to clean a wood floor naturally is to keep it from getting aggressively dirty in the first place. Prevention is not glamorous, but neither is scrubbing dried mud from an entryway while questioning everyone’s life choices.
Use Doormats at Every Entrance
Place mats outside and inside exterior doors. Outdoor mats catch grit before it enters. Indoor mats catch moisture and smaller particles. Shake or vacuum mats regularly so they do not become dirt storage units.
Take Shoes Off Indoors
Shoes track in sand, salt, oil, and outdoor debris. A no-shoes habit can dramatically reduce scratches and cleaning time.
Add Felt Pads to Furniture
Chair legs, table legs, and stools can scratch wood floors when moved. Felt pads are inexpensive, easy to apply, and surprisingly heroic.
Trim Pet Nails
Pets and wood floors can coexist beautifully, but long nails can leave marks. Regular trimming helps protect the finish.
Control Indoor Humidity
Wood expands and contracts with moisture changes. Keep indoor humidity reasonably stable to reduce gaps, cupping, and seasonal movement.
How to Make Wood Floors Shine Naturally
If your wood floor looks dull, the first step is not polish. The first step is removing dust and residue. Many dull floors are not damaged; they are simply wearing a thin layer of grime, old cleaner, or product buildup.
Start with a full dry cleaning. Dust mop, vacuum edges, then damp mop with a pH-neutral hardwood cleaner. Dry thoroughly. If the floor still looks dull, inspect whether the finish is worn, scratched, or cloudy. Natural cleaning cannot restore a finish that has physically worn away.
Avoid the temptation to add oil for shine. Oil can create a slick film and attract dirt. If your floor needs shine beyond routine cleaning, use a polish specifically made for your floor’s finish, or ask a flooring professional whether screening and recoating is appropriate.
Common Wood Floor Cleaning Mistakes
Using Too Much Cleaner
More cleaner does not mean more clean. It often means more residue. Follow dilution instructions and use the smallest effective amount.
Mopping With Dirty Water
If you use a bucket, change the water often. Better yet, use a spray mop with washable microfiber pads so dirty water does not return to the floor like an unwanted sequel.
Letting Rugs Trap Moisture
Wet rugs or rubber-backed mats can trap moisture against the floor. Use breathable rug pads and dry wet mats quickly.
Ignoring Manufacturer Instructions
Floor finishes vary. When in doubt, follow the manufacturer’s care guide. It is less exciting than a viral cleaning hack, but much better for your floor.
Extra Experience-Based Tips for Cleaning Wood Floors Naturally
After working through different wood floor cleaning routines, one lesson becomes obvious: the floor usually tells you when your method is wrong. If it looks hazy after cleaning, you may be using too much product. If it feels tacky, the cleaner may be leaving residue. If it takes a long time to dry, the mop is too wet. Wood floors are not silent. They complain visually.
A helpful habit is to clean in zones instead of attacking the whole house at once. Start with the dirtiest areas: entryways, kitchen paths, dining areas, and spaces where pets nap, snack, or conduct important pet business. By cleaning these zones more often, you can reduce how frequently the entire floor needs damp mopping. This saves time and limits moisture exposure.
Another practical experience is to keep two microfiber pads available during cleaning. Use one for the first pass and a second dry pad for finishing. The dry pass may seem unnecessary until you try it. It picks up leftover moisture, removes faint streaks, and leaves the floor looking more even. It is the cleaning equivalent of combing your hair before a photo.
For homes with kids or pets, a small “floor rescue kit” near the kitchen or entryway can make a huge difference. Keep a few soft cloths, a spray bottle filled with plain water, and a hardwood-safe cleaner nearby. When a spill happens, you can handle it in thirty seconds instead of discovering it later as a mysterious sticky continent.
One mistake many people make is waiting until the floor looks dirty. By then, gritty particles may already be rubbing against the finish. A fast dry mop every day or two is better than a dramatic weekly cleaning session. It is similar to brushing your teeth: small routine care beats emergency repair.
In winter or rainy seasons, entryways need extra attention. Salt, mud, and water can be especially rough on wood finishes. Place a washable mat by the door and let wet shoes dry somewhere other than directly on the wood. If you have a busy household, a simple shoe tray can prevent puddles from forming under boots and sneakers.
Sunlight is another sneaky factor. Cleaning will not fix uneven fading caused by rugs and furniture blocking UV exposure. Rotate rugs occasionally and move furniture slightly when possible. This helps the floor age more evenly and keeps one rectangle from looking like it has been living in witness protection.
Finally, remember that natural wood floor cleaning is not about making the floor smell like a citrus orchard. Strong fragrance does not equal cleanliness. A truly clean wood floor should feel smooth, dry quickly, and look clear rather than cloudy. If you want scent, use lightly scented products that are approved for wood floors, or simply open a window. Fresh air is natural, affordable, and unlikely to argue with your floor finish.
Conclusion
Learning how to clean a wood floor naturally is less about complicated homemade recipes and more about respecting the material. Wood floors need gentle care, minimal moisture, and regular dust removal. The best routine is simple: dry mop often, vacuum with the right setting, damp mop only when needed, use a pH-neutral or very mild cleaner, wipe spills immediately, and avoid harsh natural ingredients like vinegar, lemon juice, abrasive powders, and heavy oils.
With the right approach, your wood floors can stay clean, warm, and beautiful without harsh chemicals or risky internet cleaning experiments. Treat them kindly, keep them dry, and they will keep making your home look polished even on days when the laundry chair is winning.