Editor’s note: This guide is for everyday riders who want a more comfortable, efficient bike fit at home. If you have sharp pain, numbness, a recent injury, or a very expensive carbon bike that makes you nervous every time you touch a bolt, visit a professional bike fitter or local bike shop.
Adjusting your bike seat sounds simple until your knees start complaining, your hips start doing a tiny salsa dance, and your saddle feels like it was designed by someone who has never met a human pelvis. The good news? A better saddle position is often only a few small adjustments away.
Your bike seat, also called a saddle, affects pedaling power, comfort, balance, and how much pressure lands on your hands, knees, hips, and lower back. A saddle that is too low can make your knees work harder than they need to. A saddle that is too high can make your hips rock from side to side. A saddle that is tilted too far up or down can create pressure, sliding, or awkward posture. In other words, your bike seat may be small, but it has a very big personality.
This step-by-step guide explains how to adjust your bike seat height, saddle tilt, and fore-aft position using simple tools and practical checks. Whether you ride a road bike, hybrid, mountain bike, commuter bike, or indoor bike, these 13 steps will help you find a smarter starting position and fine-tune it for your body.
Why Proper Bike Seat Adjustment Matters
A well-adjusted bike seat helps you pedal smoothly without overreaching, bouncing, or folding your knees like a camping chair. Proper saddle height lets your leg extend with a slight bend at the bottom of the pedal stroke. Proper fore-aft position helps place your body weight more naturally over the bike. Proper saddle tilt keeps you supported without forcing you to slide forward or brace yourself with your arms.
Bike fit is personal. Two riders can be the same height and still need different saddle positions because of inseam length, flexibility, shoes, pedal type, riding style, crank length, and past injuries. Think of this guide as a reliable starting point, not a law carved into a carbon seatpost.
Tools You May Need
- Allen wrench or hex key, commonly 4 mm, 5 mm, or 6 mm
- Torque wrench, especially for carbon parts
- Tape measure
- Bubble level or smartphone level app
- Painter’s tape or marker
- A wall, trainer, doorway, or helpful friend for balance
- Plumb line or string with a small weight for fore-aft checks
How to Adjust Your Bike Seat: 13 Steps
1. Put the Bike on Level Ground
Start on a flat surface. A garage floor, driveway, or quiet hallway works well. If the bike is tilted, your saddle tilt and height checks can be misleading. Support the bike by leaning it gently against a wall, placing it in a trainer, or asking someone to hold the handlebar steady while you sit on the saddle.
Wear the shoes you normally ride in. Shoe sole thickness can change your effective leg reach, so adjusting the saddle barefoot and then riding in thick cycling shoes may throw off your fit.
2. Check the Seatpost Minimum Insertion Mark
Before raising the saddle, look for the minimum insertion mark on the seatpost. This mark tells you how much of the post must remain inside the frame. Never raise the seatpost above this mark. Doing so can damage the frame, bend the post, or create a very dramatic and embarrassing bike malfunction.
If your saddle needs to go higher than the mark allows, you may need a longer seatpost or a different frame size. Do not solve the problem with optimism and a loose clamp.
3. Loosen the Seatpost Clamp
Most bikes use either a quick-release lever or a binder bolt at the top of the seat tube. Open the lever or loosen the bolt just enough so the seatpost can move. You should not need to remove the bolt completely.
If the post is stuck, do not force it aggressively. A stuck seatpost may need cleaning, lubrication, or professional help, especially if the frame or post is carbon fiber. For metal posts in metal frames, a small amount of proper bicycle grease can help prevent future seizing. For carbon parts, use carbon assembly paste and the manufacturer’s torque recommendation.
4. Set a Starting Saddle Height With the Heel Method
Sit on the bike and place your heel on the pedal. Rotate the crank so that pedal is at the lowest point, around the 6 o’clock position. Your leg should be nearly straight without your hips rocking or your knee locking hard. This gives you a useful starting point.
When you move your foot into a normal riding position, with the ball of your foot over the pedal, your knee should have a slight bend at the bottom of the stroke. That small bend is important. A completely straight leg can lead to overreaching, while a deeply bent knee usually means the seat is too low.
5. Fine-Tune Knee Bend at the Bottom of the Pedal Stroke
Now pedal slowly backward while holding yourself steady. Stop with one foot at the bottom of the stroke. Look for a relaxed, slight knee bend. Many fit guidelines use roughly 25 to 30 degrees of knee bend as a starting range, but you do not need a lab coat and a geometry degree to begin. The practical question is this: can you pedal smoothly without your hips rocking?
If your hips sway side to side, lower the saddle a little. If your knees feel cramped or your thighs burn unusually fast, raise it slightly. Make small changes, usually 2 to 5 millimeters at a time. Big jumps create new mysteries instead of solving old ones.
6. Mark Your Current Seat Height
Once the height feels close, mark the seatpost with painter’s tape or a small line. This gives you a backup reference if you experiment later. You can also measure from the center of the bottom bracket to the top of the saddle along the seat tube line and write that number down.
This habit is especially useful if multiple people ride the same bike, you pack the bike for travel, or you own an indoor trainer bike that somehow becomes a family negotiation table every winter.
7. Tighten the Seatpost Clamp Correctly
After setting the height, tighten the quick release or binder bolt. The saddle should not twist when you apply moderate pressure. If your bike has a recommended torque value, use a torque wrench. This is especially important for carbon frames, carbon seatposts, and high-end components.
Overtightening can crush or damage parts. Undertightening can let the saddle slip mid-ride. Neither option is fun. Correct torque is the quiet hero of bicycle maintenance.
8. Level the Saddle Tilt
Place a bubble level or smartphone level across the saddle from nose to rear. In most cases, start with the saddle level or very close to level. A saddle tilted too far nose-up can increase pressure at the front. A saddle tilted too far nose-down can make you slide forward, forcing your hands, arms, and shoulders to hold you in place.
Some riders prefer the nose slightly down by a degree or two, especially on certain performance saddles, but dramatic angles are rarely the answer. If you feel like you are constantly sliding, the problem may be reach, saddle shape, or fore-aft position rather than tilt alone.
9. Adjust the Saddle Fore-Aft Position
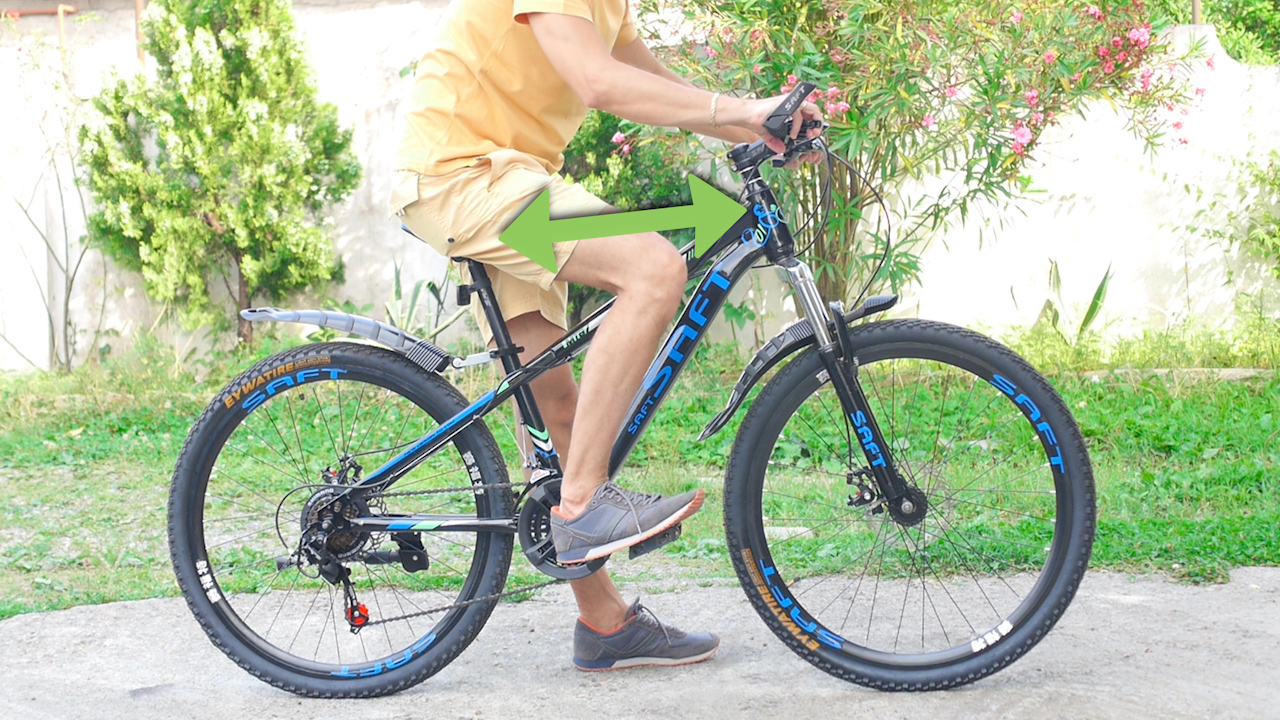
The saddle can slide forward or backward on its rails. Loosen the saddle clamp bolt or bolts under the saddle just enough to move it. A good starting check is to sit on the bike with the crank arms horizontal, one pedal forward at 3 o’clock. With your foot in normal pedaling position, the front knee area should generally line up near the pedal spindle.
This is not a perfect rule for every body or riding style, but it helps many riders avoid extreme positions. Moving the saddle forward can make the reach feel shorter and shift more weight toward the front of the bike. Moving it backward can open the hip angle and shift more weight rearward. Make small changes and test each one.
10. Keep the Saddle Centered and Straight
Stand behind the bike and check that the saddle points straight ahead, aligned with the top tube. A saddle twisted slightly left or right can make one knee track strangely, irritate your hips, or create uneven pressure. It may look harmless in the garage, but after 10 miles it can feel like your bike has developed a personal grudge.
Hold the saddle nose and gently twist it into alignment before fully tightening the clamp. Recheck after tightening, because some posts rotate slightly as the bolt clamps down.
11. Test the Fit With a Short Ride
Take a short ride of 10 to 20 minutes. Choose a route where you can pedal steadily, shift gears, brake safely, and notice your body. Do not judge the fit only while standing over the bike. A saddle position that looks perfect in the hallway may feel different under real pedaling load.
Pay attention to knee comfort, hip movement, hand pressure, and whether you naturally stay centered on the saddle. If you keep sliding forward, revisit saddle tilt and reach. If your hips rock, lower the saddle slightly. If your knees feel compressed at the top of the pedal stroke, raise it slightly.
12. Read Common Comfort Signals
Your body gives clues. Front-of-knee discomfort often appears when the saddle is too low or too far forward. Behind-the-knee discomfort can happen when the saddle is too high. Hip rocking usually points to excessive height. Numb hands may mean too much weight is being pushed forward, which can relate to saddle tilt, reach, handlebar position, or overall bike fit.
These signs are not medical diagnoses, but they are useful fit clues. If pain is sharp, persistent, one-sided, or getting worse, stop riding and speak with a qualified professional. A bike adjustment should make riding better, not turn your weekend spin into a detective story starring your kneecap.
13. Record Your Final Settings
When the bike feels good, record your settings. Write down saddle height, saddle setback, tilt, and any notes about comfort. You can save the numbers in your phone. For saddle height, measure from the center of the bottom bracket to the top of the saddle. For setback, you can measure the horizontal distance from the saddle nose to a reference point such as the handlebar or bottom bracket line.
These notes make future adjustments faster. If you change pedals, shoes, saddle, crank length, or seatpost, revisit your fit. Bike fit is not a one-time ceremony. It is more like tuning a guitar: small changes can make the whole ride feel better.
Bike Seat Height for Different Riding Styles
Road Bikes
Road cyclists often prefer a saddle height that supports efficient pedaling and a steady cadence. Because road rides can be long, even tiny errors can become noticeable. Start with a slight knee bend, level saddle, and neutral fore-aft position. If you ride aggressively with lower handlebars, be extra careful not to tilt the saddle down too much, because sliding forward can overload your hands and shoulders.
Mountain Bikes
Mountain bikers may use a slightly different setup depending on terrain. For climbing and general pedaling, proper saddle height matters just as much as it does on the road. For steep descents, many riders lower the saddle or use a dropper post so they can move their body freely. If you ride trails, make sure your seatpost clamp is tight and your saddle rails are secure before heading out.
Hybrid and Commuter Bikes
Hybrid and commuter bikes usually place riders in a more upright position. Comfort, visibility, and control matter as much as speed. Your saddle should still allow a slight knee bend at the bottom of the pedal stroke, but you may choose a position that makes stopping and starting easier in traffic. If you are a new rider, prioritize control and confidence while gradually improving pedaling efficiency.
Indoor Exercise Bikes
Indoor bikes should be adjusted with the same basic logic: slight knee bend at the bottom, level saddle, and comfortable reach. Because indoor riding is repetitive, poor saddle height can become irritating quickly. Mark your settings if other people use the same bike. Nothing says “family fitness” like discovering someone moved your saddle six inches before your morning workout.
Common Bike Seat Adjustment Mistakes
Setting the saddle low so both feet touch the ground: This may feel safe at first, but it can reduce pedaling efficiency and overload the knees. On most adult bikes, you should not expect to sit on the saddle with both feet flat on the ground while also having ideal pedaling height.
Ignoring saddle tilt: Height gets most of the attention, but tilt can make or break comfort. Begin level, then adjust only slightly.
Moving the saddle forward to fix reach: If the handlebar feels too far away, the real issue may be stem length, handlebar position, or frame size. Moving the saddle too far forward can affect pedaling mechanics.
Making huge changes: A 20-millimeter adjustment can completely change your ride. Make small changes and test them.
Forgetting to tighten bolts: Always tighten clamps securely and use proper torque when required. A slipping saddle is not a personality-building experience.
When to Get a Professional Bike Fit
A home adjustment is enough for many casual riders. However, a professional bike fit is worth considering if you ride long distances, race, have recurring pain, recently changed bikes, bought a new saddle, switched shoes or pedals, or feel uncomfortable no matter what you adjust.
A fitter can evaluate your flexibility, riding goals, knee tracking, cleat position, saddle width, handlebar reach, and posture. They can also spot problems that are easy to miss at home, such as a saddle that is the wrong shape or a frame that does not match your body proportions.
Real-World Experience: What Adjusting a Bike Seat Actually Feels Like
The first time many riders adjust a bike seat properly, the reaction is surprisingly dramatic. The bike may feel smoother, the pedals may turn more naturally, and the knees may stop sending passive-aggressive messages after every hill. The biggest lesson is that saddle adjustment is not about chasing a perfect number. It is about finding a position where your body can pedal without fighting the bike.
One common experience is discovering that the saddle was far too low. New riders often set the seat low because it feels safer to touch the ground while seated. That makes sense emotionally, but mechanically it can create a cramped pedal stroke. After raising the saddle a little, the rider may feel taller and less “folded up.” The first few starts and stops may feel unfamiliar, so it helps to practice in a quiet area. Instead of staying seated at stops, slide forward off the saddle and stand over the frame.
Another common discovery is that a tiny tilt change can feel huge. A saddle that is only a few degrees nose-down may cause the rider to slide forward all ride long. At first, the rider may blame the saddle, gloves, handlebars, or personal destiny. But leveling the saddle can reduce hand pressure almost immediately. On the other hand, a nose-up saddle can feel supportive for five minutes and unpleasant after thirty. The goal is balance: supported enough to stay centered, neutral enough to avoid pressure.
Fore-aft adjustment can also surprise people. Moving the saddle back slightly may make the pedal stroke feel stronger and calmer, especially for riders who felt crowded over the handlebars. Moving it forward slightly may help some riders reach the bars more easily, but it should not be used as the main fix for a bike that is too long. A saddle is not a steering wheel. Its first job is to support your pedaling position.
Experienced riders often make changes slowly and keep notes. They may raise the saddle 3 millimeters, ride twice, then decide whether to keep it. This patient approach beats the “garage science experiment” method, where someone changes height, tilt, tire pressure, handlebar angle, and saddle position all at once, then has no idea which change helped. Adjust one thing at a time. Your future self will thank you, probably while eating a snack after a much better ride.
Comfort also depends on the saddle itself. If your seat height, tilt, and fore-aft position are reasonable but you still feel pressure or numbness, the saddle may be the wrong width or shape. Sit bone width, riding posture, and saddle design all matter. More padding is not always better. Sometimes a firmer saddle that supports the right bones is more comfortable than a thick cushion that creates pressure everywhere else.
The best experience comes from treating bike seat adjustment as a conversation with your body. Warm up, ride, notice, adjust, and repeat. Your position may change as you gain fitness, improve flexibility, recover from injury, or switch riding styles. The perfect setting for a short neighborhood ride may not be ideal for a century ride or a rocky mountain bike trail. That is normal. Good bike fit evolves.
Conclusion
Learning how to adjust your bike seat is one of the easiest ways to improve comfort, control, and pedaling efficiency. Start with saddle height, check for a slight knee bend, keep the saddle close to level, adjust fore-aft position carefully, and test everything with a short ride. Make small changes, record your settings, and listen to your body.
A properly adjusted saddle will not turn you into a Tour de France champion overnight, but it can make your bike feel less like a medieval machine and more like something designed for actual fun. And that is the point: better fit, smoother rides, happier knees, and fewer excuses to leave the bike gathering dust in the corner.