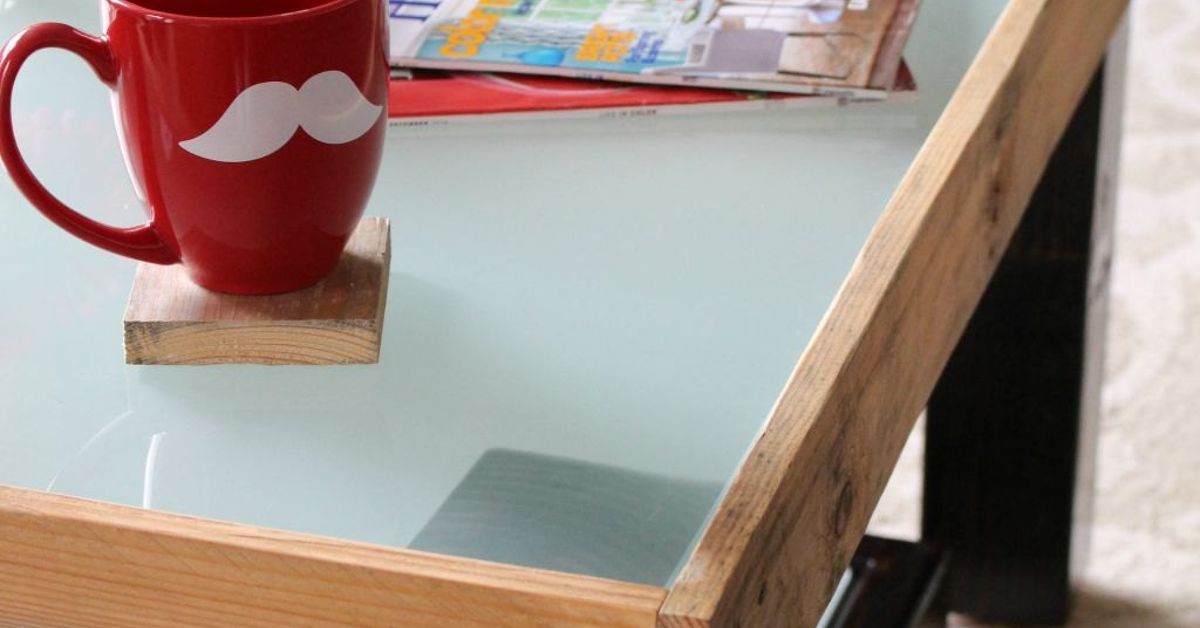
A good coffee table has one job: hold the remote, support a heroic snack plate, and make your living room look like you meant to decorate it that way. An easy pallet and glass coffee table does all three without demanding a designer budget, a master carpenter badge, or a garage full of tools that look like they belong in a superhero workshop.
This project combines the rugged charm of reclaimed pallet wood with the clean, modern look of a glass tabletop. The result is rustic but polished, casual but intentional, and just fancy enough that guests may ask where you bought it. That is your cue to sip coffee dramatically and say, “Oh, I made it.” Try not to wink too hard.
In this guide, you will learn how to choose a safe pallet, prepare the wood, add a tempered glass top, install casters or legs, finish the surface, and style your table so it looks like a smart DIY furniture project rather than something that escaped from a warehouse.
Why a Pallet and Glass Coffee Table Works So Well
The beauty of a pallet coffee table with glass top is the contrast. Pallet wood brings texture, knots, nail marks, and lived-in character. Glass adds smoothness, shine, and a visual lightness that keeps the table from looking too heavy. Together, they create a piece that fits farmhouse, industrial, boho, coastal, modern rustic, and “I just moved in and own one chair” decor styles.
Another advantage is cost. A reclaimed pallet is often free or inexpensive, and the rest of the materials are basic: sandpaper, screws, finish, rubber bumpers, optional casters, and a custom or ready-made piece of tempered glass. Compared with buying a solid wood and glass coffee table, the DIY version can save serious money while giving you a custom size and finish.
It is also beginner-friendly. You are not building a complex cabinet with drawers that must glide like butter on a summer pancake. You are cleaning, reinforcing, sanding, finishing, and topping a sturdy wood base. The main rule is simple: build it safe, build it level, and do not pretend splinters are “rustic texture.”
Before You Start: Choose the Right Pallet
Not every pallet deserves a second life as living room furniture. Some pallets have carried clean boxed goods; others have lived mysterious lives involving chemicals, leaks, and smells that no candle can defeat. Your goal is to find a pallet that is structurally sound, dry, clean, and properly marked.
Look for Heat-Treated Pallets
Many wood pallets used in shipping are marked according to international wood packaging standards. The mark may include letters such as HT, which means heat-treated, or MB, which means methyl bromide fumigation. For indoor furniture, choose pallets marked HT and avoid pallets marked MB. Heat treatment uses high temperature to reduce pest risk, while methyl bromide is a fumigant you do not want invited to coffee.
If the pallet has no mark, looks stained, smells strange, feels damp, or came from an unknown industrial site, skip it. There are plenty of pallets in the world. Do not become emotionally attached to the suspicious one behind the dumpster.
Check the Condition
Choose a pallet with straight boards, minimal cracking, and no major rot. A little roughness is fine; that is part of the charm. But broken stringers, loose boards, mold, oil stains, or heavy chemical odors are signs to walk away. For a coffee table, the base must be stable enough to support the glass, decor, books, and the occasional person who thinks every flat surface is a seat. Spoiler: it is not.
Materials and Tools You Will Need
This project can be completed with basic DIY tools. If you already own a drill, sander, and measuring tape, you are halfway there. If not, many tools can be borrowed, rented, or purchased affordably.
Materials
- One clean, heat-treated wood pallet
- Tempered glass tabletop cut to size
- Medium- and fine-grit sandpaper
- Wood screws
- Wood glue, optional
- Corner braces or mending plates, optional for reinforcement
- Four casters or furniture legs
- Rubber glass bumpers or clear silicone pads
- Wood stain, paint, or clear polyurethane
- Drop cloth and painter’s tape
Tools
- Tape measure
- Drill and drill bits
- Orbital sander or sanding block
- Hammer or pry bar for loose nails
- Screwdriver
- Clamps, optional
- Safety glasses
- Work gloves
- Dust mask
Step 1: Plan the Size and Style
Start by measuring your seating area. A coffee table usually looks best when it is about two-thirds the length of your sofa. The height should sit close to the height of your sofa seat, usually around 16 to 18 inches. Standard U.S. pallets are often around 48 by 40 inches, which can be perfect for a larger room but too bulky for a compact apartment.
If the pallet is too large, you can cut it down. For beginners, however, keeping the original pallet size is easier. Add casters for an industrial look and mobility, or install short wooden legs for a more refined furniture feel. If your living room is small, consider using half a pallet or removing boards to create a lighter, more open design.
Step 2: Clean the Pallet Thoroughly
Before sanding, brush away dirt and debris. Use a stiff brush, mild soap, and water if needed, but do not soak the wood. Pallet wood can hold moisture, and wet wood is harder to sand and finish properly. After cleaning, let the pallet dry completely in a well-ventilated area.
Inspect every board. Remove loose nails, staples, and splinters. Tap down any raised fasteners. If a board wiggles, secure it with screws. This is the stage where you transform “shipping platform” into “furniture base.” It is not glamorous, but neither is explaining to a guest why your coffee table just ate their sweater.
Step 3: Sand Like You Mean It
Sanding is where the magic happens. Pallet wood starts rough, but a good sanding session can reveal surprisingly attractive grain. Begin with medium-grit sandpaper to remove splinters and rough spots, then move to fine-grit sandpaper for a smoother finish. Focus on edges, corners, and any area where hands or knees may touch.
You do not need to make the wood glass-smooth. In fact, leaving a little texture keeps the reclaimed character. The goal is safe, touchable, and clean. Think “rustic boutique,” not “porcupine with legs.”
Step 4: Reinforce the Structure
A pallet may be strong enough for shipping boxes, but furniture needs stability in a different way. Turn the pallet over and check the underside. Add screws where boards meet support blocks or stringers. If the pallet flexes, install corner braces or mending plates underneath. This step matters because the glass top needs an even, stable base.
If you want a thicker coffee table, stack two pallets together and screw them securely from underneath. This creates built-in storage space between the pallet layers, which is perfect for books, baskets, board games, or the magazines you swear you are going to read.
Step 5: Add Casters or Legs
Casters are popular for pallet coffee tables because they match the industrial look and make the table easy to move for cleaning. Choose locking casters if the table will sit on hard flooring. Nobody wants a coffee table that slowly rolls away during movie night like it has somewhere better to be.
If you prefer a more polished style, use short furniture legs. Hairpin legs create a mid-century modern vibe, square wood legs feel farmhouse, and black metal legs lean industrial. Whatever you choose, pre-drill the holes to reduce splitting and attach each leg or caster securely.
Step 6: Finish the Wood
The finish determines the final personality of the table. A clear polyurethane preserves the natural pallet look. A warm stain makes the table feel richer and more finished. Whitewash works beautifully in coastal or cottage-style rooms. Black paint gives the base a modern industrial edge.
Apply finish in thin coats and follow the product instructions for drying time. Work in a ventilated area and protect the floor with a drop cloth. If you are using stain, test it on a hidden spot first. Pallet wood can absorb stain unevenly, which can be charming or chaotic depending on your taste and caffeine level.
Step 7: Choose the Glass Top
For a coffee table, tempered glass is strongly recommended. Tempered glass is designed to break into smaller pieces rather than large sharp shards if it fails. For horizontal surfaces such as coffee tables, safety should not be treated like an optional garnish.
Ask a local glass shop for a tabletop with polished or eased edges. Sharp glass edges are not stylish; they are just waiting to ruin someone’s afternoon. A common thickness for coffee table glass is 1/4 inch to 3/8 inch, depending on the size and support. Larger spans may need thicker glass, so tell the glass supplier your table dimensions and how the glass will be supported.
The glass should sit slightly inside the table edges or align neatly with them. If children or pets are in the home, rounded corners are a smart upgrade. Yes, rounded corners may cost a little more. So do bandages, tears, and dramatic family stories that begin with “Remember that coffee table?”
Step 8: Secure the Glass Without Overcomplicating It
You usually do not need to permanently glue the glass to the pallet. Instead, use clear rubber bumpers or silicone pads between the wood and glass. These pads help prevent slipping, reduce vibration, protect the glass from direct wood contact, and make cleaning easier.
Place bumpers at all corners and along the center supports if needed. Make sure the glass sits flat and does not rock. If the pallet surface is uneven, correct the base before adding glass. Glass is beautiful, but it does not enjoy being asked to bridge a crooked landscape.
Design Ideas for Your Pallet and Glass Coffee Table
Rustic Farmhouse
Use a medium brown stain, black casters, and simple decor such as a woven tray, a candle, and a stack of books. The glass top keeps the look clean while the wood adds warmth.
Modern Industrial
Paint the pallet matte black or charcoal gray, add black metal legs, and use clear glass with polished edges. This style pairs well with leather seating, exposed brick, metal shelving, and dramatic lighting.
Coastal Casual
Whitewash the wood and pair it with light decor: sea grass baskets, pale ceramics, and linen textures. The glass top gives the table a breezy, open look.
Boho Storage Table
Stack two pallets and use the gaps as shelves. Add baskets, plants, and colorful books. The result feels relaxed and useful without looking cluttered.
Common Mistakes to Avoid
The first mistake is using the wrong pallet. Avoid stained, moldy, chemically treated, or mystery pallets. The second mistake is under-sanding. A coffee table lives where people lounge, stretch, snack, and occasionally bump their shins. Smooth edges matter.
The third mistake is buying regular annealed glass instead of tempered glass. A coffee table should be practical, not risky. The fourth mistake is skipping rubber bumpers. Glass directly on wood can slide, rattle, or stress unevenly. Finally, do not forget scale. A huge pallet table can overpower a small room faster than a sectional sofa in a studio apartment.
Maintenance and Care
Clean the glass with a gentle glass cleaner and a microfiber cloth. Avoid soaking the wood when cleaning spills. If the finish starts to look dull, lightly clean the surface and apply another coat of clear finish as needed. Check screws, casters, and legs every few months, especially if the table is moved often.
If the wood develops small dents, embrace them. Reclaimed wood furniture is not supposed to look untouched. Every mark becomes part of the story, unless the story involves grape juice, in which case blot quickly and pretend you are calm.
Is This Project Beginner-Friendly?
Yes, an easy pallet and glass coffee table is a great beginner DIY furniture project because it does not require advanced joinery. The most important skills are measuring, sanding, drilling, and finishing. The glass should be ordered professionally rather than cut at home, especially if you want tempered glass. Once tempered, glass cannot be cut or drilled, so measure carefully before ordering.
If you are nervous, start simple: one pallet, four locking casters, clear finish, glass bumpers, and a tempered glass top. That version is affordable, attractive, and achievable in a weekend.
Experience Notes: What Building an Easy Pallet and Glass Coffee Table Teaches You
The best part of building a pallet and glass coffee table is that the project feels approachable from the first step. You do not begin with expensive lumber, complicated plans, or the terrifying sentence “cut seventeen identical pieces.” Instead, you begin with a pallet that already has structure. That makes the project less intimidating and more creative. You get to decide what to preserve, what to smooth out, and what to improve.
One of the biggest lessons is that preparation matters more than speed. At first glance, a pallet may look ready to become furniture after a quick dust-off. In reality, the cleaning and sanding stages make the difference between a table that looks intentionally rustic and one that looks like it was dragged indoors during a power outage. Sanding the edges, checking every nail, and reinforcing weak boards may not be exciting, but those steps create the quality people notice later.
Another experience many DIYers share is the surprise of how much the glass changes the final look. Before the glass goes on, the pallet base may look casual and rough. Once the tempered glass top is added, the whole piece suddenly feels designed. The glass creates a smooth usable surface, reflects light, and makes the table easier to clean. It also allows the pallet texture to remain visible, which is the entire point of using reclaimed wood in the first place.
The project also teaches practical problem-solving. Maybe one corner sits slightly lower. Maybe one board has a crack you did not notice. Maybe the stain turns darker than expected because pallet wood has the absorption habits of a thirsty sponge. None of these issues ruins the table. They simply require adjustments: a shim under a caster, an extra screw, a lighter second coat, or a design decision that turns a flaw into character.
Living with the finished table is rewarding because it becomes useful immediately. The glass top is perfect for drinks, laptops, puzzles, books, and decor trays. The pallet openings can hold baskets, blankets, or remote controls. If you install locking casters, cleaning around the sofa becomes easier. If you choose legs instead, the piece feels more like traditional furniture. Either way, the table becomes one of those rare DIY projects that looks good and earns its keep every day.
Perhaps the most satisfying experience is the conversation it creates. Guests notice handmade furniture. They ask about the pallet, the glass, the finish, and whether the project was hard. The honest answer is: not hard, but thoughtful. A successful pallet coffee table is not about perfection. It is about choosing safe materials, respecting the process, and giving old wood a second chance to be useful. And if that old wood now holds coffee, books, and a bowl of snacks with quiet confidence, that is a pretty excellent career change.
Conclusion
An easy pallet and glass coffee table is one of the smartest DIY furniture projects for anyone who wants style, function, and budget-friendly creativity in one build. By choosing a clean heat-treated pallet, sanding it properly, reinforcing the structure, adding stable legs or casters, and topping it with tempered glass, you can create a coffee table that feels custom without costing a fortune.
The secret is balance. Keep the wood rustic but safe. Keep the glass elegant but practical. Keep the design simple enough to finish, but polished enough to look intentional. In the end, you get a table with personality, storage potential, and a story far better than “I ordered it online and assembled it with an Allen wrench while questioning my life choices.”
Note: This article is based on practical DIY furniture guidance, pallet safety recommendations, glass tabletop safety principles, and common U.S. home improvement best practices.