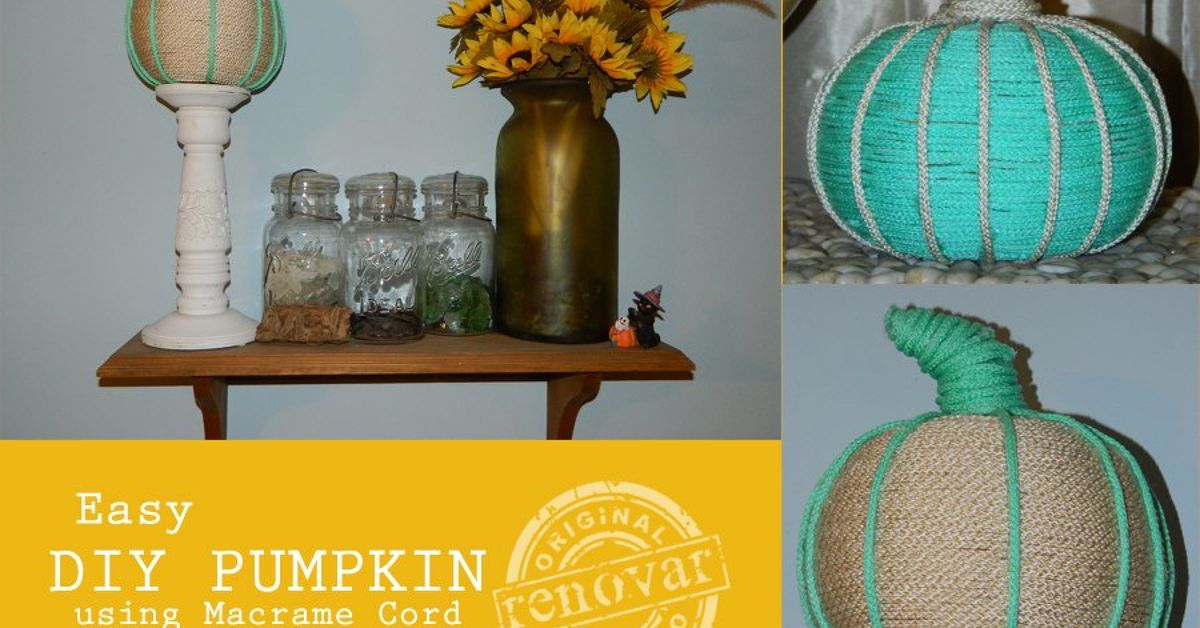
Some fall crafts whisper, “Welcome, autumn.” Others kick open the door wearing a waffle cone hat and shouting, “I am adorable and slightly sticky-looking!” These easy DIY pumpkins with macrame cord and ice cream-inspired details belong proudly in the second group. They combine the cozy texture of cotton cord, the charm of no-carve pumpkin decorating, and the playful look of ice cream conesall without melting on your table or requiring you to scrape pumpkin guts from your fingernails.
This project is perfect for Halloween, Thanksgiving, fall birthdays, classroom crafts, porch displays, dessert tables, and anyone who believes pumpkins should occasionally pretend to be mint chocolate chip. Best of all, you can make the design with inexpensive supplies: faux pumpkins, macrame cord, acrylic paint, cardboard cones, hot glue, and a little imagination. No carving knives. No complicated knots. No craft degree required.
Below, you will learn how to make decorative pumpkin “ice cream scoops,” wrap them with macrame cord for a soft handmade texture, build waffle cone bases, and style the finished pumpkins so they look like boutique fall decor instead of something that got into a fight with a glue gun. Spoiler: the glue gun usually wins unless you respect it.
Why This DIY Pumpkin Craft Works So Well
The beauty of this craft is the contrast. Pumpkins are round, rustic, and seasonal. Ice cream cones are playful, nostalgic, and sweet. Macrame cord adds texture, warmth, and that modern boho look people love in fall home decor. Put them together and you get a no-carve pumpkin craft that feels fresh but still cozy.
Unlike carved pumpkins, these DIY pumpkins last longer because they are made with faux pumpkins or craft pumpkins. That means you can pack them away after fall and bring them back next year, like tiny seasonal celebrities making their grand comeback. They also work indoors, where real carved pumpkins can become mushy little science experiments faster than anyone wants to admit.
Supplies You’ll Need
Before you begin, gather everything on a covered table. A sheet of cardboard, kraft paper, or an old baking tray will protect your surface from paint and hot glue drips.
Basic Materials
- Small faux pumpkins or craft pumpkins
- Natural, cream, orange, or pastel macrame cord
- Cardboard cones, paper-mache cones, or small terracotta pots
- Acrylic paint in ice cream colors
- Brown paint or marker for chocolate chips and fudge
- Hot glue gun and glue sticks
- Scissors
- Paintbrushes
- Pencil or chalk marker
- Optional: wooden beads, felt leaves, twine, cinnamon sticks, faux cherries, glitter, or sealant
Best Cord for the Project
For a clean, soft look, use 3mm or 4mm cotton macrame cord. Thin cord creates delicate lines and is easier to bend around small pumpkins. Thicker rope gives a chunky farmhouse look but can be harder to glue around tight curves. If you want a rustic style, jute twine works beautifully, though it sheds a bit. Consider that its charming way of saying, “I live in a barn now.”
Step-by-Step: How to Make DIY Macrame Cord Ice Cream Pumpkins
Step 1: Choose Your Pumpkin Shape
Start with a small or medium faux pumpkin. Round pumpkins look like classic scoops of ice cream, while squat pumpkins look more like soft-serve that had a long day. White craft pumpkins are easiest to paint, but orange pumpkins can work too if you apply a primer or two coats of acrylic paint.
Remove the plastic stem if it comes off easily. If the stem is fixed, leave it and turn it into a cherry, whipped cream peak, or decorative topper later.
Step 2: Paint the Pumpkin Like an Ice Cream Scoop
Paint your pumpkin in your favorite ice cream “flavor.” Try soft pink for strawberry, pale green for mint chocolate chip, creamy white for vanilla, tan for caramel, or light orange for pumpkin spice. Let the first coat dry completely before adding a second coat. Thin coats look smoother than one thick coat, and they reduce brush marks.
Once dry, add details. Use a small brush or marker to create chocolate chips, sprinkles, cookie crumbs, or a fudge drip. For a realistic drip, paint uneven brown curves around the top ridges of the pumpkin and pull a few lines downward. Nature may not have intended pumpkins to wear hot fudge, but here we are, improving the universe.
Step 3: Add Macrame Cord Texture
Cut several pieces of macrame cord long enough to run from the top center of the pumpkin to the bottom center. Apply a thin line of hot glue along one pumpkin groove, then press the cord into place. Continue around the pumpkin, following the natural ridges. The cord emphasizes the pumpkin shape and gives the scoop a soft, handmade finish.
If you prefer a wrapped look, spiral the cord around the pumpkin from top to bottom instead. Keep the rows close together and add small dots of glue every inch or so. This method creates a cozy rope pumpkin effect. It is slower, but the result looks polished and expensive, which is delightful because the supply list probably cost less than your last coffee order.
Step 4: Make the Waffle Cone Base
Use a cardboard cone, paper-mache cone, or upside-down terracotta pot as the base. Paint it a warm tan or caramel brown. Once dry, create the waffle pattern with thin macrame cord, twine, or even raised lines of hot glue.
To make the lattice, glue diagonal strips of cord across the cone in one direction, spacing them evenly. Then add a second layer diagonally in the opposite direction. The result should look like a waffle cone. If the lines are not perfect, relax. Real waffle cones are not applying for architecture school either.
Step 5: Attach the Pumpkin Scoop
Test the balance before gluing. If your pumpkin sits securely on the cone, add a generous ring of hot glue around the top edge of the cone and press the pumpkin in place. Hold it steady for 30 to 60 seconds while the glue cools. For heavier pumpkins, insert floral foam inside the cone or glue a cardboard disk across the top for extra support.
If you want a tabletop display, glue the cone to a small wood slice, saucer, or sturdy cardboard base. This keeps your pumpkin ice cream cone from tipping over every time someone walks by with enthusiasm.
Step 6: Add the Finishing Details
Now comes the fun part. Paint the stem red to resemble a cherry, glue on a wooden bead, add faux whipped cream made from white felt, or sprinkle on tiny cut pieces of colored paper. A cinnamon stick stem creates a warm fall scent, while a felt leaf makes the design look more like a pumpkin again.
For a “double scoop” pumpkin, stack two small faux pumpkins on one cone. Use hot glue between the pumpkins and make sure the bottom cone is wide enough to handle the weight. This version is especially cute for fall birthday parties, candy tables, and Halloween dessert bars.
Design Ideas for Different Styles
Boho Neutral Pumpkin Cone
Use cream macrame cord, white pumpkins, tan cones, and natural wooden beads. Add a few dried leaves or pampas grass pieces around the base. This style looks beautiful on a mantel, entryway table, or Thanksgiving buffet.
Kid-Friendly Sprinkle Pumpkin
Paint the pumpkin pink, mint, or vanilla white. Add paper sprinkles, pom-poms, or foam stickers. Use low-temperature glue with adult supervision or craft glue for younger children. The final pumpkin looks cheerful, bright, and just silly enough to become the favorite decoration in the house.
Farmhouse Rope Pumpkin
Wrap the entire pumpkin in cotton rope or jute twine, then place it on a simple kraft paper cone. Use a cinnamon stick as the stem and tie a small bow around it. This version skips the bright ice cream colors and leans into cozy fall texture.
Halloween Sundae Pumpkin
Paint the scoop black, purple, orange, or slime green. Add candy eyes, bat cutouts, spider charms, or glow-in-the-dark paint. The waffle cone can be painted black with silver cord for a spooky bakery look. It is cute, creepy, and fully prepared to attend a tiny pumpkin costume party.
Common Mistakes and Easy Fixes
The Cord Keeps Lifting
Use smaller dots of hot glue more frequently rather than one long strip. Press the cord gently with a craft stick until the glue cools. If your pumpkin has a slick plastic surface, lightly sand the area first so the glue grips better.
The Paint Looks Streaky
Apply two or three thin coats instead of one heavy coat. Let each coat dry fully. A foam brush often gives smoother coverage on faux pumpkins than a bristle brush.
The Cone Tips Over
Make the base heavier. Glue the cone to a wood round, small plate, or square of painted cardboard. You can also add dried beans, rice, or stones inside the bottom of the cone before sealing it.
The Waffle Pattern Looks Uneven
Mark light pencil lines before gluing the cord. Start with the center diagonal line, then work outward on both sides. But remember: handmade charm is part of the project. A slightly wonky cone still deserves love and maybe a sprinkle.
Safety Tips Before You Start
Hot glue is useful, but it is not shy about reminding you that it is hot. Work in a clean, dry, well-ventilated area. Keep the glue gun upright on its stand when not in use, place cardboard underneath to catch drips, and never touch the heated nozzle or fresh glue. Children should be supervised closely, and younger crafters can help with painting, sprinkles, and design choices while an adult handles the glue gun.
If you want a slower but safer option, use tacky craft glue for cord and decorations. It takes longer to dry, but it gives you more time to adjust the design. That is helpful if you are crafting with kids, pets nearby, or your own two hands behaving like they have never met before.
How to Display Your DIY Pumpkin Ice Cream Cones
These pumpkins are small enough to fit almost anywhere but charming enough to become the star of your fall decor. Place three in a row on a mantel, style one on a tiered tray, or use them as place cards for a Thanksgiving table. You can write names on small paper flags and tuck them into the top like dessert-shop labels.
For a porch display, use weather-resistant faux pumpkins and seal the paint with clear acrylic spray. Keep them under a covered area to protect the cord from rain. Cotton macrame cord looks gorgeous, but it does not dream of becoming a wet noodle.
For parties, create a “pumpkin ice cream shop” theme. Use different pumpkin flavors, label each one, and arrange them in a wooden crate or cone holder. Add candy corn, mini lights, faux leaves, and a chalkboard sign that says “Fresh Scoops of Fall.” It is festive, unexpected, and guaranteed to make guests ask, “Wait, did you make those?” That is your cue to look humble while absolutely not being humble.
Budget-Friendly Tips
You do not need expensive materials to make this project look good. Dollar stores, craft clearance aisles, thrift shops, and leftover supplies are your friends. Old faux pumpkins can be repainted. Scraps of macrame cord can become waffle lines. Cardboard from packaging can be rolled into cones. Even leftover yarn can work if you do not have cord.
To create a high-end look, stick to a tight color palette. Cream, tan, soft orange, muted green, and warm brown always look elegant. If you prefer bright colors, go all in with candy-shop energy: pink, mint, lavender, chocolate, and rainbow sprinkles. Confidence is the secret ingredient. Well, confidence and enough glue sticks.
My Real-Life Experience Making Easy DIY Pumpkins With Macrame Cord & Ice Cream
The first time I made a pumpkin ice cream cone with macrame cord, I was fully convinced it would take 20 minutes. This was ambitious, adorable, and completely false. The first pumpkin took closer to an hour because I kept changing my mind about the flavor. Was it vanilla? Was it cinnamon? Was it pumpkin spice with a dramatic fudge drizzle? At one point it looked like a potato in a party hat. But after the second coat of paint and a few careful cord lines, the little thing suddenly became charming.
What surprised me most was how much the macrame cord changed the look. A plain painted pumpkin is cute, but adding cord along the ridges made it feel intentional and handmade. It gave the pumpkin shape more depth and made the scoop look soft, almost like textured gelato. The natural cotton color also toned down the bright paint, which helped the whole piece feel more like home decor and less like a school art project that escaped the backpack.
The cone was the trickiest part. My first waffle pattern looked like it had been drawn during an earthquake. The solution was simple: I marked the diagonal lines lightly with pencil before gluing. Once I did that, the cord lattice looked much cleaner. I also learned not to stretch the cord too tightly around the cone because it can pull loose as the glue cools. Gentle tension works better. Crafting, apparently, rewards calm behavior. Rude but true.
Another helpful lesson: balance matters. A small pumpkin on a tall cone can become top-heavy, especially if the pumpkin is made of dense foam. I fixed this by gluing the cone to a small wood slice. It instantly looked more finished and stopped wobbling. For a party centerpiece, I would definitely make bases for every cone. Nobody wants a dessert-themed pumpkin toppling into the dip.
My favorite version ended up being a mint chocolate chip pumpkin with tiny brown paint marks, cream cord, and a red wooden bead cherry. It looked cheerful without being too childish. The farmhouse version with jute twine and a cinnamon stick stem came in second because it smelled faintly cozy and looked great beside candles and dried leaves.
The best part of this project is that it welcomes imperfection. If the fudge drip is uneven, it looks more realistic. If the cord curves slightly, it adds handmade character. If the cone is not perfectly symmetrical, congratulationsyou have created artisanal waffle energy. This is the kind of DIY that lets you relax, experiment, and laugh a little when things go sideways.
After making a few, I would recommend preparing several pumpkins at once. Paint all the base colors first, let them dry, then move to cord and cone assembly. It saves time and helps the set look coordinated. I would also keep the designs simple for the first batch: one vanilla, one strawberry, one mint chip. Once you understand the process, try double scoops, Halloween colors, glitter toppings, or personalized name-tag cones.
In the end, these easy DIY pumpkins with macrame cord and ice cream details are more than just cute fall decorations. They are conversation starters, party props, and a low-stress way to make your home feel festive. They are also proof that pumpkins can be many things: spooky, elegant, rustic, and occasionally dessert.
Conclusion
Easy DIY pumpkins with macrame cord and ice cream-inspired cones are a creative twist on classic fall decorating. They are no-carve, reusable, budget-friendly, and endlessly customizable. Whether you prefer neutral boho pumpkins, bright sprinkle-covered scoops, rustic rope pumpkins, or spooky Halloween sundaes, this craft gives you plenty of room to play.
The key is simple: start with a lightweight faux pumpkin, paint it like your favorite ice cream flavor, add macrame cord for texture, build a sturdy waffle cone base, and finish with details that match your fall style. The result is a handmade decoration that looks sweet, cozy, and just unexpected enough to make people smile.
Note: These DIY pumpkins are decorative only. Use faux pumpkins and craft cones for best results, and always supervise children when hot glue, scissors, or small embellishments are involved.