A DIY wooden dog or baby gate sounds like one of those weekend projects that should take “just an afternoon,” which in real life means one trip to the hardware store, one second trip because you forgot hinges, and one heroic moment where you finally find the drill bit hiding in a coffee mug. Still, this is one of the most useful home projects you can build. A custom wood gate can keep a curious dog out of the kitchen, create a safer play zone, block a hallway, or make an awkward doorway look less like a plastic barricade and more like part of the house.
But let’s be clear from the first screw: if you are building a gate for a baby or toddler, safety comes before style. A homemade gate is not the same as a professionally tested, certified child safety gate. For stairs, especially the top of stairs, a certified hardware-mounted baby gate is the smarter and safer choice. A DIY wooden gate is best used for pets, room-to-room separation, low-risk spaces, or decorative barriers where there is no fall hazard.
With that important grown-up warning out of the way, let’s build something sturdy, attractive, and practical. This guide covers planning, materials, measurements, design options, installation tips, finishing ideas, and real-life lessons from the “measure twice, mutter once” school of DIY.
Why Build a DIY Wooden Gate Instead of Buying One?
Store-bought gates are convenient, and for baby safety they are often the best route. But they do not always fit older homes, extra-wide openings, narrow doorways, angled stair posts, baseboard trim, or that mysterious hallway width that seems designed by someone who hated standard measurements.
A custom wooden dog or baby gate gives you more control over the size, style, and finish. You can match your trim, stain it to coordinate with your floors, paint it white for a farmhouse look, or build a modern slatted design that does not scream “temporary chaos lives here.”
Good Reasons to Build Your Own Gate
A DIY gate makes sense when you need a custom width, want a permanent-looking design, prefer wood over plastic or metal, or are building a pet barrier for a doorway, mudroom, laundry room, deck entrance, or kitchen opening. It is also a satisfying beginner woodworking project because the basic structure is simple: frame, slats, hinges, latch, finish, install.
For dogs, the goal is usually control and convenience. For babies, the goal is safety, supervision, and reducing access to hazards. Those goals overlap, but they are not identical. A strong gate for a golden retriever is not automatically safe for a climbing toddler with the determination of a tiny mountain goat.
Safety First: Dog Gate vs. Baby Gate
Before choosing wood, hinges, or a cute latch that looks like it belongs on a cottage pantry, decide who the gate is for.
If the Gate Is for a Dog
A pet gate should be tall enough that your dog cannot jump it, strong enough that your dog cannot push it open, and smooth enough that paws, collars, or curious noses will not get caught. Small dogs may need tighter spacing between slats. Large dogs need stronger hinges, better wall attachment, and a latch that does not pop open when bumped.
If the Gate Is for a Baby or Toddler
A baby gate needs a much stricter approach. Avoid horizontal rails or ladder-like designs that invite climbing. Use vertical slats, keep openings narrow, round over sharp edges, avoid pinch points, and install a latch that requires adult-level coordination. The gate should not swing over stairs, should not have a gap large enough for a child’s head or body, and should not rely on weak drywall anchors alone.
Most importantly, do not use a homemade wooden gate at the top of stairs. That location needs a properly tested, hardware-mounted child safety gate installed according to the manufacturer’s instructions. DIY pride is wonderful. Gravity is undefeated.
Where a DIY Wooden Gate Works Best
The safest and most practical locations for a DIY wooden dog or baby gate are level-floor openings such as kitchen entrances, hallways, laundry rooms, mudrooms, playrooms, home offices, and pet zones. It can also work at the bottom of stairs for a pet barrier, but baby safety still calls for extra caution and a certified gate when stair access is involved.
For renters, a freestanding pet gate may be better than a wall-mounted build, but freestanding gates are not appropriate for babies who can pull, climb, or push. For homeowners, a hinged wooden gate mounted into studs or solid trim offers the cleanest look and strongest performance.
Planning Your DIY Wooden Dog or Baby Gate
Good planning prevents the gate from becoming a crooked wooden apology. Start with the opening. Measure the width at the top, middle, and bottom because walls are often less square than they look. Use the narrowest measurement as your guide, then leave room for hinge clearance and latch clearance.
Recommended Basic Measurements
For a pet gate, height depends on the animal. A small dog may only need a 24-inch gate, while a larger dog may require 30 to 36 inches. For a child barrier, taller is better, but again, homemade gates should not replace certified child safety products in risky areas. A common DIY height range is about 30 to 36 inches for an indoor hinged wooden gate.
For vertical slats, keep spacing tight. A conservative approach is to keep open spaces under 3 inches. Also keep the bottom gap small enough that a child or pet cannot crawl under, but high enough that the gate clears rugs and uneven flooring. Around 1 inch to 2 inches is often practical for interior pet use, depending on the floor.
Tools and Materials
This project can be built with common lumber and basic tools. If you are new to DIY or under 18, work with an experienced adult when using saws, drills, sanders, or other tools. Safety glasses are not a fashion statement, but neither is a wood chip in the eye.
Materials
- 1×3 or 1×4 boards for the outer frame
- 1×2 boards or square dowels for vertical slats
- Wood screws or pocket hole screws
- Wood glue
- Two or three sturdy hinges
- Child-resistant latch or pet-safe gate latch
- Mounting board, if attaching to drywall beside trim
- Wood filler
- Sandpaper in medium and fine grits
- Paint, stain, polyurethane, or water-based clear coat
Tools
- Tape measure
- Pencil
- Square
- Saw or miter saw
- Drill and bits
- Sander or sanding block
- Clamps
- Level
- Stud finder
Choosing the Best Wood
Pine is affordable, easy to cut, and widely available. Poplar is smoother and takes paint beautifully. Oak, maple, or birch can make a stronger and more furniture-like gate, but they cost more and may be harder to work with. Avoid rough, splintery, warped, or pressure-treated lumber for indoor baby or pet gates.
For indoor use, select straight boards with minimal knots. Hold each board at eye level and look down its length. If it looks like a ski jump, put it back. Warped boards make the gate harder to square and more likely to rub, sag, or latch poorly.
Design Options for a Wooden Gate
Simple Vertical Slat Gate
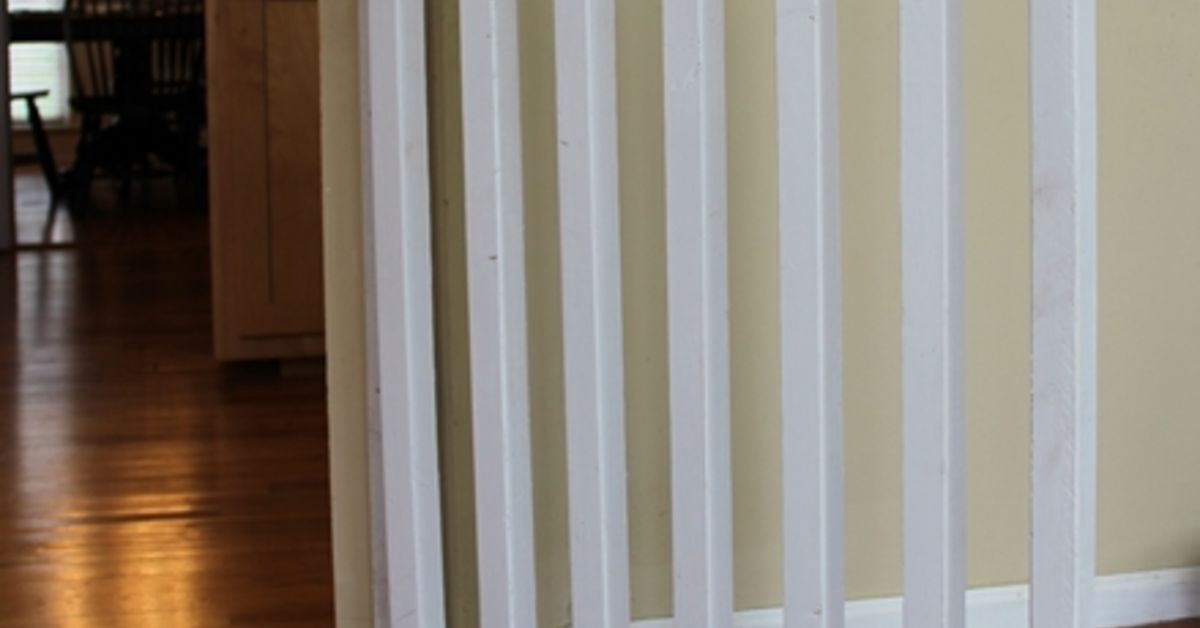
This is the best all-around design. It has a rectangular outer frame with vertical slats inside. It is clean, classic, and safer than a design with horizontal bars. For a baby-friendly appearance, keep the top edge smooth and avoid decorative cutouts.
Modern Slatted Gate
A modern slatted gate uses narrow vertical strips with even spacing. It looks polished and works well in contemporary homes. The trick is consistency. Use a spacer block while installing slats so the gaps stay even from left to right.
Farmhouse X-Style Gate
An X-style gate looks charming, especially in rustic or farmhouse interiors, but it is better suited for pets than babies. Diagonal and horizontal boards can create footholds, and determined toddlers may view them as a gym membership.
Solid Panel Gate
A solid panel gate offers privacy and prevents paws or toys from poking through, but it can be heavier. Use quality hinges and check that it swings smoothly. Solid panels are especially useful for dogs who get overexcited when they can see what is happening on the other side.
Step-by-Step: How to Build a DIY Wooden Dog or Baby Gate
Step 1: Measure the Opening
Measure the opening width in three places: top, center, and bottom. Measure the height you want the gate to be. Decide whether the gate will sit inside the opening or overlap the opening slightly. Most hinged gates work best when mounted to a sturdy side board or door frame and allowed to swing open like a small door.
Step 2: Plan for Clearance
Leave a small gap on the hinge side and latch side so the gate can swing without rubbing. A total clearance of about 1/2 inch to 3/4 inch is common, but your hinge style and wall condition may require adjustment. Do not make the latch-side gap large enough for a child or pet to squeeze through.
Step 3: Cut the Frame Pieces
Cut two vertical side pieces and two horizontal rails. A simple butt-joint frame is beginner-friendly. For a stronger build, use pocket holes, dowels, or half-lap joints. Keep the frame square by checking corner-to-corner diagonal measurements. If both diagonals match, the frame is square. If not, gently nudge it into alignment before fastening.
Step 4: Attach the Slats
Lay the frame flat and mark slat placement. Use a spacer block to keep gaps even. Apply a small amount of wood glue and secure each slat with screws or brad nails. Pre-drilling helps prevent splitting, especially near board ends. Keep all slats vertical and flush with the frame.
Step 5: Sand Everything Smooth
Sand every edge, corner, and surface. Round over sharp corners by hand or with a router. This step matters more than people think. A gate lives at hand height, paw height, and sometimes face height for small children. Smooth wood is not just prettier; it is kinder to skin, paws, and passing laundry baskets.
Step 6: Fill, Prime, Paint, or Stain
Fill screw holes with wood filler, let it dry, and sand again. If painting, prime first for a smoother finish. If staining, test the stain on scrap wood before committing. For a durable surface, add a water-based polyurethane or clear protective coat. Choose low-odor, indoor-safe finishes and let the gate cure fully before use.
Step 7: Install the Hinges
Attach hinges to the gate first, then hold the gate in place with shims underneath to set the bottom clearance. Use a level to keep it straight. The strongest installation goes into wall studs, solid door trim, or a securely mounted board. Drywall alone is not strong enough for a gate that will be pulled, pushed, bumped, or dramatically judged by a dog.
Step 8: Add the Latch
Choose a latch based on the user. For dogs, a basic gate latch may work. For children, use a latch that requires two actions and is difficult for small hands to operate. Install it high enough that a child cannot easily reach it, but not so high that adults have to perform a shoulder workout every time they enter the kitchen.
Step 9: Test the Gate
Open and close the gate repeatedly. Push gently from both sides. Check for wobble, rubbing, loose screws, latch failure, pinch points, sharp edges, and gaps. Recheck the installation after a few days of use because wood and hardware can settle.
Common Mistakes to Avoid
The biggest mistake is building for looks and hoping strength will magically appear later. A gate is a working object. It needs proper hardware, secure attachment, and enough rigidity to handle daily use.
Using Weak Anchors
Drywall anchors may hold picture frames, but a gate is not a picture frame. A gate gets pushed, pulled, leaned on, and slammed by people carrying groceries. Mount into studs or solid framing whenever possible.
Making the Slat Spacing Too Wide
Wide gaps can create entrapment risks for children and pets. Keep spacing narrow and consistent. When in doubt, make the openings smaller.
Adding Climbable Rails
Horizontal boards look nice but can become steps. If the gate may be used near children, choose vertical slats instead.
Skipping the Finish
Unfinished wood collects grime, splinters more easily, and looks tired fast. A smooth painted or sealed finish makes the gate easier to clean and more pleasant to use.
Best Latches for a DIY Wooden Gate
For a dog gate, a slide bolt, magnetic latch, hook latch, or standard gate latch may be enough. Choose one that matches your dog’s personality. A relaxed senior pug may not challenge anything. A clever border collie may open a latch, file paperwork, and reorganize your pantry by noon.
For a baby gate, the latch should be more secure. Look for a design that requires lifting and pressing, squeezing and lifting, or another two-step motion. Avoid simple hook-and-eye latches at toddler height. Also avoid latches that create pinch points where small fingers can get caught.
How to Make the Gate Look Built-In
A wooden gate looks best when it feels intentional. Paint it the same color as the trim for a built-in look. Stain it to match nearby wood floors or railings. Use black hinges for farmhouse contrast, brass hardware for warmth, or hidden hinges for a cleaner modern style.
If one side of the opening has baseboard trim, add a mounting board above the trim or use spacers so the gate hangs straight. This small detail prevents the hinge side from twisting and makes the finished project look much more professional.
Maintenance Tips
Check screws, hinges, and latch hardware regularly. Wood expands and contracts with humidity, so a gate that swings perfectly in January may rub slightly in July. Tighten loose screws, touch up paint chips, and sand any rough spots that appear over time.
For pet gates, clean paw marks with mild soap and water. For baby areas, use a finish that can handle frequent wiping. Avoid harsh cleaners that may damage paint or leave residue.
Cost Breakdown
A basic DIY wooden dog or baby gate can often be built for less than a premium store-bought gate, especially if you already own tools. Common expenses include lumber, hinges, latch, screws, sandpaper, paint, and finishing supplies. The cost rises if you choose hardwood, decorative hardware, or specialty finishes.
For many homeowners, the real value is not just saving money. It is getting a gate that fits the exact opening, matches the room, and does not wobble every time someone walks past it with a laundry basket.
of Real-Life Experience: What You Learn After Building One
The first thing you learn when building a DIY wooden dog or baby gate is that walls are liars. They look straight. They act innocent. Then you measure and discover the opening is 35 inches at the top, 35 1/4 inches in the middle, and 34 7/8 inches at the bottom. This is why measuring in multiple places matters. The gate has to fit the real opening, not the imaginary perfect rectangle your eyes promised you.
The second lesson is that hinge placement can make or break the project. A gate that is perfectly built on the floor can still hang badly if the hinges are not aligned. Use a level, use shims, and do not rush the installation. Pre-drilling holes also helps because screws tend to wander when you are balancing a gate, holding a drill, and quietly questioning your life choices.
The third lesson is that pets are excellent product testers. A dog will immediately show you whether the gate rattles, whether the latch is too weak, and whether the bottom gap is large enough for a determined nose. If your dog paws at the gate, choose a tougher finish and consider adding a small kick plate or extra lower rail. If your dog jumps, height matters more than style. If your dog is a professional escape artist, use a latch that cannot be nudged open by a nose, paw, or suspiciously intelligent eyebrow movement.
For households with children, the experience is different. You start noticing every edge, gap, and latch position. A gate that seems harmless to adults can look very different when viewed from crawling height. Getting down on the floor to inspect the gate is surprisingly helpful. You may notice a screw head that needs covering, a corner that needs more sanding, or a gap that seemed small from above but looks too inviting from below.
Another lesson: paint before final installation if possible. Painting a gate while it is already hanging sounds convenient until you are crouched in a doorway trying not to paint the hinges, trim, floor, dog, or your own sock. Build it, sand it, dry-fit it, remove it, finish it, let it cure, and then install it for good. Future you will be less cranky.
You also learn that a gate changes household traffic. People will leave it open unless the latch is easy to use. That means convenience is part of safety. If the latch is annoying, the gate becomes decoration. Choose hardware that adults can operate one-handed, especially near kitchens, laundry rooms, or play areas where people are often carrying things.
Finally, the best DIY wooden gate is not the fanciest one. It is the one that fits well, swings smoothly, latches securely, wipes clean, and quietly does its job every day. When built thoughtfully, it becomes part of the house instead of another obstacle in the daily obstacle course of family life.
Conclusion
A DIY wooden dog or baby gate can be a practical, attractive, and deeply satisfying project when it is planned with care. For pets and low-risk room dividers, a custom wooden gate can solve awkward layout problems beautifully. For babies and toddlers, safety must guide every decision, and high-risk areas such as the top of stairs should be protected with certified hardware-mounted safety gates rather than homemade designs.
Measure carefully, use sturdy materials, choose vertical slats, sand every edge, mount into solid structure, and test the latch like your household depends on itbecause sometimes it does. Build it well, and your gate will do more than block a doorway. It will make your home feel calmer, safer, and just a little more custom.
SEO Tags
Note: This article is intended for general DIY inspiration and home improvement education. For child safety, especially near stairs or fall hazards, use a properly certified hardware-mounted baby gate and follow current manufacturer instructions.