A bee garden is one of those rare home projects where being a little lazy can actually make you an environmental hero. Plant the right flowers, stop tidying every stem into oblivion, ease up on pesticides, and suddenly your yard becomes a restaurant, nursery, and tiny airport for pollinators.
And you do not need acres of land, a beekeeper’s suit, or any intention of producing honey. A bee-friendly garden can fit into a suburban flower bed, a narrow side yard, a vegetable garden, or even several containers on a sunny balcony. The goal is simple: provide bees with reliable food, nesting places, shelter, and a landscape that does not accidentally poison them.
This guide explains how to create your own bee garden using practical principles supported by U.S. conservation agencies, university extension programs, and pollinator researchers. Along the way, we will cover native plants, seasonal bloom planning, nesting habitat, water, pesticides, containers, lawn alternatives, and the common mistakes that turn good intentions into a very disappointing bee buffet.
What Is a Bee Garden?
A bee garden is a landscape intentionally designed to provide resources for both native bees and other pollinating insects. Unlike keeping a honey bee hive, creating a bee garden does not require managing colonies. You are creating habitat rather than livestock.
That distinction matters because the United States and North America support thousands of native bee species. Many are solitary rather than colony-forming, and a large percentage nest in the ground instead of hives. Others use hollow or pithy plant stems, beetle tunnels in dead wood, or small natural cavities.
A productive pollinator garden therefore needs more than flowers. Think of it as a four-part package:
- Abundant pollen and nectar
- Flowers available across the growing season
- Safe places to nest and overwinter
- Protection from unnecessary pesticide exposure
Research grounding for native bee diversity, habitat requirements, and nesting behavior.
Step 1: Choose the Right Location
Look for Sunlight First
Most of the flowering plants commonly used in bee gardens perform best in full sun or partial sun. Many pollinating insects are also most active in warm, sunny conditions.
A site receiving roughly six or more hours of direct sunlight gives you the broadest plant selection. That does not mean a shady property is doomed to become a pollinator desert. Woodland-edge native plants, shade-tolerant asters, columbines, and other regionally appropriate species can support bees in less sunny locations.
Check Your Soil and Drainage
Before buying 37 flowering plants because the nursery display looked irresistible, study the soil you already have.
Is the area dry and sandy? Heavy clay? Frequently wet? Well drained? Rather than aggressively rebuilding your soil to suit a fashionable plant, it is often easier to select native species adapted to existing conditions.
A basic soil test can also reveal pH and fertility. Avoid automatically dumping fertilizer into a future pollinator bed. Many native wildflowers perform perfectly well in moderately fertile or even relatively lean soil, and excessive fertility can encourage floppy growth or aggressive competitors.
Step 2: Make Native Plants the Foundation
If there is one rule worth remembering, it is this: start with plants native to your region.
Native plants developed alongside local insects and are typically well adapted to regional soils, temperatures, rainfall patterns, and seasons. They can provide pollen, nectar, or nesting resources that local bees recognize and use.
This does not mean every nonnative garden plant must be escorted off the premises immediately. Many herbs and ornamental flowers can provide useful nectar and pollen. Lavender, thyme, oregano, basil, and other flowering herbs, for example, can attract plenty of visitors.
But native species should form the ecological backbone of the garden whenever possible.
Think Regionally, Not Nationally
A plant that is native and excellent for bees in Wisconsin might make little ecological sense in southern Arizona. Use native plant nurseries, state native plant societies, cooperative extension services, and regional pollinator planting guides to refine your choices.
| Region | Examples to Research Locally | Possible Bloom Period |
|---|---|---|
| Northeast | Wild geranium, goldenrod, New England aster, native bee balm | Spring through fall |
| Midwest | Blazing star, butterfly milkweed, wild bergamot, goldenrod | Late spring through fall |
| Southeast | Coreopsis, mountain mint, native asters, native sunflowers | Spring through fall |
| Southwest | Penstemon, globemallow, desert-adapted sunflowers and asters | Varies by rainfall and elevation |
| Pacific Northwest | Oregon grape, camas, native buckwheats, Douglas aster | Spring through fall |
Always confirm that a species is native to your particular state or ecoregion before planting. “Native to America” is a gigantic category. Alaska and Florida technically share a country, but their gardens have rather different opinions about winter.
Plant-selection guidance synthesized from federal and university regional pollinator resources.
Step 3: Provide Flowers From Spring Through Fall
A gorgeous garden that explodes into bloom for two weeks and then becomes a green museum is not ideal bee habitat. Pollinators need food over a much longer period.
Build your planting plan around continuous bloom.
Early-Season Flowers
Early spring can be a particularly important period because overwintering queens and early-emerging solitary bees are searching for food. Depending on your region, useful plants can include native willows, serviceberries, redbuds, Oregon grape, wild geraniums, native currants, and spring wildflowers.
Summer Flowers
Summer is usually the easiest season to fill. Bee balm, coneflowers, milkweeds, mountain mints, blazing stars, sunflowers, native buckwheats, and many herbs can create a buffet that looks permanently overbooked.
Fall Flowers
Do not neglect late summer and fall. Goldenrods and asters are especially valuable in many regions, along with regionally native sunflowers and other late-blooming perennials.
A practical goal is to have at least several species flowering during each part of the growing season rather than relying on one superstar plant.
Step 4: Plant Flowers in Clumps
Pollinators need to locate food efficiently. Instead of scattering one specimen of 25 different plants around the yard like botanical confetti, plant repeated groups of the same species.
Clusters create larger visual and floral targets and allow bees to move quickly from flower to flower without burning unnecessary energy.
For a small garden, repeating groups of three, five, or more plants can also create a more intentional landscape design. Your neighbors see “beautiful planned garden” rather than “person who stopped mowing after a philosophical awakening.”
Step 5: Include Different Flower Shapes
Bee species differ enormously in body size, tongue length, behavior, and flower preferences. That makes floral diversity important.
Combine flat, open flowers with tubular flowers, composite daisy-like blooms, small clustered flowers, and deeper blossoms. Different colors and plant heights add even more variety.
Flowering shrubs and trees should not be forgotten. One mature flowering woody plant can produce an enormous quantity of blossoms in a relatively small footprint. Trees and shrubs also add structure, shade, wind protection, and habitat for other wildlife.
Step 6: Give Ground-Nesting Bees Somewhere to Live
Flowers receive most of the attention in pollinator gardening, but housing matters too. A large share of native bee species nest underground.
You can support them by leaving small areas of well-drained, undisturbed soil accessible. Avoid covering every inch of your beds with landscape fabric and several inches of heavy mulch.
A patch of bare or sparsely vegetated soil in a sunny, quiet location may not win a landscaping award, but it can be valuable real estate to a ground-nesting bee.
If you notice small holes surrounded by tiny mounds of loose soil, observe before reaching for insecticide. You may be looking at solitary bee nests rather than a dangerous pest colony.
Nesting guidance reflects research showing that many native bees use soil, stems, cavities, and other natural landscape features.
Step 7: Keep Some Stems, Leaves, and Natural Mess
The modern obsession with making gardens spotless can remove exactly the material insects need.
Some native bees nest in hollow or soft-centered stems. Others use dead wood or existing cavities. Bumble bee queens may overwinter beneath leaf litter or in other protected locations.
Instead of cutting every perennial to ground level in fall, leave some standing stems through winter. Allow some leaves to remain beneath shrubs or in designated garden areas. A small brush pile or piece of dead wood can add habitat where appropriate.
You do not have to transform your front yard into a fallen forest. Strategic messiness is enough.
Step 8: Be Careful With Bee Hotels
Bee hotels are popular, photogenic, and occasionally treated as mandatory accessories for anyone who has ever purchased a packet of wildflower seed.
They are not mandatory.
Artificial nesting tubes can help certain cavity-nesting species, including some mason and leafcutter bees, but poorly maintained structures may accumulate parasites, mites, moisture, or pathogens.
If you install a bee hotel, use appropriate untreated materials, protect it from excessive moisture, monitor it, and replace or sanitize nesting components according to expert recommendations. Natural habitat such as stems, soil, and dead wood can often be a simpler approach.
Artificial nests require maintenance to reduce disease and parasite buildup.
Step 9: Provide Water Without Creating a Mosquito Resort
Pollinators need moisture, but a deep bucket of standing water is neither necessary nor especially charming.
A shallow dish containing pebbles or stones can provide landing areas above the water surface. Refresh it regularly so it remains clean and does not become mosquito habitat.
Damp soil, mud, and naturally moist spots can also be useful to some insects. The important idea is accessible moisture combined with safe landing surfaces and sensible maintenance.
Step 10: Reduce Pesticide Exposure
A pollinator garden and routine broad-spectrum insecticide use are awkward roommates.
Start with prevention and integrated pest management. Choose appropriate plants, maintain healthy soil, identify the actual pest, tolerate modest cosmetic damage, encourage beneficial insects, and use physical or cultural controls when practical.
If pesticide treatment becomes necessary, read and follow the product label carefully. Avoid spraying flowers while bees are actively visiting them, and choose the lowest-risk effective approach appropriate to the problem.
Remember that “organic” does not automatically mean harmless to bees. Some naturally derived insecticides can still injure beneficial insects.
Current U.S. pollinator guidance emphasizes pesticide risk reduction, label compliance, avoiding exposure during bloom and foraging, and integrated management.
Can You Create a Bee Garden in Containers?
Absolutely. A balcony, patio, porch, or paved courtyard can still contribute pollinator resources.
Use the largest containers practical, since larger pots dry out more slowly and accommodate stronger root systems. Combine plants with different bloom periods rather than filling every pot with flowers that peak simultaneously.
Herbs are particularly convenient container plants. Allow thyme, oregano, mint relatives, basil, or other suitable herbs to flower rather than constantly harvesting every bud.
Native perennials can also grow successfully in containers if their root depth, climate, drainage, and winter requirements are considered.
Even a few pesticide-free flowering containers are better than zero habitat, especially in highly developed urban environments.
Small spaces and balconies can provide useful pollinator habitat when flowering plants and pesticide-free practices are incorporated.
Consider Replacing Part of Your Lawn
Traditional turf provides recreational benefits, but a uniformly mowed lawn supplies relatively little pollen or nectar.
You do not need to eliminate every blade of grass. Converting one border, corner, slope, or unused strip into flowering habitat can dramatically increase the ecological value of the property.
In appropriate regions, a bee lawn is another option. These landscapes mix mow-tolerant flowering plants with turfgrass while preserving some recreational function.
The result can require relatively low inputs once established while providing food for pollinators. Native perennial beds generally offer greater habitat value, however, so think of bee lawns as one tool rather than the final boss of pollinator gardening.
Bee lawns can supplement conventional landscapes but diverse native perennial habitat generally offers broader pollinator resources.
A Simple Bee Garden Layout
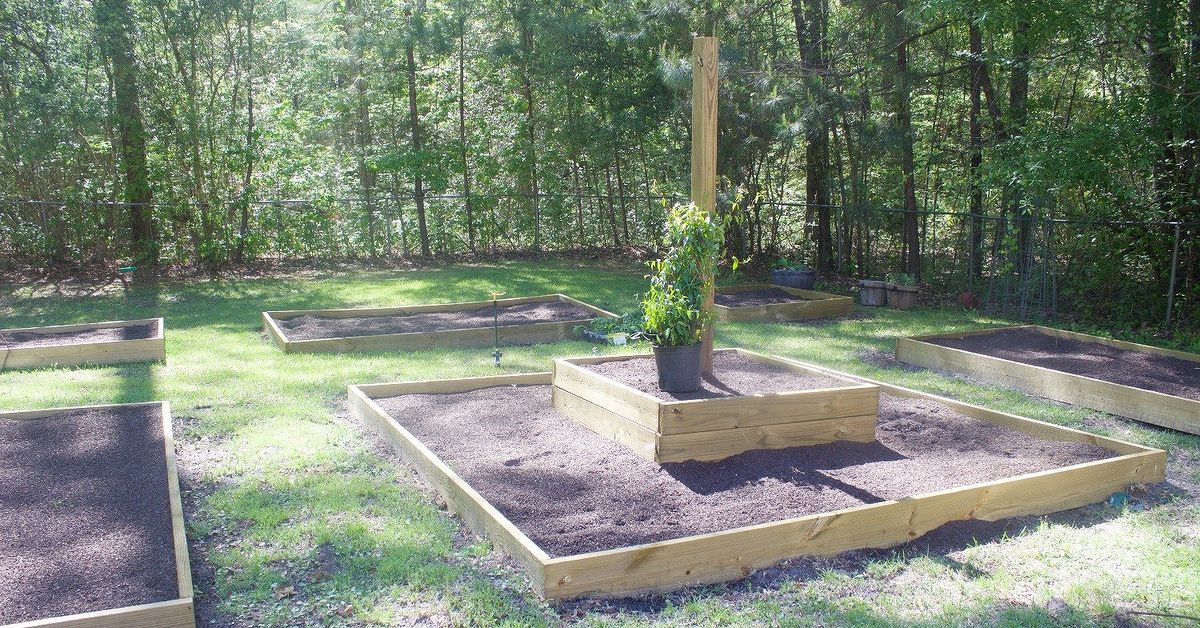
For a sunny 6-by-10-foot bed, you might organize plants in three layers:
- Back: Taller native asters, sunflowers, Joe-Pye weed, or other regionally appropriate tall species.
- Middle: Bee balm, coneflower, blazing star, milkweed, mountain mint, or similar medium-height perennials.
- Front: Low-growing native flowers, groundcovers, or compact herbs.
Repeat several plants instead of installing one of everything. Add a small patch of exposed soil away from the main walkway, leave selected stems standing over winter, and avoid treating the bed as a chemically sterile zone.
Suddenly, you have something far more useful than a flower bed: you have habitat.
Common Bee Garden Mistakes
Planting Only Summer Flowers
Summer abundance does not compensate for an empty garden in early spring and fall. Plan for the complete season.
Buying Plants Without Checking Pesticide History
Ask nurseries about how plants were produced, particularly when purchasing plants specifically for pollinators.
Choosing a Generic “Wildflower Mix”
Seed packets may contain plants unsuitable for your region or even species capable of becoming problematic. Read the species list rather than trusting a picture of a cheerful bumble bee on the package.
Mulching Every Square Inch
Heavy mulch can remove nesting opportunities for ground-nesting species.
Cleaning Up Too Aggressively
Removing all stems, leaves, dead wood, and natural debris can remove overwintering and nesting habitat along with the “mess.”
Installing a Bee Hotel and Forgetting It
A neglected hotel is not automatically conservation. Nesting materials may require routine replacement or cleaning.
How to Maintain a Bee-Friendly Garden
Once established, a well-designed native plant garden can become easier to maintain than a high-input ornamental landscape.
In spring, avoid rushing cleanup before overwintering insects have had an opportunity to emerge. Replace dead plants where necessary and monitor invasive weeds.
During summer, water newly established plants deeply but appropriately. Established native plants may require less supplemental watering once their roots mature, depending on species and climate.
Deadhead selectively. Removing spent flowers can encourage reblooming in some plants, but seed heads also provide ecological value and winter interest.
In fall, resist the instinct to cut everything down. Leave useful stems and seed heads standing. They can provide nesting and overwintering habitat while also feeding birds and giving your winter garden considerably more personality than six months of brown mulch.
Why Even a Small Bee Garden Matters
Habitat does not have to be enormous to be useful. A small urban garden will not single-handedly solve every challenge facing pollinators, but gardens can collectively create connected patches of food and shelter across developed landscapes.
Your yard may connect to a neighbor’s flowers, a school garden, a roadside planting, a city park, or another patch of habitat. That network is much more valuable than isolated landscaping designed only to look tidy from the street.
Better still, bee gardening tends to benefit far more than bees. Butterflies, moths, flower flies, beetles, hummingbirds, beneficial predatory insects, and birds may all use parts of the same habitat.
Conclusion: Build Habitat, Not Just a Flower Bed
To create your own bee garden, you do not need an elaborate landscape plan or hundreds of plants. Start with one manageable section. Add native flowering species, provide something in bloom across spring, summer, and fall, plant flowers in noticeable groups, and preserve nesting opportunities.
Then make one of the most important changes of all: stop demanding that nature look perfectly tidy.
A chewed leaf is not necessarily a gardening emergency. A hollow stem is not automatically trash. A patch of bare soil is not always unfinished landscaping. Once you begin looking at the garden from a pollinator’s perspective, many “imperfections” become habitat.
The best bee garden is therefore not necessarily the biggest, fanciest, or most expensive. It is the garden that consistently provides food, shelter, nesting opportunities, and reasonable protection from harmful chemicals. Plant it, give it time, and eventually the buzzing becomes its own kind of applause.
Real-World Bee Garden Experience: What You Learn After Planting
The first surprise many new pollinator gardeners encounter is that bees may not arrive according to the schedule printed on the seed packet. You can prepare the soil, plant beautiful native flowers, stare dramatically into the garden every morning, and still wonder whether anyone received the invitation.
Patience matters. Newly planted perennials often spend their first season establishing roots. Some native species barely resemble the impressive mature plants shown in nursery photographs. By the second and third growing seasons, however, a modest planting can become substantially denser and more productive.
Another common experience is discovering how many different insects you previously called “a bee.” Once you begin watching flowers closely, the garden becomes a miniature wildlife observation station. Large fuzzy bumble bees may dominate one plant while tiny metallic sweat bees visit another. Leafcutter bees may arrive carrying pollen beneath their bodies. Flower flies hover nearby looking suspiciously bee-like despite being flies.
You also start noticing preferences. A gardener may carefully choose an expensive ornamental flower, only to watch bees ignore it while mobbing a neighboring patch of native mountain mint or goldenrod. Bees did not receive the landscaping catalog. They are evaluating pollen, nectar, flower structure, timing, and accessibility.
Planting in groups usually makes these preferences easier to see. A broad patch of five or seven flowering plants can become busy enough that you hear activity before you notice individual insects. This is one reason repeating plants is both visually effective and practical for pollinators.
The garden also teaches tolerance. At first, holes in leaves can trigger panic. Then you realize that a garden designed to support insects will occasionally contain insects eating plants. That is not necessarily failure. A sterile garden with flawless leaves may look impressive but provide surprisingly little habitat.
Seasonal gaps become obvious too. Perhaps your garden is magnificent in June but nearly flowerless in September. Instead of treating that as a disaster, use the observation to guide next year’s planting. Add late-blooming asters or goldenrods. If March and April are empty, research early-flowering native shrubs, trees, and perennials for your region.
Maintenance habits tend to change as well. Rather than cutting every perennial stem in October, experienced pollinator gardeners often leave more material standing through winter. Fallen leaves become something to manage thoughtfully rather than automatically remove. Bare soil becomes a possible nesting resource rather than evidence that another bag of mulch must immediately be purchased.
Perhaps the most satisfying experience is realizing that a bee garden becomes more interesting as it becomes less controlled. You still weed, prune, water, and design, but you stop treating the landscape like an outdoor living room where every object must remain precisely where you placed it.
The flowers reseed. Insects choose favorites. Birds investigate seed heads. Native plants expand into available spaces. Some experiments succeed brilliantly; others become expensive compost.
That gradual change is part of the appeal. Creating a bee garden is not really a one-weekend landscaping project. It is a continuing relationship with a small piece of habitat. Every season gives you new information about what blooms, what survives, what attracts pollinators, and what your local ecosystem actually needs.
And eventually, sitting beside a garden filled with buzzing native bees can feel far more rewarding than having the neatest lawn on the block. The bees certainly will not hand you a trophy, but they may keep coming back. For a pollinator gardener, that is a pretty good review.
The practical recommendations in this article synthesize guidance from U.S. Fish & Wildlife Service, National Park Service, USDA Natural Resources Conservation Service, U.S. EPA, Xerces Society, University of Minnesota Extension, Penn State Extension, Oregon State University Extension, Utah State University Extension, Colorado State University Extension, University of Maryland Extension, University of Georgia Extension, and University of Illinois Extension.