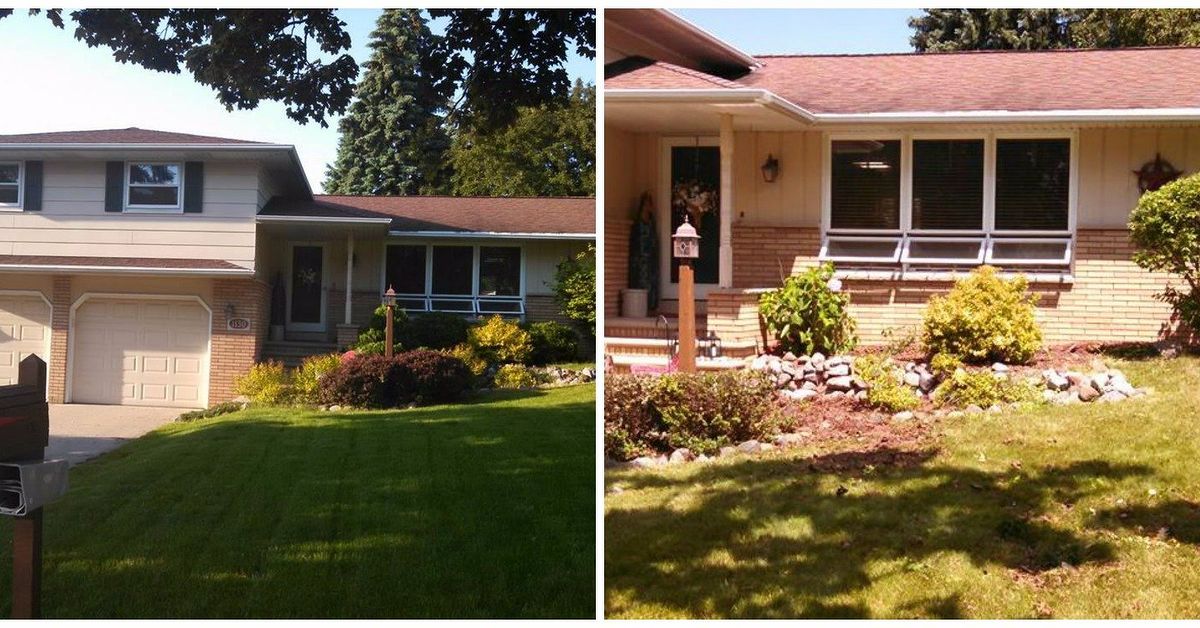
Some brick homes age like fine wine. Others age like a forgotten tomato in the back of the refrigeratortechnically still recognizable, but not doing the property any favors. If your exterior brick looks too orange, too uniform, or simply disconnected from the rest of your home, German mortar smear may provide the character-building makeover it needs.
Also known as German smear, German schmear, or mortar wash, this masonry finish uses wet mortar to partially cover brick. Instead of hiding every brick beneath an opaque coating, the technique leaves selected areas exposed. The result is a textured, timeworn appearance inspired by old European cottages, farmhouses, and masonry buildings.
Unlike a perfectly painted wall, German smear is intentionally irregular. It softens strong brick colors, emphasizes texture, and makes a plain façade look as though it has collected several generations of storieseven when the house was built during the era of beige carpet and shiny brass ceiling fans.
What Is German Mortar Smear?
German mortar smear is a decorative masonry treatment created by spreading mortar across brick or stone and removing part of it before it sets. Some mortar remains in the joints, on the edges, and across portions of the brick faces. Because the coverage is uneven, the original masonry color continues to peek through.
The finish can range from light and subtle to thick and dramatic. A lightly applied mortar wash may simply brighten the joints and soften the brick color. A heavier application can cover most of the wall, leaving only scattered patches of brick visible. According to the Brick Industry Association, mortar wash may be semi-opaque or nearly opaque while still preserving the recognizable texture of the masonry beneath it.
Traditional combinations use white or pale mortar over red brick, but that is not the only option. Warm cream, light gray, beige, and earth-toned mortar can create a softer transition between the brick and a home’s roof, trim, stonework, or landscaping.
Why German Smear Can Transform Curb Appeal
It Softens an Overpowering Brick Color
Bright red, orange, or brown brick can dominate an exterior, especially when it clashes with newer roofing, windows, or siding. German smear reduces that visual intensity without erasing the brick completely. The mortar acts like a filter, allowing the original color to remain part of the design while making it easier to coordinate with neutral exterior materials.
For example, orange-red brick that fights with charcoal shingles may look more balanced after receiving a warm gray mortar wash. Brown brick can feel lighter when paired with cream mortar, off-white trim, black lighting, and a natural wood door.
It Adds Texture and Architectural Character
Many newer brick façades are extremely consistent. Every joint is neat, every brick is similar, and the entire wall can feel a little too perfect. German mortar smear interrupts that uniformity. Thickened joints, softened edges, and irregular patches create visual depth that changes throughout the day as sunlight moves across the surface.
This texture works especially well with cottage, farmhouse, Tudor-inspired, French country, ranch, and rustic transitional homes. It can also help a basic brick exterior feel less builder-grade. However, homeowners chasing an ultra-sleek contemporary look may prefer brick stain, mineral paint, or a cleaner mortar-joint update instead.
It Highlights the Home’s Best Features
A successful curb appeal project does not treat every surface as a solo performer. The brick, front door, shutters, roof, gutters, lighting, and landscaping should look like members of the same bandnot musicians who met in the parking lot five minutes before the concert.
German smear creates a quieter background that can make other features more noticeable. A wood front door looks richer against softened brick. Black windows and lanterns gain stronger definition. Green shrubs stand out against pale mortar, while copper gutters or warm metal accents complement the rustic texture.
It Provides a Durable, Mineral-Based Finish
German smear is not simply diluted paint. Mortar hardens through a chemical reaction and bonds with the porous masonry surface. When the brick is sound, unsealed, and properly prepared, the treatment can remain durable for years. That permanence is both an advantage and a warning: this is not the ideal project for someone who changes exterior color schemes every time a new design trend appears online.
German Smear vs. Limewash, Whitewash, and Paint
These treatments can produce similar lightened-brick effects, but the materials and final textures are different.
German Smear
German smear uses mortar. It produces the thickest, most textured finish and can visibly build up the mortar joints. It is generally difficult to remove after curing.
Limewash
Authentic limewash is made with lime, water, and often mineral pigments. It penetrates compatible masonry and develops a soft, chalky appearance. Limewash usually looks flatter and less physically textured than German smear, and its appearance may weather and patina over time.
Whitewash
Modern whitewashing commonly uses diluted paint. It creates a translucent veil of color but does not add the dimensional mortar texture associated with German schmear. Depending on the product, paint-based whitewash may also change the vapor behavior of the wall.
Opaque Brick Paint
Paint provides the most uniform transformation. It can completely conceal mismatched brick, but it also hides much of the natural color variation and may require future recoating. Preparation and product compatibility are critical because masonry needs to manage moisture properly.
Is Your Brick Suitable for German Mortar Smear?
Before buying mortar, inspect the wall carefully. German smear generally adheres best to rough, porous, unpainted brick. The masonry should be structurally sound and free from coatings that could prevent a reliable bond.
Pause the project and consult a qualified mason when you find:
- Loose, crumbling, or spalling bricks
- Deep cracks or stair-step cracking
- Failed or missing mortar joints
- Persistent dampness or water intrusion
- Paint, glossy sealer, or another bonded coating
- Very smooth or glazed brick
- Historic masonry that may require specialized treatment
Old brick can be softer than modern masonry, and an incompatible mortar may contribute to damage rather than improvement. National Park Service preservation guidance recommends evaluating historic masonry and matching repair materials to the original construction instead of automatically applying stronger modern products. Aggressive cleaning and inappropriate coatings can also damage historic walls.
Planning the Right German Smear Look
Choose the Coverage Level
Decide how much brick should remain visible before starting. Light coverage leaves most brick faces exposed and concentrates mortar around the joints. Medium coverage covers edges and selected portions of each brick. Heavy coverage creates a plaster-like finish with only occasional brick showing through.
Create at least two sample boards using spare bricks, or test a small inconspicuous section of the house. View the samples in morning light, afternoon sun, and shade. Mortar may dry lighter than it appears when wet, so judging the color five minutes after application is an excellent way to meet regret ahead of schedule.
Coordinate the Mortar Color
Bright white creates strong contrast and a fresh farmhouse appearance. Cream feels warmer and often coordinates better with tan roofing, natural wood, and traditional landscaping. Light gray complements charcoal roofs and black accents. Beige or taupe can soften brown brick without making the exterior look dramatically white.
Preblended colored mortar helps keep batches consistent. Mixing random pigments into individual buckets can produce noticeable color changes across a large façade.
Consider the Architecture
Heavy German smear can overwhelm detailed brickwork, decorative bands, arches, or historic patterns. A lighter application may preserve those architectural features. On a simple ranch home, stronger coverage can create needed texture and make a long, flat façade feel more intentional.
Tools and Materials
A typical exterior project may require:
- Prebagged, preblended masonry mortar
- Clean mixing buckets
- A drill with a mortar-mixing paddle
- Trowels or wide putty knives
- Grout sponges and natural sponges
- Burlap or clean rags for varied texture
- A stiff, nonmetallic masonry brush
- Drop cloths and plastic sheeting
- Painter’s tape
- Clean water and a hose with controlled flow
- Chemical-resistant gloves
- Protective eyewear and appropriate respiratory protection
The Brick Industry Association recommends prebagged, preblended mortar meeting applicable ASTM standards, with Type N mortar commonly used for mortar-wash applications and Type S used in some circumstances. Follow the mortar manufacturer’s instructions and verify that the selected product is appropriate for the specific brick, exposure, and project conditions.
Wet Portland-cement products are caustic and can injure skin or eyes. Wear impervious gloves, eye protection, long sleeves, and suitable footwear. Wash accidental contact promptly rather than waiting until the end of the day and discovering that the mortar has been conducting a chemistry experiment on your skin.
How to Apply German Mortar Smear
1. Repair the Masonry First
German smear is a decorative treatment, not a structural repair. Replace severely damaged bricks, correct failed joints, address leaks, and resolve drainage problems before covering the surface. Decorative mortar should never become a stylish bandage over an active moisture problem.
2. Clean the Brick Gently
Remove dirt, algae, grease, soot, loose material, and biological growth. Start with the least aggressive method, such as water, mild detergent, and a stiff nonmetallic brush. Improper pressure washing or abrasive cleaning can permanently damage brick faces and force moisture into the masonry. Test any cleaning method in a hidden area and follow specialized cleaner instructions carefully.
3. Protect Adjacent Surfaces
Cover windows, doors, painted trim, plants, paving, metal fixtures, and finished wood. Mortar splashes travel with impressive enthusiasm, particularly when the nearest unprotected object is expensive.
4. Dampen the Brick
Lightly dampen porous brick before application unless the mortar manufacturer directs otherwise. The wall should not be dripping wet. Controlled dampening can keep extremely dry masonry from pulling moisture out of the mortar too quickly.
5. Mix a Manageable Batch
Add water according to the product directions and mix until the mortar reaches a spreadable consistency. It should hold to a trowel but remain workable enough to press into joints and drag across the brick. Mix small batches until you understand how quickly the material begins to set under the day’s temperature and humidity.
6. Work in Small Sections
Apply mortar to an area small enough to texture before it stiffens. Press it into the joints, then pull the material across the brick faces. Avoid creating a repetitive pattern. Natural-looking German smear contains variation: one brick may be nearly exposed, the next may have covered edges, and another may disappear beneath a wider patch.
7. Remove Mortar Selectively
Use a damp sponge, trowel, rag, or burlap to remove mortar from selected areas while it remains workable. Wipe lightly for a heavy finish or more aggressively for greater brick exposure. Step back frequently. A wall viewed from twelve inches away can look wonderfully artistic while the same wall viewed from the driveway looks as though it lost an argument with a bag of flour.
8. Blend Each Section
Keep the edge of the active section irregular rather than ending in a straight vertical line. Straight stopping points may remain visible after curing. Blend new work into the previous section before its edge becomes too firm.
9. Allow Proper Curing
Protect fresh mortar from heavy rain, freezing conditions, excessive heat, and rapid drying. Follow the product instructions for temperature limits, curing procedures, and exposure time. Do not add extra water to stiffening mortar unless the manufacturer specifically permits it.
Common German Smear Mistakes
Skipping the Test Patch
A sample establishes the mortar color, texture, coverage, and wiping time. Because cured mortar is difficult to remove, experimenting on the center of the front elevation is a bold strategy in the same way that cutting your own bangs five minutes before a wedding is bold.
Applying Mortar Over Paint or Sealer
Traditional mortar wash requires a compatible, porous surface. Paint, glaze, and some sealers interfere with adhesion. Removing those coatings can become a separate and expensive project.
Creating Uniform Coverage
Perfectly identical bricks defeat the purpose. Vary pressure, direction, thickness, and exposure. The finish should appear handcrafted, not printed.
Working Too Far Ahead
Once the mortar begins setting, shaping it becomes harder. Divide large walls into manageable zones and maintain a consistent rhythm.
Ignoring Water Problems
Check gutters, flashing, downspouts, window openings, roof transitions, and grading before changing the exterior finish. Trapped or uncontrolled moisture can contribute to staining, cracking, flaking, and masonry deterioration.
Finishing the Curb Appeal Makeover
German mortar smear creates the backdrop, but surrounding details complete the design. Consider pairing the finished brick with:
- A stained wood or muted-color front door
- Matte black, bronze, or aged-brass lighting
- Freshly painted fascia, shutters, and trim
- Simple house numbers with strong contrast
- Layered evergreen and flowering landscaping
- Defined walkways and clean edging
- Window boxes or restrained seasonal planters
Avoid adding too many rustic elements at once. German smear, barn-style lights, reclaimed signs, distressed shutters, wagon-wheel décor, and six galvanized buckets can make a house look less like a charming cottage and more like a farmhouse-themed escape room.
DIY or Hire a Professional?
A fireplace, garden wall, mailbox, or small accent area can be a manageable DIY introduction. A full exterior is much more demanding. Large projects require consistent color, careful access, controlled curing, and the physical stamina to repeatedly mix, lift, spread, wipe, and reconsider life choices.
Professional pricing varies according to wall area, brick condition, regional labor rates, access, number of stories, preparation work, and the desired coverage. Scaffolding, coating removal, masonry repair, and complicated architectural details can increase the total. Materials may be relatively affordable, but labor is the largest part of many exterior projects.
Hire a mason or qualified specialist when the home is historic, the brick is damaged, the walls are high, coatings must be removed, or you are uncertain about moisture behavior. Request sample panels and review completed projects before approving the entire façade.
Real-World Experiences and Lessons From German Smear Projects
One of the most common experiences reported in German smear projects is surprise at how quickly the finish changes as it dries. Fresh mortar often appears darker, wetter, and more dramatic than the final cured surface. Homeowners who panic midway through the first section may remove too much material, only to discover later that the remaining mortar dries into a much softer shade. A sample panel allowed to dry fully is far more useful than a quick wet test.
Another frequent lesson is that preparation takes longer than expected. The satisfying part is spreading mortar across brick; the less glamorous part is cleaning the wall, protecting windows, moving furniture or planters, repairing joints, masking fixtures, and arranging safe access. In many successful projects, the actual application represents only part of the labor. Thorough preparation is what prevents the finished wall from being surrounded by splattered glass, crusty light fixtures, and one permanently beige hydrangea.
Homeowners also discover that German smear is more artistic than mechanical. Beginners often try to make every brick match. After several rows, the wall may begin to resemble a grid covered by identical white rectangles. The better approach is to establish a general coverage level while allowing natural variation. Rotating between a trowel, sponge, and folded burlap can produce a more believable aged texture. Periodically photographing the work from across the yard also reveals patterns that are difficult to notice up close.
Batch consistency becomes especially important on large exteriors. Small changes in water content can alter workability, thickness, and finished appearance. Measuring water instead of estimating it helps keep the mortar uniform. Using preblended mortar from the same product line and, when possible, the same manufacturing batch also reduces unexpected color variation.
Timing is another practical challenge. On a warm, dry afternoon, mortar may become firm faster than anticipated. In cooler or humid conditions, the working window may be longer. Experienced applicators adjust the size of each section rather than following a rigid five-foot grid. The correct section size is the amount that can be spread, shaped, and blended without rushing.
Many exterior projects look incomplete immediately after the mortar curesnot because the smear failed, but because the remaining curb appeal elements have not caught up. Old shutters, faded trim, undersized lights, or an unrelated door color may suddenly become more obvious against the refreshed brick. Homeowners often achieve the strongest transformation by treating German smear as the first stage of a coordinated exterior plan rather than the entire plan.
Finally, successful projects usually share one decision: they stop before covering every last brick. It is easy to add a little more mortar while the work is fresh. Removing cured mortar is far more difficult. Leaving slightly more brick visible preserves color variation and provides room for adjustment. With German smear, restraint is not laziness; it is design judgment wearing work gloves.
Conclusion
German mortar smear can turn ordinary brick into a textured architectural feature while preserving hints of the original masonry. It is durable, customizable, and capable of connecting an outdated façade with modern trim, roofing, landscaping, and exterior accents.
The best results begin with sound, porous brick, careful cleaning, compatible mortar, a fully cured test patch, and an intentionally irregular application. Because the treatment is difficult to reverse, spend more time planning than smearing. Your future selfand possibly the next owner of the housewill appreciate the restraint.
Note: German mortar smear is primarily a decorative finish. Repair structural cracks, deteriorated masonry, failed joints, and moisture problems before application. Historic or unusually soft brick should be evaluated by a preservation professional or qualified mason.