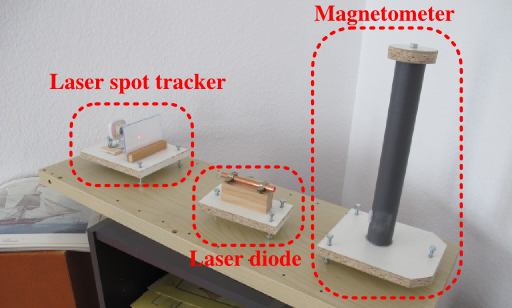
Building a DIY geomagnetic observatory sounds like the kind of project that belongs in a secret mountain laboratory guarded by people in white coats and suspiciously serious clipboards. Good news: you do not need a government bunker, a PhD in space physics, or a budget large enough to make your wallet cry. With careful planning, a sensitive magnetometer, stable data logging, and a quiet location away from magnetic chaos, you can create a small home observatory that tracks changes in Earth’s magnetic field.
A geomagnetic observatory measures variations in Earth’s magnetic field over time. Those variations can come from daily ionospheric currents, solar storms, magnetic disturbances, nearby vehicles, power lines, or the neighbor’s enthusiastic use of a leaf blower. The fun part is learning to separate the cosmic signals from the household nonsense. The slightly less fun part is discovering that your “perfect” sensor location is three feet from a buried pipe. Science keeps us humble.
This guide explains what a DIY geomagnetic observatory is, why it matters, what equipment you need, where to place it, how to collect clean data, and how to compare your readings with professional space-weather sources. Whether you are a ham radio operator, electronics hobbyist, teacher, student, citizen scientist, or backyard sky watcher, this project turns Earth itself into your laboratory.
What Is a Geomagnetic Observatory?
A geomagnetic observatory is a monitoring station that records the strength and direction of Earth’s magnetic field. Professional observatories use highly stable magnetometers, strict calibration routines, controlled buildings, and long-term operating procedures. Their data help researchers understand Earth’s interior, map magnetic changes, study space weather, and assess risks to technology such as satellites, power grids, navigation systems, pipelines, and radio communication.
A DIY geomagnetic observatory is the home-lab version of that idea. It will not replace a national observatory, just as a backyard telescope does not replace the Hubble Space Telescope. But it can still detect meaningful magnetic variations, especially during strong geomagnetic storms. It can also reveal daily magnetic patterns, sensor drift, local interference, and the delightful fact that Earth’s magnetic field is not a boring invisible arrow but a living, twitching, solar-weather-sensitive system.
Why Build a DIY Geomagnetic Observatory?
The main reason is simple: it is fascinating. Earth’s magnetic field is generated largely by motion in the planet’s liquid outer core, then shaped and disturbed by solar wind, magnetospheric currents, and ionospheric activity. A DIY observatory lets you watch this invisible environment change in real time.
For amateur radio operators, geomagnetic activity can affect high-frequency radio propagation. For aurora watchers, magnetometer data can help explain why the sky suddenly looks like it has been decorated by a neon dragon. For educators, a homemade magnetometer creates a hands-on bridge between physics, electronics, Earth science, astronomy, data analysis, and engineering. For hobbyists, it is a perfect excuse to combine sensors, microcontrollers, outdoor enclosures, Python graphs, and just enough troubleshooting to keep life spicy.
How Earth’s Magnetic Field Changes
Earth’s magnetic field has a long-term background component and shorter-term variations. The background field changes slowly over years because of processes deep inside Earth. Shorter-term variations can happen over minutes, hours, or days. These are the variations a home observatory is most likely to notice.
Solar Wind and Geomagnetic Storms
The Sun constantly releases a stream of charged particles called the solar wind. During solar flares and coronal mass ejections, more energetic material can be hurled toward Earth. When that material interacts with Earth’s magnetosphere, it can trigger geomagnetic storms. These storms disturb magnetic field measurements at the surface, sometimes dramatically enough for a modest magnetometer to detect.
The Kp Index
The Kp index is a widely used measure of global geomagnetic activity. It summarizes disturbances in Earth’s magnetic field on a scale from quiet conditions to major storm levels. A home magnetometer will not produce the official Kp index by itself, but you can compare your data with Kp values to see whether your local readings match broader space-weather conditions.
Daily Magnetic Variation
Even on quiet days, Earth’s magnetic field can show a gentle daily rhythm caused by solar heating and electric currents in the ionosphere. This regular pattern is sometimes called solar quiet variation. Detecting it is a satisfying milestone because it means your setup is stable enough to see natural changes instead of only detecting your refrigerator turning on.
Choosing the Right Magnetometer
The heart of a DIY geomagnetic observatory is the magnetometer. Your choice depends on budget, skill level, and how serious you want the data to be. The “best” sensor is not always the most expensive one. The best sensor is the one you can install properly, log consistently, calibrate reasonably, and leave alone long enough to gather useful data.
Option 1: Simple Suspended-Magnet Magnetometer
The classic beginner design uses a small magnet suspended by thread, often inside a bottle or protective container. A mirror attached to the magnet reflects a light beam onto a scale or light sensor. When the magnetic field changes, the magnet twists slightly and the reflected spot moves. This design is affordable, visually satisfying, and excellent for classrooms. It also teaches patience, because hanging a tiny magnet from thread can make you question several life choices.
This type of magnetometer can demonstrate the principle of magnetic field variation, but it is sensitive to vibration, air currents, temperature shifts, and mechanical movement. It works best indoors in a stable location and is especially useful as an educational project.
Option 2: Digital Three-Axis Magnetometer
A digital three-axis magnetometer measures magnetic field components along three perpendicular axes. Popular sensor modules can connect to microcontrollers such as Arduino, ESP32, Raspberry Pi Pico, or Raspberry Pi. These systems are compact, easy to log, and well suited to long-term monitoring.
For serious citizen-science use, choose a sensor with good resolution, low noise, stable temperature behavior, and reliable documentation. Lower-cost modules can be useful, but many are designed for compass heading rather than precision geomagnetic monitoring. They may drift, saturate, or react dramatically to nearby metal. In other words, they can be helpful, but they also have personalities.
Option 3: Fluxgate Magnetometer
A fluxgate magnetometer is more advanced and can be sensitive enough for meaningful geomagnetic monitoring. Fluxgate sensors are widely used in geophysics and space-weather applications. They usually cost more and require more careful installation, but they offer better performance than basic compass-style sensors.
If your goal is to detect geomagnetic storms with better confidence, a fluxgate or high-quality magnetometer module is a strong choice. You will still need stable power, clean wiring, careful placement, and good data processing. A great sensor installed badly is just an expensive way to measure your garage door.
Essential Parts for a DIY Geomagnetic Observatory
A practical home observatory usually includes a magnetometer sensor, a microcontroller or single-board computer, a real-time clock or network time source, storage, power, enclosure, mounting system, and data analysis software.
Recommended Hardware List
- A stable three-axis magnetometer or fluxgate sensor
- Microcontroller or Raspberry Pi for data collection
- Weather-resistant enclosure if installed outdoors
- Non-magnetic mounting materials such as wood, plastic, or fiberglass
- Stable power supply, battery backup, or solar power system
- Temperature sensor for tracking thermal effects
- SD card, local database, or cloud storage for data logs
- Basic tools, shielded cables where appropriate, and patience in bulk quantities
Non-magnetic materials matter. Steel screws, iron brackets, magnetic tools, speakers, motors, and power transformers can contaminate readings. When in doubt, test materials with a small compass or magnet before installing them near the sensor.
Finding the Best Location
Location is everything. A magnetometer is basically a professional gossip collector for magnetic fields. It notices things you never considered: passing cars, elevators, power cables, appliances, steel fences, reinforced concrete, lawn equipment, and sometimes your own tools.
Avoid Magnetic Noise
Place the sensor as far as practical from buildings, vehicles, power lines, metal sheds, transformers, air-conditioning units, speakers, and buried utilities. A backyard corner may work better than a desk. A wooden post can work better than a metal pole. A quiet rural location is excellent, but even suburban sites can produce useful data if you understand their limitations.
Control Temperature
Many sensors drift with temperature. That does not mean they are useless; it means you should measure temperature and compare it with magnetic readings. If your magnetic field graph rises every afternoon exactly when the enclosure heats up, congratulations: you have discovered the Sun, but not necessarily a geomagnetic storm.
Keep the Sensor Fixed
The sensor must not move. Even a tiny rotation can look like a magnetic change because the sensor axes are now pointed differently through Earth’s field. Mount the sensor securely, mark its orientation, and avoid bumping it. If you must move it, record the time so you do not later mistake your maintenance session for a cosmic event.
Setting Up Data Logging
Good data logging turns a gadget into an observatory. Your system should record time, magnetic field values, temperature, sensor status, and ideally power information. A common logging interval is once per second or once per minute. One-second data captures quick changes but creates larger files. One-minute averages are easier to manage and often enough for hobby analysis.
Use Accurate Time
Time accuracy is crucial if you want to compare your observations with official geomagnetic data. Use Network Time Protocol if your device is online, or a GPS time source if you want a more independent system. At minimum, keep the clock synced and record timestamps in UTC. Local time is fine for your notebook, but UTC makes comparison with global space-weather data much easier.
Record Raw and Processed Data
Save raw sensor readings whenever possible. Processed data is useful for graphs, but raw data lets you reanalyze later if you discover a calibration mistake. Store values in a simple CSV format with columns such as timestamp, X, Y, Z, total field, temperature, and notes.
Make Automatic Plots
Graphs help you spot trends quickly. Create daily plots showing each magnetic component and temperature. Add moving averages to reduce noise. Highlight unusual jumps, gaps, or spikes. A sudden square-shaped jump may be a sensor reset. A smooth multi-hour variation during high Kp conditions may be space weather. A sharp spike every morning at 7:15 may be your coffee grinder achieving scientific immortality.
Calibration and Baseline Checks
Professional observatories perform absolute measurements and careful calibration. A DIY observatory can still use practical baseline checks. The goal is not perfection; the goal is consistency, documentation, and honesty about uncertainty.
Establish a Quiet Baseline
Run your system for several quiet days. Compare your readings with nearby professional observatory plots or national geomagnetic data. Note the typical daily pattern, noise level, and temperature response. This baseline helps you identify unusual activity later.
Check for Local Interference
Walk around the site with metal objects, power tools, or a small magnet while watching live data. This controlled mischief teaches you how local disturbances appear. Then keep those objects away from the sensor. The goal is to learn from chaos, not invite it to move in permanently.
Document Everything
Keep a logbook. Record sensor model, wiring, software version, location, orientation, enclosure changes, power outages, storms, repairs, and strange events. Your future self will thank you. Your future self may also wonder why your past self wrote “weird spike, maybe raccoon?” but that is still better than no note at all.
How to Compare Your Data With Space-Weather Sources
Once your observatory is running, compare your readings with official space-weather information. Look at planetary Kp, geomagnetic storm alerts, solar wind conditions, and data from professional observatories. If a magnetic disturbance appears in your data at the same time as elevated global geomagnetic activity, you may have captured a real event.
Do not expect every solar flare to produce a local magnetic signature. Some solar events are not Earth-directed. Some arrive weakly. Some produce effects that are easier to see at high latitudes. Some are lost in local noise. In science, “nothing happened” is still a result, though admittedly less exciting than “my backyard detected the Sun punching the magnetosphere.”
Common Problems and How to Fix Them
Problem: The Data Is Too Noisy
Move the sensor farther from buildings, wiring, vehicles, and appliances. Improve the power supply. Use shorter cables. Add averaging. Check whether wind, vibration, or temperature changes are affecting the enclosure.
Problem: The Signal Drifts Every Day
Compare the drift with temperature. Add insulation or shade. Record temperature and correct for obvious thermal patterns. Some sensors need warm-up time before readings stabilize.
Problem: Sudden Spikes Appear
Look for local causes first: cars, tools, doors, power cycling, lightning, or sensor resets. Check system logs. If the spike appears in professional data too, then it becomes more interesting.
Problem: Nothing Interesting Happens
Welcome to observational science. Quiet data is still useful. It helps establish baseline behavior and proves your system can run continuously. When a real geomagnetic storm arrives, your quiet days will make the event stand out.
Safety and Practical Considerations
A DIY geomagnetic observatory is generally safe, but basic precautions matter. Use weatherproof electrical enclosures outdoors. Protect power connections from moisture. Avoid looking directly into lasers if using an optical magnetometer. Secure cables to prevent tripping. Keep magnets away from sensitive electronics, magnetic storage media, and medical devices such as pacemakers. Label your setup so nobody “cleans up” the strange box that is quietly listening to Earth.
What You Can Learn From Your Observatory
Over time, your DIY geomagnetic observatory can teach you how Earth’s magnetic field changes with solar activity, local time, season, latitude, and magnetic environment. You can learn sensor calibration, time-series analysis, noise filtering, electronics, coding, environmental monitoring, and scientific skepticism. That last one is important. The first explanation for a strange spike is not “space storm.” It is usually “someone moved a chair.” Science is glamorous like that.
You can also contribute to citizen science by sharing well-documented data with communities interested in space weather. Distributed small instruments are valuable because they provide local observations across many places. Even when individual stations are modest, networks of careful observers can reveal patterns that one station alone cannot see.
Experience Notes: Lessons From Building a DIY Geomagnetic Observatory
The first lesson of building a DIY geomagnetic observatory is that the invisible world is not quiet. Before starting, it is easy to imagine Earth’s magnetic field as a calm background force, like a compass needle politely pointing north while wearing a tiny bow tie. After logging data for a few days, you realize the magnetic environment is full of bumps, wiggles, slow waves, sudden glitches, and suspicious little spikes that demand investigation.
A practical experience is to begin with the simplest working setup before chasing perfection. Many builders spend too long comparing sensors, reading specifications, and designing the ultimate enclosure. A better approach is to build a basic prototype, log data for a week, and learn what your site actually does. You may discover that the sensor is fine but your location is terrible. Or that the backyard is quiet until trash pickup day, when a large metal truck becomes the most powerful object in your scientific universe.
One useful habit is to create a “disturbance diary.” Any time something happens near the sensor, write it down. Lawn mower at 10:12 a.m. Power outage at 2:04 p.m. Sensor enclosure opened at 5:30 p.m. Thunderstorm overnight. New metal garden chair placed nearby because apparently the patio needed more magnetic personality. These notes become priceless when reviewing graphs later. Without notes, every anomaly looks mysterious. With notes, half of them become comedy.
Another lesson is that temperature is sneaky. A sensor inside a plastic box may look stable in the morning and drift in the afternoon as sunlight warms the enclosure. Adding a temperature sensor helps you avoid false excitement. If the magnetic curve and temperature curve move together every day, you are probably seeing thermal behavior. Shade, insulation, ventilation, or better sensor placement can improve results. The goal is not to eliminate every environmental effect but to understand it well enough that it does not fool you.
Data visualization makes the project addictive. A plain CSV file is useful, but a daily graph turns the observatory into a living instrument. You begin checking it the way some people check weather radar. Quiet day? Nice baseline. Small wiggle? Interesting. Big movement during a geomagnetic alert? Suddenly you are a backyard space-weather analyst with coffee in one hand and a graph in the other.
Comparison with official data is where the project becomes genuinely rewarding. When your local magnetometer shows a disturbance that lines up with elevated geomagnetic activity, the project stops feeling like a pile of wires and starts feeling like a window into the Sun-Earth system. Even if your readings are rough, the connection is real: energy from the Sun, currents in near-Earth space, and a sensor in your yard are all part of one chain.
The final experience-based tip is to leave the system alone. After installation, resist the urge to constantly adjust it. Stability is more valuable than endless tinkering. The best observatory is slightly boring most of the time. It sits quietly, logs faithfully, and waits. Then, when the Sun decides to throw a magnetic tantrum, your humble little station is ready to catch the evidence.
Conclusion
A DIY geomagnetic observatory is one of the most rewarding science projects you can build at home. It combines electronics, Earth science, astronomy, coding, data analysis, and patient observation. It also teaches a healthy respect for noise, calibration, and the surprising magnetic influence of ordinary objects. With a good sensor, a quiet location, reliable logging, and consistent documentation, you can monitor natural magnetic variations and compare your results with professional space-weather data.
You do not need to build a perfect observatory on day one. Start small, measure carefully, improve gradually, and let the data teach you. The Earth is already broadcasting. Your job is to build a receiver quiet enough to listen.