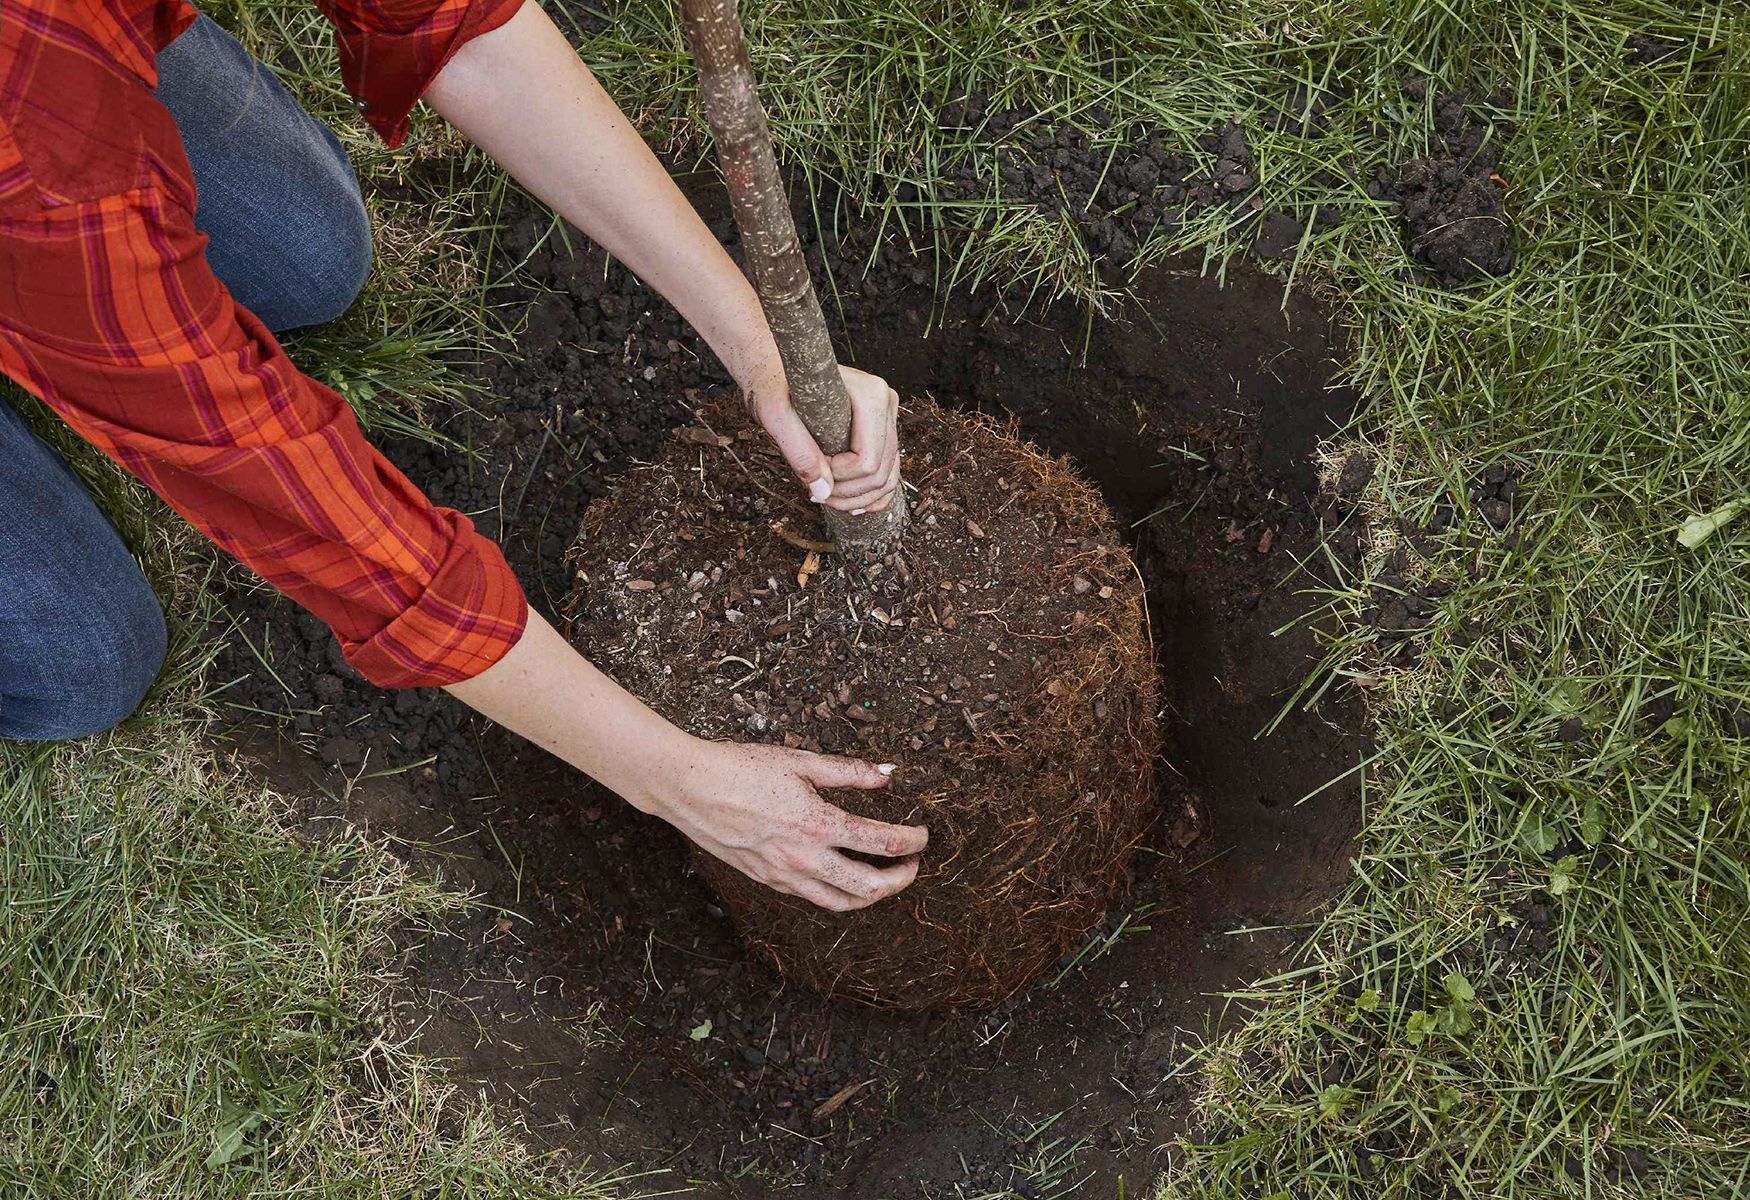
Planting a tree seems wonderfully simple. Dig hole. Insert tree. Feel like a hero. Post photo. Wait for shade. But here is the uncomfortable truth: a shocking number of trees are planted in ways that quietly sabotage them from day one. The roots go in too deep, the mulch touches the trunk, the hole is shaped like a chimney, and the poor tree ends up fighting for its life while everyone assumes trees are just “slow starters.”
If you want strong roots, steady growth, and a tree that still looks fabulous years from now, technique matters more than enthusiasm. The good news is that proper tree planting is not complicated. It is just specific. Once you understand where the root flare belongs, how wide the hole should be, and why mulch volcanoes deserve early retirement, you can give your tree a much better shot at thriving.
This guide breaks down how to plant a tree properly, step by step, with practical advice, common mistakes to avoid, and real-world experience that makes the process far less mysterious. Whether you are planting a young maple in the front yard, a flowering dogwood near the patio, or a shade tree you hope your future self will brag about, the rules are mostly the same: right tree, right place, right depth, and consistent aftercare.
Why Proper Tree Planting Matters
When a tree fails, the problem often starts underground. A tree planted too deep may struggle with oxygen, moisture balance, and root development. A tree dropped into a narrow hole can behave like it is living in a flowerpot buried in the ground. A tree with circling roots may look fine for a while, then decline years later when those roots begin to choke the trunk or limit stability.
Proper planting gives roots the best possible start. That means better establishment, stronger anchorage, improved drought tolerance, fewer pest and disease issues related to stress, and a tree that grows into its natural form instead of into a long-term rescue project.
In plain English, planting correctly is the cheapest insurance you can buy for a tree. It costs nothing extra to dig the right hole, position the root flare correctly, and mulch like a sensible person.
Before You Dig: Pick the Right Tree and the Right Spot
Think About Mature Size, Not Baby-Tree Size
That adorable little tree at the nursery is not staying little. Before planting, look up the tree’s mature height and spread. A species that eventually reaches 40 feet should not be wedged six feet from your house, under a power line, or next to a sidewalk that already looks nervous.
Choosing the right tree for the right place is one of the smartest moves in landscape planning. Large shade trees belong where they can stretch out without aggressive pruning. Smaller ornamental trees are better choices near patios, utility lines, and tighter urban lots. If you plant the wrong tree in the wrong spot, future-you inherits the problem with a pruning saw and a regretful expression.
Check Sun, Soil, Drainage, and Utilities
Most trees have clear preferences. Some love full sun. Others tolerate partial shade. Some handle wet soils. Others want sharp drainage and will sulk dramatically if their roots stay soggy. Match the species to your conditions rather than trying to force a tree into a place it hates.
Also, call 811 before digging to have underground utilities marked. This step is easy, free, and much more exciting than accidentally introducing your shovel to a gas line.
What You Need to Plant a Tree Properly
- A healthy tree: container-grown, balled-and-burlapped, or bare-root
- Shovel or spade
- Garden hose or watering can
- Organic mulch such as shredded bark or wood chips
- Pruners for minor corrective cuts
- Knife or snips for removing twine, burlap, or basket material if needed
- Stakes and soft ties only if the site truly calls for them
How to Plant a Tree Properly: Step by Step
1. Find the Root Flare First
The root flare is the point where the trunk widens and transitions into roots. This is not decorative trivia. It is the single most important visual cue for planting depth.
Many nursery trees arrive with extra soil or media piled over the top of the root ball, which can hide the flare. Gently remove loose material from the top until you find the first major roots. If the flare is buried and you plant the tree at the wrong depth, you are basically burying the trunk like treasure. Trees do not enjoy that.
2. Dig a Wide, Shallow Hole
The ideal planting hole is broad and shallow, not deep and narrow. Dig the hole about two to three times as wide as the root ball, but no deeper than the root ball itself. In many landscapes, slightly high is better than slightly low because trees settle over time.
Why wide matters: new roots tend to grow outward into loosened surrounding soil. Why shallow matters: if the hole is too deep, the tree sinks, and the root flare ends up buried below grade. That is one of the most common causes of long-term decline.
3. Inspect and Fix the Roots
If you are planting a container-grown tree, inspect the roots carefully. Many container trees develop circling or girdling roots. Loosen them, spread them outward, and cut problematic roots if necessary. If the root mass is heavily matted on the outside, shaving or slicing the outer layer can encourage better root growth into the native soil.
Bare-root trees are usually easier to inspect, but they need gentle handling so the roots do not dry out. Keep them moist before planting and spread the roots naturally in the hole without bending them into a cramped spiral.
4. Set the Tree at the Correct Height
Place the tree in the center of the hole and confirm that the root flare sits at or slightly above the finished soil grade. Step back and check from multiple angles before backfilling. This is the moment to fix depth. After the hole is filled, changing it becomes an exhausting lesson in consequences.
Always handle the tree by the root ball or container, not by the trunk. Lifting by the trunk can damage tissues that the tree needs to transport water and nutrients.
5. Remove What Should Not Stay
For container trees, remove the pot completely. For balled-and-burlapped trees, remove twine around the trunk and pull back or remove burlap and wire from the upper portion of the root ball once the tree is stable in the hole. Natural burlap may eventually decompose, but leaving too much material in place can still interfere with root establishment or trap moisture where it should not be.
If you are dealing with synthetic burlap or plastic ties, do not leave them in the ground. They are not magical woodland ingredients. They are future problems.
6. Backfill With the Same Soil You Removed
One of the most common myths in tree planting is that the hole should be filled with fancy amended soil, compost, or a rich custom blend that makes the tree feel pampered. In reality, backfilling with the native soil you removed is usually the better move.
Why? Roots need to grow from the root ball into the surrounding landscape soil. If the planting hole becomes a soft little pocket of luxury in a sea of different soil, roots may hesitate to move outward, water may behave unpredictably, and the tree can establish more slowly.
As you backfill, gently firm the soil to remove big air pockets, but do not stomp the area like you are crushing grapes in a vineyard.
7. Water Immediately and Thoroughly
Water right after planting to settle soil around the roots and eliminate remaining air pockets. Then keep watering consistently during establishment. This does not mean daily flooding forever. It means deep, thorough watering based on weather, soil type, and the tree’s condition.
New trees need regular moisture during the first growing season, and often into the second or third year depending on size and site. Sandy soil dries faster. Clay soil holds water longer. Hot, windy weather increases stress. Ignore the calendar if the soil tells a different story.
8. Mulch the Right Way
Apply a two- to three-inch layer of mulch over the root zone, extending it beyond the root ball if possible. Keep the mulch pulled back from the trunk so the root flare remains visible. Think donut, not volcano.
Mulch helps moderate soil temperature, conserve moisture, and reduce competition from turf and weeds. But when mulch is piled against the trunk, it can trap moisture, encourage rot, invite pests, and create conditions for roots to grow where they should not. A mulch volcano is not landscaping. It is a slow-motion mistake.
9. Stake Only If Necessary
Many trees do not need staking at all. A tree in a reasonably sheltered site with a stable root ball is often better off without it. Slight natural movement helps the trunk develop strength.
Stake only when the tree is top-heavy, planted in a very windy site, or unable to stand upright on its own. Use soft, flexible ties and remove the supports once the tree can support itself, usually after one growing season or by the next season. Leaving stakes on too long can weaken trunk development and injure bark.
10. Prune Lightly at Planting Time
Do not give your newly planted tree a dramatic haircut. At planting, remove only broken, dead, diseased, or clearly defective branches. The tree needs its leaves to produce energy for root establishment. Heavy pruning right away reduces that capacity and can slow recovery.
Think of it this way: the tree just moved, lost root mass, and is trying to settle into a new neighborhood. This is not the moment for cosmetic reinvention.
First-Year Tree Care After Planting
Planting day gets the photos, but aftercare determines the outcome. Water is the big one. Check soil moisture regularly near the root ball and the surrounding soil. The goal is evenly moist, not constantly soggy. A dry tree struggles; a drowning tree also struggles. Trees are annoyingly consistent about preferring balance.
Keep grass and weeds away from the base of the tree because they compete for water and nutrients. Refresh mulch as needed, but never bury the flare. Protect young trunks from mower and string-trimmer damage, which can be more harmful than many insects. If deer, rabbits, or sunscald are issues in your area, use guards or fencing as appropriate.
Do not rush to fertilize unless a soil test or clear deficiency suggests it. Most newly planted trees benefit more from correct watering and proper soil conditions than from a random blast of fertilizer.
Common Mistakes When Planting a Tree
- Planting too deep and burying the root flare
- Digging a hole deeper instead of wider
- Ignoring circling or girdling roots
- Leaving twine, synthetic burlap, or too much wire in place
- Piling mulch against the trunk
- Adding gravel to the bottom of the hole
- Over-pruning at planting time
- Staking every tree by default
- Forgetting that watering matters for months, not just one weekend
How Planting Differs by Tree Type
Container-Grown Trees
These are convenient and widely available, but they are the most likely to have circling roots. Spend extra time correcting the root system before planting. A tree with bad roots and a pretty canopy is still a tree with bad roots.
Balled-and-Burlapped Trees
These often have larger root balls and are common for bigger landscape trees. Support the ball carefully, set the tree at the correct height, then remove twine and pull back or remove upper burlap and basket material as recommended.
Bare-Root Trees
These are often affordable and quick to establish when planted while dormant. Keep roots from drying out, spread them naturally, and make sure the planting hole is shaped to fit roots without bending or bunching.
Real-World Experiences and Lessons From Planting Trees
One of the most useful things you learn from planting trees is that the textbook rules make much more sense after you have seen what happens when people ignore them. The first lesson is usually depth. A tree planted even a little too deep often looks perfectly fine at first. It leafs out, people relax, and everyone assumes success has been achieved. Then a year or two later, the canopy looks thin, growth slows, and the tree acts like it is permanently annoyed. Dig around the base, and there it is: the root flare buried under soil and mulch like a secret nobody wanted to admit.
Another common experience involves container trees that look healthy at the nursery but turn out to have roots circling inside the pot like spaghetti at the bottom of a colander. New gardeners are often afraid to cut or loosen those roots because the tree appears fragile. In practice, correcting those defects at planting is usually one of the best things you can do. It feels wrong for about thirty seconds, then very right for the next ten years.
There is also the classic mulch problem. People love mulch because it makes a planting bed look polished, finished, and intentional. Unfortunately, many people keep adding more until the trunk disappears into a little cone. Landscapers see this all the time. A neat ring of mulch can help a tree, but a towering pile pressed against the bark can create moisture problems, decay, and pest issues. The visual difference between good mulching and bad mulching is tiny. The long-term health difference is huge.
Watering teaches another humbling lesson. Most people either underwater from forgetfulness or overwater from guilt. Newly planted trees do not need random acts of kindness. They need consistency. Trees planted in hot weather, windy exposures, or sandy soils usually dry out faster than expected. Trees in compacted or clay-heavy sites can stay wet longer than expected. The gardeners who do best are usually the ones who stop guessing and start checking the soil.
Experience also shows that staking is often overused. Many homeowners assume a staked tree is a cared-for tree. Not necessarily. Trees that are strapped too tightly or left staked too long can develop weaker trunks because they never get the small natural movement that helps them strengthen. In many cases, the best-looking tree after a year is the one that was planted at the right depth, watered well, and left alone to move naturally in the breeze.
Finally, seasoned gardeners know that patience is part of proper planting. A tree is not a patio chair. You cannot put it in place and expect instant perfection. The first goal is establishment, not explosive top growth. When a tree spends its first year building roots, that is not failure. That is success happening underground, where the applause is terrible but the results are excellent.
Final Thoughts
If you remember only a few things from this guide, make them these: plant the right tree in the right place, find the root flare, dig wide instead of deep, backfill with native soil, mulch lightly away from the trunk, and water consistently during establishment. Those simple decisions have an outsized impact on long-term tree health.
Planting a tree properly is one of the most worthwhile landscape tasks you can do. Done well, it adds shade, beauty, habitat, seasonal interest, and a certain satisfying feeling that you made the future slightly better with a shovel and some patience. Done poorly, it becomes a very expensive stick in the ground. Aim for the first outcome.