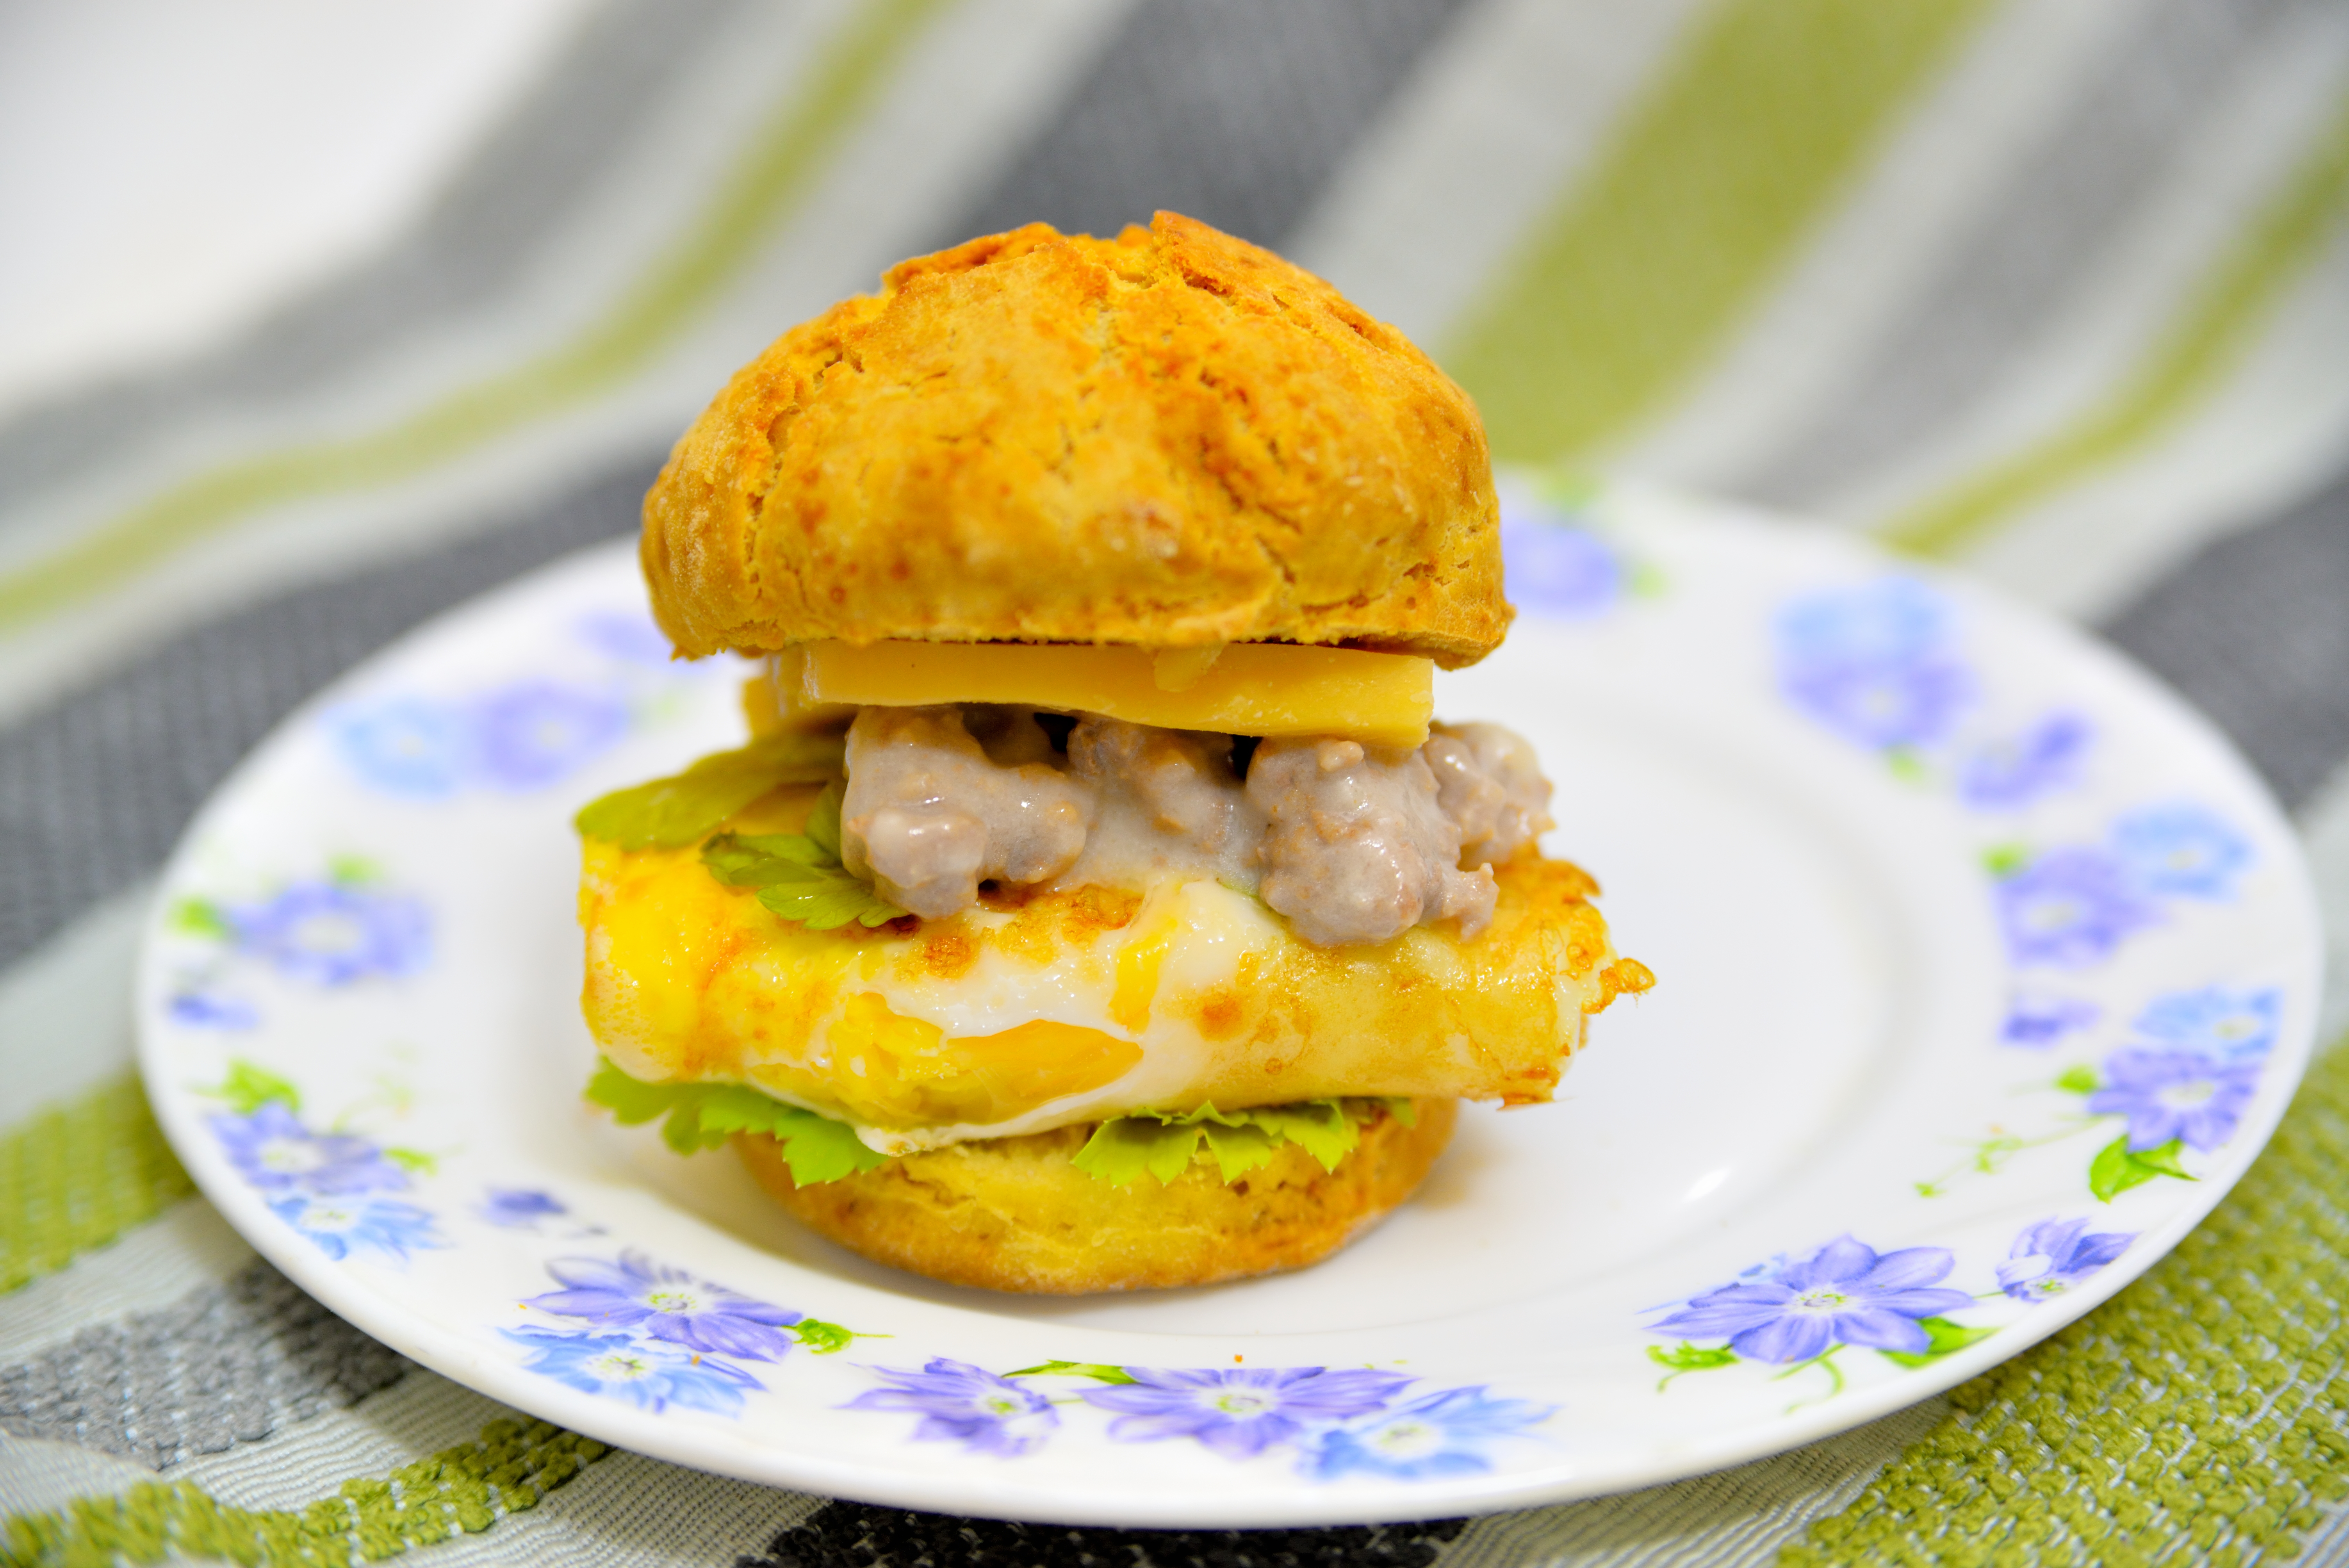
If you have ever bitten into a warm Hardee’s biscuit and briefly wondered whether clouds are secretly made of flour, butter, and Southern optimism, you are not alone. Hardee’s biscuits have earned a loyal following because they are soft, tall, tender, lightly crisp on the outside, and sturdy enough to hold sausage, egg, cheese, gravy, honey, or whatever breakfast decision your heart makes before your brain wakes up.
This guide will show you how to make Hardees biscuits at home in a copycat style. To be clear, this is not Hardee’s official recipe. The real restaurant formula and process are proprietary. But with the right flour, cold fat, tangy buttermilk, gentle mixing, and a blazing-hot oven, you can create homemade biscuits that capture the same comforting spirit: fluffy, buttery, slightly sweet, and ready to become the main character of breakfast.
The best part? You do not need a culinary degree, a commercial kitchen, or a grandmother named Miss Earlene who judges your dough technique from across the room. You just need a bowl, a cutter, a light hand, and the patience not to overwork the dough. That last one is the big biscuit test.
What Makes Hardee’s-Style Biscuits So Good?
Hardee’s built much of its breakfast identity around made-from-scratch biscuits. The appeal is simple: fresh biscuits feel personal. A burger can be assembled; a biscuit feels baked. That handmade texture is what separates a memorable biscuit from a sad, beige puck that tastes like it gave up in middle school.
A Hardee’s-style biscuit should have four major qualities:
- Tender inside: The crumb should be soft and fluffy, not chewy or dense.
- Golden outside: The top should brown beautifully while the bottom develops a light crisp edge.
- Buttermilk flavor: A little tang keeps the biscuit from tasting flat.
- Enough structure: It should split cleanly for breakfast sandwiches without crumbling into biscuit confetti.
To get there, the dough must be handled gently. Biscuit dough is not bread dough. Bread loves kneading. Biscuits do not. Biscuits want to be mixed just enough, patted into shape, cut cleanly, baked hot, and then admired like tiny edible throw pillows.
Ingredients for Copycat Hardee’s Biscuits
This recipe uses simple ingredients, but each one has a job. Do not let the short list fool you. Biscuits are like a small band: when one member is off-key, everyone hears it.
Ingredients
- 4 cups self-rising flour, plus more for dusting
- 1 tablespoon baking powder
- 2 tablespoons granulated sugar
- 1/2 teaspoon fine salt, only if your self-rising flour is low-salt
- 1/2 cup cold unsalted butter, cut into small cubes
- 1/4 cup cold vegetable shortening
- 1 3/4 to 2 cups cold whole buttermilk
- 2 tablespoons melted butter, for brushing after baking
This combination gives you the best of both worlds. Butter brings flavor and browning. Shortening adds tenderness and helps produce a softer, more restaurant-style texture. If you prefer all butter, you can replace the shortening with more cold butter, but the biscuits may taste richer and feel slightly less like the fast-food breakfast classic.
Why Self-Rising Flour Matters
Many Southern-style biscuits rely on self-rising flour because it already contains flour, baking powder, and salt in a balanced mix. It is convenient, consistent, and especially helpful for beginners. If you can find a soft wheat self-rising flour, even better. Soft wheat flour has lower protein than many all-purpose flours, which helps biscuits stay tender instead of bouncy.
If you do not have self-rising flour, make a substitute by combining 1 cup all-purpose flour with 1 1/2 teaspoons baking powder and 1/4 teaspoon salt. For this recipe, you would need 4 cups all-purpose flour, 6 teaspoons baking powder, and 1 teaspoon salt. Since this recipe also adds extra baking powder for lift, keep the additional tablespoon in the ingredient list.
Step-by-Step: How to Make Hardees Biscuits at Home
Step 1: Chill Everything First
Cold ingredients are the secret to tall biscuits. Keep the butter, shortening, and buttermilk refrigerated until the moment you use them. If your kitchen is warm, place the mixing bowl and flour in the freezer for 10 minutes before starting. This sounds fussy, but it helps keep the fat solid, which creates steam pockets in the oven. Steam pockets become layers. Layers become joy.
Step 2: Mix the Dry Ingredients
In a large mixing bowl, whisk together the self-rising flour, baking powder, sugar, and salt if using. Whisking matters because it evenly distributes the leavening. Nobody wants one biscuit that rises like a champion and another that sits there like a coin purse.
Step 3: Cut in the Cold Fat
Add the cold butter cubes and shortening to the flour mixture. Use a pastry cutter, fork, or your fingertips to work the fat into the flour until the mixture looks like coarse crumbs with some pea-size pieces remaining. Do not completely blend the fat into the flour. Those little pieces are future flaky layers.
If your hands run warm, use a pastry cutter instead of fingers. Warm hands melt butter quickly, and melted butter in biscuit dough is like showing up to a snowball fight with soup.
Step 4: Add the Buttermilk
Make a well in the center and pour in 1 3/4 cups cold buttermilk. Stir gently with a fork or rubber spatula until the dough begins to come together. It should look shaggy, slightly sticky, and a little messy. That is good. Biscuit dough should not look polished. If it looks like modeling clay, you have gone too far.
If dry flour remains at the bottom of the bowl, add the remaining buttermilk 1 tablespoon at a time. Different flours absorb liquid differently, so trust the dough more than the measuring cup.
Step 5: Fold the Dough for Height
Turn the dough onto a lightly floured surface. Pat it into a rough rectangle about 1 inch thick. Fold it in half, then gently pat it out again. Repeat this folding process 3 to 4 times. This creates layers without aggressive kneading.
The word “gently” is doing heavy lifting here. Press with confidence, but do not mash the dough. Imagine you are waking a sleeping cat, not flattening a cardboard box.
Step 6: Cut the Biscuits Correctly
Pat the dough to about 3/4 to 1 inch thick. Use a floured 2 1/2-inch biscuit cutter and press straight down. Do not twist. Twisting seals the edges and can prevent the biscuits from rising tall. Press down, lift up, and move on like a biscuit professional.
Gather scraps gently and cut more biscuits. The first round will usually be the prettiest. The second round will still taste wonderful, even if it looks like it has been through a minor emotional event.
Step 7: Arrange and Bake
Place biscuits close together on a parchment-lined baking sheet or in a lightly greased cast-iron skillet. For softer sides, let them touch. For crispier edges, space them about 1 inch apart.
Bake at 450°F for 12 to 16 minutes, or until the tops are golden and the biscuits are cooked through. The hot oven gives the biscuits fast lift before the structure sets. This is how you get height instead of flat disappointment.
Step 8: Brush with Butter
As soon as the biscuits come out of the oven, brush the tops with melted butter. This adds shine, flavor, and that “yes, I absolutely know what I am doing” finish. Let them cool for 5 minutes before splitting.
Copycat Hardee’s Biscuit Recipe Card
Prep Time
20 minutes
Cook Time
12 to 16 minutes
Total Time
About 35 minutes
Yield
10 to 12 biscuits
Instructions Summary
- Preheat oven to 450°F.
- Whisk flour, baking powder, sugar, and salt.
- Cut in cold butter and shortening until crumbly.
- Stir in cold buttermilk until a shaggy dough forms.
- Pat, fold 3 to 4 times, and pat again to 3/4 to 1 inch thick.
- Cut straight down with a floured biscuit cutter.
- Bake 12 to 16 minutes until golden.
- Brush with melted butter and serve warm.
Tips for Making Better Hardee’s-Style Biscuits
Use Cold Buttermilk
Buttermilk adds tang, tenderness, and moisture. It also works with leavening to help the biscuits rise. Whole buttermilk gives the best flavor and texture. Low-fat buttermilk works in a pinch, but avoid plain milk unless you are truly trapped in a breakfast emergency.
Do Not Overmix
Overmixing develops gluten, and too much gluten makes biscuits tough. Stir only until the dough comes together. A shaggy dough is a happy dough. A smooth dough is often a warning sign.
Do Not Roll Too Thin
Thin dough makes short biscuits. For tall, restaurant-style biscuits, keep the dough close to 1 inch thick before cutting. If you want dramatic height, cut fewer but thicker biscuits.
Check Your Baking Powder
Expired baking powder is one of the sneakiest causes of flat biscuits. If yours has been sitting in the pantry since the era of flip phones, replace it. Fresh leavening gives better rise and a lighter crumb.
Bake in a Hot Oven
A 450°F oven may seem intense, but biscuits need strong heat. The quick blast helps the fat release steam and pushes the dough upward. Low heat can cause the fat to melt before the biscuit structure sets, leading to flatter biscuits.
Common Mistakes to Avoid
Mistake 1: Twisting the Cutter
Twisting feels natural, but it seals the dough edges. Sealed edges restrict rise. Press straight down and pull straight up. It is a small move with a big payoff.
Mistake 2: Adding Too Much Flour on the Counter
A little flour prevents sticking. Too much flour dries out the dough. Dust lightly, and use a bench scraper if the dough sticks.
Mistake 3: Using Warm Butter
Warm butter blends into the flour too quickly and reduces flakiness. If the dough becomes greasy or soft while you work, place it in the refrigerator for 10 minutes before cutting.
Mistake 4: Expecting Perfection on the First Batch
Biscuits are simple, but they are also technique-driven. Your first batch may be good. Your third batch may make you question why you ever bought frozen biscuits. Keep notes and adjust the buttermilk, thickness, and baking time based on your kitchen.
How to Serve Hardee’s-Style Biscuits
These biscuits are flexible. Serve them plain with butter, honey, or jam. Split them and add sausage patties, scrambled eggs, cheese, or crispy bacon for breakfast sandwiches. Pour sausage gravy over them for a classic Southern-style meal. Use leftovers for mini chicken biscuit sliders, biscuit bread pudding, or a quick strawberry shortcake.
For a Hardee’s-inspired breakfast sandwich, split a warm biscuit, add a cooked sausage patty, a folded egg, and a slice of American cheese. Wrap it in foil for 2 minutes so the cheese melts into the biscuit. This tiny pause makes a big difference. It gives the sandwich that steamy, drive-thru-style comfort without requiring you to leave the house wearing real pants.
Storage and Reheating
Fresh biscuits are best the day they are baked, especially within the first hour. Store leftovers in an airtight container at room temperature for up to 2 days. For longer storage, freeze them in a sealed freezer bag for up to 2 months.
To reheat, wrap biscuits in foil and place them in a 300°F oven for 10 minutes. For a slightly crisp outside, unwrap during the last 2 minutes. Avoid microwaving too long because biscuits can become rubbery. A short microwave warm-up of 10 to 15 seconds is fine if you are in a hurry, but the oven gives better texture.
Recipe Variations
Honey Butter Biscuits
Mix 2 tablespoons softened butter with 1 tablespoon honey and a pinch of salt. Brush over warm biscuits for a sweet-savory finish.
Cheddar Biscuits
Add 1 cup shredded sharp cheddar to the dry ingredients before adding buttermilk. These are excellent with eggs or chili.
Sausage Gravy Biscuits
Serve split biscuits with creamy sausage gravy for a hearty breakfast. This turns a side dish into a full meal and makes Monday morning slightly less rude.
Cinnamon Sugar Biscuits
Add 1 teaspoon cinnamon to the dry ingredients and brush the baked biscuits with butter, then sprinkle with cinnamon sugar. They will not be exactly like a dessert biscuit from a restaurant menu, but they will disappear quickly.
Extra Experience: What I Learned Making Hardee’s-Style Biscuits at Home
The first time you make copycat Hardee’s biscuits, you may be tempted to treat the dough like pizza dough. Resist this urge with everything you have. Biscuit dough does not want a workout. It wants a spa day. The biggest lesson is that less handling usually creates a better biscuit. When the dough looks a little rough, that is often when it bakes up beautifully.
One practical experience is learning how the dough should feel. Good biscuit dough is moist but not wet, shaggy but not dry, and soft but not soupy. If it sticks lightly to your fingers, that is normal. If it coats your hand like paste, add a small dusting of flour. If it crumbles apart like beach sand, add a splash more buttermilk. Over time, your hands learn what the recipe means better than your eyes do.
Another helpful discovery is that biscuit height begins before baking. If you pat the dough too thin, the oven cannot magically turn it into a skyscraper. Start thick. A 1-inch slab of dough can feel excessive, but it produces the tall, split-worthy biscuit most people want. When in doubt, choose thick over wide. A biscuit should have presence. It should enter the breakfast plate with confidence.
The cutter technique also matters more than expected. Twisting the cutter seems harmless, but it can pinch the edges shut. Once you switch to a straight-down cut, the biscuits rise more evenly. A sharp metal cutter works better than a drinking glass because dull edges compress the dough. If a glass is all you have, flour the rim well and press decisively.
Temperature control is another game changer. Cold butter and cold buttermilk make the dough easier to handle and help create steam in the oven. If the kitchen is hot, chill the cut biscuits for 10 minutes before baking. This one small step can improve lift, especially during summer or in warm apartments where butter softens if you simply look at it with affection.
Baking surface changes the final texture. A parchment-lined baking sheet gives clean bottoms and easy cleanup. A cast-iron skillet creates a slightly crispier base and a more old-school Southern feel. Placing biscuits close together gives soft sides and encourages upward rise. Spacing them apart gives more browned edges. Neither is wrong; it depends on whether you want tender pull-apart biscuits or crisp-edged individuals.
Finally, homemade biscuits teach humility. Some batches lean sideways. Some rise unevenly. Some look like they were cut during a mild earthquake. But even imperfect biscuits can taste fantastic. Serve them warm, brush them with butter, and nobody will complain. In fact, people are usually too busy reaching for a second biscuit to inspect your lamination pattern.
Conclusion
Learning how to make Hardees biscuits at home is really about mastering classic Southern biscuit technique: cold fat, cold buttermilk, gentle mixing, clean cutting, and hot baking. You may not have Hardee’s official recipe, but you can absolutely create a fluffy, golden, buttery copycat biscuit that brings the same breakfast comfort to your kitchen.
Start with good flour, keep your ingredients cold, avoid overworking the dough, and bake with confidence. The reward is a tray of warm biscuits that can carry butter, jam, sausage, eggs, gravy, or just your proud little smile. And if the first batch is not perfect, congratulations: you now have an excellent excuse to make biscuits again tomorrow.