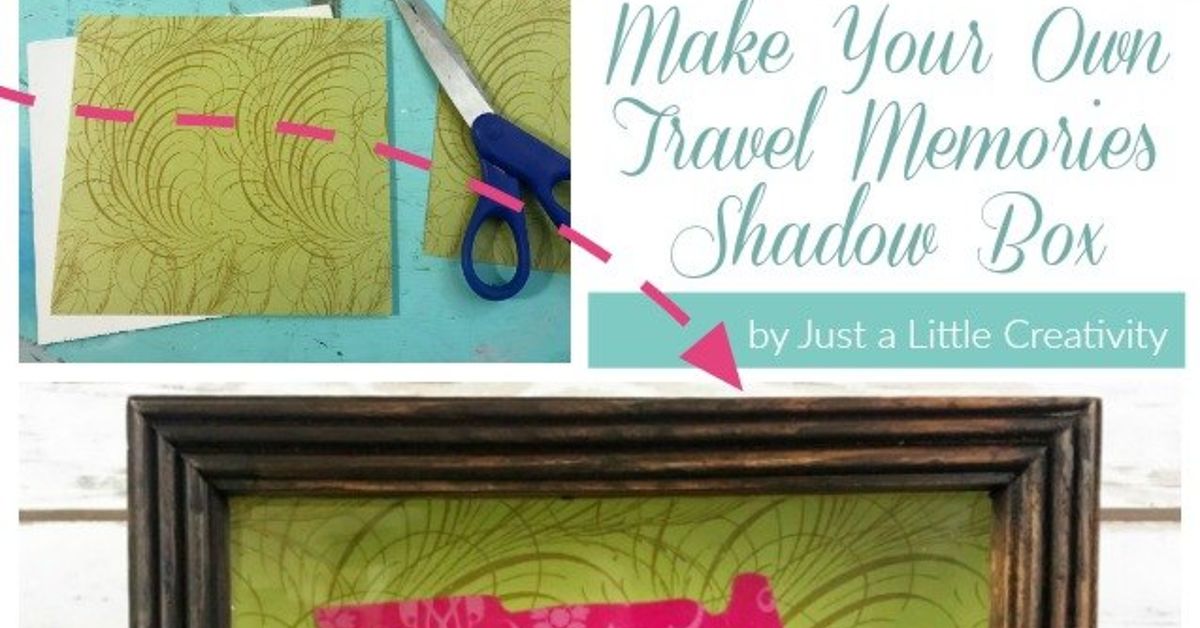
Some people come home from a trip with a glowing tan, 900 photos, and a strong opinion about airport coffee. Others come home with ticket stubs, museum wristbands, coins, pressed maps, postcards, hotel key cards, seashells, luggage tags, and one tiny receipt from a gelato shop that somehow feels emotionally important. If that sounds familiar, a DIY travel memories shadow box may be exactly what your souvenirs need.
A travel shadow box turns small keepsakes into a framed story. Instead of letting your vacation treasures disappear into a drawer labeled “miscellaneous but sentimental,” you can display them as wall art, shelf decor, or a handmade gift. It is part craft project, part memory capsule, and part proof that yes, you really did save that train ticket for a reason.
This guide walks you through how to design, arrange, and preserve a beautiful travel memory box using real-world crafting and preservation principles. You will learn what materials to use, how to protect fragile items, how to create a balanced layout, and how to make your shadow box look polished instead of like your suitcase exploded behind glass.
What Is a DIY Travel Memories Shadow Box?
A DIY travel memories shadow box is a deep frame or display case used to showcase three-dimensional souvenirs and flat memorabilia from a trip. Unlike a standard photo frame, a shadow box has enough depth to hold layered items such as shells, pins, small maps, charms, dried flowers, coins, boarding passes, or miniature keepsakes.
Think of it as a scrapbook that got promoted to wall decor. Instead of flipping through pages, viewers can see the whole story at once: where you went, what you loved, what you collected, and what small details made the trip unforgettable.
Popular Items to Include
Great travel shadow box ideas often begin with the little things you almost threw away. Consider using printed photos, attraction tickets, boarding passes, subway cards, postcards, paper maps, foreign coins, pressed pennies, stamps, luggage tags, restaurant matchbooks, festival wristbands, beach glass, tiny shells, fabric patches, handwritten notes, or a small label with the destination and travel dates.
The best pieces are not always the most expensive. A faded bus ticket from a rainy afternoon in Chicago may tell a better story than a souvenir magnet bought during a last-minute airport sprint. Choose items because they spark a memory, not because they look “important.”
Why Make a Travel Shadow Box?
Digital photos are wonderful, but they can disappear into phone storage faster than snacks disappear on a road trip. A shadow box gives your memories a physical place in your home. It also lets you combine photos with texture, color, handwriting, and objects that carry emotional weight.
A handmade travel keepsake display can work as a personal decor piece, a vacation anniversary gift, a honeymoon memory frame, a family road trip project, or a creative way to celebrate a bucket-list destination. It is also a smart option for people who want to preserve travel souvenirs without creating another overstuffed album.
Materials You Need for a Travel Shadow Box
Before you start gluing anything with the confidence of a caffeinated raccoon, gather your supplies. A little preparation helps your finished project look clean, intentional, and durable.
Basic Supplies
- A shadow box frame with enough depth for your items
- Acid-free cardstock, mat board, or scrapbook paper for the background
- Printed travel photos
- Tickets, maps, postcards, tags, coins, shells, charms, or other souvenirs
- Photo-safe adhesive, glue dots, archival corners, or small pins
- Scissors or a craft knife
- Ruler and pencil
- Tweezers for small items
- Optional labels, letter stickers, vinyl decals, or handwritten captions
Preservation-Friendly Materials
If you are displaying original photos, paper tickets, or delicate documents, use preservation-friendly materials whenever possible. Acid-free paper and photo-safe adhesives help reduce long-term yellowing and damage. For especially fragile or irreplaceable items, consider displaying a high-quality copy and storing the original in an archival folder or box.
This is especially useful for old family travel photos, vintage postcards, original letters, or paper items printed on thin thermal receipt paper. Some receipts fade dramatically over time, so scanning or photographing them before display is a very good idea.
How to Plan Your DIY Travel Memories Shadow Box
The secret to a beautiful shadow box is not using every souvenir you own. It is choosing the right pieces and giving them room to breathe. A strong design tells a story without making your eyes feel like they are trying to board a delayed flight.
Choose a Theme
Start with one clear theme. You might create a shadow box for a single destination, such as “Paris 2026,” “Grand Canyon Road Trip,” or “Honeymoon in Hawaii.” You could also make a broader travel memory box based on a type of trip, such as beach vacations, national park adventures, family road trips, study abroad memories, or favorite cities.
A focused theme helps you decide what belongs in the box. If the project is about a beach vacation, shells, sand-colored paper, ocean photos, and a ferry ticket may work beautifully. If the theme is a city weekend, subway cards, museum tickets, coffee shop receipts, and architecture photos may tell the story better.
Pick a Color Palette
Choose two or three main colors from your trip photos or souvenirs. For a desert trip, warm tan, rust, and cream may look natural. For a mountain getaway, try forest green, charcoal, and sky blue. For a tropical vacation, soft aqua, coral, and white can create a bright, breezy effect.
A color palette makes mixed items feel connected. It also prevents the finished box from looking like a tiny souvenir shop had a dramatic sneeze.
Decide on a Layout Style
There are several easy layout styles for a travel keepsake shadow box. A grid layout feels clean and modern. A layered collage feels casual and scrapbook-inspired. A map-based layout uses a map as the background and places items around the route. A museum-style layout gives each object its own label, creating a curated display.
If you are new to crafting, begin with a simple layout: one large photo, one map or postcard, two or three small souvenirs, and a title label. Simple usually looks more expensive than crowded.
Step-by-Step: How to Make a DIY Travel Memories Shadow Box
Step 1: Sort Your Travel Keepsakes
Lay everything on a clean table. Group your items into categories: photos, paper memorabilia, small objects, natural items, and decorative pieces. Remove duplicates and anything that does not support the story. You do not need seven identical coffee receipts unless the trip was specifically about caffeine survival.
Keep the most meaningful items, the most visually interesting pieces, and the ones that fit safely inside your frame. If an item is too thick, heavy, or fragile, photograph it and use the image instead.
Step 2: Prepare the Background
Open the shadow box and remove the backing. Cover the backing with acid-free cardstock, scrapbook paper, fabric, a printed map, or a neutral mat board. Use a smooth background if your souvenirs are colorful. Use a patterned background only if your items are simple.
A map makes an excellent background for a road trip shadow box. For a honeymoon or anniversary trip, a soft linen-look paper can feel elegant. For a family vacation, you might use a playful patterned paper and handwritten captions.
Step 3: Arrange Before Attaching
Place everything on the background without adhesive. Move items around until the arrangement feels balanced. Put larger pieces down first, then layer medium and small items. Try not to place all heavy objects on one side unless you want the design to look like it missed its connecting flight.
Take a quick photo of the layout before attaching anything. This gives you a reference if a breeze, pet, child, or your own elbow decides to participate.
Step 4: Add Dimension
Shadow boxes look best when they use depth. Raise a photo with foam squares, tuck a ticket partly behind a postcard, or pin a small charm near the destination label. Mix flat items with three-dimensional pieces so the display feels alive.
Be careful not to overfill the frame. Before securing everything permanently, place the glass or acrylic front over the arrangement to confirm that nothing presses too tightly against it.
Step 5: Attach Items Safely
Use photo-safe adhesive for pictures and acid-free paper items. Glue dots work well for many lightweight souvenirs. Pins can be helpful for fabric patches, ribbons, or wristbands. For heavier pieces, use a stronger craft adhesive, but avoid applying permanent glue directly to irreplaceable items.
If you want a reversible project, use mounting corners, clear sleeves, cotton thread, small clips, or pins instead of glue. This allows you to remove or rearrange pieces later.
Step 6: Add Labels and Captions
Labels turn a pretty display into a story. Add the destination, travel dates, names of travelers, favorite places, or one short memory. For example: “Portland, Maine October 2025,” “First family road trip,” or “The day we got lost and found the best tacos.”
Keep captions short. A shadow box is not the place for your full travel diary, unless your handwriting is microscopic and your patience is heroic.
Step 7: Close and Display
Once everything is secure, carefully close the shadow box. Wipe the glass or acrylic before sealing it so you do not preserve a fingerprint forever. Hang the box away from direct sunlight, damp rooms, hot attics, and steamy areas. A hallway, bedroom, home office, or gallery wall is usually a better choice than a bathroom or sunny window.
Creative Travel Shadow Box Ideas
Beach Vacation Shadow Box
Use a pale blue or sandy background, one favorite ocean photo, a small shell, a ferry ticket, and a handwritten label. If you include sand, seal it in a tiny glass vial or clear pouch rather than sprinkling it loose. Loose sand has a way of escaping like it has unfinished business.
National Park Adventure Box
Feature a park map, entrance pass, trail photo, pressed penny, hiking patch, and a small note about your favorite overlook. Earth-tone paper and simple labels work well for this style.
City Weekend Shadow Box
Combine subway cards, museum tickets, restaurant cards, skyline photos, and a map clipping. A black, white, and metallic color scheme can make the display feel modern and urban.
Honeymoon or Anniversary Travel Box
Use romantic but restrained details: a boarding pass copy, hotel stationery, a favorite photo, pressed flowers, a dinner receipt copy, and a small quote. Choose soft neutrals, blush, navy, champagne, or classic black and white.
Family Road Trip Memory Box
Include a printed route map, gas station postcards, silly photos, roadside attraction tickets, and a note written by each family member. This kind of shadow box does not need to be perfect. In fact, a little chaos may be historically accurate.
Tips for Making Your Shadow Box Look Professional
Use Negative Space
Empty space is not wasted space. It helps important items stand out. Leave margins around the edges and breathing room between objects. A clean layout often looks more thoughtful than a crowded one.
Repeat Shapes or Colors
Repetition creates harmony. If you use one round coin, add another round element such as a button, compass sticker, or circular photo crop. If your map has red roads, repeat red in a label, ribbon, or small accent.
Balance Flat and Dimensional Items
A box filled only with paper may look like a framed bulletin board. A box filled only with chunky objects may look cluttered. Mix photos, tickets, labels, and small 3D items for a layered design.
Choose One Focal Point
Pick the star of the display. It might be your favorite photo, a postcard, a map, or a meaningful souvenir. Place it slightly off-center or near the upper third of the frame, then arrange supporting items around it.
Common Mistakes to Avoid
The first common mistake is using too many items. If everything is special, nothing gets attention. Save extra souvenirs in an envelope behind the frame or in a separate memory box.
The second mistake is using the wrong adhesive. Hot glue can be useful for some sturdy objects, but it is not ideal for delicate photos, old tickets, or fragile paper. When in doubt, use photo-safe or reversible mounting methods.
The third mistake is ignoring depth. Always test the frame before final assembly. If the glass presses against your objects, the box may not close properly, and your display can look squished.
The fourth mistake is hanging the shadow box in harsh sunlight. Light exposure can fade photos, paper, fabric, and ink. Choose a display spot where your memories can be admired without being roasted like vacation marshmallows.
How to Preserve Travel Souvenirs Before Displaying Them
Good preservation starts before the craft project. Keep paper items flat and dry. Remove souvenirs from plastic bags if moisture is trapped inside. Store photos and tickets away from heat, humidity, and direct sunlight until you are ready to use them.
For fragile originals, make digital scans or photos first. This gives you a backup and lets you print copies for crafting. You can use the copy in the shadow box and store the original in an acid-free folder or archival box.
Natural items such as shells, leaves, or pressed flowers should be clean and dry before display. Avoid using food items, fresh plants, or anything that may attract insects. Your shadow box should preserve travel memories, not start a tiny wildlife documentary.
Budget-Friendly DIY Travel Shadow Box Ideas
You do not need an expensive frame or designer supplies. Craft stores often sell basic shadow boxes in several sizes, and sales can make them much more affordable. You can also refresh an old frame with paint, line the background with leftover fabric, or print your own title labels at home.
If you want a low-cost version, use a small frame, one printed photo, a map scrap, and two or three flat souvenirs. Even a simple arrangement can feel meaningful when the story is clear.
Gift Ideas Using Travel Memory Boxes
A DIY travel shadow box makes a thoughtful gift because it is personal without being overly complicated. Create one for a partner after a weekend getaway, for parents after a family vacation, for a friend after a graduation trip, or for newlyweds after their honeymoon.
For a gift, include a small handwritten note on the back of the frame. Mention why the trip mattered, what moment made you laugh, or what memory you hope they keep. The note does not need to be poetic. Honest beats fancy every time.
Experiences and Personal Lessons from Making a DIY Travel Memories Shadow Box
The first thing you learn when making a DIY travel memories shadow box is that travel souvenirs multiply in secret. You begin with one boarding pass and one photo, then suddenly discover three maps, four receipts, a coffee sleeve, a pressed flower, and a museum sticker that has been living in your backpack like a tiny historian.
One of the best experiences is the sorting stage. It feels simple, but it often brings back details you forgot. A train ticket may remind you of the morning you almost missed your stop. A restaurant card may bring back the exact taste of a meal. A wrinkled map may remind you of the moment your phone battery died and you had to navigate like it was 1998. These small paper pieces often carry more emotion than polished souvenir-shop items.
Another lesson is that not every memory needs to be displayed. At first, it is tempting to include everything. But a shadow box works better when it has a clear story. For example, if you are making a box about a New York City trip, you might choose a subway card, a skyline photo, a museum ticket, and a slice of a walking map. That tells a sharper story than adding every receipt from every snack stop. Your pretzel was important, yes, but it may not need its own gallery wall moment.
The layout process can also be surprisingly relaxing. Moving items around before attaching them gives you time to think about the trip. You may notice patterns: lots of blue from a coastal vacation, earthy tones from a national park visit, or bright red accents from city signs and ticket stubs. Those colors can guide your background paper and labels.
A practical experience worth mentioning: always test the depth before gluing. Small objects look innocent until the frame refuses to close. Shells, pins, keychains, and thick patches can be bulkier than expected. If something is too deep, replace it with a photo of the item, use a deeper frame, or display it on a shelf beside the shadow box.
It also helps to create a “maybe pile.” These are items you like but are not sure about. After building the main layout, check whether the maybe items add meaning or just clutter. Most of the time, the design improves when you leave a few things out.
The most satisfying moment is closing the frame and seeing the trip become a finished piece of art. A good travel shadow box does not just say, “I went somewhere.” It says, “This mattered.” It turns scattered souvenirs into a story you can see every day.
Over time, making shadow boxes can become a travel tradition. After each trip, place your best keepsakes in an envelope labeled with the destination and date. When you are ready, print a few photos and build the display. This habit keeps memories organized and makes the crafting process easier. Future you will be grateful, and future you may even stop finding mystery ticket stubs in jacket pockets.
Conclusion
A DIY travel memories shadow box is one of the most charming ways to preserve vacation keepsakes, tell a personal story, and decorate your home with meaning. By choosing a focused theme, using preservation-friendly materials, balancing photos with small objects, and leaving enough breathing room in the design, you can create a travel memory box that looks thoughtful, polished, and deeply personal.
Whether you are displaying a honeymoon, family road trip, national park adventure, beach vacation, or once-in-a-lifetime city escape, the goal is not perfection. The goal is connection. Your shadow box should make you smile, remember, and maybe start planning the next adventure.
Note: For fragile, old, or irreplaceable souvenirs, use copies in the display and store the originals in a cool, dry, archival-safe place.