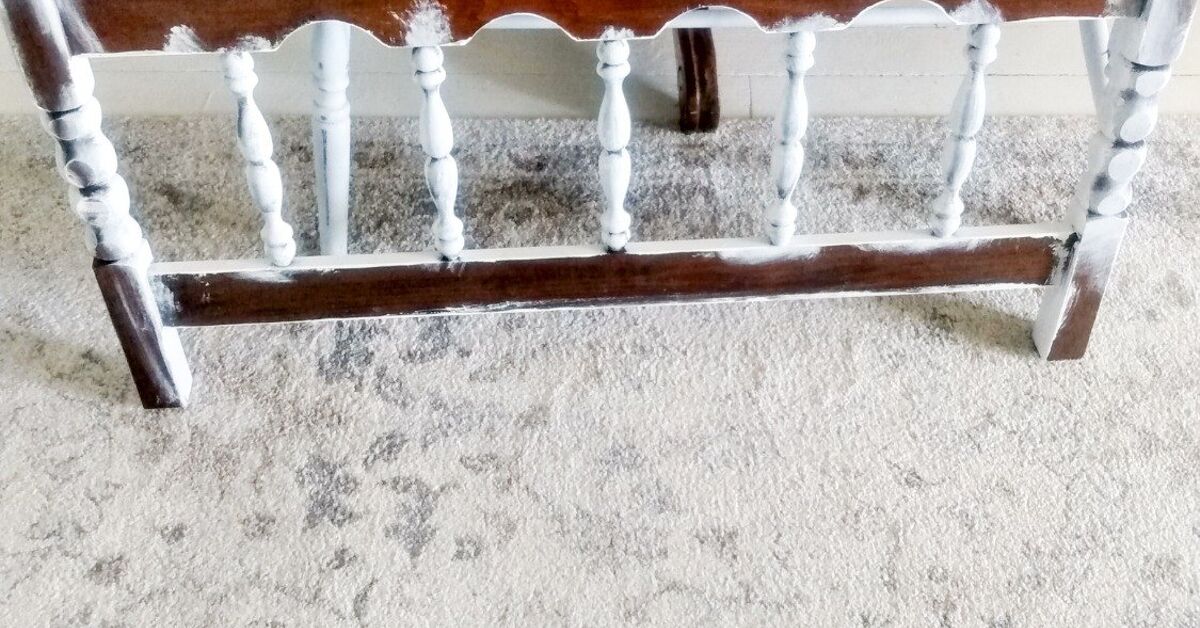
That old headboard in your garage? The one leaning against the wall like it’s auditioning for “Most Likely to Become
Spider Real Estate”? In farmhouse style, it’s not junkit’s a future bench, rack, or garden show-off. The best part:
headboards are already “architectural.” They come with curves, spindles, panels, and trim you’d pay good money for in
brand-new décor.
This guide walks you through smart, farmhouse-friendly ways to repurpose an old headboardwithout turning your weekend
into a three-season DIY drama. You’ll get practical project options, the finishes that scream “modern farmhouse,” and
the safety/structural checks that keep your masterpiece from becoming a wobbly regret.
What “farmhouse style” actually means (so your project doesn’t look like a haunted saloon)
Farmhouse style is equal parts cozy and hardworking: warm wood tones, simple lines, functional storage, and finishes
that look gently timewornnot “I attacked it with a chain in the driveway.” Think painted neutrals (white, cream,
greige), black metal accents, visible grain, and honest hardware.
- Texture: beadboard, shiplap vibes, raised panels, turned spindles.
- Finish: matte/chalky paint, whitewash or pickling, light distressing on edges.
- Hardware: oil-rubbed bronze or matte black hooks, bin pulls, strap hinges.
- Function: storage + seating + “drop zone” organization (entryways love this).
Before you cut, paint, or declare victory: a 10-minute headboard audit
1) Identify what you’re working with
- Solid wood: best for benches, shelves, and anything load-bearing.
- Veneer/engineered wood: great for wall décor and racks; be gentle with sanding.
- Metal: perfect for trellises and outdoor art; needs rust control and exterior paint.
2) Check structural integrity
Wiggle the posts, joints, and spindles. If anything moves, plan to re-glue, clamp, and add fasteners. “Rustic charm”
is not a synonym for “about to collapse.”
3) Don’t ignore safety, especially on older finishes
If the headboard (or your home workspace) dates to before 1978, assume lead-based paint is possible. Avoid dry
sanding or aggressive scraping on unknown coatings. Use containment (plastic sheeting), wear a proper respirator, and
consider lead testing and lead-safe methodsespecially if kids or pregnant people are around.
Tools and materials you’ll actually use (no “mystical DIY wand” required)
- Basic: drill/driver, tape measure, square, clamps, pry bar, utility knife
- Cutting: circular saw or miter saw; jigsaw for curves (optional)
- Sanding: 120 and 220 grit; sanding sponge for profiles
- Fasteners: 1¼"–2½" wood screws; pocket-hole screws if using a jig
- Adhesives: wood glue; construction adhesive for wall assemblies
- Finish: primer (as needed), chalk-style paint or latex paint, stain/whitewash, wax or water-based poly
- Mounting: heavy-duty wall anchors or (better) screws into studs; French cleat for heavy pieces
7 farmhouse-style ways to repurpose an old headboard (with real-world tips)
1) The classic: headboard-to-farmhouse bench
If you want one project that screams “upcycle win,” this is it. Use the headboard as the backrest; cut the footboard
(or bed rails) into arms/side panels, then build a simple seat frame with 2x4s. Top with reclaimed boards for that
farmhouse texture.
-
Plan dimensions: Most entry benches are 16–18" seat height and ~14–16" deep. If the
headboard is tall, you can shorten posts or leave them for drama. - Build a base: Screw/glue a rectangle frame from 2x4s; add cross braces so it doesn’t sag.
- Attach the back: Fasten the headboard to the base from behind, then reinforce with corner brackets.
- Add sides/arms: Use cut footboard sections, or build simple box sides from 1x lumber.
- Seat slats: Reclaimed 1x4s or 1x6s look great. Leave tiny gaps for a “porch bench” vibe.
- Finish + seal: Wax for indoor, poly for heavy-use entryways.
Farmhouse upgrade: Paint the frame a soft white, then whitewash the seat slats. Add matte-black bin pulls on
the sides and slide baskets underneath.
2) Entryway coat rack + shelf: the “drop zone” hero
Cut the headboard down to the most decorative section, mount it to the wall, and add a 1×6 shelf plus sturdy hooks.
This turns “Where are my keys?” into “Oh, they’re right where Future Me wanted them.”
- Mount smart: Locate studs; use a French cleat if the piece is heavy.
- Shelf depth: 5½"–7¼" is plenty for mail and small baskets.
- Hook spacing: 6"–8" apart for coats; 4"–6" for lighter items.
Farmhouse upgrade: Add a simple “Welcome Home” stencil or a small framed quote, but keep it subtleyour
entryway doesn’t need to yell.
3) Headboard shelf (or kitchen rail) with hooks
Headboards often have gorgeous curves that make a shelf look custom. Add brackets underneath, then hooks along the
lower rail. Use it in a mudroom, pantry, or kitchen for towels, aprons, and baskets.
Pro tip: If the headboard has deep molding, it can hide a cable channelsneaky spot for under-shelf
puck lights on a coffee bar.
4) Farmhouse garden trellis (especially for metal headboards)
Metal headboards make fantastic trellises because the scrollwork gives vines natural places to climb. Clean, remove
loose rust, prime with a rust-inhibiting primer, then paint with exterior enamel. Secure it in the ground with stakes
or rebar, or bolt it to a fence.
- Plants that love trellises: clematis, climbing roses, jasmine, cucumbers, pole beans.
- Fast training: Soft plant ties or garden Velcro; avoid wire that cuts stems.
Farmhouse upgrade: Choose classic colorsmatte black, deep green, or weathered white. Add a small bed of
white gravel around the base for that “intentional garden” look.
5) Porch “headboard swing back” or daybed backdrop
Got a covered porch? A headboard can become the back of a porch swing or an outdoor daybed, but only if the material
is solid and you reinforce everything like you’re building it for a rowdy family reunion. Use exterior-rated screws
and finishes, and make sure any hanging hardware is properly rated.
Reality check: If you’re not confident with load calculations and structural mounting, keep the
headboard as a backdrop for a freestanding daybed or a wall-mounted feature instead.
6) Bathroom towel rack with vintage charm
A narrow twin headboard is almost the perfect width for a towel rack. Mount it horizontally, add a towel bar (or
two), and optionally a shallow top shelf for baskets. Painted white with black metal accents is the farmhouse sweet
spot.
7) “Faux headboard” wall panel behind a bench or bed
If your headboard is gorgeous but not sturdy, let it be decorative. Mount it to the wall behind a bed (as a floating
headboard) or behind an entry bench as an architectural accent. This is a great option for veneer pieces or anything
too delicate for seating.
Farmhouse finishes that make it look intentional (not like a craft store explosion)
Finish A: Chalky painted base + gentle distress
Chalk-style paint is forgiving, dries quickly, and loves texture. Use two thin coats, then lightly sand edges and
raised details with 220 grit. Focus on spots that would naturally wear: corners, top rails, and around pulls.
Finish B: Whitewash/pickling for visible grain
Whitewash is diluted paint applied and wiped back so the wood grain still shows. Mix paint and water (start near 1:1,
then adjust), test on the back, brush on with the grain, and wipe with a lint-free rag. Seal with a clear coat if it
will be touched a lot.
Finish C: Layered paint for “been here forever” depth
For a more aged farmhouse look, layer a darker base coat under a lighter top coat. Distress lightly to reveal the
underlayer in strategic places. It looks like decades of repaintingwithout waiting decades.
Common mistakes (and how to avoid them)
- Mounting to drywall only: If it’s heavy, hit studs or use a cleat system.
- Over-distressing: A little goes a long way. You want “worn,” not “wrecked.”
- Skipping a topcoat in high-traffic spots: Entry benches and coat racks get abused. Seal them.
- Ignoring unknown old paint: When in doubt, follow lead-safe practices and keep dust contained.
FAQ: Repurposing an old headboard in farmhouse style
Is it cheaper to repurpose a headboard than buy farmhouse furniture?
Usually, yesespecially if you already have the headboard. Your main costs are fasteners, finish materials, and
hardware. The “hidden” cost is time, but that’s also where the fun lives.
Do I need a footboard to make a bench?
Nope. A footboard helps for arms/sides, but you can build simple box sides from 1x boards, or use legs from another
piece. The headboard is the star.
What’s the best finish for an entryway bench?
For durability, a water-based polyurethane over paint or stain holds up well. Wax is beautiful but better for
low-wear decorative pieces.
Conclusion: Let the headboard live its second (better) life
Repurposing an old headboard farmhouse-style is one of those rare DIY wins where the “before” can be forgotten fast.
Whether you build a bench that anchors your entryway, a coat rack that ends the daily key hunt, or a trellis that
makes your garden look like it has a Pinterest manager, you’re taking a ready-made architectural piece and giving it
purpose again.
Start with the project that fits your space, keep the finish simple and consistent, and focus on sturdy construction.
Your future self will thank youprobably while sitting on that bench putting on shoes like a functional adult.
Bonus: What the experience is really like (a 500-word, real-world-style rundown)
Here’s the part no tutorial shows: the “emotional arc” of repurposing a headboard. It tends to follow a predictable
pattern, and if you know it’s coming, you’ll panic less and laugh more.
Hour 0–1: Optimism. You drag the headboard into the driveway and think, “This will be cute and quick.”
You clean it, and immediately discover that old furniture holds a shocking amount of dust. Like, enough dust to
qualify as a minor ecosystem. You wipe it down anyway and feel virtuous.
Hour 1–2: The first decision spiral. Do you paint it white? Whitewash it? Leave it natural? You test
three options on the back and realize the wood has opinions. Knotty pine, for example, loves to turn yellow at the
worst possible moment. This is when you learn why “test first” is a rule and not a suggestion.
Hour 2–4: The sanding stage, a.k.a. the moment you understand why people buy new furniture. You sand
the flat areas easily, then hit the spindles and carved trim and start negotiating with yourself. “Maybe farmhouse
means dusty,” you whisper. Then you swap to a sanding sponge, the details clean up, and hope returns.
Hour 4–6: Paint magic. Chalk-style paint goes on and suddenly the whole thing looks intentional. You
get excited and do “just one more coat” even though the coverage is already good. Your brush strokes start to look
artsy instead of accidental. You begin referring to the headboard as “the piece” like you’re hosting a home makeover
show.
Hour 6–7: Hardware shopping (or, if you planned ahead, hardware victory). You hold hooks up to the
board and realize matte black hardware is basically eyeliner for furniture: everything looks sharper. You also
realize hooks are never all the same size, even in the same package, because the DIY universe enjoys jokes.
Hour 7–9: Assembly and reality checks. If you’re building a bench, this is where you discover the
floor isn’t level, the headboard isn’t perfectly square, and your “quick frame” needs one more brace. Add it. Future
you will sit there without a creak and feel smug.
Hour 9–10: The finish and the wait. Wax or topcoat goes on and you want to use it immediately.
Don’t. Let it cure. The next day, when you mount it or slide it into place, it feels like you rescued something from
the landfill and gave it a job with benefits. That’s the best part of upcycling: the project doesn’t just look
goodit feels good.