Friendship bracelets are tiny handmade mood boosters. They are colorful, nostalgic, surprisingly relaxing to make, and somehow still manage to feel special even in a world full of text messages and same-day shipping. But once you have finished knotting your masterpiece, one question always shows up like an uninvited guest at a sleepover: How exactly do you tie friendship bracelets so they stay on, look neat, and do not turn into a tangled spaghetti emergency?
The good news is that you do not need a jewelry engineering degree. In most cases, there are three reliable ways to tie friendship bracelets: classic braided ties, a loop-and-braid closure, and an adjustable sliding-knot finish. Each method has its own personality. One is easy, one is polished, and one is the overachiever that actually adjusts to fit different wrists.
In this guide, you will learn when to use each method, how to tie it step by step, and how to avoid the most common mistakes. Whether you are making a candy stripe bracelet for your best friend, a camp-style chevron bracelet, or a stack of colorful wrist candy just because your embroidery floss drawer is judging you, these tying techniques will help you finish strong.
Why the Way You Tie a Friendship Bracelet Matters
A friendship bracelet is only as wearable as its closure. You can knot the prettiest pattern on Earth, but if the ends are bulky, uneven, or impossible to secure around a wrist, the bracelet ends up living a sad life in a desk drawer. A good closure makes the bracelet easier to wear, more comfortable, and more durable.
The best tying method depends on three things: the style of bracelet you made, who will wear it, and whether you want the bracelet to be permanent or removable. Some people love the classic “tie it on and wear it forever until life decides otherwise” approach. Others want a bracelet they can take off before soccer practice, swimming, or pretending to be productive at work. That is where choosing the right finish really matters.
Before You Tie: A Few Smart Prep Tips
Before you finish any friendship bracelet, leave enough loose thread at the ends. This sounds obvious, but it is the craft equivalent of remembering your keys before locking the door. If you cut too close to the knotted section, your closure options shrink dramatically. Leaving a few inches of extra thread gives you room to braid, knot, twist, or create an adjustable finish.
It also helps to secure the final knotted section with an overhand knot before starting your closure. That keeps the bracelet pattern from loosening while you work on the ends. If your bracelet has many strands, divide them evenly before braiding or twisting so the finish looks balanced instead of like it survived a windstorm.
Method 1: Classic Braided Ties
Best for: Beginners, traditional friendship bracelets, and bracelets you plan to tie directly onto the wrist
If friendship bracelets had a hall of fame, braided ties would be the first inductee. This method is simple, reliable, and great for beginners. It works especially well for traditional embroidery-floss bracelets such as candy stripe, chevron, and diagonal stripe designs.
To make braided ties, start by tying a firm overhand knot at the end of the knotted bracelet section. Then divide the loose strings into two equal groups. Braid each group separately for a few inches. Once each braid is long enough to wrap and tie comfortably, finish each one with a small knot at the end. Trim the excess floss, but do not cut so close that the braid can unravel.
When it is time to wear the bracelet, wrap it around the wrist and tie the two braids together in a snug double knot. That is it. No hardware, no special tools, and no dramatic monologue required.
Why this method works
Braided ties are popular because they are easy to make and strong enough for everyday wear. Braiding also keeps the loose threads from fraying into a fluffy little disaster. If you are making several bracelets in one sitting, this method is fast and consistent.
What to watch out for
The main downside is that braided ties usually require help to put on your own wrist unless you have the flexibility of a yoga instructor and the patience of a saint. They are also less adjustable once tied, so getting the tension right matters. Too loose, and the bracelet spins around like it is trying to escape. Too tight, and your wrist starts writing complaint letters.
Example
Imagine you made a six-strand candy stripe bracelet in bright pink, orange, and yellow. Braided ties are perfect here because they match the casual handmade look. The closure feels classic, clean, and true to the old-school friendship bracelet vibe.
Method 2: Loop-and-Braid Closure
Best for: A neater finish, reusable bracelets, and bracelets you want to fasten without a bulky knot
The loop-and-braid closure is a favorite among bracelet makers who want a more polished finish. This method starts with a loop at one end of the bracelet and braids at the other. Instead of tying both ends together directly, you pull one or both braids through the loop and knot them in place.
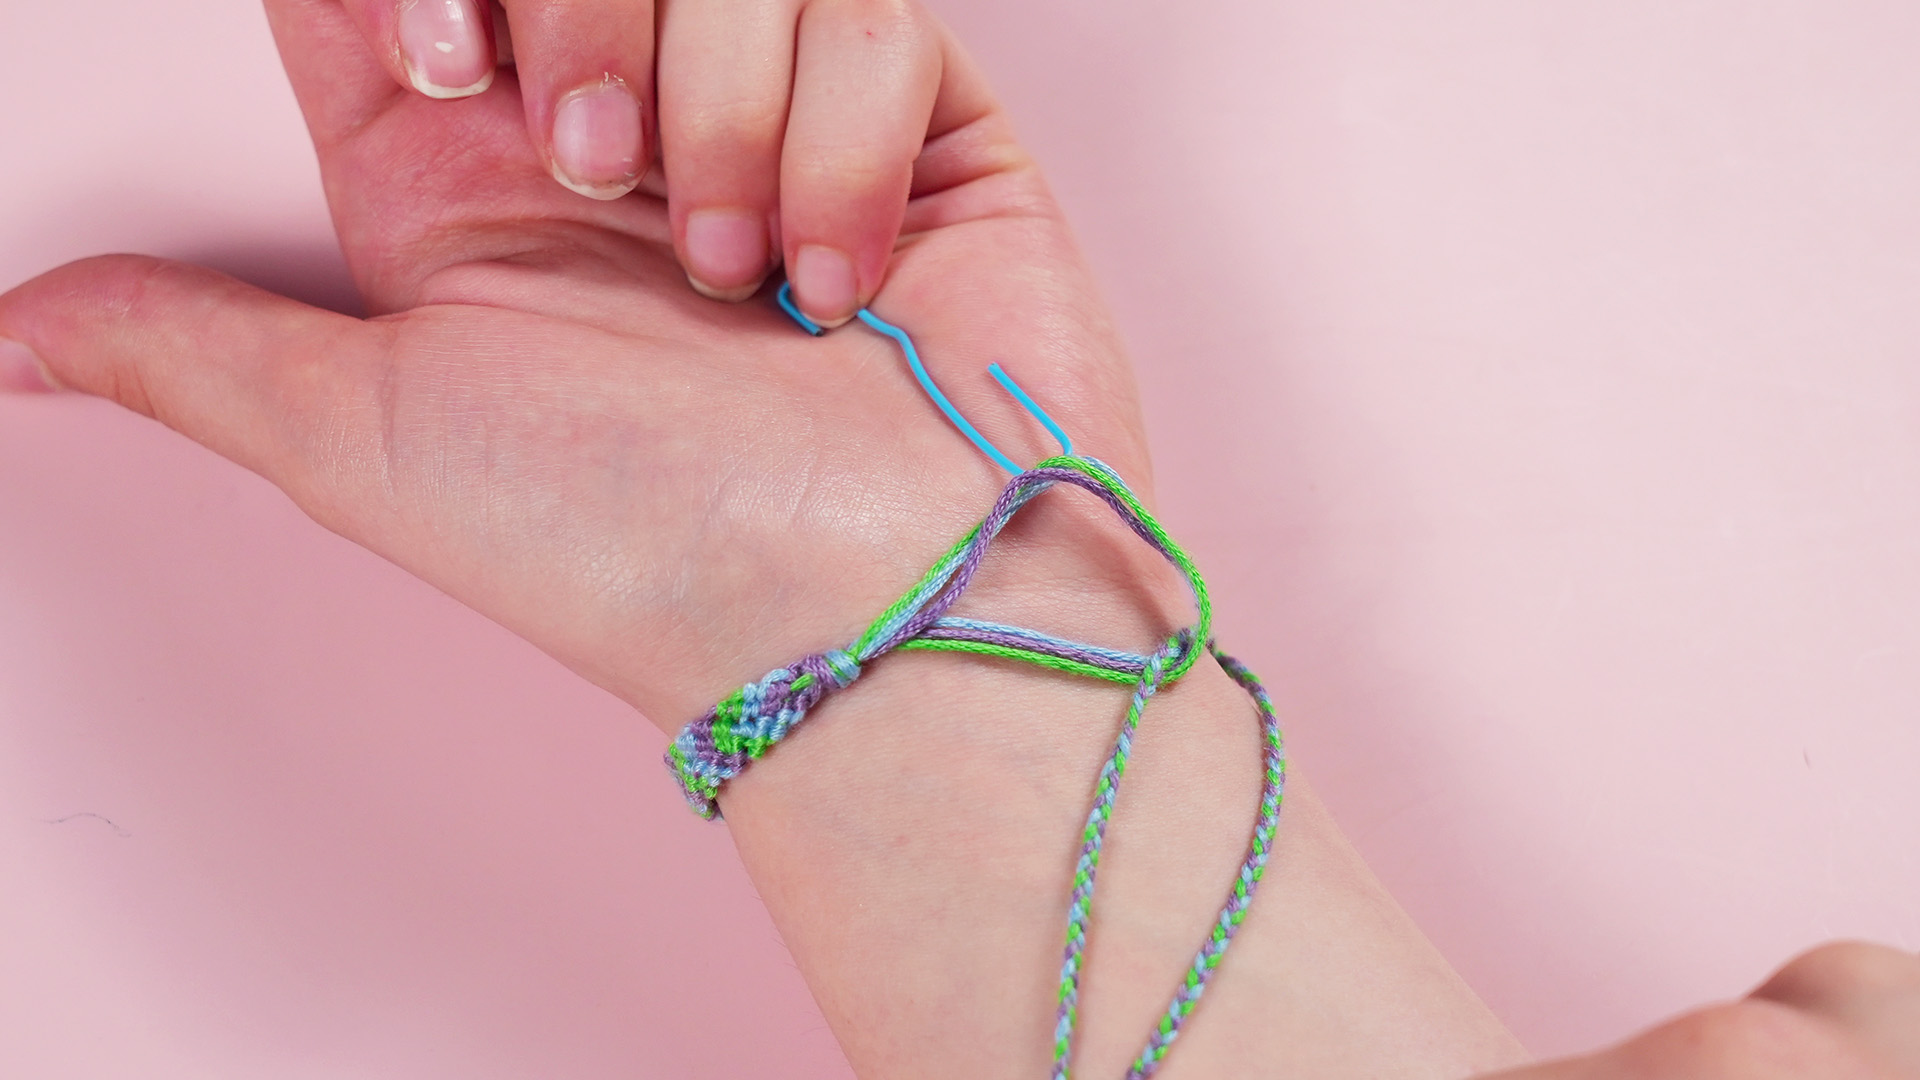
If you are planning ahead, create the loop at the beginning of the bracelet. Fold your threads in half and tie an overhand knot near the folded end, leaving a small loop at the top. That loop will act like a built-in clasp. Then make your bracelet pattern as usual. When you finish knotting the bracelet, separate the loose strands into two groups and braid them into two ties.
To wear the bracelet, slide one braid through the loop and tie it over the second braid, or pass both braids through the loop and secure them, depending on the thickness of your bracelet and how snug you want the fit. The result is tidy, lightweight, and easier to reuse than the standard tie-on method.
Why this method works
The loop keeps the closure centered and reduces bulk at the wrist. It also gives the bracelet a more intentional, finished appearance. Many bracelet makers like this method because it feels secure without looking clunky.
What to watch out for
The loop has to be the right size. Too small, and getting the braid through it becomes an exercise in creative frustration. Too large, and the bracelet may loosen while you wear it. A small, neat loop usually works best, especially for embroidery-floss bracelets.
Example
Say you made a chevron bracelet with eight strands in two shades of blue, white, and lavender. A loop-and-braid closure gives it a cleaner, more symmetrical finish than tying two braids together. It also makes the bracelet easier to take off and put back on when needed.
Method 3: Adjustable Sliding-Knot Closure
Best for: Reusable bracelets, gifting, and anyone who wants a bracelet that adjusts easily
If the braided tie is the classic method and the loop closure is the neat method, the adjustable sliding knot is the clever method. This finish allows the bracelet to expand and tighten, which means it can slide over the hand and then sit comfortably on the wrist without being permanently tied on.
To make a sliding-knot closure, overlap the two bracelet ends so they form a small circle. Use one extra strand or one of the existing ends to tie knots around the opposite cords. In many versions, you wrap the cord around the two bracelet ends and tie a snug overhand-style sliding knot, then repeat on the other side or use a short row of square knots. The key is to knot around the cords without trapping them completely, so the closure can slide back and forth.
Once the knot section is secure, add stopper knots at the ends of the cords so they do not slip out of the closure. Test the bracelet by pulling the cords apart to tighten it and pulling the bracelet body outward to loosen it. If it slides smoothly but still holds its place, congratulations: you have entered the advanced friendship bracelet era.
Why this method works
An adjustable closure makes the bracelet more versatile. It is especially useful for gifts because you do not need the exact wrist measurement. It also feels more “finished,” almost like a store-bought bracelet, but still handmade in the best possible way.
What to watch out for
This method takes more patience than braided ties. If the knots are too tight, the closure will not slide. If they are too loose, it may slip open during wear. Practice on scrap cord first if you are new to adjustable closures. Your future self will thank you, and your bracelet will avoid a very preventable identity crisis.
Example
If you are making a friendship bracelet for a birthday gift and you are not sure of the exact wrist size, a sliding-knot closure is the safest choice. It looks intentional, feels comfortable, and lets the wearer adjust the fit without needing a second person to tie it.
Which Method Is Best?
There is no universal winner, only the best method for your situation.
Choose braided ties if you want the easiest finish, especially for classic camp-style bracelets.
Choose a loop-and-braid closure if you want a cleaner, reusable bracelet with a traditional handmade look.
Choose an adjustable sliding knot if you want flexibility, easy wear, and a more polished finish for gifts or everyday use.
If you are a beginner, start with braided ties. Once that feels easy, try a loop closure. Then graduate to sliding knots when you feel brave, caffeinated, and emotionally ready for precision.
Common Mistakes to Avoid
Cutting the ends too short
Always leave enough thread to finish the bracelet properly. Extra floss is annoying. Not enough floss is tragic.
Skipping the securing knot
An overhand knot before the closure helps hold your design in place and keeps your hard work from unraveling.
Making uneven braids
If one braid is much thicker or longer than the other, the bracelet can look off-balance and tie awkwardly.
Testing the fit too late
Before finishing the closure, wrap the bracelet around a wrist or use a bracelet sizing guide. A gorgeous bracelet that does not fit is basically decorative string with a backstory.
Final Thoughts on Tying Friendship Bracelets
Learning how to tie friendship bracelets is one of those small skills that pays off immediately. A good closure turns your bracelet from “cute craft project” into “actual thing someone will wear.” Whether you choose classic braided ties, a loop-and-braid finish, or an adjustable sliding knot, the goal is the same: make the bracelet secure, comfortable, and easy to enjoy.
The best part is that these methods are not just practical. They also change the personality of the bracelet. A tied-on braid feels nostalgic. A loop closure feels handmade and thoughtful. A sliding knot feels sleek and modern. Same craft, different attitude.
So go ahead and finish that bracelet with confidence. Your embroidery floss has done enough already.
Experiences and Memories Behind Friendship Bracelets
There is something oddly powerful about tying friendship bracelets. It is not just the craft itself. It is the atmosphere around it. Friendship bracelets often happen in the middle of real life: summer camp cabins, sleepovers, road trips, lunch tables, dorm rooms, or lazy weekends when people are talking about everything and nothing at the same time. The bracelet becomes the excuse to sit still long enough for a conversation to happen.
That is probably why so many people remember making them long after they forget what they had for dinner yesterday. You remember the colors you picked because they matched someone’s favorite hoodie. You remember getting one section wrong and deciding it looked “creative” instead of “incorrect.” You remember asking someone to hold out their wrist while you tied the final knot, and for a second the whole thing felt much more important than a few strands of thread should reasonably feel.
Even the mistakes become part of the story. Maybe the bracelet came out too short, so it ended up fitting a younger sibling instead. Maybe one braid was suspiciously longer than the other and the whole bracelet sat sideways, but the person wore it anyway because you made it. Friendship bracelets are wonderfully forgiving like that. They do not have to be perfect to matter.
There is also a kind of quiet confidence that comes from learning how to tie them well. The first time you finish a bracelet with clean braids or an adjustable knot that actually slides, it feels like you unlocked a secret level of craft competence. Suddenly you are not just making bracelets. You are making gifts, keepsakes, tiny colorful souvenirs of a moment in time.
And that is really the charm of it. Friendship bracelets are simple, but they carry emotion in a way bigger projects sometimes do not. They are handmade without being intimidating, meaningful without being expensive, and personal without needing a long speech attached. A bracelet can say “thanks,” “I missed you,” “good luck,” “remember this summer,” or just “I saw these colors and thought of you.”
So yes, learning the best way to tie friendship bracelets matters on a practical level. But it also matters because the closure is the final step in turning thread into memory. It is the moment the bracelet stops being a work in progress and becomes something wearable, giftable, and real. That is a pretty impressive job for a knot.