That pile of used printer pages, old schoolwork, junk mail, and abandoned doodles does not have to end its career in the recycling bin. With water, a little patience, and a surprisingly small amount of equipment, you can transform ordinary pap basic idea is simple: break old paper into individual fibers, suspend those fibers in water, collect them in a thin layer, press out the moisture, and let the fibers bond together as they dry.
This guide explains three practical ways to make recycled paper at home. The first method produces traditional sheets with a blender and a mold and deckle. The second offers a low-tech approach without a blender. The third turns the pulp into decorative or plantable seed paper. Each method uses the same papermaking principles but creates a different result.
How Homemade Recycled Paper Works
Paper is made primarily from cellulose fibers. When scrap paper is soaked and agitated, those fibers loosen and separate, creating a watery mixture called paper pulp. A screen catches the pulp while allowing most of the water to drain away. Pressing and drying bring the fibers close enough to bond into a new sheet.
Commercial recycling mills use industrial pulpers, screens, cleaners, presses, and heated dryers. A home setup is much smaller, but the general sequence is similar: sort, soak, pulp, screen, press, and dry.
Recycled fibers become shorter each time they are processed, so homemade paper may not be as strong or smooth as new office paper. That is not necessarily a defect. The irregular edges, visible fibers, tiny flecks, and soft texture are exactly what make handmade paper attractive.
Choose the Right Scrap Paper
Good Paper for Homemade Pulp
Start with clean, uncoated paper that absorbs water easily. Printer paper, notebook pages, construction paper, paper bags, tissue paper, envelopes without plastic windows, newspaper, and non-glossy wrapping paper usually work well.
White office paper creates light-colored sheets that are easy to tint. Newspaper produces gray pulp with visible print speckles. Brown paper bags make rustic tan sheets, while colored construction paper can be blended into surprisingly vivid pulp.
Paper to Avoid
Skip greasy pizza boxes, waxed paper, laminated sheets, photographs, thermal receipts, heavily coated packaging, metallic gift wrap, and paper covered with glitter or plastic film. These materials may resist water, contaminate the pulp, damage equipment, or create weak, uneven sheets.
Remove staples, paper clips, plastic windows, tape, thick adhesive labels, and other nonpaper materials before soaking. Your blender is brave, but it should not be asked to fight a staple.
Basic Supplies
- Clean scrap paper
- Warm water
- A bucket, bowl, dishpan, or shallow storage tub
- Old towels, felt sheets, or absorbent cloths
- A sponge
- A rolling pin, smooth board, or heavy books
- A drying surface
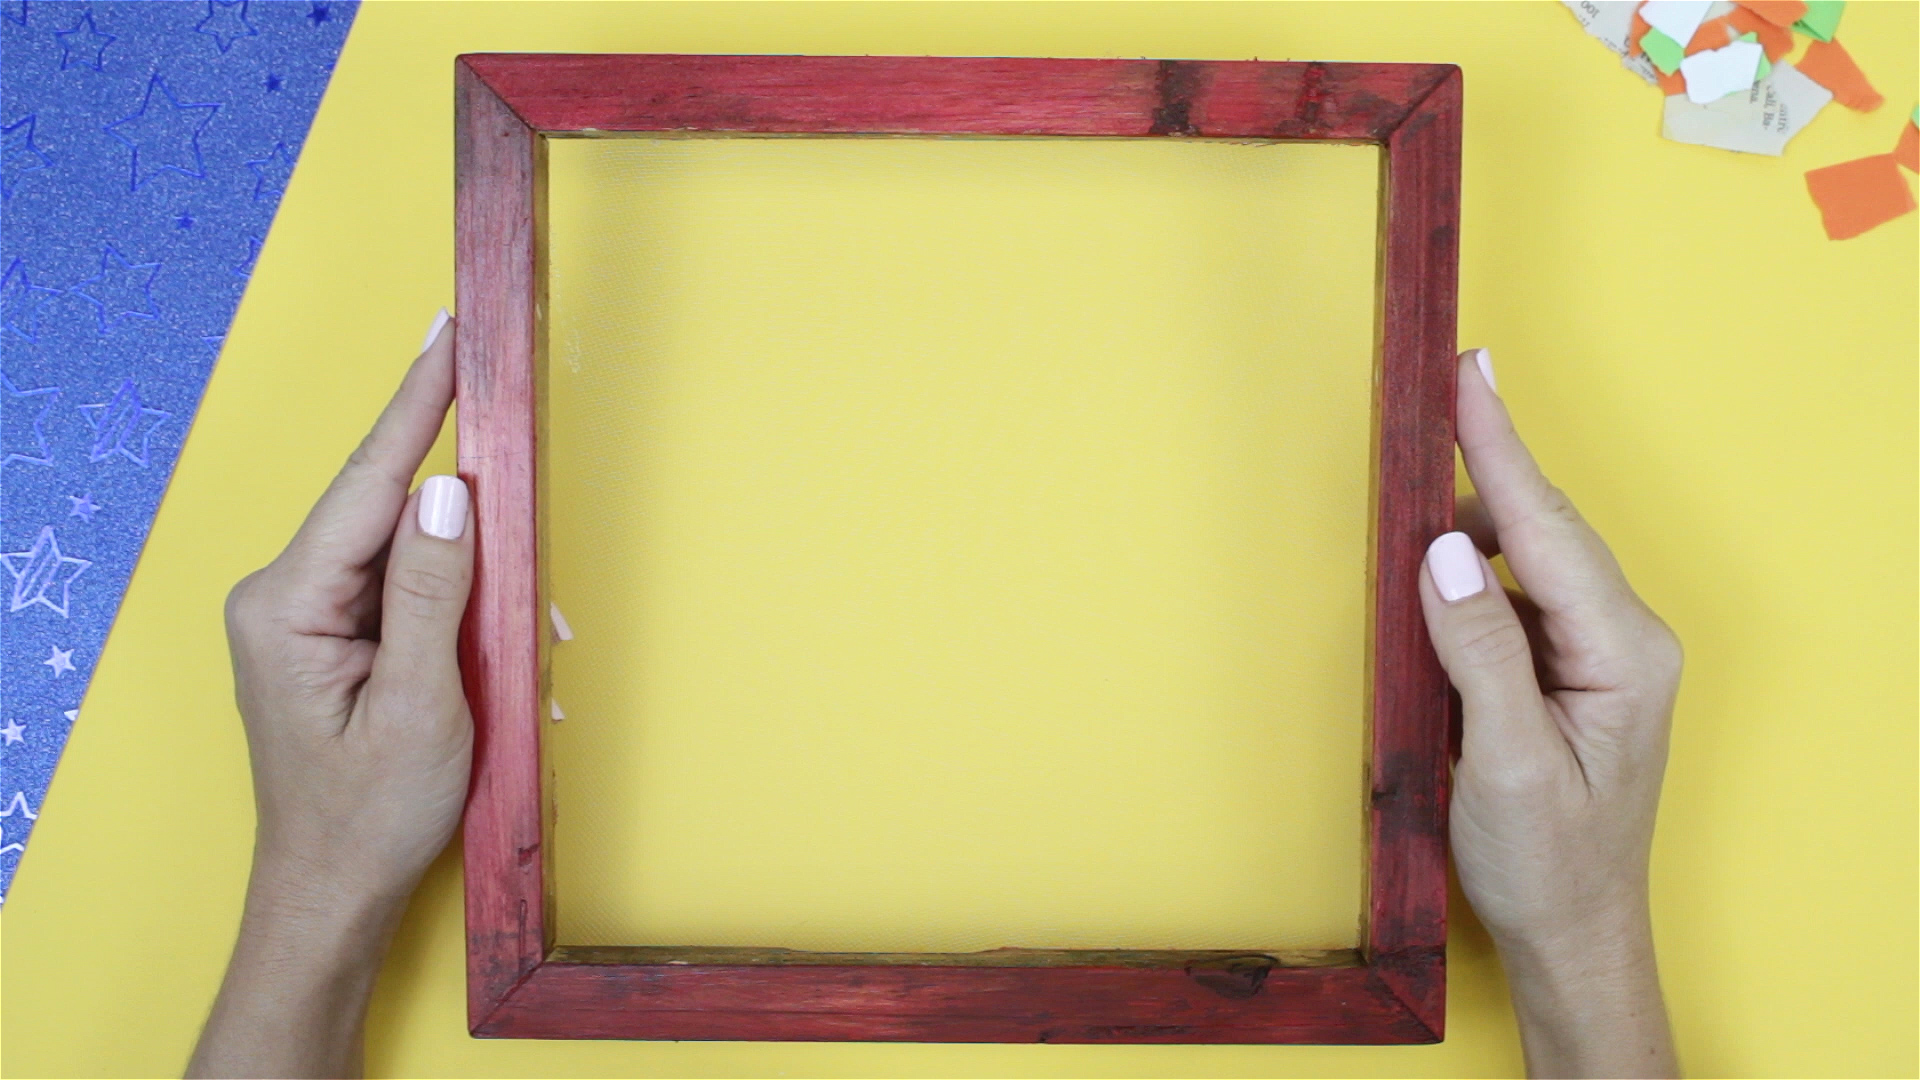
For traditional sheets, you will also need a mold and deckle. The mold is a frame covered with fine mesh, while the deckle is an open frame placed on top to define the edges. You can purchase a papermaking set or make one from two matching picture frames and fiberglass window screen.
Way 1: Make Classic Recycled Paper With a Blender
This method gives you the most control over sheet size, thickness, and texture. It is the best choice for stationery, cards, bookmarks, journal covers, and other recycled paper crafts.
Step 1: Tear and Soak the Paper
Tear the scrap paper into pieces approximately one inch wide. Smaller pieces soak faster and are easier on the blender. Place them in a bowl or bucket and cover them with warm water.
Let thin office paper soak for at least 30 minutes. Newspaper, paper bags, and heavier scraps benefit from several hours or an overnight soak. The paper is ready when it tears apart easily between your fingers.
Step 2: Blend the Paper Pulp
Fill the blender about halfway with warm water. Add a loose handful of soaked paper, replace the lid, and pulse the mixture in short bursts. Continue until the large pieces disappear and the mixture resembles watery oatmeal.
Avoid packing the blender with paper. Too much material can strain the motor and create stubborn clumps. It is faster to make several small batches than to conduct an unauthorized stress test on your kitchen appliances.
Step 3: Prepare the Vat
Pour several inches of water into a shallow tub. Add the blended pulp and stir it thoroughly with your hand. More pulp creates thicker paper; more water creates thinner sheets.
For a standard sheet, begin with enough pulp to make the water look cloudy but still fluid. You can always add more after testing the first sheet.
Step 4: Pull a Sheet
Place the deckle on top of the screened mold. Hold both frames together and lower them into the vat at a slight angle. Level the frames beneath the surface, then lift them upward in one smooth motion.
Gently shake the frames from side to side and front to back while the water drains. This distributes the fibers and reduces thin spots. Stop moving the frame once the pulp begins settling, or the sheet may develop ripples.
Step 5: Couch and Press the Paper
Remove the deckle. Place an absorbent cloth over the wet sheet, then flip the mold so the pulp rests against the cloth. Press a sponge against the back of the screen to remove water. Carefully lift the mold away.
Cover the wet paper with another cloth and press it with a rolling pin, flat board, or stack of heavy books. Firm, even pressure creates a flatter and stronger sheet.
Step 6: Dry the Sheet
Leave the paper on the cloth until it is stable enough to move. You can air-dry it flat, hang it with clips after it becomes partially dry, or transfer it to a smooth nonstick surface.
Drying may take several hours or overnight, depending on thickness, airflow, temperature, and humidity. Place nearly dry paper beneath heavy books to reduce curling.
Way 2: Make Recycled Paper Without a Blender
No blender? No problem. People made paper long before countertop appliances arrived, although they probably complained about the arm workout.
This method relies on longer soaking and manual beating. The resulting paper usually has a chunkier texture, making it ideal for collages, gift tags, rustic cards, ornaments, and decorative projects.
Step 1: Use Soft, Thin Paper
Select tissue paper, newspaper, paper towels, napkins, thin office paper, or other scraps that break down easily. Tear the material into pieces smaller than a postage stamp. The smaller the pieces, the smoother the final pulp will be.
Step 2: Soak Overnight
Cover the pieces with hot tap water and let them soak overnight. Stir the mixture occasionally. The extended soaking time softens the fibers and reduces the amount of pounding required later.
Step 3: Mash the Fibers
Use a potato masher, wooden spoon, fork, whisk, mortar and pestle, or gloved hands to crush and pull apart the wet paper. Add water as needed and continue until the mixture becomes thick pulp.
Do not expect perfectly smooth results. Small visible pieces are part of this method’s handmade character. For finer paper, press the softened mixture through a kitchen sieve and mash it again.
Step 4: Form the Paper
You can use a mold and deckle just as you would in the blender method. For an even simpler approach, place a fine mesh screen over a sink or shallow tray and spoon the pulp directly onto it.
Spread the pulp into a thin rectangle with your fingers or the back of a spoon. Fill gaps carefully and keep the edges reasonably even. A layer that looks slightly too thin while wet often dries into a useful sheet.
Step 5: Press and Dry
Lay a cloth over the pulp and press firmly with a sponge. Flip the paper onto another absorbent cloth, cover it, and roll it flat. Replace wet cloths when necessary and allow the sheet to dry completely.
Because manually processed fibers are less uniform, this paper may be thicker and more textured. Use it for projects that celebrate those qualities rather than trying to disguise them.
Way 3: Make Decorative or Plantable Seed Paper
The third method begins with ordinary recycled paper pulp but adds color, texture, or seeds. Decorative paper is excellent for invitations and gift tags, while seed paper can be planted after use.
Step 1: Make a Fine Pulp
Blend soaked, uncoated paper with plenty of water. White or pale scrap paper works best because it allows flower petals, colored fibers, and other additions to remain visible.
For plantable paper, let the pulp cool before adding seeds. Do not blend the seeds, since the blades may damage them.
Step 2: Add Decorative Materials
Mix in small amounts of dried flower petals, finely cut thread, tiny paper confetti, dried herbs, or natural fibers. Keep additions thin and lightweight. Large leaves and thick decorations can prevent the sheet from bonding properly.
To make seed paper, choose small seeds that tolerate shallow planting. Wildflowers and many herbs are common options. Use seeds suited to the climate where the paper will eventually be planted, and avoid invasive species.
Step 3: Shape the Paper
Pull a traditional sheet with a mold and deckle, or press the pulp into cookie cutters placed on a mesh screen. Hearts, circles, flowers, and simple geometric shapes work better than designs with narrow points.
Spread the pulp thinly and distribute the seeds throughout the surface. A heavy block of pulp may look impressive, but it dries slowly and can be difficult to plant.
Step 4: Remove Moisture Gently
Press the pulp with a sponge and absorbent cloth. Avoid heated drying methods for seed paper because excessive heat may reduce germination. Air-dry it in a well-ventilated location and turn the pieces occasionally so both sides dry evenly.
Step 5: Store and Plant
Store finished seed paper in a cool, dry place. To plant it, place the paper on loosened soil, cover it with a thin layer of soil, water gently, and keep the area moist while the seeds germinate.
Tips for Better Handmade Paper
Control the Thickness
If your sheets are too thick, add more water to the vat or use less pulp. If they tear easily or develop holes, add more pulp and shake the mold gently while lifting it.
Create a Smoother Surface
Blend the pulp longer, use fine mesh, press firmly, and dry the sheet against a smooth surface. A rolling pin helps flatten bumps, although handmade paper will rarely feel as slick as commercial copy paper.
Improve Strength
Mix short recycled fibers with a small amount of stronger paper, such as cotton-based stationery or sturdy office paper. Avoid using only brittle scraps that have already been recycled many times.
Experiment With Natural Color
Colored paper scraps are the easiest way to tint pulp. Small amounts of food coloring or water-based craft pigment can also work, but remember that wet pulp often appears darker than the finished sheet.
Reuse the Water
Papermaking can use a surprising amount of water, but much of it can be reused throughout the same session. Allow leftover pulp to settle, strain out the fibers, and use the remaining water for another batch. Do not pour a thick concentration of paper pulp down the drain.
Common Recycled Paper Problems
The Paper Falls Apart
The pulp layer may be too thin, the fibers may be too coarse, or the sheet may not have been pressed firmly enough. Add more finely blended pulp and increase the pressure during couching.
The Sheet Sticks to the Screen
Remove more water with a sponge before lifting the mold. Make sure the couching cloth is absorbent and press it evenly against the pulp. Peeling the mold away from one corner is often easier than pulling it straight upward.
The Paper Curls
Uneven drying causes many curling problems. Dry the sheet between absorbent cloths, rotate it occasionally, and press it beneath heavy books when it is almost dry.
The Paper Has Holes
Stir the vat before every sheet because pulp settles quickly. Shake the mold gently as you lift it, and patch obvious gaps with a spoonful of pulp before couching.
What Can You Make With Recycled Paper?
Homemade recycled paper works especially well for greeting cards, gift tags, bookmarks, journal covers, place cards, ornaments, collages, small envelopes, wedding favors, seed-paper invitations, and framed artwork.
Very textured sheets may not move smoothly through a home printer. Write on them by hand, use rubber stamps, or attach printed text as a separate layer. Test pens and markers on a scrap because rough paper may cause ink to feather.
Experiences and Lessons From Making Recycled Paper
A realistic first papermaking session rarely begins with a flawless sheet. The first pull often looks like a wet gray pancake with one thick corner, two suspiciously transparent areas, and an edge shaped like a coastline. That sheet is still useful because it teaches the most important lesson: pulp must remain evenly suspended in the vat.
Beginners commonly prepare pulp that is too thick. It feels efficient to pour a large amount into the tub, but the result can resemble cardboard more than writing paper. Thick sheets hold water for hours, curl dramatically, and may develop soft layers that separate. Adding more water and using less pulp usually produces a stronger, more flexible sheet.
The next discovery is that couching matters as much as blending. A beautifully formed sheet can still fail if it is not transferred and pressed correctly. Pressing the back of the mold with a sponge makes an immediate difference. The pulp becomes compact, excess water disappears, and the sheet releases more cleanly onto the cloth.
Drying also rewards patience. Moving a sheet too early can stretch it, tear it, or leave fingerprints that become permanent design features. On the other hand, leaving wet paper on a coarse towel creates a strong fabric texture. That can be attractive for rustic cards, but it may be inconvenient when you want to write with a fine-tip pen.
Different scraps create noticeably different personalities. Office paper makes dependable, pale pulp. Newspaper creates a soft gray sheet with a vintage appearance. Brown grocery bags produce sturdy, earthy paper that looks excellent with black ink. Construction paper offers color, although some shades blend into unexpected results. Combining red, blue, yellow, and green scraps does not necessarily create a rainbow. It frequently creates brownthe official color of overconfidence.
Decorative additions require restraint. A few petals or threads can make a sheet look elegant. A giant handful can prevent the fibers from connecting, producing paper that breaks around the decorations. The most successful sheets usually contain small, evenly scattered additions rather than a botanical traffic jam.
Seed paper introduces another lesson: thinner is often better. Thick seed-paper shapes take longer to dry and require deeper planting. Thin pieces make better tags and break down more easily in moist soil. Seeds should be folded gently into cooled pulp and dried without strong heat.
Making several sheets in one session quickly improves consistency. By the third or fourth pull, you begin recognizing the right pulp concentration, the correct lifting speed, and the amount of pressure needed. The process becomes less like following instructions and more like cooking by feel.
The finished sheets will not be identical, and that is their greatest advantage. Commercial paper is valued for uniformity. Handmade recycled paper is valued for evidence of the process: deckled edges, tiny fibers, faint color variations, embedded petals, and small imperfections. Every sheet records what went into it and how it was made.
Perhaps the most satisfying experience comes from using the final product. A grocery bag becomes a journal cover. Old homework becomes a thank-you card. Shredded office paper becomes a plantable gift tag. The transformation is visible, practical, and just messy enough to feel like a proper weekend project.
Conclusion
Learning how to make recycled paper turns ordinary waste into useful craft material. Use a blender and mold and deckle for traditional sheets, try the manual method when you want a low-tech project, or add seeds and decorative fibers for paper with a second purpose.
Your early sheets may be lumpy, crooked, or thick enough to stop a door. Keep adjusting the pulp-to-water ratio, pressing technique, and drying method. With practice, those discarded scraps can become distinctive paper that is ready for writing, gifting, planting, or turning into art.