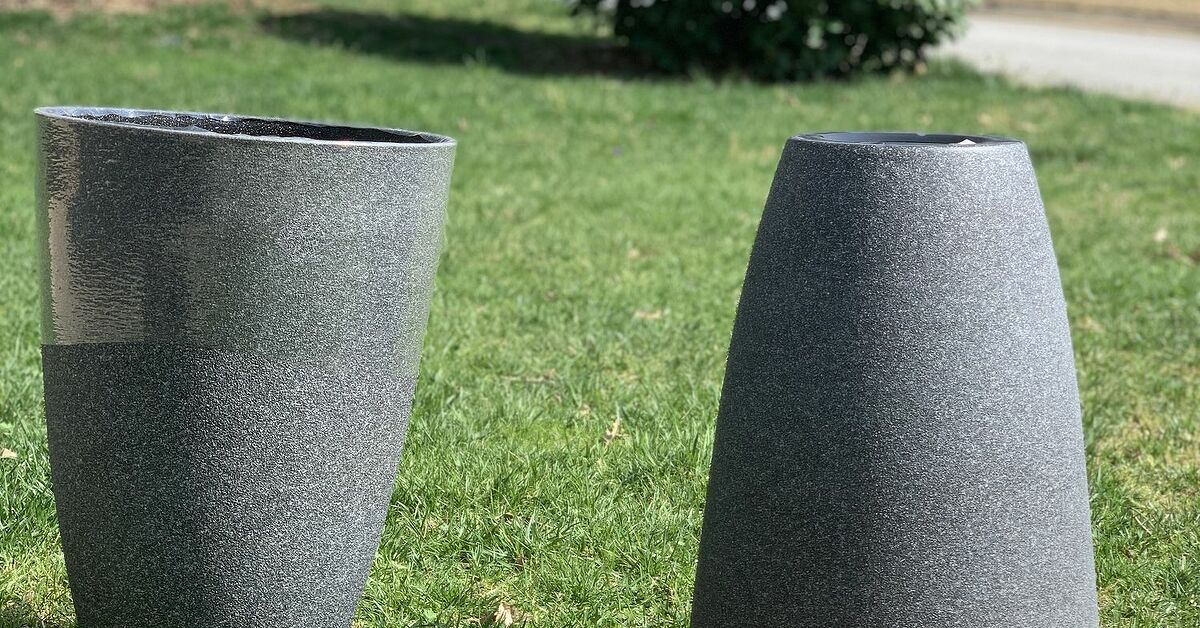
Some planters arrive in life with main-character energy. Others look like they were designed during a committee meeting held under fluorescent lights. If your patio pots, thrift-store vases, or basic terra-cotta planters are giving “garden center clearance shelf,” there is a surprisingly easy fix: use mud and paint to update boring planters into pieces that look aged, earthy, expensive, and intentionally collected.
Yes, mud. Actual dirt mixed with water. The same stuff that attaches itself to your shoes and somehow migrates across the kitchen floor can become a design tool. Paired with paint, it can soften harsh colors, add believable texture, create an antique finish, and make a new planter look like it has spent several charming decades in a sun-drenched courtyard instead of ten minutes in your shopping cart.
This DIY planter makeover is budget-friendly, beginner-friendly, and wonderfully forgiving. Drips? Texture. Smudges? Patina. Uneven color? Congratulations, you are now “layering.” The trick is knowing how to prep the surface, choose the right paint, apply the mud effect, and protect the finish without making the planter unsafe for your plants.
Why Mud and Paint Work So Well on Planters
The magic of a mud and paint planter makeover comes from contrast. Paint gives you control over the base color, while mud adds the imperfect, mineral-rich finish that makes the pot look aged rather than freshly painted. Instead of a flat, shiny surface, you get depth: dusty corners, softened edges, and a natural variation that feels organic.
Many popular “aged terra-cotta” and “weathered stone” looks rely on the same basic visual idea. Real garden pots develop mineral deposits, soil stains, sun fading, and wear over time. Mud speeds up that story. It settles into crevices, dulls paint that looks too bright, and creates a chalky, earthy film that looks especially good on terra-cotta, concrete, ceramic, and plastic planters.
This method is also inexpensive. You do not need designer pots, specialty aging wax, or a workshop that looks like it belongs to a professional scenic painter. You need a planter, paint, a little dirt, water, a brush or sponge, and a willingness to make a small mess in the name of beauty.
Best Planters for a Mud and Paint Makeover
Not every planter needs the same prep, but many common materials can be updated with this technique.
Terra-Cotta Pots
Terra-cotta is the classic choice because it already has an earthy texture. The porous clay absorbs paint and stain beautifully, and the mud effect looks natural on the surface. A plain orange pot can become soft white, weathered gray, limestone beige, charcoal black, or old-world mossy brown with very little effort.
Concrete Planters
Concrete planters are perfect for a rustic or modern garden look. Mud enhances their weighty, stone-like quality. If the concrete is already rough, you can dry-brush paint over the raised areas and use mud to deepen the recessed spots.
Plastic and Resin Planters
Plastic planters are affordable, lightweight, and often extremely boring. They can absolutely be improved, but they usually need more prep. Clean them well, lightly scuff the surface with fine-grit sandpaper, and use a primer or spray paint designed to bond with plastic. Once the base coat is dry, mud can help remove that “brand-new plastic pretending to be stone” look.
Glazed Ceramic Pots
Glossy ceramic is trickier because paint has a harder time gripping slick surfaces. For best results, scuff the surface, use a bonding primer, and choose a finish that complements the glaze rather than fighting it. A mud wash over a matte paint layer can tone down shine and make a glossy pot look more handmade.
Wooden Planters
Wooden planters can be painted and distressed, but they should be handled carefully because wood expands, contracts, and absorbs moisture. Use exterior paint or stain, keep the planting area properly lined if needed, and avoid trapping water against untreated wood. Mud can be used lightly on the exterior for an aged garden-box effect.
Supplies You’ll Need
Before you begin, gather your materials. The project is simple, but it moves faster when you are not searching for a brush with wet paint on your hands and a planter balanced on a cardboard box like a tiny circus act.
- Plain planter or pot
- Mild soap and water
- Rag or scrub brush
- Fine-grit sandpaper
- Painter’s tape, if creating a design
- Primer suited to your planter material
- Exterior acrylic paint, chalk-style paint, masonry paint, or spray paint
- Dry garden soil, clay soil, or clean dirt
- Small bowl or disposable cup
- Water
- Foam brush, chip brush, sponge, or paper towel
- Gloves
- Cardboard or drop cloth
- Outdoor-safe clear sealer, if desired
Choose dirt that is free of fertilizer pellets, mulch chunks, roots, insects, and mystery driveway gravel. Fine, dry soil works best because it creates a smoother wash. Clay-heavy soil gives a thicker, more dramatic finish. Sandy soil creates a grittier, stone-like texture.
Step-by-Step: How to Use Mud and Paint to Update Boring Planters
Step 1: Clean the Planter Thoroughly
Paint does not like dust, grease, algae, old soil, or spider condos. Wash the planter with mild soap and water, then scrub away loose dirt and residue. If the pot has been used before, remove old soil from the inside and around the drainage hole. Rinse well and let it dry completely.
This drying step matters. Terra-cotta and concrete can hold moisture, and painting too soon may cause bubbling, peeling, or a finish that never fully behaves. Give the pot time to dry, especially if it is porous.
Step 2: Sand or Scuff the Surface
Lightly sand glossy, plastic, resin, or glazed surfaces. You are not trying to grind the planter into dust; you are simply giving the paint something to grip. Wipe away sanding residue with a damp cloth and let the surface dry again.
For terra-cotta, sanding is usually optional unless there are rough spots, stickers, or crusty mineral deposits. For plastic, it is strongly recommended. Plastic planters are slippery little escape artists, and paint needs help staying attached.
Step 3: Protect the Drainage Hole
Good drainage is non-negotiable for most container plants. Before painting, check the bottom of the planter. If it has a drainage hole, keep it open. If paint or mud clogs it, clear it before planting. If the container does not have a hole and you plan to use it for live plants, drill one if the material allows. Another option is to keep the plant in a nursery pot and slip that pot inside the decorative planter, removing it for watering.
Also avoid coating the entire interior with heavy paint if the planter will hold soil directly. A little paint around the upper inner rim is fine for appearance, but the plant’s root zone should remain practical, breathable, and safe.
Step 4: Apply Primer if Needed
Primer is especially useful for plastic, resin, metal, glossy ceramic, and dark planters that need a lighter topcoat. It helps the paint adhere and creates a more even surface. Terra-cotta may not always need primer, but using one can help the color look cleaner and reduce how much paint the clay absorbs.
Let primer dry according to the product directions. Do not rush. DIY impatience is responsible for many crimes, including fingerprints in paint, gummy finishes, and the classic “I thought it was dry” sleeve mark.
Step 5: Paint the Base Color
Now choose your mood. For an antique garden look, try warm white, stone gray, oatmeal beige, mushroom taupe, charcoal, or soft olive. For a modern desert look, use matte black, sand, rust, or clay. For cottage style, consider faded blue, sage green, or creamy ivory.
Apply one or two thin coats rather than one heavy coat. Thin layers dry more evenly and are less likely to drip. If you want a distressed finish, do not worry about perfect coverage. Let bits of the original pot peek through. Those small imperfections will help the finished planter look collected rather than freshly manufactured.
Step 6: Mix the Mud Wash
In a small bowl, mix dry soil with water until it forms a loose slurry. Think chocolate milkshake, not concrete. For a subtle effect, use more water. For a heavier, crustier aged finish, use less water and more soil.
A simple starting ratio is three tablespoons of fine dirt to one or two tablespoons of water. Stir until smooth enough to spread. If the mixture has pebbles or twigs, remove them unless you are going for “abandoned ruin discovered by archaeologists.”
Step 7: Smear, Dab, and Drag the Mud Over the Paint
Once the painted base coat is dry, apply the mud mixture with a gloved hand, sponge, brush, or crumpled paper towel. Work in sections. Smear it around the rim, dab it near the bottom, and drag it lightly across raised details. The goal is uneven coverage.
Focus on areas where age would naturally collect: under the lip of the pot, around grooves, near the base, and in textured areas. Avoid making the mud too uniform. A perfect mud stripe around the planter will look less like patina and more like the pot lost a wrestling match with a puddle.
Step 8: Let the Mud Dry
Allow the mud to dry on the planter. Depending on the thickness, humidity, and temperature, this may take anywhere from 20 minutes to a few hours. As it dries, the color will lighten and become dusty.
This is the awkward stage. The planter may look dirty in a bad way before it looks dirty in a good way. Trust the process. Many DIY finishes go through a moment where they resemble a mistake wearing a hat.
Step 9: Wipe Back the Excess
Once dry, use a soft cloth, sponge, or paper towel to gently wipe away some of the mud. Leave it in cracks, along edges, and in random patches. If you remove too much, apply another layer. If you leave too much, keep wiping. This technique is wonderfully adjustable.
You can also mist the surface lightly with water and rub in circles to soften harsh lines. For more dimension, dry-brush a small amount of light paint over the high points after the mud layer dries.
Step 10: Seal the Finish if the Planter Will Live Outdoors
A sealer can help protect painted planters from moisture, handling, and weather. Choose an outdoor-safe clear sealer in a matte finish if you want to keep the aged, natural look. Glossy sealer can make a rustic pot look oddly shiny, like it just received lip gloss.
For planters used indoors or under a covered porch, sealing may be optional. For pots exposed to rain, sun, and regular watering, sealing the outside can extend the life of the finish. Keep the drainage hole clear and avoid creating a sealed bowl that traps water around roots.
Design Ideas for Mud and Paint Planters
Old-World Whitewashed Terra-Cotta
Paint the pot with a thin coat of warm white or ivory. Let some orange clay show through. Rub on a watery mud wash, let it dry, then wipe it back so the mud remains around the rim and bottom. This look pairs beautifully with lavender, rosemary, olive trees, and trailing thyme.
Weathered Stone Look
Start with a gray or greige base coat. Dab on a thicker mud mixture, then wipe it unevenly. Add a dry brush of pale gray or off-white over raised areas. The result looks like stone without the arm workout of moving actual stone.
Modern Matte Black With Earthy Patina
Paint the planter matte black or charcoal. Once dry, rub on a small amount of tan or clay-colored mud. Wipe most of it off, leaving subtle streaks and dusty edges. This works well for sculptural plants like snake plants, agave, yucca, or architectural grasses.
Cottage Garden Soft Sage
Use sage green as the base color, then age it with a light mud wash. Add a little white dry brushing around the rim for a faded look. This style is charming with geraniums, pansies, sweet alyssum, and herbs.
Faux Antique Urn
Take a plastic urn, scuff it, prime it, and paint it in a stone or charcoal shade. Add mud heavily around decorative details, then wipe back the high points. Suddenly your plastic urn looks like it has opinions about Renaissance architecture.
Common Mistakes to Avoid
Using Wet Soil From the Garden
Wet garden soil can be clumpy and full of organic material. Let soil dry first, then sift or crumble it. The finer the dirt, the more elegant the finish.
Skipping Surface Prep
If paint peels, the problem often began before the first coat. Clean, dry, and scuff the surface when needed. Prep is not glamorous, but neither is watching your beautiful finish flake off like a sunburn.
Painting Over the Drainage Hole
Drainage keeps roots healthier. Always check the hole after painting, mudding, and sealing. If needed, reopen it with a skewer, drill bit, or small tool.
Using the Wrong Paint for Outdoor Planters
Indoor craft paint may work for decorative indoor pots, but outdoor planters need more durability. Choose outdoor acrylic, exterior paint, masonry paint, or spray paint suitable for the planter material.
Making the Finish Too Perfect
Aged planters should not look machine-made. Step back frequently. Rotate the pot. Leave some areas lighter and others darker. Nature is not symmetrical, and your planter does not need to be either.
Planting Tips After the Makeover
Once your planter is dry and finished, think about the plant going inside. A gorgeous container still needs to function well. Use fresh potting mix rather than heavy garden soil. Potting mix is designed to drain while still holding moisture, which is exactly what container plants need.
Match the plant to the pot size. Small herbs and succulents are fine in modest pots, while tomatoes, shrubs, and larger perennials need deeper containers with room for roots. If your planter is decorative but lacks drainage, use it as a cachepot: keep the plant in a separate nursery pot inside, then remove it to water and drain.
Color matters, too. A dark planter can heat up in full sun, which may stress some roots in hot climates. Terra-cotta dries faster than glazed ceramic or plastic, which can be helpful for drought-tolerant plants but challenging for thirsty ones. The best planter makeover is both pretty and practical.
Where to Use Updated Planters
Mud-and-paint planters look good almost anywhere. Place a group of aged pots on front steps for instant curb appeal. Use matching finishes on different shapes to create a collected but cohesive patio garden. Add a pair of large faux-stone planters beside a doorway. Line a balcony with small whitewashed pots filled with herbs. Even a single updated planter on a windowsill can make a plant look more intentional.
For the strongest design impact, group planters in odd numbers and vary the heights. Combine upright plants, mounding plants, and trailing plants. A weathered pot with rosemary, creeping Jenny, and purple petunias has more personality than a lonely plastic container with one nervous basil plant.
Budget-Friendly Ways to Make the Project Look Expensive
Start with thrifted, old, or mismatched planters. The mud-and-paint finish can unify different shapes and materials. If you have three pots in unrelated colors, paint them all in the same base tone and age them with the same mud wash. Suddenly they look like a curated set instead of a garage-sale argument.
Use leftover exterior paint from another project. A small amount goes a long way on planters. Try sample pots from the paint store if you want a specific color without buying a full quart. For texture, mix a pinch of baking soda into acrylic paint to create a chalkier finish, or use a dry brush technique to build layers.
Choose plants that elevate the finish. Mediterranean herbs, ornamental grasses, succulents, ferns, and trailing vines all look especially good in aged planters. The right plant can make a $5 pot look boutique. The wrong plant can make even an expensive pot look like it is having a bad week.
Extra Experience: What I Learned Updating Planters With Mud and Paint
The first time I tried using mud and paint to update boring planters, I was skeptical. It felt slightly ridiculous to paint a pot carefully and then immediately smear dirt all over it. That is usually the kind of thing you do by accident while gardening, not a decorative decision. But once the mud dried and I wiped it back, the finish changed completely. The pot went from “freshly painted craft project” to “weathered piece from a charming garden shop where everything costs too much.”
My biggest lesson was that the base color matters more than expected. Bright white looked too stark until the mud toned it down. Cool gray looked flat until I added a warmer dirt wash. Matte black looked modern and dramatic, but only when I used a very light hand with the mud. Too much mud on black paint made the pot look dusty rather than aged. The sweet spot was a thin, uneven layer around the rim and lower third.
I also learned that real dirt varies a lot. Fine clay soil created the most convincing antique look because it dried into a soft, mineral film. Sandy soil gave a rougher texture that worked nicely on larger planters but looked a little messy on small pots. Potting mix was not ideal because it contained bark pieces and organic material that scratched across the paint. For the smoothest result, I had the best luck letting garden soil dry, crumbling it with my fingers, and picking out anything chunky before adding water.
Another useful discovery: do not judge the project while the mud is wet. Wet mud looks dark, blotchy, and slightly alarming. I had a moment where I thought I had ruined a perfectly decent planter and created a prop for a swamp-themed restaurant. Once it dried, the color softened dramatically. After wiping it down with a cloth, the finish became subtle and layered. It is one of those projects where patience does most of the design work.
The wiping stage is where the planter really becomes yours. A dry cloth removes the mud slowly and leaves a dusty finish. A damp cloth removes more and creates stronger contrast. A sponge gives a softer, cloudy effect. I liked using a dry cloth first, then touching up a few spots with a barely damp paper towel. Around raised details, I wiped the high points clean and left darker mud in the low areas. That small contrast made inexpensive pots look much more dimensional.
One mistake I made early was sealing too soon. The paint felt dry, but it had not fully cured. When I sprayed sealer over it, a few areas became tacky. Now I let painted planters dry longer than I think they need, especially in humid weather. I also prefer matte sealer because it preserves the natural look. Satin can work, but gloss usually fights the aged effect unless the planter is meant to look glazed.
I found this project especially satisfying for mismatched pots. I had one terra-cotta pot, one plastic planter, and one old ceramic container that did not belong together at all. After painting them in related neutral tones and aging them with the same mud wash, they suddenly looked like a set. Not identical, but related. That is the secret to a good patio display: not everything has to match, but it should look like it came to the party on purpose.
If you are nervous, start with a small pot. Use cheap materials and experiment. Try a white base on one, a gray base on another, and a black base on a third. Apply more mud than you think you need, let it dry, and wipe it back. You will quickly see which finish fits your home. And if you hate it? Paint over it. Planters are forgiving. They are basically tiny outdoor canvases that hold basil.
The best part is how fast the transformation feels. In an afternoon, you can turn plain planters into pieces that make your porch, balcony, or garden corner look styled. Add healthy plants, group the pots together, and the whole space feels refreshed. It is low-cost, low-pressure, and just messy enough to be fun. Honestly, any DIY project that lets you play with mud as an adult and still call it home improvement deserves a permanent spot on the weekend project list.
Conclusion
Using mud and paint to update boring planters is one of the easiest ways to give your outdoor space personality without spending a small fortune on designer containers. The technique is simple: clean the pot, paint a base color, apply a mud wash, let it dry, wipe it back, and seal if needed. The result can be rustic, modern, cottage-inspired, Mediterranean, or antique depending on your paint color and how heavily you apply the mud.
More importantly, this project proves that good design does not always require complicated tools or expensive supplies. Sometimes the secret ingredient is literally dirt. With the right prep and a little creative courage, a plain planter can become the kind of piece that makes your plants look happier, your patio look styled, and your guests ask, “Where did you buy that?” At which point you can smile mysteriously and say, “Oh, I made it with mud.”