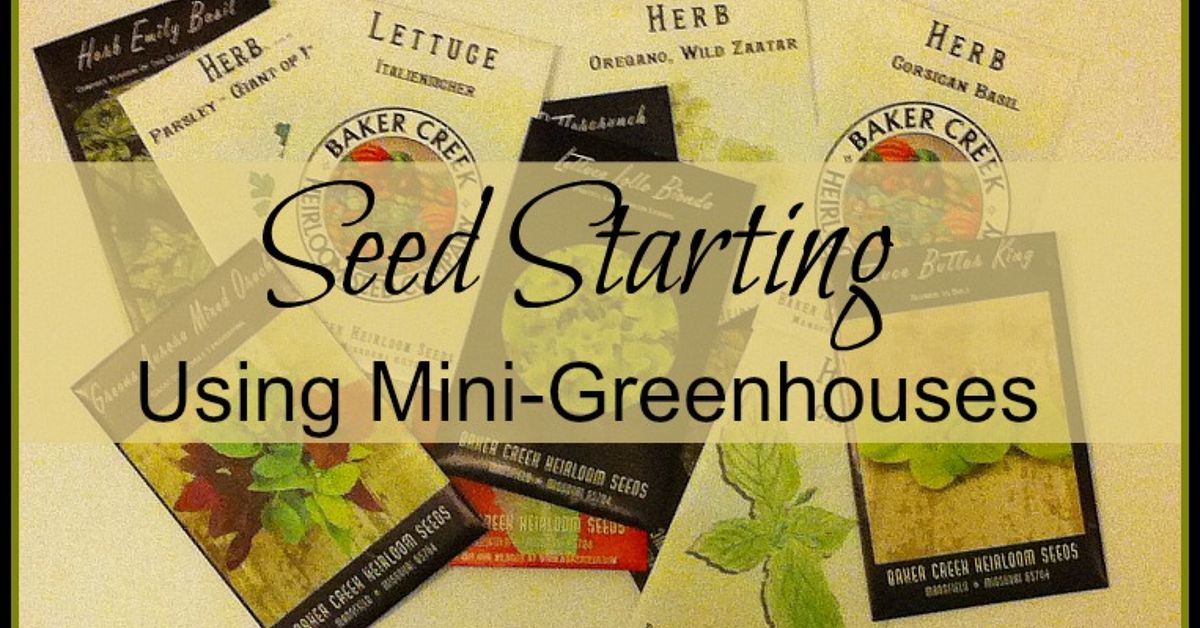
Starting seeds can feel like running a tiny botanical daycare. The residents are demanding, everyone wants a different temperature, and one careless watering session can turn the place into a swamp. Fortunately, mini-greenhouses make the job much easier.
A mini-greenhouse creates a warm, humid environment that helps seeds absorb moisture and begin germinating. It may be a commercial propagation tray with a clear dome, a reusable food container, a berry clamshell, or a simple tray covered with clear plastic. Whatever form it takes, the goal is the same: maintain steady conditions until seedlings emerge without turning the growing mix into soup.
This guide explains how to choose a mini-greenhouse, prepare the growing medium, sow seeds, control moisture and temperature, provide adequate light, prevent common diseases, and prepare seedlings for outdoor life.
What Is a Mini-Greenhouse for Seed Starting?
A seed-starting mini-greenhouse is a covered container that traps moisture and some warmth around newly planted seeds. The clear cover allows light to enter while slowing evaporation from the growing mix.
Commercial versions usually include a waterproof bottom tray, a cell insert, and a transparent humidity dome. Homemade alternatives can work just as well when they are clean, transparent, and equipped with drainage holes. Oregon State University Extension, for example, notes that ventilated berry containers can serve as practical humidity chambers for germinating seeds.
What the Cover Actually Does
The cover does not magically make seedlings grow faster. Its main job is to keep moisture around the seeds reasonably consistent. Seeds must absorb water before germination can begin, and a clear dome reduces the risk of the surface drying out during this vulnerable stage.
High humidity is useful before germination, but the dome should be removed soon after sprouts appear. Leaving seedlings sealed under a wet cover for too long encourages weak growth, excessive condensation, mold, and damping-off disease. University of Maryland and Colorado State University guidance both recommend removing humidity coverings after emergence.
Why Start Seeds in a Mini-Greenhouse?
Mini-greenhouses are especially helpful for gardeners who struggle to keep seed trays evenly moist. An uncovered cell tray can dry surprisingly quickly, particularly near heating vents or under grow lights. A dome gives the gardener a larger margin for error.
More Consistent Germination
A covered tray stabilizes humidity around the growing medium. That can improve germination consistency, especially for small seeds planted close to the surface. The system is not completely hands-off, but it is less likely to require constant misting.
A Longer Growing Season
Starting vegetables indoors allows gardeners to raise transplants before outdoor temperatures are suitable. This is particularly useful for crops such as tomatoes, peppers, eggplants, broccoli, cabbage, and many flowers.
Timing varies by crop. Tomatoes are commonly started about six to eight weeks before transplanting, while faster-growing cucurbits such as cucumbers and squash may need only three or four weeks. Seed packets and local frost-date guidance should always take priority over a generic calendar.
Protection From Indoor Drafts
A clear cover provides a small buffer against sudden changes in room temperature and humidity. It will not protect seeds from a freezing garage or a blazing windowsill, but it can soften ordinary indoor fluctuations.
Better Use of Space
A standard propagation tray can hold dozens of seedlings in a compact area. That is good news for gardeners whose “greenhouse” is technically half a folding table beside the laundry basket.
Choosing the Right Mini-Greenhouse
Commercial Seed-Starting Kits
A basic kit with a tray, cell insert, and clear dome is convenient and reusable. Look for sturdy plastic, drainage holes in the cells, a leak-resistant bottom tray, and a dome tall enough to provide some headroom.
Adjustable vents are helpful but not essential. They allow humidity to escape gradually as germination begins. However, vents are not a substitute for removing the dome once most seedlings have emerged.
Recycled Containers
Clear takeout containers, produce boxes, and bakery clamshells can become inexpensive mini-greenhouses. Before using one, wash it thoroughly and create drainage holes in the bottom if none are present. Place it on a waterproof tray to protect furniture.
A recycled container should be deep enough for at least 1.5 to 2 inches of growing mix. Extremely shallow containers dry quickly and leave little room for roots.
Individual Pots Inside a Covered Tray
Instead of using a cell insert, gardeners can place small pots inside a larger tray and cover the entire group with a transparent dome or loose plastic cover. This arrangement works well when different crops need separate containers.
Containers to Avoid
Avoid anything that cannot drain, has previously held toxic materials, or blocks light completely after germination. Also skip containers that collapse when wet. A soggy cardboard box full of pepper seeds is not a mini-greenhouse; it is a future cleaning project.
Supplies Needed for Seed Starting
You do not need a laboratory full of equipment. A reliable setup includes:
- A clean tray, cell pack, or small pots
- A clear dome or transparent cover
- Fresh seed-starting mix
- Seeds suited to indoor starting
- Plant labels and a waterproof marker
- A spray bottle or gentle watering can
- A bright grow light or shop light
- An optional seedling heat mat
- A timer for controlling the lights
Use Seed-Starting Mix, Not Garden Soil
Seed-starting mix is lightweight, fine-textured, and designed to balance drainage with moisture retention. Typical ingredients include peat moss or coconut coir, perlite, and vermiculite. Garden soil is usually too dense for small containers and may contain weed seeds or organisms that contribute to seedling disease.
Dry seed-starting mix can initially repel water, so moisten it before filling the cells. Add water gradually and mix until the material feels like a wrung-out sponge. It should hold together briefly when squeezed but should not drip.
How to Start Seeds in a Mini-Greenhouse
Step 1: Clean the Containers
Wash trays, domes, and tools before planting. When reusing containers that previously held plants, disinfect them to reduce the chance of carrying pathogens into the new crop. Several extension programs recommend soaking reusable trays in a diluted household bleach solution and rinsing them thoroughly. Follow the product label and wear appropriate protection when handling disinfectants.
Step 2: Fill the Cells
Add premoistened seed-starting mix without packing it into a brick. Tap the tray lightly to settle the material, then fill low spots. Leave a little space below the rim so water does not immediately run over the sides.
Step 3: Read the Seed Packet
The packet usually provides planting depth, germination time, temperature preferences, and the recommended number of weeks before transplanting. Some seeds require light to germinate and should barely be covered. Others need to be planted more deeply.
A common rule is to sow seeds at a depth approximately two to three times their diameter, but packet instructions are more reliable for individual species.
Step 4: Sow Carefully
Place one or two seeds in each cell. Tiny seeds can be picked up with a damp toothpick or folded piece of paper. Cover them with the recommended amount of mix or vermiculite, then gently press the surface to ensure good contact.
Planting ten tomato seeds in one tiny cell may feel efficient, but it creates a root-separation puzzle later. Seeds are plants, not passengers being squeezed onto the last train.
Step 5: Label Everything
Write the crop, variety, and sowing date on each label. Do this immediately. A gardener who believes every variety will remain memorable has never stared at four identical trays of mystery peppers in April.
Step 6: Water Without Rearranging the Landscape
Mist the surface or water gently from below. Bottom watering is often the least disruptive method: place water in the solid tray and allow the cells to absorb it. Remove excess water after the mix is evenly moist.
The goal is consistent moisture, not saturation. Waterlogged media contain less oxygen, which can delay germination and encourage disease.
Step 7: Install the Dome
Place the clear cover over the tray. The cover should not press against the growing mix. Keep the covered mini-greenhouse away from direct sunlight because temperatures can rise quickly inside a sealed container. Utah State University Extension specifically advises against putting covered germination trays in direct sun.
Step 8: Provide the Right Temperature
Many garden seeds germinate well when the growing medium is approximately 65°F to 75°F, although individual crops differ. Warm-season vegetables often benefit from bottom heat, while cool-season crops may germinate at lower temperatures. Missouri Extension identifies 65°F to 75°F as a useful general germination range for many plants.
A seedling heat mat warms the root zone more consistently than a room heater. Use a thermostat when possible, and remove or reduce bottom heat after germination unless the crop still requires warm conditions.
Light Requirements After Germination
Seeds may germinate without strong light, but newly emerged seedlings need bright illumination almost immediately. A sunny window often looks brighter to human eyes than it actually is for plants. Seedlings leaning toward the glass or stretching into thin stems are asking for more light.
Place fluorescent or LED grow lights a few inches above the seedlings, adjusting the distance according to the fixture manufacturer’s instructions. Many indoor seedlings perform well with approximately 14 to 16 hours of light per day and a dark period at night. A timer makes the schedule consistent and prevents the grow light from becoming a 24-hour interrogation lamp.
Remove the Dome Promptly
Once the first seedlings emerge, open the vents or shift the cover slightly. Remove the dome when most cells have germinated. If one slow variety shares a tray with faster crops, move the unsprouted cells into another covered container rather than forcing the emerged seedlings to remain in excessive humidity.
Rotate the Tray
When using window light, rotate the tray daily. Under centered grow lights, rotation may still help if plants along the edges receive less illumination.
Watering Seedlings Without Drowning Them
After removing the dome, monitor moisture more frequently. The surface may begin drying faster because air circulation has increased.
Water when the top of the growing mix begins to lighten in color, but before seedlings wilt. Bottom watering encourages roots to grow downward and helps keep foliage dry. Allow the cells to absorb water, then empty the leftover liquid so the roots are not permanently sitting in a puddle.
Constantly wet mix creates favorable conditions for algae, fungus gnats, root problems, and damping-off. Constantly dry mix creates favorable conditions for tiny plant funerals. The useful zone is evenly moist, not soggy.
Preventing Damping-Off Disease
Damping-off is a general name for seedling diseases caused by soilborne organisms. Affected seeds may rot before emergence, while young seedlings may develop thin, discolored stems and collapse near the growing-medium surface.
Reduce the Risk
- Use fresh, sterile seed-starting mix.
- Clean reused trays, pots, and tools.
- Avoid overcrowding the cells.
- Remove the humidity dome after germination.
- Provide air movement around the seedlings.
- Do not keep the growing mix saturated.
- Provide adequate light so seedlings grow sturdily.
A small fan set on low can improve air movement, but it should create only a gentle flutter. The goal is to strengthen stems and dry excess surface moisture, not recreate a Midwestern thunderstorm on the propagation shelf. Clean growing materials, careful watering, warmth during germination, and adequate lighting are central recommendations for reducing damping-off risk.
Feeding and Potting Up Seedlings
Seeds contain stored energy for their earliest growth. Once seedlings develop true leaves, however, they may benefit from a diluted, balanced fertilizer if the growing mix contains little or no added nutrition.
Follow the fertilizer label and start with a weak solution. More fertilizer does not create a superhero tomato plant. Excess salts can damage delicate roots and leaf tissue.
Recognizing True Leaves
The first leaves that appear are cotyledons, or seed leaves. True leaves emerge afterward and resemble the mature foliage of the plant. This stage is commonly used as a signal for light feeding, thinning, or transplanting into a larger container.
When to Pot Up
Move seedlings into larger pots when roots fill the original cells, growth slows, or plants begin drying out unusually quickly. Handle seedlings by their leaves rather than pinching their fragile stems.
Tomatoes can often be planted more deeply when moved to larger containers because buried portions of the stem can produce roots. Most other seedlings should remain at approximately the same depth at which they were growing.
Hardening Off Before Transplanting
Seedlings raised indoors are accustomed to gentle temperatures, limited wind, and controlled light. Moving them directly into a sunny garden can cause leaf scorch, wilting, stalled growth, or death.
Begin hardening off roughly one to two weeks before transplanting. Place seedlings outside in a protected, shaded location for a short period, then gradually increase their exposure to sunlight, wind, and outdoor temperatures.
Bring warm-season seedlings indoors when cold conditions threaten. Utah State University Extension recommends beginning the hardening process before transplanting while avoiding temperatures below roughly 45°F to 50°F for warm-season crops such as tomatoes, peppers, squash, and melons.
A Simple Seven-Day Schedule
- Day 1: One or two hours in bright shade.
- Day 2: Two or three hours outdoors with gentle morning sun.
- Day 3: Three or four hours with additional sunlight.
- Day 4: Half a day outside in mild conditions.
- Day 5: Most of the day outdoors, protected from strong wind.
- Day 6: A full day outside, returning indoors at night if needed.
- Day 7: A full day and night outdoors when temperatures are safe.
Adjust the schedule for the crop and weather. Hardening off is a gradual transition, not a rigid countdown.
Common Mini-Greenhouse Problems
Condensation Is Dripping Constantly
A little condensation is normal. Heavy dripping suggests excessive moisture or inadequate ventilation. Open the vents, offset the lid slightly, and check whether water is standing in the bottom tray.
Seedlings Are Tall and Floppy
Leggy growth usually indicates insufficient light, excessive warmth after germination, crowding, or a combination of all three. Move the light closer, increase light duration, lower the temperature slightly when appropriate, and thin overcrowded seedlings. Recent University of Minnesota guidance also identifies inadequate light, excessive warmth, and moisture problems as common causes of weak indoor seedlings.
Mold Appears on the Surface
Remove the dome, improve airflow, and allow the surface to dry slightly between waterings. Make sure the cells drain freely. A light coating of algae or harmless surface fungi does not always kill seedlings, but it signals that the environment is staying too wet.
Some Cells Germinate and Others Do Not
Uneven germination can result from old seed, inconsistent planting depth, cold spots, dry cells, or normal differences among varieties. Labeling each crop and recording its expected germination period prevents a great deal of unnecessary digging.
Roots Are Growing Through the Cell Bottoms
The seedlings are ready for more space. Pot them up or transplant them if outdoor conditions are suitable. Do not leave vigorous plants tangled together in a water-filled bottom tray.
Five Practical Experiences From Using Mini-Greenhouses
The instructions on a seed packet are valuable, but seed starting also teaches lessons that become obvious only after several trays have succeeded, failed, or produced plants with the posture of cooked spaghetti. The following experiences can make a mini-greenhouse setup more predictable.
Experience 1: Separate Crops by Germination Speed
One of the easiest mistakes is planting peppers, lettuce, tomatoes, and cucumbers in the same tray simply because empty cells are available. The arrangement looks efficient on sowing day, but it becomes awkward after germination.
Lettuce may emerge quickly and need the dome removed while peppers are still underground enjoying their extended vacation. Cucumbers can become enormous before slower crops have developed true leaves. Using separate containers for crops with similar germination times makes temperature, humidity, and lighting much easier to manage.
Experience 2: Bottom Watering Solves Several Problems
Top watering seems harmless until a stream of water uncovers tiny seeds, flattens seedlings, and redistributes labels. Bottom watering is usually calmer. Water is poured into the solid tray, absorbed through drainage holes, and removed after the cells are moist.
This method is not an excuse to leave standing water beneath the pots. After ten to twenty minutes, check the growing mix and drain the excess. Seedlings appreciate a drink; they do not need waterfront property.
Experience 3: More Heat Is Not Always Better
A heat mat can dramatically improve germination for peppers, eggplants, and tomatoes in a cool room. However, leaving every crop on constant bottom heat after emergence can produce rapid, weak growth. It can also dry small cells faster than expected.
Use heat as a targeted germination tool. Check the temperature at the growing-medium level rather than relying only on room temperature. After seedlings emerge, move cool-season crops away from the heat and evaluate whether warm-season seedlings still need it.
Experience 4: The Dome Must Come Off
New gardeners often hesitate to remove the cover because the mini-greenhouse looks wonderfully humid and productive. Unfortunately, the same moist environment that helps seeds germinate can become unhealthy for emerged seedlings.
A useful habit is to inspect trays every morning and evening during the expected germination window. As soon as several seedlings appear, increase ventilation. Once most have emerged, remove the dome. The plants may look less cozy, but they now need stronger light and moving air more than tropical humidity.
Experience 5: Keep a Simple Seed-Starting Record
Write down the sowing date, variety, germination date, number of seedlings, potting-up date, and transplant date. This takes only a minute and becomes extremely useful the following season.
Records reveal which pepper variety took three weeks to emerge, which tomato was started too early, and which seed packet had disappointing germination. Without notes, every spring begins with the same optimistic guessing game.
Experience 6: Start Fewer Seeds Than You Think You Need
Seed packets contain many seeds, and empty cells create a powerful temptation to plant all of them. Then germination succeeds and the gardener somehow owns 48 tomato plants.
Estimate how many mature plants will fit in the garden, add a few extras for losses, and sow accordingly. Starting a manageable number gives each seedling more attention, space, and light. It also reduces the awkward process of asking everyone you know whether they would like six unidentified squash plants.
Experience 7: Inspect the Tray, Not Just the Calendar
Seed-starting schedules are guides rather than guarantees. Indoor temperature, seed age, variety, moisture, and planting depth all influence germination. Check the tray every day instead of assuming nothing will happen until the packet’s estimated date.
Daily inspection catches dry corners, standing water, emerging sprouts, mold, and roots escaping from cells. Most seed-starting disasters begin as small, correctable problems. They become large problems when the tray is ignored for four days because “the seeds are not supposed to be up yet.”
Conclusion
Seed starting using mini-greenhouses gives gardeners a practical way to control moisture, warmth, and space during germination. Success depends less on expensive equipment than on several consistent habits: use clean containers, choose a fine seed-starting mix, follow crop-specific timing, keep the medium moist but not saturated, provide strong light after emergence, and remove the humidity dome promptly.
Watch the plants rather than following a schedule blindly. Seedlings communicate clearly through their color, posture, roots, and growth rate. With a little observation, a simple covered tray can produce sturdy vegetables, herbs, and flowers ready for the garden.