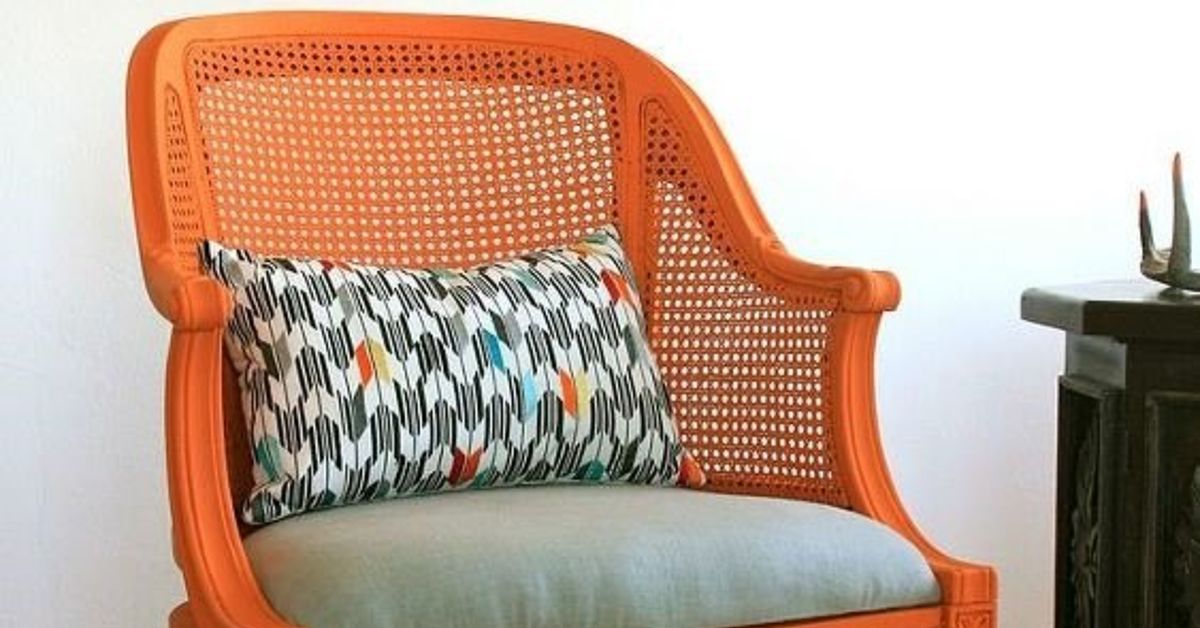
Learning how to reupholster a chair is one of those DIY skills that feels suspiciously fancy. One minute you are staring at a sad dining chair with pancake-flat padding and fabric from another decade. The next, you are holding a staple gun like a home makeover hero and wondering why you ever tolerated that mysterious coffee stain shaped like Florida.
The good news? Reupholstering a basic chair seat is much easier than it looks. You do not need to be a professional upholsterer, own a workshop, or understand every mysterious piece of furniture vocabulary. For a beginner-friendly project, a dining chair with a removable seat is the perfect place to start. It has a small surface, simple corners, and just enough drama to make the “before and after” photo satisfying.
In this guide, you will learn how to reupholster a chair in 5 easy steps, from removing the old fabric to stapling on the new upholstery like you actually know what you are doing. We will also cover tools, fabric choices, cost estimates, common mistakes, and real-life experience tips that can save you from crooked patterns, lumpy foam, and the classic beginner move: stapling everything beautifully before realizing the fabric is upside down.
Why Reupholstering a Chair Is Worth It
Reupholstering is a practical way to refresh furniture without buying something new. If the chair frame is sturdy, the seat can often be revived with new foam, batting, and upholstery fabric. This makes the project especially useful for dining chairs, thrift-store finds, vanity stools, desk chairs with removable cushions, and heirloom pieces that have good bones but questionable fashion sense.
There are three big reasons to try DIY chair reupholstery. First, it saves money. A small chair seat usually needs only a modest amount of fabric, especially compared with a sofa or large armchair. Second, it gives you control over the style. You can choose performance fabric for a busy kitchen, velvet for a glam bedroom, linen-blend fabric for a relaxed look, or a bold print that says, “Yes, I own a personality.” Third, it keeps usable furniture out of the trash.
Reupholstering a chair also gives you a chance to improve comfort. Old foam can flatten, crumble, or lose support. Replacing it with fresh upholstery foam and wrapping it in batting can make a chair feel newer, softer, and more supportive. That is a big win for anyone who has ever sat through a long dinner on a chair that felt like a wooden apology.
Before You Start: Choose the Right Chair
Not every chair is equally beginner-friendly. The easiest chair to reupholster is a dining chair with a removable seat cushion. Flip the chair over and look for screws holding the seat to the frame. If you can unscrew the seat, remove the old fabric, and wrap new fabric around the cushion, you have found a great first project.
More complex chairs, such as wingbacks, recliners, channel-back chairs, tufted chairs, and fully upholstered armchairs, require more skill. They may involve sewing, webbing, tack strips, welt cord, pleats, dust covers, hidden fasteners, and a surprising number of staples that seem personally committed to ruining your afternoon. Beginners can still learn those projects eventually, but a removable chair seat is the best training ground.
Good beginner chairs include:
- Dining chairs with drop-in seats
- Wooden chairs with removable padded cushions
- Small stools or benches with simple square or rectangular seats
- Desk chairs with screw-on seat pads
Think twice before starting with:
- Antique chairs with delicate frames
- Chairs with springs, webbing, or major structural damage
- Tufted chairs with buttons and deep folds
- Large armchairs with multiple sewn panels
Tools and Materials You Will Need
You do not need a giant tool collection, but having the right basics will make the job cleaner, safer, and less likely to turn into a one-person wrestling match with fabric.
Basic tools:
- Flathead screwdriver or staple remover
- Needle-nose pliers
- Phillips screwdriver or drill for removing the seat
- Heavy-duty staple gun
- Upholstery staples, often 3/8 inch for many chair-seat projects
- Fabric scissors
- Measuring tape
- Marker or chalk
- Utility knife or serrated knife for cutting foam
- Safety glasses and work gloves
Materials:
- Upholstery fabric
- Upholstery foam, if the old cushion is worn out
- Batting for softness and rounded edges
- Spray adhesive, optional but helpful for attaching foam
- Cambric dust-cover fabric, optional for a cleaner underside
A quick safety note: a staple gun is a real tool, not a toy with commitment issues. Wear eye protection, keep your fingers away from the staple path, and work on a stable surface. If you use spray adhesive, work in a ventilated area and follow the product label.
How Much Fabric Do You Need?
For a standard removable dining chair seat, one yard of upholstery fabric can often cover two small seats, depending on the seat size, fabric width, and pattern repeat. However, do not guess if the fabric has stripes, large flowers, plaid, or a design that needs to be centered. Pattern matching can require extra fabric.
The easiest measuring trick is to remove the old fabric and use it as a template. Lay it flat, measure it, and add a few extra inches on each side if you are replacing thin old padding with thicker foam. If the old fabric is torn or missing, measure the widest part of the seat, add the cushion thickness, then add at least 3 to 4 inches on each side so the fabric can wrap underneath and be stapled securely.
When in doubt, buy a little more fabric than you think you need. Future you may need it for pattern alignment, mistakes, repairs, or the moment when you accidentally cut one piece while your brain is apparently on lunch break.
How to Reupholster a Chair in 5 Easy Steps
Step 1: Remove the Seat and Old Fabric
Turn the chair upside down and locate the screws holding the seat to the frame. Remove the screws and set them aside in a small bowl or bag. This is important because chair screws have a talent for vanishing into another dimension.
Once the seat is free, inspect the underside. You will likely see staples holding the old fabric in place. Use a staple remover, flathead screwdriver, or needle-nose pliers to lift and remove them. Work slowly so you do not damage the wooden seat base. If the old fabric comes off in one piece, save it. It is your best pattern for cutting the new fabric.
Take photos as you go, especially if the corners are folded neatly or the underside has a dust cover. Photos help you remember how everything was attached. You may think, “I will remember this.” You will not. Upholstery projects have a way of erasing short-term memory right around the third corner.
After removing the fabric, check the foam and seat board. If the foam is still springy, clean, and comfortable, you may reuse it. If it is flat, crumbly, stained, or smells like an attic with opinions, replace it.
Step 2: Cut New Foam, Batting, and Fabric
If the foam needs replacing, place the wooden seat base or old foam on top of the new upholstery foam. Trace the shape with a marker. Cut along the line using a serrated knife, electric carving knife, or sharp utility knife. For many dining chairs, foam that is 1 to 3 inches thick works well, depending on the chair design and desired comfort.
Next, cut batting large enough to wrap over the foam and around the underside of the seat. Batting softens the edges, smooths the surface, and helps prevent the fabric from looking harsh or boxy. Think of it as the chair’s filter, but actually useful.
Now cut your upholstery fabric. Place the fabric wrong-side up on a clean surface. If you saved the old fabric, lay it on top and trace around it. If not, place the seat and foam on the fabric and cut around it, leaving 3 to 4 inches of extra fabric on all sides. For patterned fabric, make sure the design is centered before cutting. Stripes should run straight, not diagonally like they are trying to escape.
Step 3: Attach the Foam and Batting
Place the foam on the seat base. If you want extra stability, use a light coat of spray adhesive between the wood and foam. Let the adhesive become tacky according to the product instructions, then press the foam into place.
Lay the batting on your work surface and place the seat foam-side down on top of it. Pull the batting over one side and staple it to the underside of the wooden base. Then move to the opposite side, pull gently, and staple. Repeat on the remaining sides.
The goal is smooth, even tension. Do not yank so hard that the foam curls or the seat looks pinched. Work from the center of each side toward the corners. Trim extra batting after it is stapled, but do not cut too close to the staples.
For the corners, fold the batting neatly and staple it flat. Bulky corners can make the final fabric look lumpy, so take your time. This is where patience pays rent.
Step 4: Staple the New Fabric
Lay the new upholstery fabric wrong-side up. Place the padded seat upside down on the fabric. Check the pattern one more time. If it has a front-facing design, make sure it faces the correct direction when the seat is reinstalled.
Start by placing one staple in the center of the front edge. Pull the fabric snug, then place one staple in the center of the back edge. Repeat with the left and right sides. Flip the seat over and check the top. The fabric should be smooth, centered, and free of wrinkles. If it is crooked, remove the staple and adjust now. This is much easier than pretending crooked fabric is “artisan.”
Once the first four staples look good, continue stapling from the center outward on each side. Alternate sides as you work to keep the tension balanced. Pull the fabric firmly, but not so tightly that the pattern warps or the cushion puckers.
Leave the corners for last. For a clean corner, pull the center of the corner fabric toward the underside of the seat and staple it. Then fold one side over neatly, creating a small pleat, and staple. Fold the other side and staple again. The top corner should look smooth, not bulky. Repeat for all four corners.
Step 5: Trim, Finish, and Reattach the Seat
After the fabric is stapled, trim away excess material. Leave enough fabric beyond the staples so it stays secure, but remove bulky overhang that could interfere with reinstalling the seat.
For a professional-looking finish, staple a piece of black cambric or lightweight dust-cover fabric over the underside. This hides raw edges and gives the chair a cleaner look. It is optional, but it makes the project feel polished. It is the upholstery equivalent of wearing matching socks.
Finally, place the seat back onto the chair frame and reinstall the screws. Tighten them securely, but do not overtighten to the point of stripping the holes. Turn the chair upright, sit carefully, and admire your work. You have officially rescued a chair from its sad fabric era.
Choosing the Best Upholstery Fabric
The best upholstery fabric depends on where the chair will live and how much abuse it will politely endure. Dining chairs need durable, cleanable fabric because food, drinks, kids, pets, and gravity are all involved. A decorative bedroom chair can handle something more delicate. A kitchen chair should be tougher than a Monday morning.
Good fabric options for chair seats:
- Performance fabric: Great for families, pets, and frequent use.
- Cotton canvas: Casual, sturdy, and often affordable.
- Linen blend: Stylish and relaxed, though it may wrinkle more.
- Vinyl or faux leather: Easy to wipe clean, especially for dining areas.
- Velvet: Soft and dramatic, best for lower-mess spaces unless it is performance velvet.
- Outdoor fabric: Useful for sunrooms, patios, and spill-prone homes.
Before buying, check the fabric weight and durability. Upholstery fabric is usually stronger than quilting cotton or thin apparel fabric. If you fall in love with a lightweight print, consider using it only on a low-use chair or adding a protective treatment if appropriate for the fabric.
Also consider pattern scale. A tiny print is forgiving. A huge floral or bold stripe can look amazing, but it requires careful centering. If you are reupholstering multiple chairs, make sure the pattern placement looks consistent from chair to chair.
Common Chair Reupholstery Mistakes to Avoid
Using fabric that is too thin
Thin fabric may look pretty at first, but it can wear quickly, wrinkle badly, or show the texture of the foam beneath it. Choose fabric designed for upholstery or at least a sturdy home decor fabric.
Skipping the inspection
Do not cover up cracked wood, loose screws, mildew, or crumbling foam. Reupholstery makes a chair prettier; it does not magically fix structural problems. Repair the frame and replace bad padding first.
Pulling fabric unevenly
If one side is pulled tighter than the other, the pattern may twist and the cushion may look lopsided. Staple the center of each side first, check the top, then keep working evenly around the seat.
Making bulky corners
Corners are the difference between “custom” and “wrapped by a raccoon.” Fold them neatly, trim excess batting, and keep checking the top as you staple.
Forgetting screw placement
Before covering the underside completely, make sure you know where the screw holes are. You can mark them with chalk or poke a small guide hole through the fabric. Otherwise, reinstalling the seat becomes a treasure hunt with hardware.
How Long Does It Take to Reupholster a Chair?
A simple dining chair seat can take about 30 minutes to 2 hours, depending on your experience, the number of staples in the old fabric, and how fussy the corners are. The first chair usually takes the longest. By the second chair, you will feel more confident. By the fourth, you may start giving motivational speeches to the furniture.
| Project Type | Estimated Time | Difficulty |
|---|---|---|
| Simple dining chair seat | 30 minutes to 2 hours | Beginner |
| Stool or small bench | 1 to 3 hours | Beginner to intermediate |
| Chair with padded back | 3 to 6 hours | Intermediate |
| Fully upholstered armchair | Several days or more | Advanced |
How Much Does DIY Chair Reupholstery Cost?
The cost depends on fabric choice, foam quality, tools, and how many chairs you are reupholstering. If you already own a staple gun and only need fabric, the project can be very affordable. If you need new foam, batting, staples, and tools, the first chair costs more, but the supplies can often be used for future projects.
For a basic dining chair, budget for upholstery fabric, foam if needed, batting, staples, and optional dust-cover fabric. Premium fabrics, designer prints, and performance materials cost more, but they may last longer in high-use spaces. The smartest approach is to spend where it matters: durable fabric, comfortable foam, and a staple gun that does not jam every five seconds like it is protesting labor conditions.
FAQs About Reupholstering a Chair
Can I reupholster a chair without sewing?
Yes, many dining chair seats can be reupholstered without sewing. If the seat is removable and the fabric simply wraps around the cushion and staples underneath, it is a no-sew project.
Can I put new fabric over old fabric?
You can sometimes cover old fabric if it is clean, smooth, odor-free, and not too thick. However, removing the old fabric is usually better because it lets you inspect the foam and avoid bulky edges.
What kind of staple gun is best for upholstery?
A heavy-duty manual, electric, or pneumatic staple gun can work. Manual staple guns are affordable, while electric or pneumatic options can be easier on your hands if you are reupholstering several chairs.
Should I replace the foam?
Replace the foam if it is flat, stained, crumbling, uneven, or uncomfortable. Fresh foam can dramatically improve the feel of the chair.
How do I make the corners look neat?
Pull the center of the corner fabric underneath first, staple it, then fold each side into a small pleat. Keep the top smooth and trim extra bulk underneath.
Real-Life Experience: What Reupholstering a Chair Actually Teaches You
The first thing you learn when reupholstering a chair is that old staples are tiny metal goblins. They hide under dust covers, cling to wood, snap in half, and somehow multiply when you are not looking. Removing them is not glamorous, but it is the step that sets up the whole project. Rushing through it usually leads to torn old fabric, scratched wood, or leftover staple bits that make the new fabric sit unevenly.
One practical experience tip is to take more photos than you think you need. Photograph the underside before you remove anything. Photograph the corners. Photograph the order of fabric, batting, foam, and dust cover. It may feel excessive, but those photos become incredibly useful when you are trying to recreate a fold that looked obvious 40 minutes ago and now resembles fabric origami invented by an angry squirrel.
Another lesson is that foam thickness changes everything. A chair that originally had thin padding may not look right with very thick foam unless the seat frame has room for it. Extra-thick foam can make the chair more comfortable, but it can also make the seat look puffy or prevent it from fitting neatly back into the frame. Before stapling the final fabric, place the padded seat on the chair to test the height and fit. This one-minute test can save you from undoing twenty minutes of stapling.
Fabric choice also matters more in real life than it does in your imagination. In the store or online, a fabric may look perfect. On a chair, it may stretch strangely, fray at the edges, or reveal that the pattern is slightly crooked. Beginners usually have an easier time with medium-weight upholstery fabric that has a small pattern, texture, or solid color. Large stripes and plaids are beautiful, but they are honest. If they are crooked, they will announce it to the entire room.
Corner folding is where most people improve the fastest. The first corner may look bulky. The second gets better. By the fourth, you begin to understand the fabric. The trick is to remove extra batting from the corner area, pull the fabric smoothly, and create consistent pleats. Do not be afraid to pull a staple and redo a corner. Reupholstery is not a one-shot test. It is more like editing: adjust, check, tighten, and improve.
Finally, the best experience advice is to start with one chair before committing to a full set. Use the first chair as your practice piece. Once you know how much fabric you need, how the corners behave, and whether the foam thickness works, the remaining chairs will go faster and look more consistent. By the end, you will probably look at every tired chair in your house and think, “I can fix you.” That is the real danger of learning upholstery: suddenly, no old chair is safe.
Conclusion
Reupholstering a chair is one of the most satisfying DIY furniture projects because the transformation is fast, affordable, and surprisingly forgiving. With a sturdy chair, the right upholstery fabric, fresh foam or batting when needed, and a little patience, you can turn a worn-out seat into something stylish and comfortable.
The basic process is simple: remove the seat, take off the old fabric, cut new padding and fabric, staple everything evenly, finish the underside, and reattach the seat. The details matter, especially fabric tension and corners, but those skills improve quickly with practice.
If you are new to DIY upholstery, start with a removable dining chair seat. It is small enough to manage, useful enough to feel worthwhile, and dramatic enough to make you want to show before-and-after photos to anyone who wanders too close. Your chair gets a second life, your room gets a fresh look, and you get the satisfaction of saying, “Thanks, I reupholstered it myself.” Not a bad payoff for fabric, staples, and a little weekend determination.