If your home has ever needed a little texture, a pop of pattern, or a craft project that does not require a degree in advanced glue management, scarf covered spheres are about to become your new favorite DIY. They are simple, affordable, cozy, and stylish enough to make guests ask, “Where did you buy those?” This is the part where you smile mysteriously and say, “Oh, I made them,” like a crafting legend in slippers.
This easy DIY project turns ordinary foam balls, plastic ornaments, ping-pong balls, or even old decorative spheres into fabric-wrapped accents using scarves. You can use thrifted scarves, old winter scarves, bandanas, silky fashion scarves, plaid blanket scarves, or lightweight fabric scraps. The result is a set of decorative balls that work as bowl fillers, shelf accents, garland pieces, wreath ornaments, holiday decorations, or year-round home decor.
The best part? You do not need sewing skills. You do not need expensive supplies. You do not need to wrestle with a sewing machine that sounds like it is judging your life choices. With a few basic materials and a little patience, you can make scarf covered spheres that look custom, cozy, and completely charming.
What Are Scarf Covered Spheres?
Scarf covered spheres are decorative balls wrapped or decoupaged with scarf fabric. Think of them as the softer, cozier cousins of store-bought bowl fillers. Instead of buying a bag of generic decorative orbs, you create your own using colors, textures, and patterns that match your home.
They can look rustic, farmhouse, vintage, modern, cottagecore, coastal, patriotic, romantic, holiday-themed, or playful depending on the scarf you choose. A buffalo plaid scarf creates instant Christmas cabin energy. A floral scarf feels springy and charming. A silky jewel-toned scarf gives the spheres a more elegant, boutique-style finish. A faded bandana adds vintage Americana flair.
Why This Easy DIY Is Worth Trying
This project is popular for a reason: it is beginner-friendly, budget-friendly, and surprisingly forgiving. If one side gets wrinkly, you turn that side toward the bottom of the bowl. If a seam looks uneven, you cover it with ribbon, twine, or a tiny bow. Crafting is not about perfection; it is about confidently hiding evidence.
Scarf covered spheres are also a great way to repurpose fabric that might otherwise sit in a drawer forever. Maybe you have a scarf with a stain near one end, a print you still love but no longer wear, or a thrift store find that cost less than a fancy coffee. This DIY gives those textiles a second life as handmade home decor.
Supplies You Need
Gather your materials before you begin. Once glue enters the room, the project moves quickly, and nobody wants to search for scissors with sticky fingers.
- Foam balls, plastic ornaments, ping-pong balls, wooden balls, or old decorative spheres
- One or more scarves, bandanas, or lightweight fabric pieces
- Fabric scissors or sharp craft scissors
- Decoupage medium, fabric glue, or hot glue
- Foam brush or small paintbrush
- Straight pins or sewing clips, optional
- Twine, ribbon, jute, yarn, or lace for finishing
- Wax paper, parchment paper, or a covered work surface
- Small cup, bowl, or egg carton for drying spheres
Best Spheres to Use
Foam balls are the easiest base because they are lightweight and easy to pin. Plastic ornaments are great for holiday decor, especially if you want to hang the finished spheres. Ping-pong balls work well for garlands or mini bowl fillers. Wooden balls create a sturdier, more polished piece, though they are slightly heavier and usually cost more.
If you are making a large dough bowl centerpiece, mix different sizes. A combination of 2-inch, 3-inch, and 4-inch spheres creates depth. When everything is exactly the same size, the display can look a little too organized, like the balls are waiting for a team meeting.
Choosing the Right Scarf
The scarf you choose determines the final look. Lightweight cotton, linen blends, polyester, rayon, and thin flannel are easy to cut and wrap. Thick knit scarves can work, but they are bulkier and better suited for a simple gathered wrap method rather than smooth decoupage.
For beginners, cotton scarves and bandanas are the easiest. They grip glue well, fold neatly, and do not slide around too much. Silky scarves look beautiful, but they can be slippery, so use small sections and work slowly. If your scarf has a bold pattern, cut pieces strategically so the prettiest parts show on the front of each sphere.
Pattern Ideas
- Plaid scarves for winter, farmhouse, and Christmas decor
- Floral scarves for spring centerpieces
- Bandanas for patriotic, western, or vintage style
- Neutral linen scarves for minimalist decor
- Animal print scarves for glam accents
- Silky scarves for elegant trays and bookshelves
Method 1: The Smooth Decoupage Method
This method creates a clean, fitted look. It works best with lightweight scarves and foam, plastic, or wooden spheres.
Step 1: Cut the Scarf Into Small Pieces
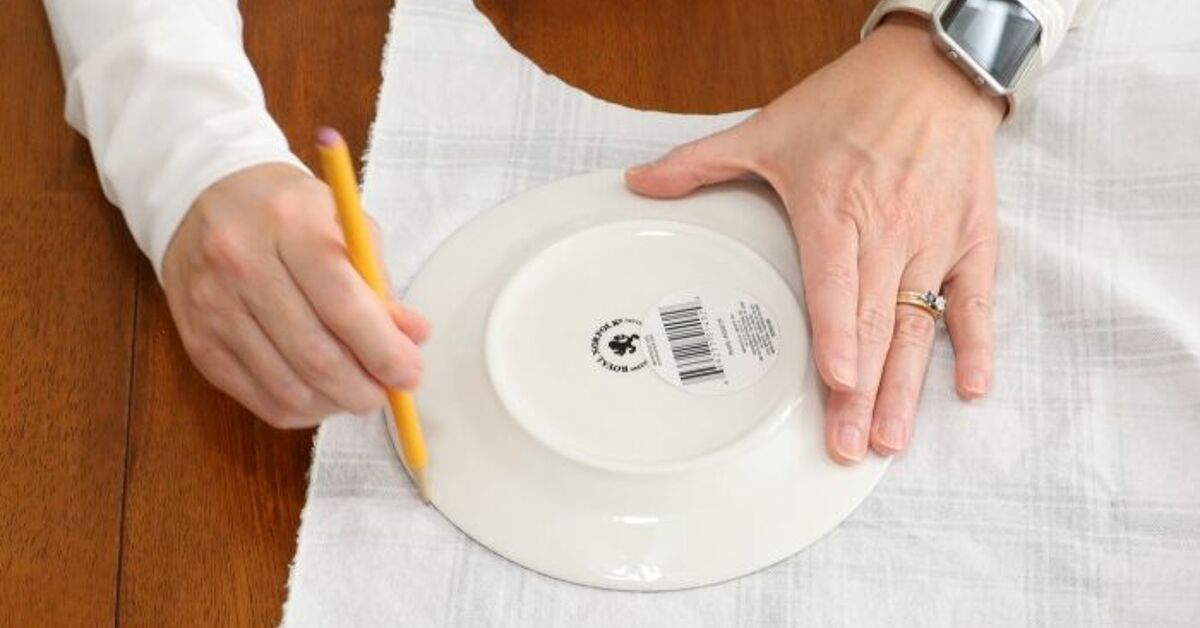
Cut your scarf into strips, squares, or petal-shaped pieces. For a 3-inch sphere, pieces around 1 inch wide are easy to manage. Smaller pieces curve around the ball better than large pieces. Large fabric sections may wrinkle because a sphere is basically a geometry test wearing a sweater.
Step 2: Apply a Thin Layer of Decoupage Medium
Brush a thin layer of decoupage medium onto one small section of the sphere. Do not coat the entire ball at once unless you enjoy panic crafting. Work in sections so the glue stays tacky and manageable.
Step 3: Press Fabric Onto the Sphere
Place one fabric piece onto the glued area. Smooth it from the center outward with your fingers or the edge of a foam brush. The goal is to remove bubbles and flatten wrinkles. A few tiny folds are normal and actually add handmade charm.
Step 4: Overlap the Edges
Add the next fabric piece so it overlaps the first slightly. Keep working around the sphere until the entire surface is covered. Overlapping prevents gaps and gives the ball a layered, finished appearance.
Step 5: Seal the Surface
Brush a final thin coat of decoupage medium over the fabric. This helps secure loose edges and adds durability. Let the sphere dry completely before styling it. Depending on the glue and fabric, drying may take several hours.
Method 2: The Gathered Scarf Wrap Method
This is the fastest method and works especially well with larger spheres, thicker scarves, and holiday bowl fillers. The finish is softer and more gathered, like a tiny fabric pumpkin without the pumpkin commitment.
Step 1: Cut a Fabric Square
Cut a square large enough to wrap around the entire sphere. Place the sphere in the center of the fabric with the wrong side facing up.
Step 2: Pull the Fabric Up
Bring the corners and edges of the fabric up around the sphere. Gather the fabric at one point. Smooth the sides as much as possible while keeping the pattern positioned nicely.
Step 3: Secure the Gathered End
Use hot glue, fabric glue, a rubber band, or twine to secure the gathered fabric. Trim excess fabric if needed. You can hide the gathered area at the bottom of a bowl or turn it into a decorative top with ribbon.
Step 4: Add a Finishing Touch
Wrap twine, lace, ribbon, or yarn around the gathered area. This makes the sphere look intentional instead of like it survived a tiny laundry accident.
Method 3: The Strip-Wrapped Sphere
The strip-wrapped method gives your spheres a cozy, handmade look with visible texture. It is ideal for plaid scarves, gauze scarves, and torn cotton strips.
- Cut or tear the scarf into long strips about 1/2 inch to 1 inch wide.
- Add a small dot of glue to the sphere and attach one end of a strip.
- Wrap the strip around the ball, slightly overlapping as you go.
- Add glue every few turns to keep the fabric secure.
- Continue wrapping until the sphere is covered.
- Tuck and glue the final end underneath another strip.
This method is wonderfully forgiving. It also creates a charming rag-ball effect, perfect for primitive, farmhouse, and cottage-style decorating.
How to Style Scarf Covered Spheres
Once your spheres are dry, the fun begins. Place them in a wooden dough bowl, glass vase, ceramic tray, basket, tiered tray, or metal lantern. Mix them with pinecones, faux greenery, ornaments, dried orange slices, bells, beads, or moss depending on the season.
For Winter and Christmas
Use plaid scarves, red fabric, green fabric, cream flannel, or soft gray patterns. Display the spheres with evergreen clippings, battery-operated fairy lights, cinnamon sticks, and small ornaments. They make beautiful tree decorations if you add a loop of ribbon or twine.
For Spring
Choose floral scarves, pastel bandanas, or light cotton prints. Style the spheres with faux moss, speckled eggs, small nests, tulips, or white ceramic pieces.
For Summer
Try blue bandanas, nautical stripes, chambray, faded red, or yellow prints. Place them in a tray with shells, driftwood, or glass beads for easy coastal decor.
For Fall
Use burnt orange, mustard, burgundy, brown, plaid, or paisley scarves. Pair them with mini pumpkins, wheat stems, acorns, and amber glass.
Common Mistakes and Easy Fixes
Wrinkles Everywhere
Use smaller fabric pieces. Spheres curve in every direction, so large pieces wrinkle quickly. If wrinkles already happened, call them texture and keep going. Handmade decor is allowed to have personality.
Fabric Will Not Stick
Make sure the sphere is clean and dry. If the fabric is thick or slippery, switch to hot glue or fabric glue. For foam balls, straight pins can hold stubborn edges while the glue dries.
Pattern Looks Uneven
Before gluing, decide which part of the scarf should be most visible. Center large flowers, plaid lines, or decorative borders on the front-facing side of the sphere.
Glue Shows Through
Use less glue and test on a scrap first. Thin scarves can become darker when wet with glue. If that happens, choose a thicker fabric or embrace the slightly aged look.
Helpful Tips for a Better Finish
Work on wax paper or parchment paper to prevent glue from sticking to your table. Keep a damp cloth nearby for your fingers. Let each sphere dry on a cup, egg carton, or skewer so it does not stick to the surface. If you use hot glue, a low-temperature glue gun is easier to control and safer for many craft projects.
For a more polished result, add a seam detail. A strip of velvet ribbon, jute twine, braided yarn, lace, or metallic cord can cover overlaps and make the finished sphere look expensive. Nobody has to know the base started as a foam ball that cost pocket change.
Budget-Friendly Ideas
This project is perfect for thrift stores and dollar sections. Look for scarves with interesting patterns, even if they have a small stain or tear. You only need the good sections. Old scarves from your closet are even better because they are free, and free is the official language of happy crafting.
You can also reuse old ornaments, scratched decorative balls, or plastic toy balls as bases. If the original color shows through the fabric, paint the sphere white or a matching color first. This step helps lightweight fabric look brighter and cleaner.
Creative Variations
Scarf Covered Ornament Balls
Use clear plastic ornaments as the base. Cover them with scarf pieces, then add a ribbon loop for hanging. These make thoughtful handmade gifts and pretty tree accents.
Scarf Covered Garland
Wrap small foam balls or ping-pong balls with fabric, then string them with wooden beads. This works beautifully for mantels, shelves, party decor, and seasonal displays.
Wreath Accent Spheres
Glue finished spheres onto a grapevine wreath or foam wreath form. Add greenery, ribbon, and small ornaments for a textured wreath that looks custom.
Decorative Bowl Fillers
Make a set of 8 to 12 scarf covered spheres in coordinating fabrics. Place them in a dough bowl, tray, or basket for instant decor. Add a few natural elements so the display feels layered instead of lonely.
Experience Notes: What I Learned Making Scarf Covered Spheres
The first time I made scarf covered spheres, I assumed the process would be as simple as “wrap ball, glue fabric, become home decor genius.” It was mostly that simple, but there were a few lessons hiding in the glue bottle. The biggest lesson: fabric choice matters more than you think. A soft cotton scarf behaved beautifully. It wrapped, smoothed, and stayed where I placed it. A slippery satin scarf, on the other hand, acted like it had somewhere more important to be. It slid around the sphere, stuck to my fingers, and made me question whether I was crafting or negotiating.
I also learned that smaller fabric pieces create a cleaner finish. At first, I tried to cover a foam ball with one large scarf square. It looked promising for approximately seven seconds. Then the folds started gathering like tiny mountain ranges. When I switched to smaller strips and overlapping patches, the sphere looked much smoother and more intentional. The patchwork effect also made the pattern more interesting, especially with plaid and floral scarves.
Another helpful discovery was the power of a “front side.” Not every inch of a handmade sphere needs to be perfect. When styling them in a bowl or tray, only part of each ball is visible. I started placing the prettiest section of fabric on one side and letting seams or gathers land on the bottom. This made the final display look polished without requiring every sphere to pass a museum inspection.
Drying time also deserves respect. I wanted to style the spheres immediately because patience is apparently not included in my craft supplies. But when I moved them too soon, the fabric shifted and my fingers left little dents in the glue. Letting them dry fully made a huge difference. Setting each ball on a small cup or egg carton kept it from sticking to the table and helped air circulate around the surface.
My favorite version used an old plaid scarf, foam balls, and twine. The finished spheres looked warm, rustic, and perfect for a winter dough bowl centerpiece. I mixed them with pinecones and small brass bells, and the whole arrangement looked like something from a charming holiday shop. My least favorite version used fabric that was too thick. It was not a disaster, but it looked bulky, like the sphere was wearing a coat it borrowed from a much larger sphere.
The most satisfying part of this DIY is how customizable it is. One scarf can create several spheres, and each one looks slightly different. You can make them elegant, cozy, playful, vintage, or seasonal. They are also easy to refresh. If your style changes, make a new set with a different scarf. Compared with buying decorative fillers, this project feels more personal and much more fun. Plus, you get to say, “I made those,” which is one of the best sentences in the crafting universe.
Conclusion
Learning how to make scarf covered spheres is an easy DIY win for anyone who loves affordable, creative home decor. With a few foam balls, old scarves, glue, and simple wrapping techniques, you can create custom decorative accents for every season. Use the smooth decoupage method for a polished look, the gathered wrap method for quick cozy texture, or the strip-wrapped method for rustic charm.
These handmade spheres are perfect for bowls, trays, garlands, wreaths, ornaments, shelves, and centerpieces. They help repurpose old fabric, add personality to your home, and make store-bought decor look a little less exciting by comparison. Best of all, the project is flexible. If a seam gets messy, hide it. If a wrinkle appears, call it texture. If you end up making twelve more than planned, congratulations: you have officially entered the decorative sphere era.