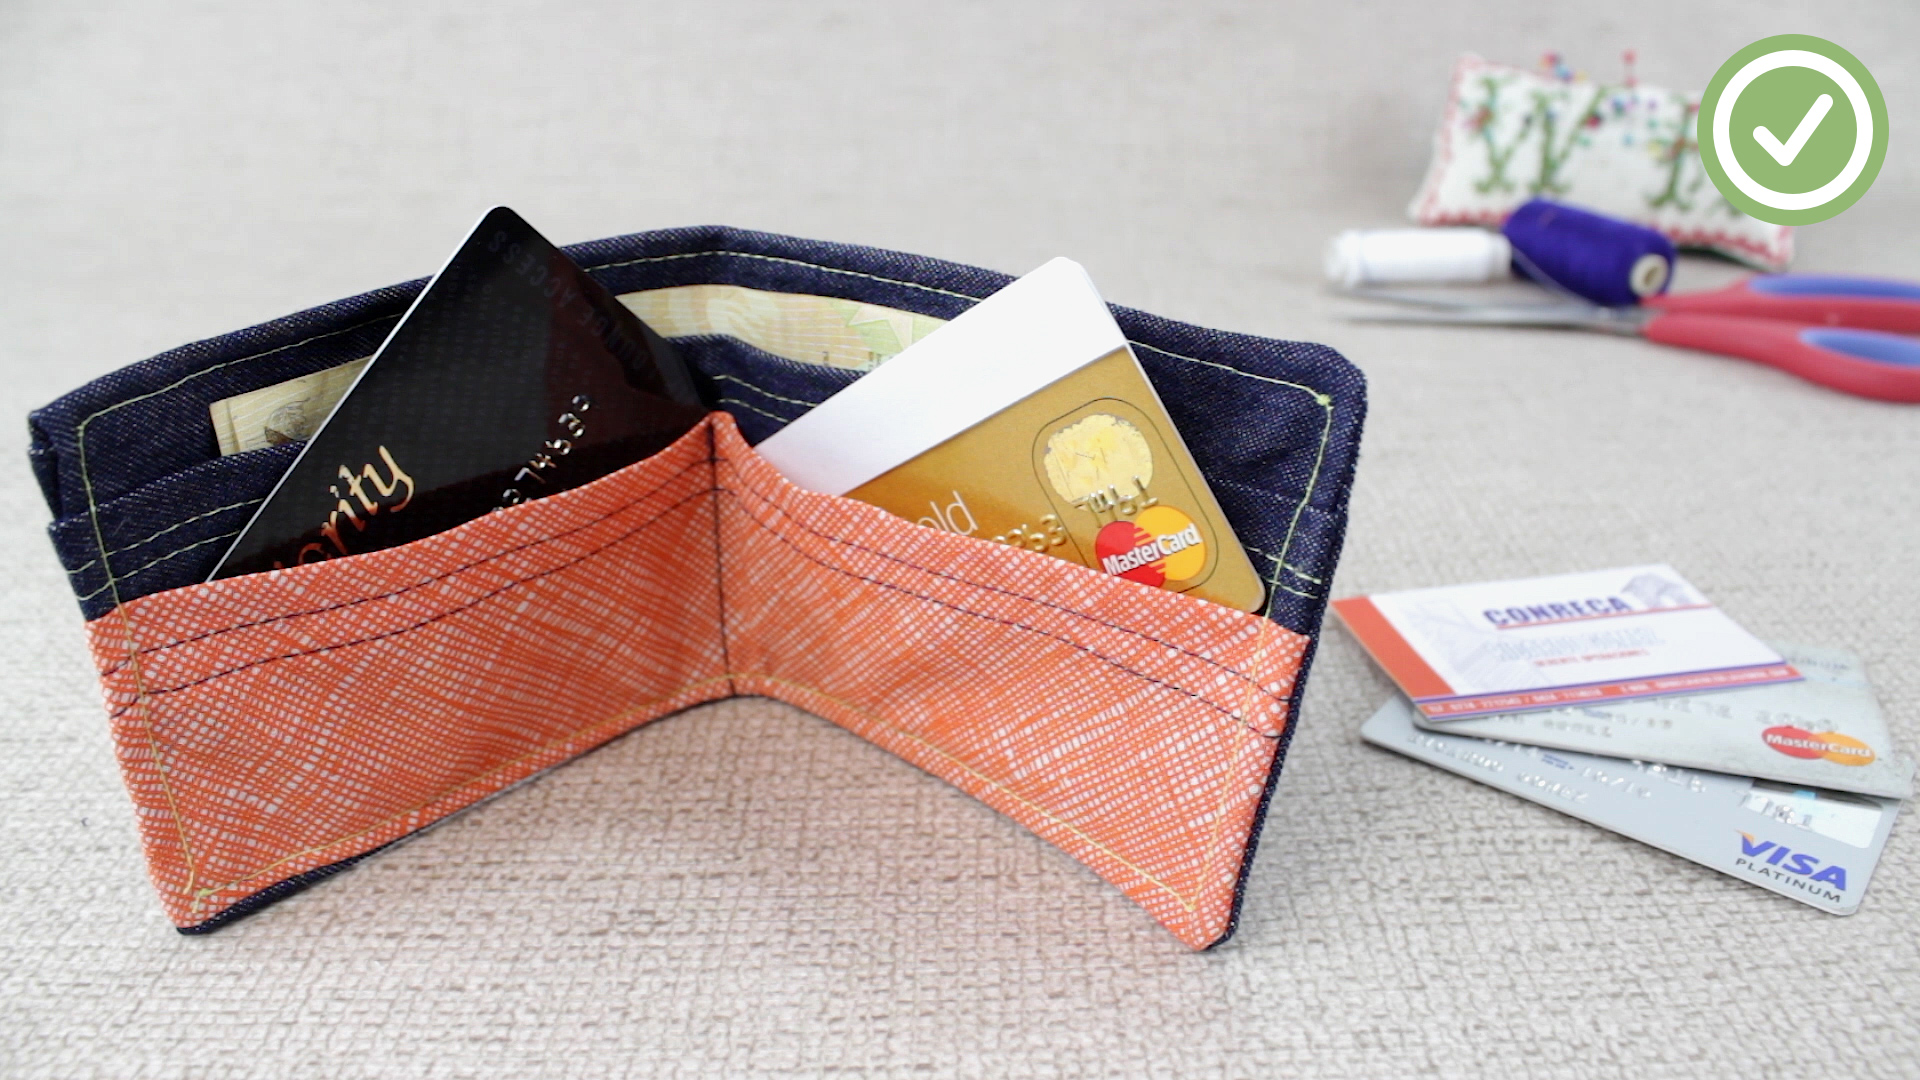
Learn how to make a wallet that looks good, feels personal, and does not require you to own a mysterious workshop filled with expensive tools.
Introduction: Why Make Your Own Wallet?
A wallet is one of those everyday objects we barely notice until it starts falling apart, bulging like a tiny suitcase, or embarrassing us at checkout with a receipt from three summers ago. Making your own wallet solves more than one problem. You get to choose the size, material, pocket layout, color, stitching style, and level of personality. A handmade wallet can be sleek and minimalist, rugged and outdoorsy, soft and fabric-based, or polished enough to pass as a boutique gift.
The good news is that learning how to make a wallet is much less intimidating than it sounds. You do not need to become a master leatherworker overnight. A simple DIY wallet can be made from leather, cork fabric, canvas, denim, felt, or sturdy cotton. Beginners often start with a card holder or slim bifold wallet because the pattern is small, the materials are affordable, and mistakes are easier to fix than on a large bag or jacket.
This guide focuses on a beginner-friendly handmade wallet with practical construction tips used in real leathercraft and sewing projects. You will learn how to plan the design, choose materials, prepare a wallet pattern, assemble pockets, finish the edges, and personalize the final piece. By the end, your wallet may not look like it came from a luxury brand’s secret mountain atelier, but it will hold cards, cash, and pride. That is a strong start.
What Kind of Wallet Should You Make?
Before choosing materials, decide what your wallet needs to do. A wallet that carries two cards and a little emergency cash is very different from a full bifold wallet with six card slots, an ID window, a coin pouch, and enough receipts to audit your entire snack history.
Popular DIY Wallet Styles
Minimalist card holder: Best for beginners. It usually has two or three pockets and a slim shape. This is ideal if you mostly use cards and want something light.
Bifold wallet: A classic fold-over design with space for cash and multiple cards. It requires more measuring and alignment but is still manageable for patient beginners.
No-sew leather wallet: A great option if you want to work with leather but do not want to stitch. These designs often use rivets, snaps, folds, or adhesive-assisted construction.
Fabric snap wallet: A soft, colorful option that works well with quilting cotton, canvas, cork fabric, or denim scraps. It can include a snap closure and small compartments.
Zipper pouch wallet: Best if you want to carry coins, small keys, earbuds, or folded cash. It requires zipper installation, so it is slightly more advanced.
For your first project, choose a minimalist wallet or simple bifold. The goal is not to create a wallet that can survive a spy movie chase scene. The goal is to learn clean measuring, neat assembly, and durable finishing.
Materials and Tools You Will Need
The best material depends on the style you want. Leather gives a classic, durable finish. Cork fabric is lightweight, flexible, and beginner-friendly. Canvas and denim are affordable and easy to find. Felt is simple to work with, though it is less durable for long-term daily use.
For a Leather Wallet
- Thin vegetable-tanned leather or soft leather panel
- Printed wallet pattern or handmade paper template
- Leather glue or double-sided leather basting tape
- Waxed thread and leather needles, if stitching
- Hole punch, stitching punch, or pre-punched leather pieces
- Rivets or snaps for a no-sew design
- Edge slicker or soft cloth for smoothing edges
- Leather conditioner or finish, if desired
For a Fabric Wallet
- Sturdy cotton, canvas, denim, or cork fabric
- Lightweight interfacing or stabilizer
- Thread that matches or contrasts nicely
- Snap, button, hook-and-loop tape, or zipper
- Printed wallet pattern
- Sewing machine or hand-sewing needle
- Iron for pressing fabric seams
Safety note: Wallet making may involve sharp craft tools, punches, needles, or heated equipment such as an iron. Beginners, especially younger crafters, should work with adult supervision and use pre-cut materials whenever possible.
Step 1: Plan the Wallet Layout
Good wallet making begins before you touch the material. Start by listing what the wallet must carry. For example, a simple daily wallet might need space for three cards, folded cash, and one hidden pocket. A travel wallet might need a wider slot for IDs or transit cards. A gift wallet might need initials, decorative stitching, or a color that matches the recipient’s style.
Draw the wallet as a rough rectangle first. Then mark where each pocket will go. Most cards are about the same size, but you should still leave a little extra room so cards can slide in and out easily. Too tight, and the wallet becomes a tiny wrestling match. Too loose, and your cards may escape like they have weekend plans.
A simple card holder usually has one back panel and two pocket panels. A bifold wallet usually has an outer shell, inner panels, card slots, and a cash compartment. Keep the first version simple. Once you understand the structure, you can add more pockets later.
Step 2: Create or Print a Wallet Pattern
A wallet pattern is the blueprint for your project. You can use a free printable wallet pattern, trace an old wallet you like, or draw your own. If you design from scratch, use paper first. Fold it, test it with real cards, and check whether the proportions feel comfortable in your hand or pocket.
Beginner Pattern Tips
- Keep the shape rectangular for your first wallet.
- Round the corners slightly for a softer, more professional look.
- Mark fold lines, pocket positions, stitch lines, and snap or rivet locations.
- Add a little extra space around card pockets for easy access.
- Test the paper mockup before cutting your final material.
The paper test is the secret weapon. It helps you spot problems before they become expensive leather problems or “why did I sew this pocket shut?” problems. Place actual cards inside the paper version and fold it closed. If it feels bulky on paper, it will feel bulkier in leather or fabric.
Step 3: Prepare the Material
For leather, choose a piece that is firm enough to hold shape but thin enough to fold comfortably. Very thick leather can make a wallet look bulky, especially once pockets overlap. For fabric, apply interfacing or stabilizer so the wallet does not feel floppy. A wallet needs structure; otherwise, it becomes more of a polite napkin with card slots.
Place your pattern pieces on the material and mark them lightly. For fabric, pay attention to print direction. A pattern with tiny cats looks cute until half of them are upside down. For leather, avoid scars, weak areas, or overly stretchy sections when possible. Natural marks can add character, but avoid placing them where pockets need strength.
If you are new to leatherworking, using pre-cut panels or asking an experienced adult to help prepare the pieces can make the project safer and cleaner. Accuracy matters more than speed. A wallet is small, so even tiny measurement errors can be noticeable.
Step 4: Assemble the Pockets
Start with the inner pocket pieces before attaching them to the outer wallet body. If you are making a leather wallet, lightly secure the pocket pieces with leather glue or basting tape so they stay aligned. If you are making a fabric wallet, press folds neatly and stitch pocket edges before final assembly.
The top edge of each card pocket should be finished before the pocket is attached. On leather, this may mean smoothing and burnishing the edge. On fabric, it usually means folding and sewing a hem. This step is small but important because pocket openings are touched constantly. A raw, unfinished edge will wear faster and make the wallet look homemade in the “summer camp craft table” way rather than the “cool handmade studio” way.
How to Avoid Bulky Pockets
Stacking too many layers in one spot creates bulk. To avoid this, stagger pocket heights and keep overlaps minimal. For a slim wallet, use two to four card slots instead of trying to carry every loyalty card from every sandwich shop in America. Your wallet does not need to be a filing cabinet with dreams.
Step 5: Stitch, Rivet, or Secure the Wallet
There are several ways to hold a wallet together. The best method depends on the material and style.
Hand-Stitched Leather Wallet
Hand stitching gives a traditional, durable finish. Many leatherworkers use a saddle-stitch style because it creates strong, independent stitches. The key is consistency: evenly spaced holes, steady thread tension, and patient stitching. If a stitch looks messy, it is better to correct it than to pretend your wallet is “rustic” and hope nobody asks questions.
No-Sew Leather Wallet
No-sew leather wallets are beginner-friendly because they can use folds, rivets, snaps, and adhesive-assisted construction. This style is excellent for a wrap wallet or simple card holder. The result can look clean and modern, especially if the edges are finished well.
Sewn Fabric Wallet
Fabric wallets are great practice projects for sewing. They use small pieces, straight seams, and simple closures. Pressing is especially important. A neat press can make a beginner project look dramatically better, almost like the fabric suddenly got a college degree.
Step 6: Finish the Edges
Edge finishing is what separates a rough DIY wallet from a polished handmade wallet. On leather, smooth edges can be achieved by sanding lightly, moistening the edge, and burnishing with a slicker or cloth. Some makers add gum tragacanth, wax, or edge finish for a cleaner result. On fabric, trim loose threads, press seams flat, and topstitch around the wallet for structure.
Do not rush this part. The edges are the first thing people notice when they pick up the wallet. A clean edge says, “I planned this.” A ragged edge says, “The wallet and I went through a lot together.” Both are emotionally valid, but only one looks professional.
Step 7: Add Personal Details
Personalization is one of the best reasons to make your own wallet. You can stamp initials, use contrasting thread, add a small fabric label, choose a bright lining, or add a hidden message inside a pocket. For leather, stamping works best on vegetable-tanned leather. For fabric, embroidery, decorative topstitching, or a patterned lining can add charm.
Keep decoration balanced. A wallet is small, so one strong design detail is usually enough. A monogram, colored thread, or curved pocket shape can look elegant. Too many extras may make the wallet look busy, like it got dressed in the dark.
Common Wallet-Making Mistakes and How to Avoid Them
Mistake 1: Making the Wallet Too Thick
Beginners often add too many pockets. Every layer adds bulk. Start with the essentials: a few card slots and one cash pocket. If you need more storage later, make a second wallet. Congratulations, you now have a hobby.
Mistake 2: Skipping the Pattern Test
A paper mockup can prevent wasted material. Fold it, test cards inside it, and check the size in your pocket or bag. This simple test catches problems early.
Mistake 3: Uneven Stitching
Uneven stitching can make even high-quality material look careless. Mark stitch lines clearly and keep your spacing consistent. Slow stitching is usually better than fast stitching.
Mistake 4: Forgetting Edge Finishing
Unfinished edges wear faster and look rough. Whether you are working with leather or fabric, finish the edges before calling the project done.
Mistake 5: Choosing the Wrong Material
Very thick leather, stretchy fabric, or flimsy cotton can make wallet construction frustrating. Choose material with enough body to hold shape but enough flexibility to fold naturally.
Best Materials for Different Wallet Styles
Best for a classic wallet: Thin leather or vegetable-tanned leather gives a timeless look and becomes more attractive with use.
Best for colorful designs: Quilting cotton with interfacing offers endless pattern choices, from florals to geometric prints.
Best for eco-friendly style: Cork fabric is lightweight, flexible, and naturally textured.
Best for rugged everyday use: Denim, canvas, or waxed canvas can create a casual wallet with solid durability.
Best for quick practice: Felt or scrap fabric is affordable and forgiving, though it may not last as long as leather or canvas.
How Long Does It Take to Make a Wallet?
A simple card holder can take one to two hours once your pattern and materials are ready. A fabric snap wallet may take an afternoon, especially if you are adding interfacing, pressing seams, and installing a closure. A hand-stitched leather bifold can take several hours or more, depending on the number of pockets and the finishing details.
Do not measure success by speed. The first wallet teaches you how the pieces work together. The second wallet usually looks cleaner. By the third, you may start giving them as gifts and casually saying things like, “Oh, I made that,” while pretending not to enjoy the compliment.
Care Tips for a Handmade Wallet
A handmade wallet lasts longer when treated kindly. Do not overstuff it. Keep leather wallets away from soaking water, and condition them occasionally if they start to feel dry. Fabric wallets can often be spot-cleaned, depending on the material. Cork fabric should be wiped gently with a damp cloth.
Rotate what you carry. Remove old receipts, expired cards, and mystery paper scraps. A slim wallet stays slim only if you do not feed it like a hungry backpack.
Experience Notes: What Making a Wallet Teaches You
Making a wallet is a small project, but it teaches surprisingly big lessons. The first lesson is patience. A wallet looks simple because it is small, but small objects expose every crooked line. When a pocket is slightly uneven, there is nowhere for it to hide. This is why the pattern stage matters so much. People often want to jump straight into cutting and assembling, but the paper mockup is where the project quietly becomes successful.
The second lesson is that material choice changes everything. A design that works beautifully in thin leather may feel bulky in heavy leather. A fabric wallet without stabilizer may feel too soft, while too much interfacing can make it stiff. After making one or two wallets, you start noticing how commercial wallets are built. You look at pocket spacing, folded edges, lining, stitch length, and thickness. Suddenly, standing in a store and inspecting wallets becomes “research,” not suspicious behavior.
The third lesson is that neatness beats complexity. A simple two-pocket card holder with clean edges often looks better than a complicated bifold with uneven seams. Beginners sometimes think more features make a wallet more impressive. In reality, clean construction makes it impressive. Straight lines, smooth edges, balanced pocket placement, and secure stitching matter more than adding ten compartments.
The fourth lesson is that mistakes are useful. If your first wallet is too tight, you learn to add clearance. If the fold is bulky, you learn to reduce layers. If the stitching looks uneven, you learn to mark better guide lines. These are not failures; they are the project charging tuition. Luckily, the tuition is usually a few scraps of material and a little time.
The most satisfying part is using something you made. Pulling out a handmade wallet at a coffee shop feels different from using a store-bought one. It carries a story. Maybe the stitching is not perfect. Maybe one corner has “character.” Maybe the inside pocket is slightly more enthusiastic on the left side. But it is yours. You planned it, shaped it, assembled it, and finished it. That feeling is the real reason DIY wallet making is worth trying.
After your first successful wallet, experiment. Make a slim leather card holder for everyday carry, a colorful fabric wallet as a gift, a cork wallet for travel, or a no-sew wrap wallet for quick weekend crafting. Each version teaches a new skill. Before long, you will have a drawer full of prototypes and the calm confidence of someone who knows exactly why pockets need seam allowance.
Conclusion
Learning how to make a wallet is one of the best beginner projects in leathercraft or sewing because it is practical, customizable, and small enough to finish without turning your home into a craft warehouse. Start with a simple wallet pattern, choose the right material, test the layout with paper, assemble the pockets carefully, and finish the edges with patience. Whether you make a leather wallet, fabric wallet, cork card holder, or no-sew minimalist design, the result is useful and personal.
A handmade wallet also makes a thoughtful gift. It shows effort without requiring a giant budget. More importantly, it teaches skills you can reuse in other DIY projects: measuring, pattern making, stitching, edge finishing, and design thinking. Begin simple, improve with each version, and remember that every great maker has at least one early project hidden in a drawer. That drawer is not shame. That drawer is progress.