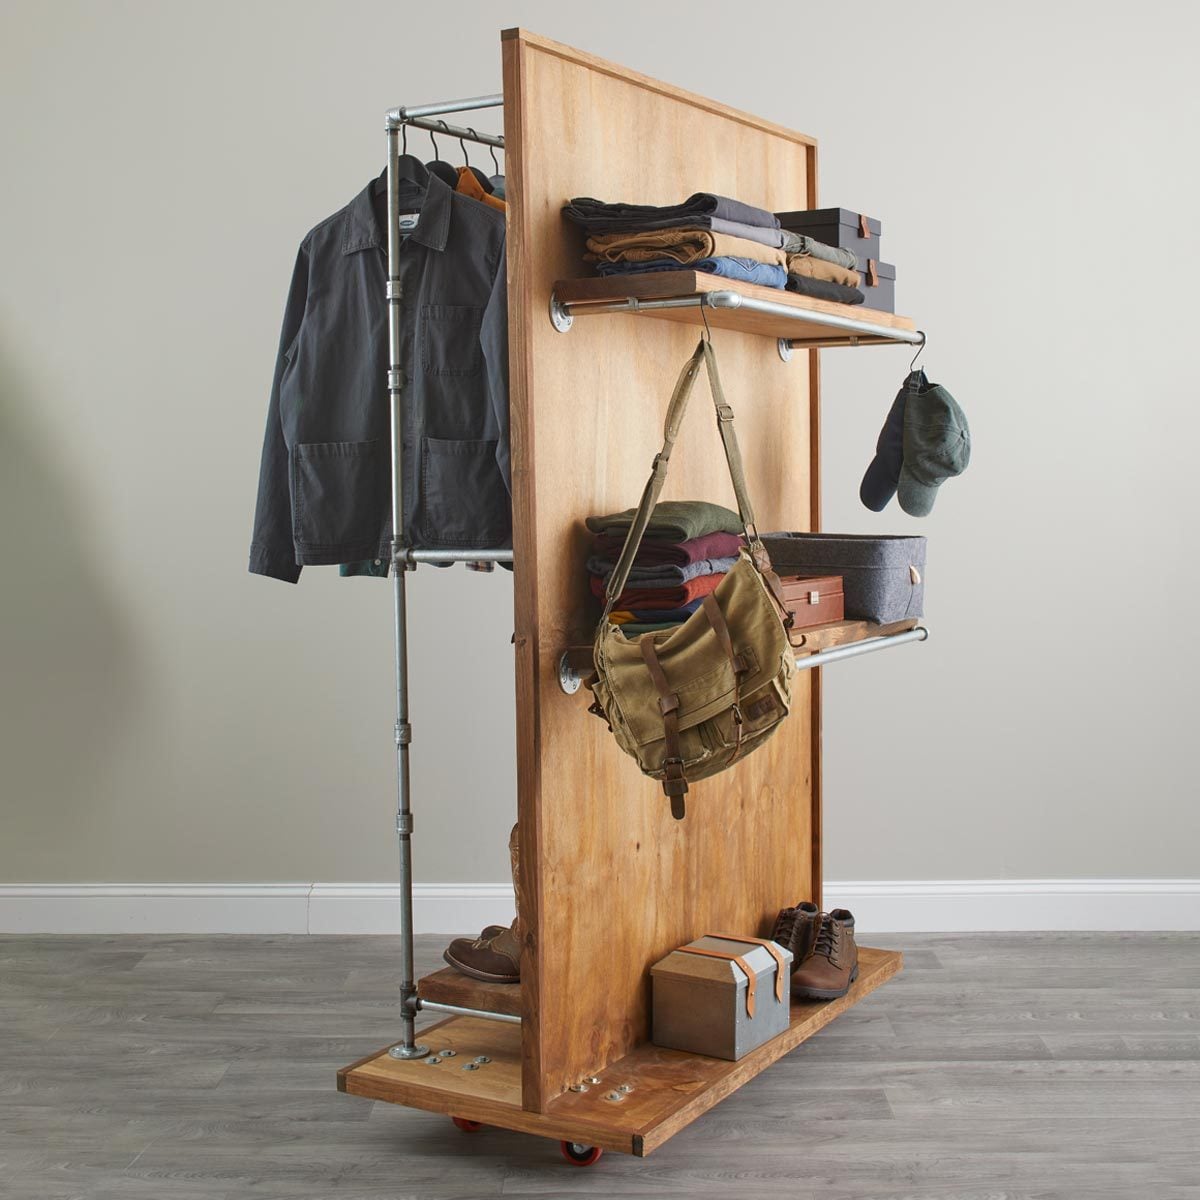
A closet is wonderful until it becomes the textile equivalent of rush-hour traffic. Shirts are squeezed together, jackets mysteriously migrate to the floor, and finding one pair of pants requires an archaeological permit. A rolling clothes rack offers a practical escape route.
This project combines a sturdy plywood shoe shelf, threaded steel pipe, and locking casters. The finished rack is easy to move between a bedroom, laundry room, guest room, sewing studio, or photo-shoot area. It also looks polished enough to leave in plain sight instead of hiding it behind a curtain and pretending it is not there.
The plan below creates a rack approximately 48 inches wide, 18 inches deep, and 70 inches tall. You can adjust the dimensions, but keep the base wide enough to resist tipping and make sure every caster and fastener is suitable for the expected load.
Why Build a Rolling Clothes Rack?
Store-bought garment racks can be useful, but inexpensive models sometimes wobble, roll poorly, or lean dramatically after meeting three winter coats. Building your own lets you control the size, materials, appearance, and storage features.
A mobile garment rack can serve several purposes:
- Create temporary closet space in an apartment or dorm room.
- Hold freshly ironed clothing in a laundry room.
- Organize costumes, sewing projects, or photography wardrobes.
- Store guest coats during parties.
- Display clothing at a craft fair, boutique, or yard sale.
- Keep tomorrow’s outfit visible and ready.
Rolling racks are especially helpful in rooms without built-in closets. Shelves, side hooks, adjustable rods, and lockable wheels are common features in well-designed commercial racks because they improve storage flexibility and portability.
Project Overview
Recommended Finished Dimensions
- Width: Approximately 48 inches
- Depth: 18 inches
- Height: Approximately 68 to 72 inches
- Hanging space: About 40 to 44 inches
A rack around 70 inches tall can accommodate shirts, jackets, pants, and many dresses without making the structure unnecessarily top-heavy. The 18-inch-deep base provides useful shoe storage while giving the uprights a reasonably stable footprint.
Difficulty, Cost, and Time
- Difficulty: Beginner to intermediate
- Active building time: About four to six hours
- Drying and curing time: Overnight or longer
- Typical cost: Varies significantly according to pipe, lumber, finish, and caster quality
The Home Depot and This Old House both feature clothes-rack projects that combine wooden components with metal pipe or specialized furniture hardware. Their designs illustrate why a strong base, dependable joints, and thoughtful proportions matter more than decorative complexity.
Materials and Hardware
Wood Components
- One piece of 3/4-inch plywood, cut to 48 by 18 inches
- Two 1-by-4 boards cut to 48 inches
- Two 1-by-4 boards cut to approximately 16 1/2 inches
- Optional wood edging or iron-on veneer for the plywood
The four 1-by-4 pieces form a reinforcing frame beneath the plywood. This frame stiffens the shelf and gives the caster bolts more material to pass through.
Pipe Components
- Two 3/4-inch black steel pipes, approximately 60 to 64 inches long
- One 3/4-inch black steel pipe, approximately 42 inches long
- Two 3/4-inch threaded 90-degree elbows
- Two 3/4-inch threaded floor flanges
Ask the hardware or plumbing supplier to cut and thread the pipes when necessary. Threaded fittings change the final assembled width, so dry-fit the complete inverted U-shaped pipe frame before drilling holes in the base.
Caster and Fastener Hardware
- Four 3-inch swivel plate casters with total-lock brakes
- Quarter-inch bolts long enough to pass through the plywood and reinforcing frame
- Flat washers and locknuts for the bolts
- 1 1/4-inch wood screws
- Interior wood glue
- Optional side hooks for bags, hats, or belts
Total-lock casters are preferable because the brake can stop both wheel rotation and swivel movement. Choose casters with load ratings that comfortably exceed the estimated weight of the rack and clothing. Remember that adding four caster ratings together does not automatically establish the safe capacity of the complete rack; the plywood, pipe fittings, bolts, and balance of the structure also matter. Larger wheels generally cross small floor gaps more easily, while softer polyurethane, rubber, or PVC treads are kinder to scratch-prone floors.
Finishing Supplies
- 120-grit and 220-grit sandpaper
- Wood stain, paint, or clear protective finish
- Metal primer and spray paint, if painting the pipe
- Lint-free cloths
- Painter’s tape
Tools You Will Need
- Tape measure
- Pencil
- Carpenter’s square
- Circular saw, table saw, or cutting service
- Drill and drill bits
- Socket wrench or adjustable wrench
- Clamps
- Random-orbit sander or sanding block
- Metal pipe wrench
- Safety glasses and hearing protection
- Dust mask or suitable respiratory protection
Wear eye protection when drilling, cutting, or working around flying particles. Control sanding dust with extraction, ventilation, and appropriate protection. Wood dust can irritate the eyes and respiratory system, and allowing it to gather around a workspace is an invitation for both poor finishes and poor decisions.
How To Make a Clothes Rack on Wheels: Step-by-Step Instructions
Step 1: Measure the Intended Location
Before cutting anything, measure the room, doorway, and path along which the rack will roll. A beautiful 60-inch-wide rack is less impressive when it cannot leave the workshop.
Check ceiling height, baseboard projections, floor transitions, and door openings. Leave enough room around the rack to turn it without scraping walls or knocking framed photographs into a dramatic descent.
Step 2: Cut the Base and Reinforcing Boards
Cut the plywood shelf to 48 by 18 inches. Cut two long reinforcing boards to match the 48-inch length. Fit the two shorter boards between them at each end. Their exact length should equal the shelf depth minus the combined thickness of the two long boards.
Dry-fit the frame beneath the plywood. Confirm that the corners are square by measuring diagonally from corner to corner. If both diagonal measurements match, the frame is square. If not, gently persuade it into position. Woodworking often involves patient persuasion followed by a clamp.
Step 3: Sand the Wood
Sand the plywood and boards with 120-grit paper to remove rough areas, machining marks, and splinters. Follow with 220-grit paper for a smoother surface. Slightly round sharp corners so they are less likely to snag clothing or bruise ankles.
Sand in the direction of the wood grain and remove all dust before applying stain or finish. Manufacturers commonly recommend progressing from a medium grit to a finer grit because properly prepared pores absorb stain more evenly.
Step 4: Assemble the Reinforced Shelf
Place the plywood upside down on a protected work surface. Apply wood glue to the upper edges of the reinforcing boards and position them around the underside perimeter.
Clamp the pieces in place. Drill pilot holes through the reinforcing boards and drive 1 1/4-inch screws upward into the plywood. Check screw length carefully so the tips do not burst through the top surface like tiny metal groundhogs.
Wipe away wet glue before it dries. Follow the adhesive manufacturer’s instructions for clamping and curing. Many interior wood glues require at least 30 minutes of clamping for ordinary joints and recommend avoiding significant stress for approximately 24 hours.
Step 5: Dry-Fit the Steel Pipe Frame
Thread one elbow onto the top of each vertical pipe. Connect the vertical pipes with the horizontal hanging bar. Attach one floor flange to the bottom of each upright.
Tighten the assembly gradually while keeping the flanges aligned. Do not fully wrench one joint before the others are positioned. Threaded pipe has a mischievous habit of becoming perfectly tight while pointing in exactly the wrong direction.
Set the assembled frame on the shelf and center it from side to side. The flanges should sit near the short ends of the shelf while leaving enough wood around every bolt hole. Mark the flange locations only after confirming that the frame is straight and the horizontal bar is level.
Step 6: Drill the Flange Mounting Holes
Use the flange holes as templates. Mark every bolt location, remove the pipe frame, and drill through the shelf and the reinforcing boards beneath it.
Place a scrap board under the drilling area to reduce tear-out. Keep the drill vertical. Pilot and clearance holes can reduce splitting and help fasteners seat more accurately, particularly near board edges.
Step 7: Plan the Caster Layout
Turn the base upside down and position one caster near each corner. Keep the mounting plates fully supported by the reinforcing frame. Mark all holes, but verify that caster bolts will not collide with the flange bolts.
Place the wheels as far toward the corners as practical without weakening the edges. A broad wheel pattern improves stability. Using four swivel casters provides excellent maneuverability in bedrooms and tight laundry rooms. Four total-lock models make it easier to park the rack without unwanted rotation.
Step 8: Apply the Finish
It is easier to finish the base before installing the pipe and wheels. Apply stain, paint, or clear finish according to the product label. Test the product on a scrap piece or hidden area first because plywood and solid lumber may absorb color differently.
For stain, wipe away excess product evenly and allow it to dry completely. Light sanding between clear coats with fine-grit paper can improve adhesion and smooth raised grain, provided the previous coat is fully dry.
To paint the steel pipe, clean away grease, dust, and loose residue. Work outdoors or in a well-ventilated area, apply a compatible metal primer, and follow it with light coats of paint. Rust-Oleum’s preparation guidance emphasizes removing oil and contaminants and allowing the surface to dry before coating.
Step 9: Bolt on the Casters
After the finish has cured, drill the caster mounting holes. Insert bolts through the caster plates, reinforcing frame, and plywood. Add flat washers and locknuts on the opposite side.
Tighten the hardware evenly. The caster plates should sit flat without crushing deeply into the wood. Washers spread the clamping force over a larger area, while locknuts help resist loosening as the rack rolls and vibrates.
Step 10: Attach the Pipe Frame
Set the rack upright and place the pipe frame over the predrilled holes. Install the flange bolts with washers and locknuts. Tighten each fastener a little at a time, alternating among the holes so the flange remains flat.
Check the uprights with a level. Small alignment corrections can often be made by loosening the bolts, repositioning the assembly, and tightening it again.
Step 11: Test the Rack Carefully
Lock the casters and push gently against the upper bar from several directions. Check for rocking, flexing, loose fittings, and movement around the flanges.
Begin the load test with a few lightweight garments. Gradually add weight while observing the pipe, base, fasteners, and wheels. Do not assume the rack can hold hundreds of pounds simply because the combined caster rating sounds heroic.
Roll the loaded rack slowly over the actual floor. Test thresholds cautiously. Never pull the rack sideways by one upper corner, climb on the base, or allow children to swing from the hanging rail.
Ways To Customize Your DIY Rolling Garment Rack
Add a Second Shoe Shelf
Install a raised slatted shelf above the plywood base to create two levels of shoe storage. Leave enough clearance below for boots, baskets, or folded blankets.
Install Side Hooks
Hooks attached to the wooden base or appropriate pipe fittings can hold hats, belts, scarves, and lightweight bags. Avoid hanging heavy items far outside the base because off-center weight increases the risk of tipping.
Create a Laundry Station
Add a narrow basket for clothespins, stain-removal supplies, or an iron. A removable fabric bag can collect empty hangers, which otherwise reproduce across the laundry room when nobody is watching.
Build a Knockdown Version
If you move frequently, use threaded inserts, furniture bolts, or other reusable fasteners instead of repeatedly driving ordinary screws into the same holes. Knockdown hardware can be assembled and disassembled multiple times without degrading the wood as quickly.
Match the Rack to Your Decor
Try a natural clear finish with black pipe for an industrial look, white paint with brass-toned hardware for a brighter bedroom, or dark walnut stain with matte metal for a boutique-style display.
Common Mistakes To Avoid
Choosing Tiny Casters
Small wheels may work on perfectly smooth floors but struggle with rugs, grout lines, cords, and doorway transitions. Choose wheel size and tread material for the actual surface, not the beautifully polished floor shown on the package.
Using Only Two Locking Wheels
Two brakes may prevent rolling but still allow the opposite casters to swivel. Four total-lock casters create a more settled rack when loading, steaming, or selecting clothes.
Mounting Flanges With Short Screws
The upper frame acts like a long lever. Through-bolts with washers and locknuts provide a more dependable mechanical connection than a few short screws driven only into plywood.
Making the Base Too Narrow
A tall rack on a skinny base can become unstable when heavy clothing is pushed to one side. Preserve a useful depth, keep heavy objects on the bottom shelf, and distribute garments evenly.
Rolling It Like Airport Luggage
A garment rack should be pushed slowly from the middle of an upright or the base. Yanking the top bar around corners applies unnecessary leverage to the flanges and can turn a calm storage project into interpretive dance.
Ignoring Tip-Over Risks
Place the rack on level flooring and do not let children climb, pull, or hang on it. The U.S. Consumer Product Safety Commission emphasizes that tall furniture can cause serious injuries when it tips. A mobile open rack is different from a drawer unit, but the same basic lesson applies: stability must be treated as a safety feature, not a decorative bonus.
Practical Build Experiences and Lessons Learned
The most useful lessons from a rolling clothes rack project usually arrive before the first shirt touches the bar. One common discovery is that “48 inches wide” can mean several different things. It might describe the plywood, the distance between uprights, or the outside width of the elbows. Threaded fittings add width in ways that are easy to underestimate. Dry-fitting the pipe first prevents the awkward moment when the flanges land half an inch beyond the shelf.
Another realistic build-day experience involves caster placement. At first, putting the wheels directly in the extreme corners seems obvious. Then a bolt head collides with a flange bolt, a washer overlaps the plywood edge, or the drill cannot reach the nut. Laying out every piece of hardware before drilling takes ten extra minutes and may save an hour of muttering at an innocent sheet of plywood.
The finished rack also behaves differently when loaded. Empty, it may glide across the room like a figure skater. Add coats, bags, and several pairs of shoes, and the center of gravity changes. Clothing concentrated on one end can make the rack feel less stable, particularly during turns. Distributing garments across the bar and keeping shoes or storage bins on the lower shelf gives the rack a more grounded feel.
Caster quality becomes noticeable immediately. Hard plastic wheels may roll acceptably on concrete yet sound like a shopping cart escaping across tile. Softer wheels are generally quieter and more floor-friendly. Larger wheels are also easier to guide over thresholds, although they raise the total height of the rack. That extra height needs to be included when selecting the vertical pipe length.
Finishing the wood before final assembly is another lesson worth learning the easy way. Trying to brush clear finish around installed wheels, bolts, and pipe flanges creates drips and inaccessible corners. Finishing separate components produces cleaner results and makes sanding between coats much simpler.
It is also wise to wait for finishes and glue to cure. A surface can feel dry while still being soft enough to collect fingerprints, wheel marks, or fabric impressions. Loading the rack too soon may leave a charming permanent outline of a sneaker box on the shelf. Charming, in this case, means irritating.
During the first week of use, check the hardware again. Rolling creates vibration, and threaded pipe or nuts may settle slightly. Tightening a loose fitting early prevents wobble from becoming structural wear. After that, inspect the rack periodically, especially before loading it with heavy coats or moving it across a threshold.
The most successful version is rarely the one with the greatest number of accessories. A simple bar, stable shelf, and dependable wheels often outperform an elaborate design loaded with hooks, baskets, extensions, and mysterious protrusions. Add features only when they solve a real storage problem. Otherwise, the rack may begin as a closet alternative and end as a mobile hardware display.
Finally, build for the clothes you actually own. Long dresses need more vertical clearance. Heavy wool coats need stronger fittings and conservative loading. A photographer may prioritize smooth wheels and an open bar, while a bedroom rack may benefit more from shoe storage and decorative finishing. The advantage of a homemade clothes rack on wheels is not merely saving space; it is creating storage that fits your room and routine instead of asking your routine to squeeze into somebody else’s design.
Frequently Asked Questions
Can I Build the Rack With PVC Pipe?
Yes, but PVC is generally better for lightweight clothing and temporary use. Long horizontal sections can flex, and PVC fittings may not provide the same rigid feel as threaded steel pipe. Increase the pipe diameter, shorten unsupported spans, and test the structure conservatively.
Can I Use a Wooden Dowel Instead of Metal Pipe?
A hardwood dowel can create a warmer appearance, but its diameter and unsupported length must be appropriate for the load. A long, thin dowel may bow under coats. Support the dowel securely at both ends and consider adding a center support on wider racks.
Should All Four Casters Swivel?
Four swivel casters provide excellent maneuverability in small rooms. Two swivel and two fixed casters track more predictably over longer straight distances. For a household garment rack, four total-lock swivel casters are often the most flexible arrangement.
How Much Weight Can a Homemade Clothes Rack Hold?
There is no universal rating for a homemade rack. Capacity depends on the base material, pipe diameter, fittings, fasteners, caster ratings, construction quality, balance, and condition. Test gradually and stop using the rack if you notice bending, cracking, loose hardware, or instability.
Can the Rack Be Used Outdoors?
It can be used temporarily in dry weather if the wood, metal, and hardware are protected appropriately. However, ordinary plywood, interior glue, and uncoated steel are not ideal for permanent outdoor exposure. Store the rack indoors when it is not being used.
Conclusion
Learning how to make a clothes rack on wheels is less about advanced carpentry and more about sensible planning. Build a wide, reinforced base, choose wheels that suit the floor, use through-bolts at important connections, and test the rack gradually before trusting it with your favorite wardrobe.
The combination of a wooden shoe shelf and threaded steel pipe offers durability, clean lines, and plenty of customization options. Better still, the finished rack rolls wherever it is needed. Today it may organize the laundry room; tomorrow it may become a guest closet, costume station, or emergency home for every jacket that no longer fits in the hall closet.