Note: This article is written in standard American English for web publication and synthesizes practical DIY guidance from reputable U.S. home improvement, woodworking, and interior design sources.
A barn door headboard has the magical ability to make a bedroom look cozy, intentional, and slightly more expensive than it actually was. It whispers, “I own matching bedding,” even if the laundry pile in the corner is currently applying for permanent residency. The best part? You do not need to rip a real barn door off a countryside building, haul it home like a pioneer with a Pinterest account, or spend a small fortune on reclaimed lumber. You can fake the look beautifully with smart materials, careful layout, and a little decorative trickery.
This guide explains how to fake a faux barn door headboard using plywood, trim boards, peel-and-stick wood planks, paint, stain, or simple wall-mounted panels. The goal is not to build a working sliding barn door. The goal is to create the illusion of one: rustic boards, cross braces, farmhouse charm, and enough character to make your bed look like the main character of the room.
Whether you rent, own, decorate on a budget, or simply want a weekend bedroom makeover, this faux barn door headboard project is flexible, affordable, and surprisingly forgiving. Wood has knots. Paint has texture. Rustic style has a built-in excuse for tiny imperfections. In other words, if your cut is not perfect, congratulationsyou have invented “authentic farmhouse character.”
What Is a Faux Barn Door Headboard?
A faux barn door headboard is a decorative headboard designed to look like a barn door without functioning as one. Instead of hanging from a track or sliding across the wall, it sits behind the bed or mounts securely to the wall. The classic version uses vertical wood boards with horizontal rails and diagonal braces, creating the familiar “X” or “Z” barn door pattern.
The “faux” part gives you freedom. You can make it from plywood and trim, reclaimed-style planks, MDF, peel-and-stick wood panels, or even painted wall molding. If you want the look of rustic wood without the weight, cost, splinters, or mysterious old-barn smell, this is your project.
A faux barn door headboard works especially well in farmhouse, cottage, rustic, modern farmhouse, industrial, coastal, and even minimalist bedrooms. The finish decides the mood. Weathered gray feels relaxed and beachy. Warm walnut feels cozy and traditional. Matte black looks modern and dramatic. Whitewashed wood says, “I read under linen sheets and never spill coffee,” which may or may not be true.
Why Fake It Instead of Buying a Real Barn Door?
Real barn doors are beautiful, but they can be heavy, expensive, and awkward behind a bed. A true sliding barn door needs proper hardware, wall clearance, and careful installation. For a headboard, most people only need the looknot the actual sliding function. A faux version gives you the visual impact without the extra engineering.
It Costs Less
A store-bought barn door headboard or full farmhouse bed frame can cost hundreds of dollars. A DIY faux version can often be made with basic lumber, plywood, stain, paint, and trim. If you already have tools or can borrow them, the savings get even better.
It Weighs Less
Using thin plywood, lightweight boards, or peel-and-stick planks keeps the headboard easier to handle. That matters when you are lifting it behind a bed and trying not to knock over your nightstand lamp, water glass, phone charger, and emotional support pile of books.
It Is Easier to Customize
You can size the headboard to fit a twin, full, queen, king, or California king bed. You can make it taller for drama, wider to frame the nightstands, or lower for a room with short ceilings. You can also choose the exact stain, paint color, plank direction, and brace pattern.
It Can Be Renter-Friendly
If you cannot drill heavily into the wall, you can create a lightweight freestanding headboard or use a removable panel system behind the bed. Always make sure it is stable and safe, especially if it is tall or placed in a child’s room.
Planning the Perfect Faux Barn Door Headboard
Before you start cutting, staining, or confidently walking around the hardware store like you know where everything is, take time to plan. A good barn door headboard is mostly about proportion. The boards, braces, and overall size should look balanced behind the bed.
Choose the Right Width
A headboard usually looks best when it is the same width as the mattress or a few inches wider. For a more designer look, extend it behind the nightstands. This creates a built-in accent wall effect and makes the bed feel grounded. Just make sure you measure the wall, outlets, baseboards, and any nearby windows before committing to a giant wooden masterpiece.
Choose the Right Height
A barn door headboard should be tall enough to be visible above pillows but not so tall that it overwhelms the room. For most bedrooms, 48 to 60 inches high works well. If you have high ceilings, you can go taller. If your room is small, a lower headboard with horizontal planks may make the space feel wider.
Pick a Pattern
The most recognizable barn door patterns are the “X” brace and the “Z” brace. An X pattern feels classic and symmetrical. A Z pattern is simpler and works well for narrow headboards. You can also use two faux barn door panels side by side for a queen or king bed. That double-door look creates a charming “found object” style, as if the headboard had a previous life guarding hay bales and dramatic secrets.
Materials You Can Use
There is more than one way to fake a barn door headboard. The right material depends on your budget, skill level, tools, and whether you want a permanent or removable project.
Option 1: Plywood and Trim Boards
This is the most practical method for many DIYers. Use a sheet of plywood as the backing, then attach thin boards or trim pieces on top to create the barn door pattern. The plywood gives structure, while the trim creates depth and shadow. Once painted or stained, the headboard looks like a constructed barn door without requiring thick, heavy boards.
Option 2: Common Boards or Pine Boards
Pine boards are easy to find, relatively affordable, and simple to stain. You can attach vertical boards together, then add horizontal and diagonal braces. This method creates a more realistic wood headboard, though it will be heavier than a plywood version.
Option 3: Peel-and-Stick Wood Planks
For a lightweight faux barn wood look, peel-and-stick planks can be applied to a plywood panel or directly to a smooth wall if the product is suitable for your surface. This method is excellent for renters or anyone who wants the reclaimed wood vibe without sawdust becoming a new household seasoning.
Option 4: Painted Wall Molding
If you want the illusion of a barn door with minimal thickness, install molding on the wall in a barn door pattern and paint the entire section one color. This creates a faux architectural feature. It is less rustic than real wood but can look elegant, clean, and modern.
Option 5: Reclaimed or Salvaged Wood
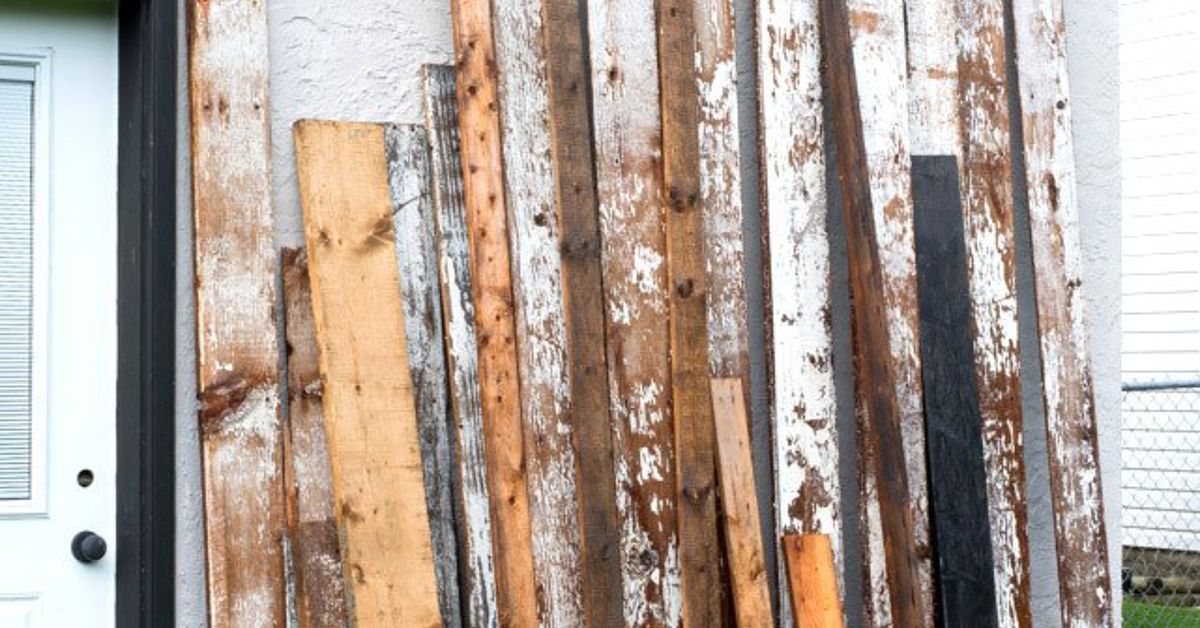
Reclaimed wood adds instant age and character. Old fence boards, pallet wood, or salvaged planks can create a beautiful headboard. However, inspect every piece carefully. Avoid wood with rot, pests, strong odors, loose nails, or unknown chemical exposure. Sand rough areas and seal the surface so the headboard looks rustic, not hazardous.
Tools and Supplies
You do not need a professional shop to make a faux barn door headboard, but a few basic tools help. Depending on the method, you may use a tape measure, pencil, level, saw, drill, screwdriver, sander, clamps, wood glue, brad nails or screws, stain, paint, brush, roller, and protective finish. If you are not experienced with power tools, work with a skilled adult or use precut boards from the hardware store.
For mounting, consider a French cleat, wall studs, heavy-duty screws, or bed-frame attachment brackets. A wall-mounted headboard should be secured properly so it cannot tip forward. A freestanding headboard should be stable, especially in homes with kids, pets, or enthusiastic pillow floppers.
Step-by-Step: How to Fake a Faux Barn Door Headboard
Step 1: Measure Your Bed and Wall
Measure the mattress width, bed frame height, and the wall area behind the bed. Decide whether the headboard will stop at the mattress edges or extend beyond them. Mark the ideal height with painter’s tape on the wall. Step back and look at it from the doorway. This is the DIY version of squinting like an interior designer.
Step 2: Sketch the Barn Door Layout
Draw a simple rectangle for the headboard. Add vertical plank lines, then place horizontal rails near the top and bottom. Add a diagonal brace or an X shape. Keep the layout symmetrical if you want a classic farmhouse look. For a casual rustic style, slight variation in board width can look more natural.
Step 3: Cut or Buy the Backing Panel
If you are using plywood, cut it to the final headboard size or have it cut at the store. Sand the edges smooth. If you want a thicker look, add a simple outer frame with 1×2 or 1×3 boards. This creates a finished edge and hides the plywood side.
Step 4: Add Vertical Plank Lines
You can create the look of individual boards in several ways. Attach narrow boards to the plywood, apply peel-and-stick planks, or use a router or shallow grooves to suggest seams. The easiest method is attaching thin vertical strips with wood glue and brad nails. Leave tiny, even gaps between strips for shadow.
Step 5: Attach the Rails and Braces
Cut the top and bottom rails first. Then measure the diagonal brace carefully. A diagonal board should fit from one inside corner to the opposite inside corner. For an X pattern, two diagonals cross at the center. You can miter the ends for a clean fit or square-cut them for a chunkier rustic look. Dry-fit everything before attaching. This prevents the classic DIY moment where one board is upside down and everyone pretends it was intentional.
Step 6: Sand the Surface
Sand all visible surfaces and edges. Start with medium-grit sandpaper, then finish with a finer grit. If you want a weathered style, do not sand away every mark. Rustic wood should have personality. Just remove splinters, sharp corners, and rough patches that could snag bedding.
Step 7: Create a Faux Aged Finish
To fake barn wood, layer color. Start with a base stain or paint in gray, brown, white, or black. Then dry-brush a lighter or darker shade over the top to highlight grain and texture. You can lightly sand edges after painting to reveal the layer underneath. This gives the headboard a worn-in look without requiring actual decades of weather, livestock, and questionable barn history.
Step 8: Seal the Headboard
A clear protective finish helps prevent stain transfer, dust buildup, and surface wear. Choose a matte or satin finish if you want a natural farmhouse look. Glossy finishes can work, but they may make the project look more “new furniture showroom” than “perfectly aged barn door.” Let the finish cure fully before placing the headboard near bedding.
Step 9: Mount or Position It Safely
If mounting to the wall, locate studs and use proper hardware. A French cleat is a strong option because it spreads weight across the wall and lets the headboard hang securely. If attaching to a bed frame, use compatible brackets and check that the headboard does not wobble. Do not rely on leaning a heavy headboard loosely behind the bed. Gravity has a poor sense of humor.
Step 10: Style the Finished Headboard
Once installed, style the bed with soft layers that contrast the wood. White bedding creates a fresh farmhouse look. Linen, quilts, striped pillows, or chunky knit throws add texture. Industrial lamps, black metal sconces, woven baskets, and vintage nightstands pair beautifully with a faux barn door headboard.
Design Ideas for Different Bedroom Styles
Modern Farmhouse
Use a warm wood stain, black metal accents, and simple white bedding. Keep the pattern crisp and symmetrical. Add matte black wall sconces or a black-framed mirror nearby to connect the rustic headboard with modern details.
Coastal Farmhouse
Choose a whitewashed or driftwood-gray finish. Pair it with blue, ivory, beige, or soft green bedding. Keep the headboard lighter in tone so the room feels breezy rather than cabin-heavy.
Industrial Rustic
Use dark stain, black paint, or charcoal-gray boards. Add metal corner brackets or decorative faux strap hinges. Be careful not to overdo the hardware. You want “cool loft,” not “medieval storage unit.”
Cottage Style
Paint the headboard creamy white, sage green, dusty blue, or soft taupe. Lightly distress the edges for charm. Floral sheets, vintage lamps, and layered quilts make this style feel relaxed and personal.
Minimal Rustic
Use clean lines, a simple Z brace, and one consistent wood tone. Avoid heavy distressing. This version works well in small bedrooms because it adds warmth without visual clutter.
Common Mistakes to Avoid
Making It Too Small
A tiny headboard can look like a confused wall decoration. Measure generously. A barn door design needs enough width for the pattern to read clearly.
Using Boards That Are Too Thick
Thick lumber looks authentic but can make the headboard heavy. If you are mounting it to the wall, weight matters. Thin trim over plywood often gives the same visual effect with less stress on the wall and your arms.
Skipping the Dry Fit
Always arrange boards before gluing or nailing. This lets you adjust spacing, pattern, and grain direction. It also prevents accidental modern art.
Ignoring the Wall Color
The headboard should contrast enough with the wall to stand out. A gray headboard on a gray wall can disappear. If you love a tone-on-tone look, add texture, trim depth, or darker hardware.
Forgetting About Pillows
Your pillows will cover part of the headboard. Place decorative braces high enough to remain visible. Otherwise, your beautiful X pattern may spend its life hidden behind a mountain of shams.
Budget-Friendly Shortcuts
If you want the look fast, use peel-and-stick planks on a plywood panel and frame the edges with lightweight trim. If you want to spend less, paint faux plank lines directly on the wall and add molding for dimension. If you have scrap wood, mix board widths for a collected, rustic style. If you are short on tools, ask the hardware store about cutting sheet goods or boards to size.
Another clever shortcut is using an old flat door as the base. Turn it sideways, add trim in a barn door pattern, and refinish it. A hollow-core door is lightweight, while a solid door feels more substantial. Just make sure the final piece is stable and properly mounted.
How to Make New Wood Look Like Barn Wood
New wood can look a little too perfect for a barn door headboard. To age it visually, use layered stain, diluted paint, dry brushing, and light sanding. Gray stain can imitate weathered boards. A dark brown base with white dry brushing creates a timeworn farmhouse effect. For extra texture, lightly tap scrap wood with a chain or hammer before staining, but practice first and keep the effect subtle. Rustic should look natural, not like the headboard got into a bar fight.
Focus distressing on edges, corners, and raised trim. Those are the areas that would naturally wear over time. Seal everything afterward so the finish stays put and does not rub onto pillows.
Safety and Practical Comfort
A headboard sits close to where you sleep, so comfort and safety matter. Smooth all edges. Seal painted or stained surfaces. Avoid sharp metal decorations near pillows. Do not use questionable salvaged wood that smells musty, oily, or chemical-like. If using reclaimed wood, clean it thoroughly and remove old nails or staples.
Mounting is just as important as appearance. Secure the headboard into wall studs when possible. Use hardware rated for the weight of the piece. For a tall or heavy headboard, ask another person to help lift and position it. DIY pride is wonderful; dropping a headboard on your foot is less wonderful.
Personal Experience: What This Project Teaches You
Faking a faux barn door headboard is one of those projects that looks intimidating at first and then becomes strangely addictive. The first lesson is that measuring matters more than bravery. You can have the most beautiful stain in the world, but if the headboard is three inches too narrow, it will look like it borrowed the bed’s clothes and they do not fit. Painter’s tape on the wall is a simple trick that saves a lot of regret. Mark the size, live with it for a few hours, and look at it in daylight and at night.
The second lesson is that rustic style is forgiving, but not lawless. A little uneven grain looks charming. A diagonal brace that misses the corner by an inch looks like the project needs a snack and a nap. Dry-fitting boards before attaching them makes the whole process calmer. Lay every piece out, take a photo, and label the backs if needed. This sounds overly careful until you rotate one diagonal board and suddenly the pattern looks like a lightning bolt designed by a tired raccoon.
The third lesson is that finish changes everything. Raw pine can look plain in the garage and gorgeous after stain. White paint can look flat until the edges are sanded and the grain peeks through. Gray wash can turn basic lumber into something that feels salvaged and soft. Always test finishes on scrap wood. The same stain can look completely different depending on the board. Wood is dramatic like that.
The fourth lesson is that lightweight construction is your friend. Many people imagine a barn door headboard must be thick and massive. In reality, a plywood panel with trim can look just as convincing once it is painted or stained. It is easier to move, easier to mount, and less likely to make you question every life choice while carrying it upstairs.
The fifth lesson is that the bedroom will suddenly demand upgrades. Once the headboard is finished, the old lamp may look suspicious. The bedding may seem tired. The nightstand may start giving “college apartment” energy. This is normal. A strong focal point raises the standard for the whole room. You do not have to redecorate everything at once, but small changes help: matching pillow covers, warmer light bulbs, a textured throw, or a simple rug can make the new headboard feel integrated.
Most importantly, this project teaches confidence. A faux barn door headboard is not just a piece of decor; it is proof that a room can change without a full renovation. You can take simple materials, arrange them thoughtfully, and create something that looks custom. And when someone asks where you bought it, you get to casually say, “Oh, I made it,” which is one of the finest sentences in the DIY language.
Conclusion
A faux barn door headboard is the perfect project for anyone who wants farmhouse charm without the cost, weight, or installation drama of a real barn door. By using plywood, trim, peel-and-stick planks, reclaimed-style boards, paint, or stain, you can create a custom bedroom focal point that feels warm, stylish, and personal.
The secret is not complicated: measure carefully, choose a balanced pattern, keep the construction lightweight, finish the wood thoughtfully, and mount it safely. Whether your style is modern farmhouse, coastal cottage, industrial rustic, or cozy country, this DIY headboard can be adapted to fit your room beautifully.
Best of all, the faux approach gives you permission to be creative. You are not copying a barn door exactly; you are borrowing its best features and making them bedroom-friendly. That is the sweet spot of DIY: practical, affordable, good-looking, and just imperfect enough to feel human.