Your car’s radiator hoses are not glamorous. Nobody leans over the hood at a car meet and says, “Wow, look at the tasteful curvature of that upper coolant hose.” But these humble rubber tubes do one of the most important jobs under the hood: they move coolant between the engine and radiator so your engine can stay at a healthy operating temperature instead of auditioning for the role of a barbecue grill.
Learning how to check radiator hoses is one of the easiest maintenance habits a driver can build. It does not require a professional scan tool, a lift, or a degree in mechanical wizardry. In many cases, a flashlight, a cool engine, and a few careful minutes are enough to spot early warning signs such as cracks, bulges, coolant leaks, loose clamps, soft spots, or a collapsed hose.
This guide explains how to inspect radiator hoses in four easy steps, what a healthy hose should look and feel like, when to replace one, and why ignoring a bad radiator hose can turn a small rubber problem into a very expensive engine problem.
Why Radiator Hoses Matter
The cooling system is designed to move heat away from the engine. Coolant absorbs heat from the engine, travels through hoses to the radiator, releases heat through the radiator core, and then circulates back again. Radiator hoses are the highways in this system. If one cracks, collapses, leaks, swells, or disconnects, coolant flow can drop quickly.
When coolant flow is restricted or coolant level gets too low, the engine may overheat. Overheating can damage gaskets, warp metal parts, shorten the life of the engine, and leave you stranded at the worst possible time. Because radiator hoses live in a harsh environment filled with heat, pressure, vibration, oil mist, road grime, and age, they deserve regular attention.
Before You Start: Safety First
Always inspect radiator hoses when the engine is completely cool. A hot cooling system can be under pressure, and hot coolant can cause serious burns. Never remove the radiator cap or coolant reservoir cap when the engine is hot. Give the vehicle enough time to cool down before touching hoses or nearby parts.
Park on a flat surface, set the parking brake, turn off the engine, and let everything cool. Use a flashlight so you can see around hose ends, clamps, and hidden connection points. A pair of gloves can help protect your hands from grime and sharp edges, but your fingers still need enough sensitivity to feel changes in the hose.
How to Check Radiator Hoses in 4 Easy Steps
Step 1: Find the Upper and Lower Radiator Hoses
Open the hood and locate the radiator. The upper radiator hose usually runs from the top area of the radiator to the engine, often near the thermostat housing. The lower radiator hose usually connects the lower portion of the radiator to the engine or water pump area. Depending on your vehicle, one or both hoses may be partly hidden by plastic covers, air intake parts, or other components.
Do not confuse radiator hoses with smaller heater hoses, air-conditioning lines, or vacuum hoses. Radiator hoses are usually thicker and designed to carry coolant. Many are molded into specific curves, so they fit around engine parts without kinking. Some modern vehicles also use quick-connect fittings, plastic connectors, temperature sensors, or special hose assemblies, which means “close enough” replacement parts are not always close enough.
Once you identify the hoses, follow each one from end to end. Look at the middle section, the bends, the clamp areas, and the connection points. Most hose failures do not politely announce themselves in the easiest place to see. They often begin near clamps, under bends, or along areas that rub against other parts.
Step 2: Inspect for Visible Damage
Start with a visual inspection. A healthy radiator hose should look smooth, properly shaped, and securely attached. It should not be split, deeply cracked, blistered, swollen, flattened, oily, or rubbing against a pulley, belt, bracket, or sharp edge.
Look closely for these warning signs:
- Cracks: Small surface cracks can become bigger cracks, especially near bends or clamp areas.
- Bulges or swelling: A swollen hose may be weakening internally and could burst under pressure.
- Coolant residue: Dried coolant may look crusty, chalky, white, green, orange, pink, or yellow depending on the coolant type.
- Wet spots: Damp hose ends or shiny areas may indicate an active leak.
- Oil contamination: Oil can soften rubber and shorten hose life.
- Abrasion marks: A hose rubbing against another part can wear through over time.
- Collapsed sections: A flattened hose may restrict coolant flow and contribute to overheating.
Pay special attention to the hose ends. Leaks often appear where the hose meets the radiator, thermostat housing, engine outlet, or water pump connection. If you see dried coolant around a clamp, do not automatically blame the radiator. A loose clamp, aging hose, corroded connection, or damaged fitting may be the real culprit.
Step 3: Perform a Gentle Squeeze Test
With the engine cool, gently squeeze the radiator hose in several places. A good hose usually feels firm but flexible. It should spring back into shape when released. It should not feel mushy, spongy, crunchy, extremely hard, or unusually soft in one area.
Check near the clamps as well as the middle of the hose. Many hoses deteriorate from the inside out, so the outside may look acceptable while the inner lining is weakening. If one section feels noticeably softer than the rest, the hose may be breaking down internally. If it feels rock-hard and brittle, age and heat may have taken away the rubber’s flexibility.
Do not squeeze aggressively. You are inspecting, not trying to win a wrestling match against a rubber tube. If the hose cracks, flakes, or makes a faint crackling feeling when gently flexed, it is time to replace it.
Step 4: Check Clamps, Connections, and Coolant Level
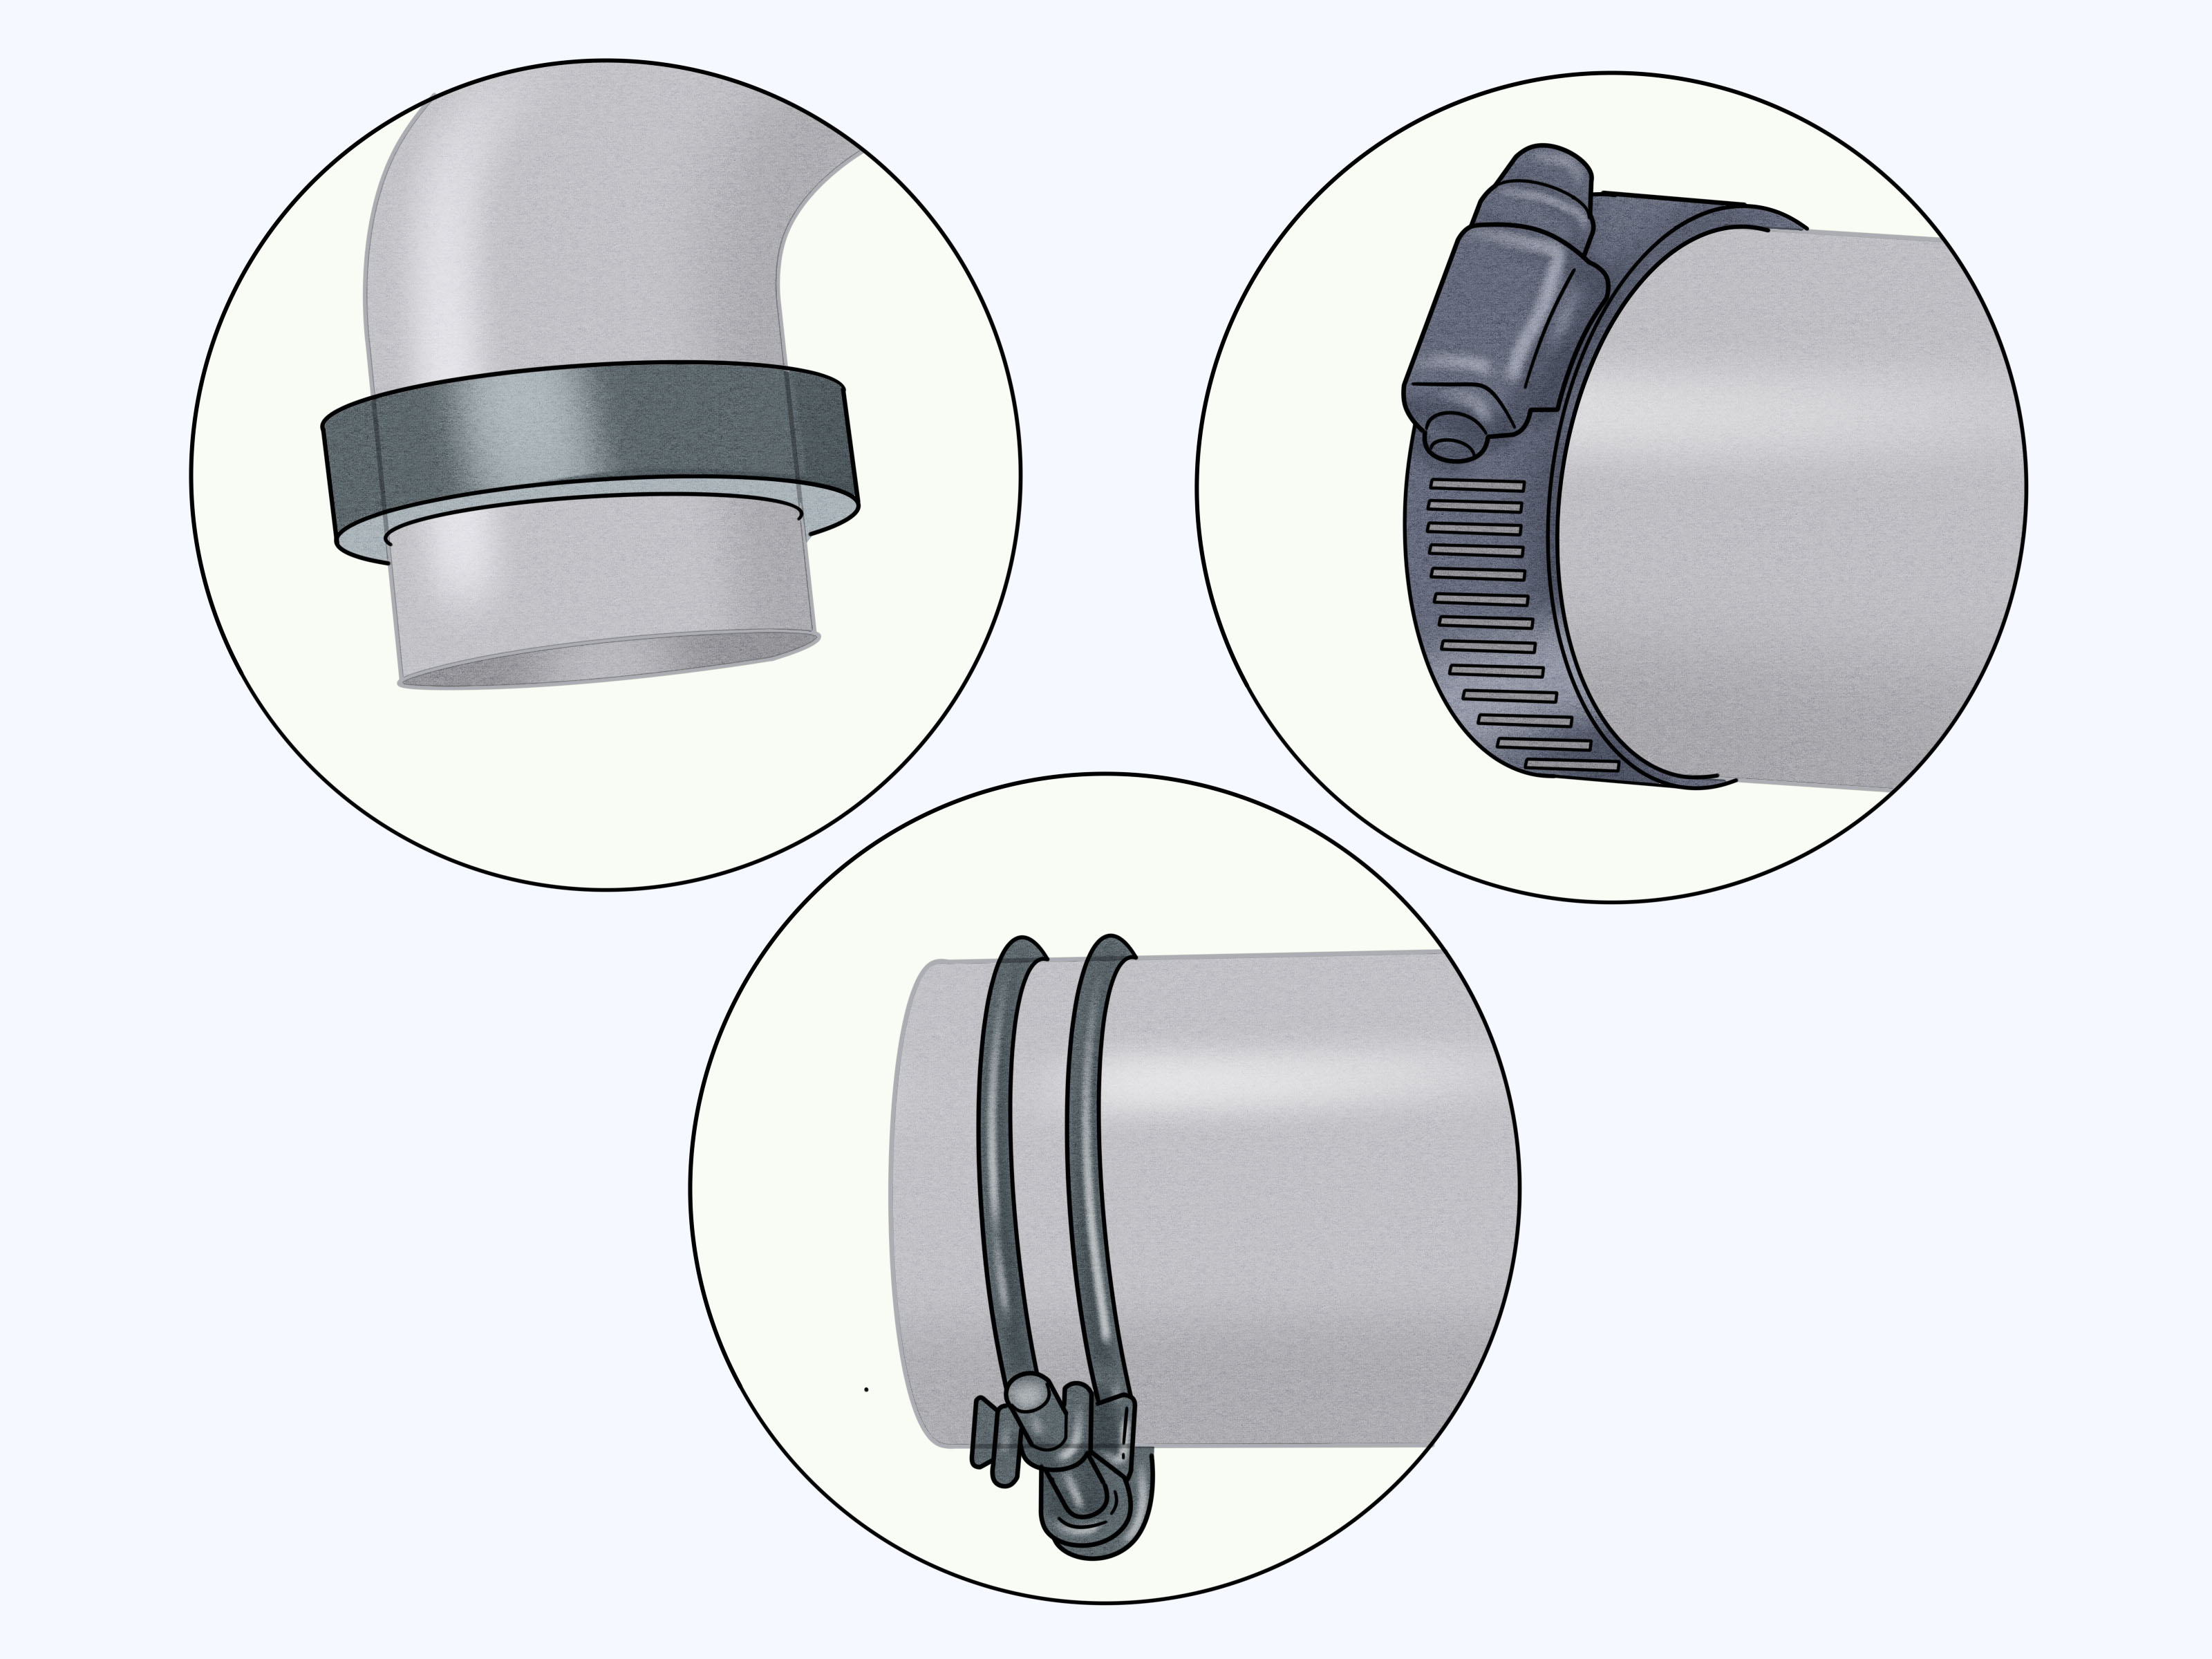
Radiator hoses do not work alone. They depend on clamps and clean connection points to hold pressure. Inspect each clamp for rust, looseness, misalignment, or damage. A clamp should sit squarely over the hose end and hold the hose tightly without cutting into it.
Spring clamps, worm-gear clamps, and factory-style clamps all have different designs, but the goal is the same: a tight, even seal. If a clamp is crooked, badly corroded, or sitting too far from the connection ridge, coolant may seep out. If the hose end is swollen, split, or distorted, simply tightening the clamp may not solve the problem.
Next, check the coolant reservoir level when the engine is cool. Most vehicles have markings such as “MIN” and “MAX” or “LOW” and “FULL.” Low coolant does not always mean a radiator hose is leaking, but it is a clue that the cooling system needs attention. If you repeatedly top off coolant, there is likely a leak somewhere.
Also watch the temperature gauge during normal driving. A rising temperature gauge, dashboard warning light, sweet coolant smell, steam from under the hood, or puddle under the vehicle should be taken seriously. These are not “maybe next weekend” problems. These are “the engine is sending a dramatic text message” problems.
What a Bad Radiator Hose Looks and Feels Like
A bad radiator hose may show one obvious problem or several subtle ones. The most common signs include coolant leaks, visible cracks, swelling, soft spots, hard brittle rubber, damaged clamps, low coolant, overheating, or a hose that has collapsed.
A swollen hose often looks like it has a bubble or enlarged section. This can happen when internal reinforcement weakens. A collapsed hose may look pinched or flattened, especially after the engine cools. This can restrict coolant flow and may also point to other cooling system issues, such as pressure or cap problems.
Dried coolant near a hose connection is another big clue. Coolant can seep slowly, evaporate, and leave residue behind. Many drivers miss this because they look only for puddles. But small leaks can begin as crusty deposits before they become obvious drips.
How Often Should You Check Radiator Hoses?
A quick radiator hose inspection should be part of routine vehicle maintenance. A practical habit is to check hoses whenever you check oil, refill washer fluid, prepare for a road trip, or notice the engine running hotter than usual. At minimum, inspect them a few times a year and before long drives.
Older vehicles, high-mileage vehicles, cars driven in very hot climates, and vehicles that tow or idle heavily should be checked more often. Heat is one of the biggest enemies of rubber. If your vehicle has already needed cooling system repairs, inspect the hoses more carefully afterward because one weak component often points to age across the system.
Should You Replace Both Radiator Hoses at the Same Time?
If one radiator hose has failed because of age, the other may not be far behind. The upper and lower radiator hoses often experience different conditions, but they live in the same general environment. Many mechanics recommend replacing related hoses together when one is clearly aged, especially if the cooling system is already being drained for repair.
That said, replacement decisions should consider vehicle age, mileage, hose condition, service history, and manufacturer recommendations. A nearly new hose damaged by rubbing may not mean every hose is bad. But a ten-year-old hose with cracks, stiffness, and coolant residue is not exactly screaming “trust me, I’ve got this.”
Can You Drive With a Bad Radiator Hose?
Driving with a questionable radiator hose is risky. A small leak can become a large leak quickly once the cooling system builds pressure. A hose that bursts on the road can dump coolant fast, causing the engine temperature to rise in minutes.
If you see steam, smell coolant, notice a temperature warning, or see the gauge climbing, pull over safely and turn off the engine. Do not open the radiator cap while hot. Allow the engine to cool and arrange proper service. Continuing to drive an overheating vehicle can turn a hose replacement into a much larger repair.
Common Mistakes to Avoid
Checking Hoses When the Engine Is Hot
This is the big one. Hot coolant is dangerous, and a pressurized cooling system should not be opened. Always inspect hoses when the engine is cool.
Looking Only at the Top Hose
The upper radiator hose is easier to see, but the lower hose is just as important. The lower hose can collapse, leak, or rub against nearby parts. Use a flashlight and inspect as much of it as possible.
Ignoring Clamp Areas
Many leaks start at hose ends. A hose may look fine in the middle but fail near the connection. Always inspect clamps, fittings, and dried coolant residue.
Using the Wrong Replacement Hose
Radiator hoses are often shaped for a specific vehicle. A hose that is too long, too short, too narrow, too wide, or bent incorrectly can kink, rub, leak, or fail early. Use the correct part for your vehicle’s year, make, model, engine, and cooling system configuration.
Quick Radiator Hose Inspection Checklist
- Engine is completely cool before inspection.
- Upper and lower radiator hoses are located.
- Hoses have no cracks, bulges, blisters, or cuts.
- Hoses feel firm but flexible during a gentle squeeze test.
- No soft, spongy, crunchy, or rock-hard sections are found.
- No coolant residue, wet spots, or sweet smell is present.
- Clamps are tight, aligned, and not badly rusted.
- Hoses are not rubbing against belts, pulleys, brackets, or sharp edges.
- Coolant reservoir level is within the correct range when cool.
- Temperature gauge stays normal during driving.
Extra Experience: Real-World Tips for Checking Radiator Hoses
Experience teaches you that radiator hose problems often begin quietly. A driver may not notice anything dramatic at first. There may be no giant puddle, no steam cloud, and no dashboard warning. Instead, the first clue might be a faint sweet smell after parking, a small crusty mark near a clamp, or a coolant reservoir that needs topping off every few weeks. These small signs matter.
One useful habit is to inspect hoses in good lighting after the car has been parked overnight. A cool engine makes the inspection safer, and overnight parking gives tiny leaks time to leave evidence. Look under the front of the vehicle before moving it. A few drops near the radiator area can help guide your inspection. Coolant may appear green, orange, pink, yellow, blue, or another color depending on the vehicle, but it often has a slick feel and a sweet odor. Keep pets away from coolant because it can be toxic.
Another practical tip is to compare both radiator hoses. They will not always feel identical because they may be different designs, but the comparison can still help. If one hose feels firm and flexible while the other feels swollen, gummy, or brittle, that difference is a useful warning. You can also compare the feel near the clamp with the feel in the center of the hose. A weak spot near the end often suggests internal aging or clamp-related stress.
Do not overlook hose routing. A replacement hose that touches a belt, fan shroud, pulley, or metal bracket may look fine today but fail later from rubbing. Even a small contact point can slowly grind through rubber as the engine vibrates. After any cooling system work, check that hoses sit naturally without twisting, stretching, or sharp bends. A hose should look relaxed, not like it is doing yoga under protest.
For older vehicles, it is smart to inspect related hoses at the same time, including heater hoses and bypass hoses. They may be smaller than radiator hoses, but they carry coolant too. A cooling system is only as reliable as its weakest hose. If one hose is badly aged, the others may also be near the end of their service life.
Drivers should also understand that topping off coolant is not a repair. If coolant keeps disappearing, the system is leaking, burning coolant internally, or experiencing another problem. Adding coolant may buy time, but it does not solve the cause. Repeated low coolant can introduce air into the system, reduce heater performance, and increase overheating risk.
Finally, trust patterns. If the vehicle runs hot in traffic, smells like coolant, leaves residue around hose ends, and has a hose that feels spongy, those signs should be considered together. Radiator hose inspection is not about finding one perfect clue. It is about reading the whole cooling system story before the final chapter becomes “tow truck.”
Conclusion
Checking radiator hoses is simple, fast, and surprisingly valuable. In four easy stepslocating the hoses, inspecting visible condition, performing a gentle squeeze test, and checking clamps, connections, and coolant levelyou can catch many cooling system problems before they become expensive repairs.
A good radiator hose should be secure, clean, flexible, properly shaped, and free of leaks, cracks, swelling, and soft spots. A bad hose may look damaged, feel wrong, leak coolant, collapse, or contribute to overheating. When in doubt, have the cooling system inspected by a qualified technician, especially if the vehicle is overheating or losing coolant.
Radiator hoses may not be exciting, but neither is sitting beside the road with steam rolling out from under the hood. Give those rubber workhorses a few minutes of attention, and your engine will thank you by continuing to behave like an engine instead of a tea kettle.
Note: This article is for general educational maintenance guidance. Always follow your vehicle owner’s manual and consult a qualified mechanic if your engine overheats, coolant level keeps dropping, or you are unsure about the condition of a radiator hose.