Note: This guide is written for general DIY education. Before building a deck safety gate, check your local residential code, deck permit rules, and hardware manufacturer instructions. Decks are fun; gravity, unfortunately, is not known for its sense of humor.
Introduction: A Deck Gate That Looks Like It Belongs There
A safety gate can be the difference between a relaxing afternoon on the deck and a full-speed toddler, dog, or runaway soccer ball heading for the stairs like it has a personal vendetta against your blood pressure. The good news is that building a DIY deck safety gate is a very manageable weekend project, especially if your deck already has sturdy posts and railings.
The real trick is not just building any gate. A slapped-together gate can look like a last-minute apology made from leftover lumber. The goal is to build a safety gate that matches your deck, works smoothly, resists sagging, and blends with your existing railing design. When done right, it should look like it was part of the original build, not something added after the family dog discovered stairs.
This guide walks through planning, measuring, framing, matching materials, installing hardware, and finishing your deck gate. You will learn how to create a custom wood deck gate that follows practical safety principles, keeps openings small, swings in the right direction, and looks sharp enough that your neighbors may ask who you hired. You can decide whether to tell them the truth or simply nod mysteriously.
Why Build a Safety Gate for Your Deck?
A deck gate is one of those upgrades that feels small until you use it every day. It helps keep young children away from stairs, gives pets a safer outdoor space, and adds a layer of control when guests are moving between the yard and deck. It can also improve the look of your deck by closing off a staircase opening with a finished architectural detail instead of a plastic baby gate, patio chair, or the classic “temporary board that has somehow been there for three years.”
The most common reasons homeowners build a DIY deck gate include child safety, pet containment, pool access control, privacy, and convenience. If your deck sits more than 30 inches above grade, guardrail safety becomes especially important. Even when a gate is not legally required in your area, it should be built with the same care as the rest of the railing system.
Planning Your DIY Deck Safety Gate
Check the Existing Deck Structure First
Before cutting lumber, inspect the posts where the gate will attach. A safety gate is only as reliable as the post holding it. Grab a level and check whether both posts are plumb. Push gently on each post to see if it wobbles. Look for rot, cracked wood, loose fasteners, rusted connectors, or soft spots near the deck surface.
If the hinge post flexes, fix that first. A gate adds repeated movement and weight. Hanging a new gate on a weak post is like putting a fancy lock on a wet cardboard box. Reinforce the post, replace damaged lumber, or consult a professional if the deck structure itself seems questionable.
Measure the Opening Carefully
Measure the width between the two posts at the top, middle, and bottom. Do not assume the opening is perfectly square. Outdoor lumber moves, posts shift, and decks age. Use the smallest measurement as your starting point. Then subtract clearance for hinges, latch hardware, and smooth swinging.
For many deck gates, leaving about 1/2 inch to 3/4 inch total side clearance works well, but this depends on your hinge and latch style. If you use adjustable gate hinges, follow the manufacturer’s clearance requirements. Also measure the height of your existing railing so the new gate can match the top rail line. A gate that sits too high or too low will shout “DIY” from across the yard.
Think About the Swing Direction
A deck gate at the top of stairs should generally swing inward toward the deck, not outward over the stairs. This helps prevent someone from opening the gate and stepping backward into open air. It also keeps the gate from becoming an accidental trap door with hinges.
Plan enough space on the deck side for the gate to swing fully open. If furniture blocks the swing path, adjust the hinge side or gate width before you build. A gate that opens into a grill, planter, or chair every time is not charming. It is just a wooden argument waiting to happen.
Materials and Tools You Will Need
Recommended Materials
- Pressure-treated lumber, cedar, redwood, or matching deck material
- 2×4 boards for the gate frame
- 2×2 balusters or matching railing infill
- Exterior-rated deck screws or structural screws
- Waterproof exterior wood glue, if using wood joinery
- Heavy-duty exterior gate hinges
- Self-latching gate latch
- Optional self-closing hinges or gate spring
- Galvanized or stainless corner brackets
- Exterior stain, sealer, or paint to match the deck
Helpful Tools
- Tape measure
- Speed square or framing square
- Level
- Miter saw or circular saw
- Drill and driver bits
- Clamps
- Sander or sanding block
- Pencil
- Safety glasses and hearing protection
Choose exterior-rated hardware. Outdoor gates live in rain, sun, snow, humidity, and whatever mysterious sticky substance children bring outside. Galvanized, stainless steel, powder-coated, or weather-resistant hardware will last longer and look better.
How to Match the Gate to Your Existing Deck
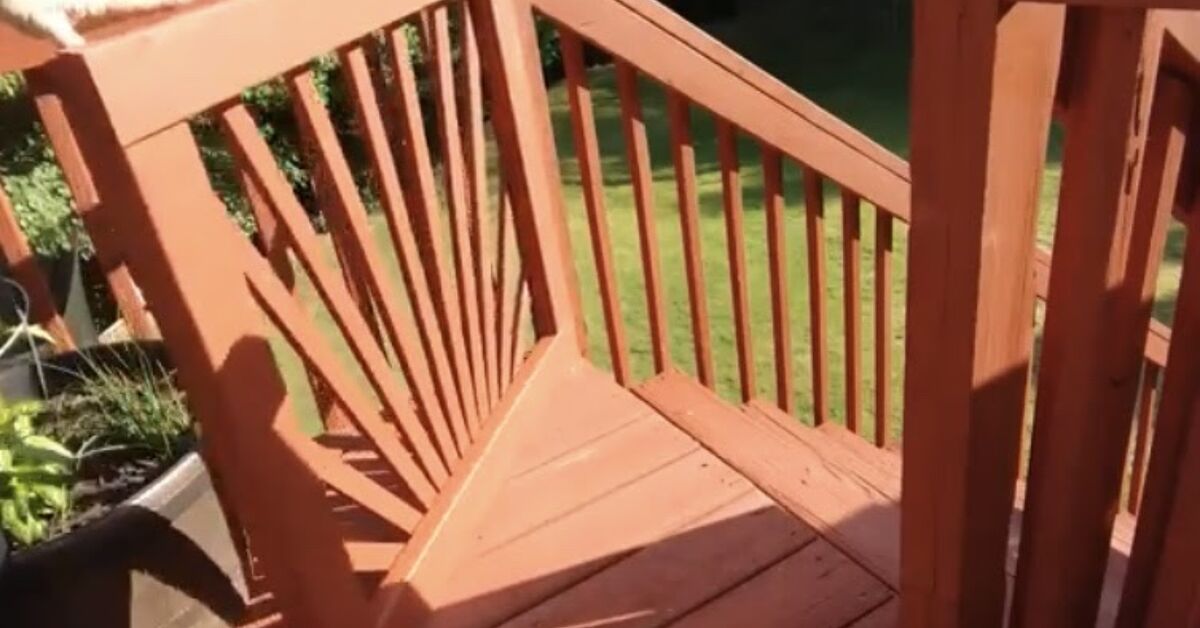
The best deck safety gate looks like a continuation of the railing. To achieve that, copy the visual language already on your deck. Match the top rail height, baluster spacing, wood species, stain color, trim details, and hardware finish as closely as possible.
If your deck uses vertical wood balusters, use vertical balusters on the gate. If the railing has black aluminum balusters, consider using the same style in the gate frame. If your deck has composite railing, you may be able to use matching sleeve material, a premade gate kit, or a wood frame painted to blend with the composite color.
Small details matter. Line up the bottom rail of the gate with the adjacent railing. Keep the baluster spacing consistent. Match screw placement when possible. If your existing railing uses a flat top cap, add a similar cap to the gate. This is the difference between “custom built” and “my cousin had leftover 2x4s.”
Safety Rules to Keep in Mind
Local codes vary, so always verify requirements in your city or county. Still, several safety principles are commonly used for residential deck railings and gates. Openings between balusters should typically be small enough that a 4-inch sphere cannot pass through. The gap under the gate should also be limited so small children or pets cannot crawl under it. On elevated decks, railing height is commonly at least 36 inches, while some places require 42 inches.
For a deck stair gate, use a reliable latch that is easy for adults to operate but not easy for toddlers to defeat. A self-latching or self-closing setup adds convenience and safety, especially for families who know that “I thought you closed it” is not a great safety system.
Do not install climbable horizontal rails if the goal is child safety. They may look modern, but they can act like a ladder. If your existing railing is horizontal, consider local rules and the age of children using the space before duplicating that design on the gate.
Step-by-Step: How to Build a Safety Gate to Match Your Deck
Step 1: Sketch the Gate Design
Draw a simple front view of the opening. Mark the width, desired height, hinge side, latch side, top rail height, and baluster spacing. A sketch prevents mistakes and makes your lumber list clearer. You do not need to create a museum-quality blueprint. A decent rectangle with numbers is enough. If your drawing looks like it was made during a mild earthquake, label everything clearly.
Step 2: Cut the Frame Boards
Cut two horizontal 2×4 rails for the top and bottom of the gate. Cut two vertical 2×4 stiles for the sides. Dry-fit the pieces on a flat surface and check the final outside dimensions against your opening. Remember to allow space for hardware and seasonal wood movement.
For a stronger frame, you can use half-lap joints, pocket screws, or metal corner brackets. A simple butt-joint frame can work for a small gate, but it needs reinforcement. Gates experience twisting and repeated movement, so strength matters.
Step 3: Square the Frame
Lay the frame on a flat surface. Use a framing square at the corners and measure diagonally from corner to corner. If both diagonal measurements match, the frame is square. If not, adjust the frame until they match. Clamp the boards before driving screws.
Use exterior screws instead of nails. Screws provide better holding power and make repairs easier. Predrill near board ends to reduce splitting, especially with cedar or dry pressure-treated lumber.
Step 4: Add an Anti-Sag Brace
A gate without bracing eventually sags, and then it drags, sticks, and makes you question your life choices every time you open it. Add a diagonal brace from the lower hinge side to the upper latch side. This helps transfer weight back toward the hinge post.
You can also use metal corner braces or an anti-sag cable kit. For a deck gate that needs to match surrounding rails, a hidden or neatly placed diagonal brace on the inside face often works best. It keeps the public-facing side clean while still giving the frame strength.
Step 5: Install Matching Balusters
Measure the inside width of the gate frame and determine baluster spacing. Keep gaps consistent with the existing deck railing and within local safety rules. Mark each baluster location on the top and bottom rails. Use a spacer block to keep the layout even.
Cut balusters to length and fasten them securely with exterior screws. Keep them plumb. A row of crooked balusters will be visible immediately, and once you see it, you will never unsee it. Your guests may say nothing, but the gate will whisper at you forever.
Step 6: Sand and Ease Sharp Edges
Sand the gate before installation. Focus on corners, cut ends, and areas where hands will touch. Slightly round over sharp edges with sandpaper. This improves comfort, helps finish absorb evenly, and reduces splinters.
If you are using pressure-treated wood, make sure it is dry enough before staining or painting. Wet treated lumber does not accept finish well. If water beads on the surface, wait. If it soaks in after a few minutes, you are closer to finishing time.
Step 7: Finish the Gate to Match the Deck
Apply stain, sealer, or exterior paint before hanging the gate if possible. It is easier to coat all sides when the gate is lying flat. Pay special attention to cut ends because they absorb moisture quickly. Matching the color of an older deck can be tricky, so test stain on scrap wood first.
If your deck is weathered, a brand-new gate may look brighter for a season. That is normal. You can soften the contrast by choosing a semi-transparent stain close to the existing tone. Avoid over-darkening the gate in panic mode. Outdoor finishes often deepen as they dry.
Step 8: Mount the Hinges
Set the gate in the opening on temporary spacer blocks. Use shims to create even gaps at the sides and bottom. Check the top rail alignment with the existing railing. Mark hinge locations on the gate and post.
Install hinges into solid framing, not thin trim or balusters. Use the screws provided with the hardware if they are exterior-rated and long enough, or upgrade to structural exterior screws recommended for the hinge. Keep hinges aligned vertically so the gate swings smoothly.
Step 9: Install the Latch
Close the gate and mark the latch position. Install the latch at a comfortable adult height while considering child safety. A self-latching latch is a smart choice for deck stair openings. Test the latch repeatedly. It should catch cleanly without slamming, lifting, or forcing the gate.
If the latch misses by a tiny amount, adjust the hinges or latch plate rather than accepting a bad fit. A gate that only latches when you “do the special wiggle” is not a safety gate. It is a puzzle.
Step 10: Test the Gate
Open and close the gate several times. Make sure it clears the deck boards, does not rub the posts, and latches reliably. Push gently on the gate to check for flex. Look at the baluster gaps, bottom gap, hinge screws, and frame corners.
If you installed self-closing hinges or a spring, adjust the tension so the gate closes firmly but not violently. Nobody wants a deck gate that behaves like it is auditioning for a haunted house.
Common Mistakes to Avoid
Building the Gate Too Wide
Wide wood gates are more likely to sag. If your deck opening is large, consider a double-gate design or a narrower framed section with one gate. A compact gate is easier to brace and easier on the hinges.
Using Interior Screws
Interior screws can rust, stain the wood, and fail outdoors. Use exterior-rated fasteners. For coastal areas or harsh climates, stainless steel is often worth the extra cost.
Skipping the Diagonal Brace
The gate may look fine on day one without bracing. By month six, the latch side may droop like it just read its own credit card bill. Add bracing from the start.
Ignoring Local Code
A deck gate is part of a safety system. Do not rely only on internet advice or guesswork. Check local railing height, spacing, stair, latch, and pool barrier rules if applicable.
Maintenance Tips for a Long-Lasting Deck Gate
Inspect your deck gate at least twice a year. Tighten loose screws, check hinge movement, test the latch, and look for rot or splitting. After winter, check whether frost, moisture, or wood movement has affected the swing. After summer, inspect for sun damage and dried-out finish.
Clean the gate when you clean the deck. Dirt holds moisture, and moisture is what turns good lumber into future compost. Reapply stain or sealer as needed. If the gate begins to sag, adjust the hinges, tighten the brace, or install an anti-sag cable before the problem becomes severe.
Design Ideas for a Better-Looking Deck Gate
A safety gate does not have to look boring. You can add a cap rail that matches the rest of the deck, use black hardware for contrast, install decorative post caps, or repeat the railing pattern exactly. For a modern deck, slim aluminum balusters can look clean and intentional. For a rustic deck, cedar boards and a warm semi-transparent stain can feel natural and cozy.
If your deck has lighting, consider adding a small post light near the gate. It improves visibility at night and makes the entrance feel finished. Just keep wiring safe, weather-rated, and code-compliant.
Experience-Based Tips: What You Learn After Building a Deck Gate Yourself
The first thing most DIYers learn when building a safety gate to match a deck is that measuring “the opening” is not one measurement. It is several measurements, and they may disagree with each other like relatives choosing a restaurant. Posts can lean slightly. Deck boards can crown. Railings that look straight from the patio may be off by a quarter inch when you put a level on them. That is why it helps to measure top, middle, and bottom, then build for the real opening, not the imaginary perfect one.
Another experience-based lesson is that matching the deck matters more than making the gate fancy. A simple gate with the same rail height, same baluster style, and same stain usually looks better than an elaborate design that does not belong. The eye loves repetition. If your existing deck uses plain vertical balusters, repeat them. If the railing has a chunky top cap, copy that profile. The result feels intentional, even if the gate itself is made from basic materials.
Dry-fitting is also worth every minute. Before glue, stain, or final screws, place the gate frame in the opening with spacer blocks. This is where you catch problems early. Maybe the latch side needs more clearance. Maybe the bottom rail is too low. Maybe the gate swings directly into a planter that your spouse insists is “not in the way.” Dry-fitting gives you the chance to fix these issues before the project becomes a dramatic outdoor sculpture.
Hardware quality is another area where real-world use teaches quickly. Cheap hinges may work on a light garden gate, but a deck safety gate opens and closes constantly. Children lean on it. Dogs push it with their noses. Guests swing it open while carrying coolers, plates, and far too much confidence. Heavy-duty exterior hinges and a dependable latch make the gate feel solid. They also reduce future adjustments.
The diagonal brace is the quiet hero. Many beginners skip it because the gate feels strong right after assembly. But wood moves, screws loosen slightly, and gravity never takes a vacation. A diagonal brace or anti-sag kit protects the latch alignment. If you want the cleanest appearance, place the brace on the inside face where it is less visible from the yard.
Finishing takes patience. New wood and old deck boards rarely match perfectly on the first day. The best approach is to test stain on scrap, compare it in natural light, and accept that weathering will help blend the gate over time. Rushing the finish or using the darkest stain on the shelf can make the gate look like it came from a different deck family entirely.
Finally, a good deck gate changes how the space feels. Parents relax more. Pets get outdoor freedom without immediate escape plans. Guests understand the traffic flow. The deck feels complete. It is a small project, but it adds daily convenience, safety, and polish. And every time the latch clicks shut smoothly, you get that tiny DIY victory feelingthe one that says, “Yes, I built that, and no, it does not sag.”
Conclusion
Building a safety gate to match your deck is one of the most practical DIY upgrades you can make. It improves safety, helps contain children and pets, and gives your outdoor space a more finished look. The key is to treat the gate as part of the railing system, not as an afterthought. Match the materials, copy the spacing, align the rails, use strong hardware, and build in anti-sag support from the beginning.
A well-built DIY deck gate should swing smoothly, latch securely, resist weather, and blend into the deck design. Take your time with measuring, dry-fitting, and finishing. Check local code. Use exterior-rated materials. And remember: the best safety gate is the one that works every time without needing a shove, a lift, or a secret handshake.