If your bathroom is small, your trash can is probably doing what tiny bathroom trash cans do best: sitting in the worst possible place and judging your floor plan. One minute it is tucked beside the vanity. The next minute it is blocking a cabinet door, bumping your toes, and somehow collecting exactly one cotton round, three floss picks, and a shocking amount of attitude.
That is why a bathroom cabinet door garbage can DIY is such a smart little upgrade. It hides clutter, clears floor space, and makes everyday cleanup easier without requiring a full vanity remodel. Better yet, this project can be built in an afternoon with common tools, a compact bin, and a little patience. Nothing fancy. Nothing dramatic. No need to summon a contractor in a branded polo shirt.
In this guide, you will learn how to build a hidden trash solution that mounts to a bathroom vanity cabinet door, plus how to avoid the classic mistakes: bad measurements, hinge interference, overloading the door, and creating a trash can that is technically “inside the cabinet” but impossible to actually use. We are aiming for clever, not chaotic.
Why This DIY Works So Well in Small Bathrooms
A cabinet door garbage can makes sense for the same reason behind-the-door storage works so well in tight spaces: it uses space that is already there. Instead of giving up valuable floor area, you turn the inside of the vanity into a hidden waste zone. That means a cleaner-looking room, easier sweeping, and less visual clutter around the toilet and vanity.
This setup is especially helpful in bathrooms where the vanity cabinet is deep enough to hold a slim bin but not wide enough for bulky organizers. It is also handy if you regularly toss cotton swabs, makeup wipes, empty toothpaste boxes, tissue scraps, or packaging while getting ready. Translation: real-life bathroom trash, not construction debris and definitely not anything super heavy.
The best version of this project is lightweight, easy to wipe clean, easy to reline, and positioned so the bin swings out with the door. Open the cabinet, trash comes to you. Close the cabinet, mess disappears. It is basically a magic trick, but with screws.
Before You Start: Choose the Right Build Style
There are two good ways to approach this project.
Option 1: Direct Door-Mount Bin
This is the simplest method. A small plastic or metal bin mounts directly to the inside of the cabinet door using brackets or a wood backer panel. When the door opens, the bin moves with it. This version is affordable, compact, and ideal for bathrooms where you are mostly tossing lightweight dry trash.
Option 2: Door-Attached Mini Pull-Out
This is the upgraded cousin. Instead of mounting the bin straight to the door, you install a small pull-out frame or slide system inside the cabinet and attach the cabinet door to that system. It feels smoother, reduces stress on the door, and gives the project a more built-in look. It is a stronger choice if you want a cleaner mechanism or have a slightly larger vanity cabinet.
For most bathrooms, Option 1 is the easier DIY. It is the version we will focus on here, with notes on how to upgrade if you want the pull-out style.
Tools and Materials
- Small bathroom-size trash bin or slim waste container
- Measuring tape
- Pencil
- Drill/driver
- Small drill bit for pilot holes
- Short wood screws
- Two small L-brackets or a door-mount bracket kit
- Thin plywood or solid wood panel for a mounting plate
- Sandpaper
- Optional: painter’s tape, adhesive bumpers, magnetic catch, removable liner ring, small lid stop
If your vanity door is thin, decorative, or made from material that does not love extra holes, a mounting plate is your best friend. It spreads the load, gives you a flatter surface to work with, and helps prevent that terrible moment when a screw pokes through the front of the cabinet and ruins your day.
Step 1: Measure Like You Mean It
This is the part that separates a satisfying DIY from a weekend argument with a drill. Open the vanity cabinet and measure the usable interior space, not just the overall cabinet box.
Measure the width, depth, and height. Then measure around the plumbing, especially the P-trap, water supply lines, shutoff valves, and any cross braces. If there is shelving inside, note how much room is left below or beside it. Finally, look at the cabinet hinges and the swing path of the door. Your bin cannot hit the plumbing, scrape the frame, or collide with the hinge arm every time you open it.
A good rule is to leave enough breathing room on all sides so the bin does not rub. A hidden trash can should glide into your routine, not audition as a percussion instrument.
Step 2: Pick a Bin That Matches the Door, Not Your Ambition
Choose a compact bin made for light-duty use. Bathroom trash is usually dry and lightweight, so you do not need a giant container. In fact, going too large is one of the easiest ways to make this project annoying. A smaller bin is easier to mount, easier to empty, and less likely to strain the door over time.
Look for a bin with a flat back or flat mounting surface. Removable inner buckets are great. Built-in handles are even better. A lid can be useful, but in a bathroom cabinet setup, it needs to stay out of the way. Some DIYers mount the lid to the cabinet wall so the can lifts away from it when the door opens. Others skip the lid entirely and focus on frequent emptying. Both approaches work.
If you want the cleanest result, choose a bin that looks intentional, not like you borrowed it from the laundry room during a moment of desperation.
Step 3: Make a Simple Mounting Plate
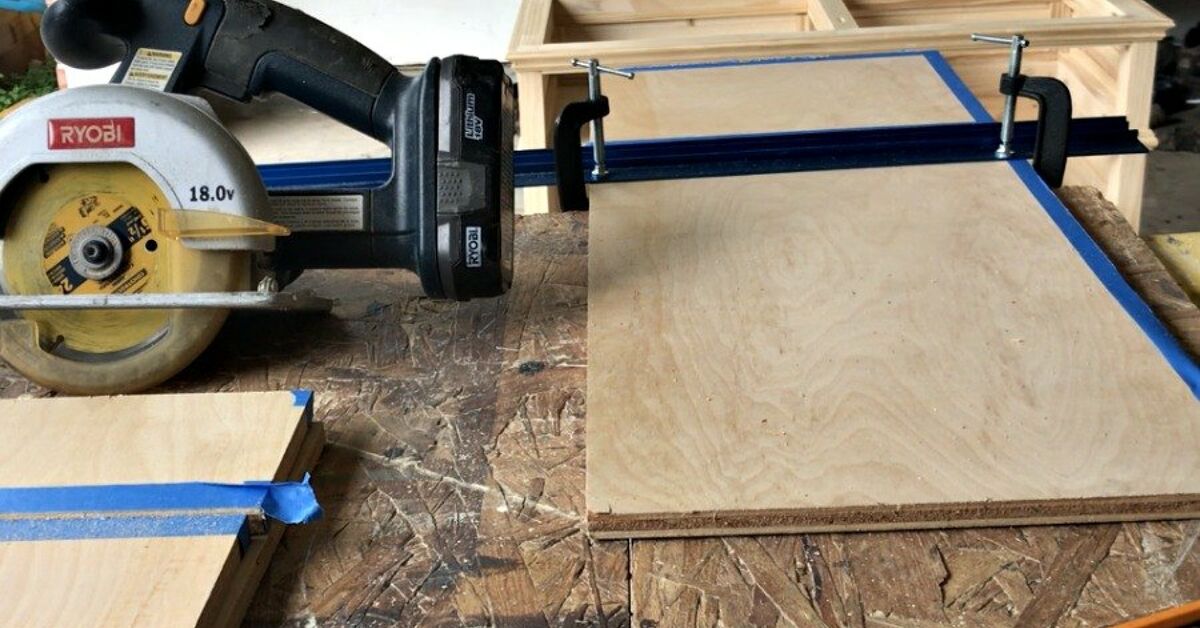
Cut a piece of plywood or solid wood so it fits neatly on the inside of the cabinet door without blocking hinges, raised panels, or inset details. Sand the edges and hold it in place with painter’s tape while you test the position.
This plate gives you three benefits. First, it creates a flat surface for mounting brackets. Second, it helps distribute weight more evenly. Third, it lets you build the project without treating your cabinet door like a dartboard.
If your door has a recessed center panel, the mounting plate is especially useful because brackets need solid contact. If your cabinet door already has a flat interior face, you may be able to mount directly to it, but the plate still makes alignment easier.
Step 4: Mark the Placement
Set the bin against the mounting plate or cabinet door and test how it sits when the door closes. This is the “pretend everything works before committing holes to wood” phase. Highly recommended.
Make sure:
- the top of the bin clears the sink basin and plumbing,
- the bottom of the bin does not hit the cabinet floor lip,
- the screws will land in a thick, safe part of the door or plate,
- the door still closes fully without pressure.
Mark bracket holes with pencil. If your bracket position lines up with a thin section of the cabinet door, add spacers or shift the mount. Never rely on hope. Hope is not a fastener.
Step 5: Drill Pilot Holes and Install the Brackets
Remove the door from the vanity if that makes your life easier. It usually does. Lay it flat on a protected surface, then drill pilot holes for the mounting plate and bracket screws. Pilot holes reduce the chance of splitting and help keep everything aligned.
Attach the mounting plate first if you are using one. Then install the brackets or hardware that will hold the trash bin. If your bin uses a commercial door-mount kit, follow the manufacturer’s order of assembly. If you are using L-brackets, keep the hardware snug but do not overtighten and crush the bin or distort the plate.
Rehang the door and test the swing. Open and close it several times before adding a liner. If anything rubs, fix it now. Your future self will be very impressed.
Step 6: Add the Bin and Liner System
Once the structure is mounted, drop in your liner and make it easy to change. That sounds obvious, but many hidden-trash projects become tiny engineering failures because the bag is too loose, too visible, or too hard to replace.
Here are simple ways to keep the liner tidy:
- Use a bin with an inner rim that holds small bags in place.
- Add a tension band, spring ring, or homemade elastic retainer under the lip.
- Store replacement liners inside the vanity so you never play the “where are the bags?” game at 11:47 p.m.
If odor is a concern, use smaller liners and empty the bin more often. This is a bathroom trash can, not a landfill internship.
Step 7: Upgrade It for a More Built-In Look
If you want this project to feel more custom, add a few easy finishing touches:
Use Soft Bumpers
Stick felt or rubber bumpers where the bin or plate might tap the cabinet frame. That keeps the operation quieter and protects the finish.
Add a Magnetic Catch
If your cabinet door tends to drift open, a magnetic catch or a stronger existing latch can solve it. No one wants a secret trash can that keeps introducing itself.
Create a Lid-Lift Setup
For a more advanced version, secure a lightweight lid to the interior cabinet wall so the bin slides away from it when the door opens. This mimics the “hidden lid” idea used in many built-in cabinet systems.
Install a Mini Pull-Out Frame
If you want smoother motion and less weight directly on the door, mount a small pull-out slide platform to the cabinet floor, then attach the door to the platform’s front brackets. It takes more setup, but the result feels polished and durable.
Common Mistakes to Avoid
Choosing a Bin That Is Too Deep
If the bin sticks too far into the cabinet, it will bump plumbing or block your stored items. Slim beats oversized almost every time.
Ignoring the Hinge Side
Hinges take up more real estate than people think. If your bin sits too close to them, the door may not open fully or the hardware may scrape.
Skipping Pilot Holes
This is how cabinet doors get split, screws wander off course, and DIY confidence leaves the room.
Overloading the Door
This project is best for light bathroom trash. If you toss heavy bottles, full-size product containers, or wet waste constantly, consider the pull-out frame version instead.
Making Bag Changes a Chore
If relining the bin requires removing three screws, a bracket, and your will to live, redesign it. Easy maintenance is part of the build.
How to Keep It Clean
A hidden trash can still needs attention. Wipe the bin weekly, check the screw tightness monthly, and avoid storing damp rags directly beside it. If you keep bathroom cleaners under the sink too, place them in a separate caddy or tray so spills do not mingle with trash. Keep replacement liners nearby and toss wet items promptly so moisture and odors do not build up inside the cabinet.
In other words, your hidden trash can should be invisible, not mysterious.
Is This DIY Worth It?
Absolutely, especially if your bathroom is short on floor space and long on visual clutter. A bathroom cabinet door garbage can DIY is one of those upgrades that feels surprisingly luxurious for such a small project. It does not scream for attention. It just quietly makes the room work better.
You gain cleaner lines, easier sweeping, and one less object hanging around your bathroom like an uninvited houseguest. The best part is that the project is flexible. You can build a simple door-mounted version for very little money or go for a pull-out version that looks custom and smooth.
Either way, the result is the same: less mess in plain sight, more function where you actually need it, and a vanity cabinet that finally pulls its weight. Politely. With trash.
Real-World Experience: What This DIY Feels Like in Everyday Life
The most interesting thing about building a bathroom cabinet door garbage can is that it does not feel like a dramatic renovation when you finish. It feels like your bathroom suddenly got smarter. That is why people end up loving this project more than they expect. At first, it sounds like a tiny organizational tweak. In real life, it changes the rhythm of how the room works.
A lot of DIYers start this project because they are tired of kicking a floor trash can while opening the vanity. That sounds minor until you do it every day. In smaller bathrooms, one freestanding bin can make the whole room feel crowded. Once the trash moves behind the cabinet door, the bathroom looks calmer almost immediately. The floor looks bigger. Sweeping gets easier. Nothing has to be shuffled around just to clean.
Another common experience is realizing how much random bathroom waste happens during normal routines. Cotton pads, tissues, empty floss containers, razor caps, skincare packaging, and those tiny protective seals that somehow stick to your fingers like they have a personal vendetta. When the trash is hidden inside the vanity, cleanup becomes automatic. Open door, toss item, close door, continue with life. There is no awkward half-step across the room with a wet cotton ball in hand.
People also notice that this project works best when they keep expectations realistic. A bathroom cabinet door bin is not meant to hold a week’s worth of heavy junk. It shines when used for small, everyday trash and emptied often. The DIY feels successful when the bin stays light, the liner is easy to swap, and the cabinet still has room for the basics. That is the sweet spot.
There is usually a little trial and error in the first week. Some people move the bin up an inch for better clearance. Others add adhesive bumpers because the door closes a bit louder than expected. Many end up storing spare liners inside the cabinet because once you use the hidden can for a few days, you realize convenience matters more than perfection. The good news is that these tweaks are small. The core idea works quickly.
One of the most satisfying experiences is when guests do not notice the trash can at all. That may sound silly, but in a small bathroom, “less obvious stuff” equals “more polished room.” The space feels intentional. The vanity stops looking overcrowded. Even budget bathrooms start to feel more custom when everyday mess is tucked out of sight.
DIYers who choose the pull-out version often say it feels especially high-end, while those who go with a direct door-mount version love how fast and affordable it is. Neither group is wrong. The simpler build wins on speed. The pull-out wins on smoothness. Both win against the old freestanding bin that kept living exactly where your foot wanted to go.
Over time, this becomes one of those projects you stop noticing because it works so naturally. That is usually the sign of a great home upgrade. It does not demand applause every morning. It just quietly solves a problem, keeps the room tidier, and saves a little space in a place where every inch matters. Not bad for a humble trash can with a secret identity.
Conclusion
If you want an easy DIY that makes your bathroom feel cleaner, more organized, and a little more custom, building a cabinet door garbage can is a smart move. Measure carefully, keep the bin compact, mount to a solid surface, and make bag changes simple. Do that, and you will end up with a hidden trash solution that looks neat, works every day, and saves precious space where it counts most.