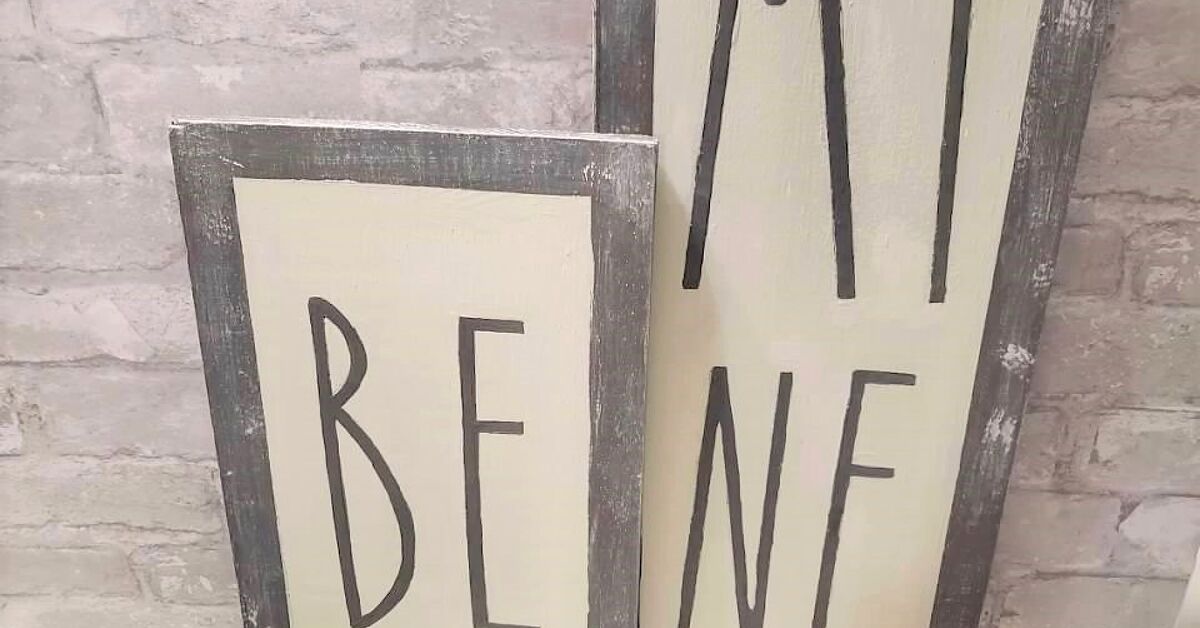
An old shelf is rarely just an old shelf. Sometimes it is a dusty board with screw holes, a suspicious stain from 2009, and a heroic future as a farmhouse sign. Before you send it to the curb or let it retire permanently in the garage, look again. That forgotten piece of wood may already have the texture, age, and character that expensive “rustic” decor tries very hard to fake.
Making a farmhouse sign from an old shelf is one of the most satisfying DIY farmhouse decor projects because it checks all the best boxes: affordable, beginner-friendly, customizable, eco-conscious, and charming enough to make guests ask, “Where did you buy that?” At which point you may casually sip your coffee and say, “Oh, I made it,” as if you were not covered in sanding dust twelve hours earlier.
This guide walks through how to turn an unwanted shelf into a rustic wood sign with practical steps, design ideas, safety tips, and finishing tricks. Whether you want a kitchen sign, porch sign, laundry room sign, entryway quote, or personalized family name sign, the process is flexible. The shelf brings the bones; you bring the creativity.
Why an Old Shelf Makes the Perfect Farmhouse Sign
Farmhouse style is built on warmth, simplicity, history, and practical beauty. That is why old shelves work so well. They already have a lived-in look: softened edges, small dents, nail holes, uneven grain, or faded finish. Instead of seeing flaws, farmhouse decor sees personality. A perfectly smooth board can look a little too showroom-perfect, but an old shelf looks like it has stories, even if most of those stories involve holding printer paper and a ceramic frog.
Using an old shelf also saves money. New wood, stain, paint, stencils, and hardware can add up quickly. Starting with a shelf you already own reduces the material list and gives the finished sign a more authentic reclaimed wood feel. It is also a smart upcycling project. Instead of buying another mass-produced wall sign, you create something useful from an item that might otherwise become waste.
Best of all, shelves are usually the right shape. Most are long, flat, and sturdy, which makes them ideal for horizontal farmhouse signs over a doorway, above kitchen cabinets, behind a sofa, or in an entryway. A shorter shelf can become a small shelf sitter, pantry label, bathroom sign, or seasonal accent.
Before You Start: Inspect the Shelf
Not every shelf deserves a second career. Some are solid wood treasures. Others are particle board wearing a thin disguise and hoping no one asks questions. Before you begin, inspect the shelf carefully.
Check the Material
Solid wood is the best choice because it can be sanded, stained, painted, distressed, and sealed. Plywood can also work well, especially if the surface veneer is intact. MDF or particle board may work for painted signs, but it does not distress as beautifully and can swell if exposed to moisture. If your shelf feels heavy, has visible grain, and shows wood fibers along the edge, you probably have a good candidate.
Look for Damage
A few dents and scratches are welcome. Deep cracks, crumbling edges, water damage, mold, or severe warping are not. Lay the shelf on a flat surface. If it rocks like a restaurant table with one short leg, it may need trimming or support. For a wall sign, minor bowing is usually acceptable, but a badly warped board will be frustrating to stencil and hang.
Think About Safety
If the shelf is very old and has existing paint, be cautious before sanding. Older painted surfaces may contain lead. Do not aggressively sand or scrape unknown old paint indoors. If you suspect lead paint, use a lead test kit or consult a qualified professional. For ordinary modern shelves, wear a dust mask, use eye protection, and sand in a ventilated area. Rustic should not mean “surprise respiratory adventure.”
Supplies You May Need
You can keep this project simple or dress it up like it is going to a farmhouse gala. The basic supplies include an old shelf, sandpaper, primer or paint, stain if desired, a stencil or vinyl lettering, painter’s tape, a small brush or foam roller, a ruler, pencil, and a clear sealer. For hanging, use sawtooth hangers, D-rings, picture wire, or heavy-duty wall-hanging hardware depending on the size and weight of the shelf.
Optional supplies include wood filler, wood glue, clamps, a miter saw or handsaw, transfer tape, carbon paper, chalk, a cutting machine, distressing wax, antiquing glaze, and decorative trim. If the shelf has old bracket holes, you can fill them for a cleaner look or leave them visible for character. Farmhouse style is forgiving. In fact, it often rewards the kind of imperfections that would make modern minimalist decor faint dramatically.
Step 1: Clean the Shelf Thoroughly
Start with a good cleaning. Remove dust, grease, sticky residue, and mystery garage particles. A damp cloth with mild soap is usually enough. For greasy kitchen shelves, use a degreasing cleaner and wipe clean with fresh water afterward. Let the wood dry completely before sanding or painting.
This step matters more than people think. Paint does not love dust. Stain does not love old wax. Adhesive stencils do not love oily surfaces. A clean shelf gives every later layer a better chance of sticking properly.
Step 2: Sand Without Erasing the Character
Sanding prepares the surface, smooths rough spots, and helps paint or stain adhere. For most shelves, start with medium-grit sandpaper, then finish with a finer grit. Sand with the grain when possible. If the shelf has a glossy finish, lightly scuff the surface so primer or paint can grip.
The goal is not to make the board look brand-new. You want smooth enough to paint, not so polished that all the old charm disappears. Keep interesting dents, worn corners, and small marks. Those details help the finished farmhouse sign feel collected rather than manufactured.
Step 3: Decide on the Look
Before opening paint cans, choose the style. A farmhouse sign from an old shelf can go several directions.
Classic White Farmhouse Sign
Paint the shelf white or warm ivory, add black lettering, then distress the edges. This is the timeless kitchen-and-entryway look. It pairs well with shiplap, baskets, vintage hooks, black metal fixtures, and neutral decor.
Stained Wood Sign
Keep the wood visible by staining the shelf in a warm brown, weathered gray, or natural finish. Then add white or cream lettering. This style looks great in rustic living rooms, covered porches, mudrooms, and dining spaces.
Two-Tone Aged Sign
Layer dark paint under light paint, then sand selected areas so the darker color peeks through. This creates a distressed, timeworn look that feels like something rescued from a country store.
Minimal Modern Farmhouse Sign
Use clean lettering, a matte black or soft beige background, and minimal distressing. This gives you farmhouse warmth without making your wall look like it churns butter on weekends.
Step 4: Paint, Stain, or Whitewash the Background
If you want a painted sign, apply primer first if the shelf is slick, dark, stained, or uneven. Then add one or two thin coats of paint. Thin coats dry more evenly and reduce brush marks. Matte, chalky, or eggshell finishes usually look more farmhouse than glossy finishes.
For a stained sign, sand the shelf well and test the stain on the back or underside first. Different woods absorb stain differently. Pine can become blotchy, while oak and other open-grain woods may take stain more evenly. Wipe away excess stain and let it dry thoroughly before lettering.
For a whitewashed effect, mix a small amount of white paint with water, brush it onto the shelf, and wipe back the excess with a rag. This softens the wood tone while letting grain show through. It is a great choice when you want the sign to look airy, casual, and slightly weathered.
Step 5: Choose the Words
The words are the personality of the sign. The best farmhouse sign phrases are short, readable, and suited to the room. A kitchen might say “Gather,” “Farm Fresh,” “Homemade,” or “Bless This Mess.” A laundry room can get away with “Wash, Dry, Fold, Repeat,” because laundry is basically a subscription service no one remembers signing up for. An entryway might use a family name, “Welcome,” or “Stay Awhile.”
For a personalized sign, use your last name, a meaningful date, a town name, or a favorite phrase. Avoid long quotes unless the shelf is large enough. Tiny letters on a rustic board can become difficult to read, especially from across the room. A good rule: if guests need to squint, the sign is working too hard.
Step 6: Transfer the Lettering
There are several easy ways to add lettering to a wood sign.
Stencil Method
Reusable stencils are beginner-friendly and affordable. Tape the stencil in place, use very little paint, and dab rather than brush heavily. Too much paint causes bleeding under the stencil. Remove the stencil carefully before the paint fully cures for cleaner edges.
Vinyl Stencil Method
If you have a cutting machine, adhesive vinyl creates crisp lettering. Apply transfer tape, burnish the vinyl onto the shelf, paint lightly over the cut areas, then peel the stencil away. Sealing the stencil edges with a thin coat of background paint before applying the letter color can help reduce bleeding.
Carbon Paper or Pencil Transfer
Print your phrase on regular paper, place carbon paper underneath, and trace the letters onto the shelf. Then fill them in with a small brush or paint marker. This method takes patience, but it gives a handmade look that is hard to beat.
Freehand Lettering
Freehand lettering is brave, personal, and occasionally humbling. Use pencil guidelines first. If the sign is meant to look casual, slight irregularities add charm. If you want perfect lettering, use a stencil and save your blood pressure.
Step 7: Distress the Sign
Distressing is where the farmhouse magic happens. Once the paint is dry, lightly sand the edges, corners, and raised areas. Focus on places that would naturally wear over time. Do not sand evenly across the whole surface unless you want the sign to look like it lost a fight with a belt sander.
You can also add age with dark wax, antiquing glaze, dry brushing, or a tiny amount of stain wiped into corners and grooves. The key is restraint. Add a little, step back, and look. You can always distress more, but undoing too much distressing is like trying to put toothpaste back in the tube while pretending everything is fine.
Step 8: Seal the Finished Sign
A clear sealer protects the paint and makes the sign easier to dust. Use a matte or satin topcoat for an authentic farmhouse finish. If the sign will hang indoors, a water-based polyurethane, finishing wax, or clear matte spray may be enough. For a covered porch or semi-outdoor area, choose a more durable exterior-rated sealer and avoid direct rain exposure unless the materials are designed for outdoor use.
Let the sign cure fully before hanging. Paint can feel dry to the touch before it has hardened completely. Patience here prevents fingerprints, smudges, and the special sadness of ruining your own work ten minutes before victory.
Step 9: Add Hanging Hardware
Because shelves can be heavier than thin craft boards, choose hardware carefully. A small sign may only need a sawtooth hanger. A long or heavy shelf sign should use D-rings, picture wire, or wall anchors rated for the weight. Measure twice before installing hardware so the sign hangs level.
If you want the sign to sit on a mantel, open shelf, buffet, or kitchen counter, attach small felt pads to the back or bottom. This prevents scratches and helps the sign lean securely. A shelf sign with depth can also stand on its own, which is convenient if you are renting and want fewer holes in the wall.
Design Ideas for a Farmhouse Sign From an Old Shelf
The beauty of this project is that one shelf can become dozens of different signs depending on size, color, and wording.
Kitchen Shelf Sign
Use phrases like “Gather,” “Eat Well,” “Farmhouse Kitchen,” or “Fresh Baked.” A stained wood background with cream lettering looks warm above cabinets or near a coffee bar.
Entryway Welcome Sign
A long shelf can become a horizontal welcome sign with your family name. Add small hooks underneath if the shelf is sturdy enough, and it can double as a key holder or dog-leash station.
Porch Farmhouse Sign
For a covered porch, try “Welcome,” “Home,” “Stay Awhile,” or a seasonal message. Use exterior paint and sealer, and keep the sign protected from heavy moisture.
Laundry Room Sign
Laundry room signs can be playful because the room itself is already a tiny domestic comedy club. Try “Loads of Fun,” “Lost Socks,” or “Wash & Fold.” Add a distressed white background and black lettering for a clean farmhouse look.
Seasonal Reversible Sign
If the shelf is thick enough and both sides are attractive, make it reversible. One side can say “Hello Fall,” while the other says “Merry Christmas.” This is efficient, festive, and excellent for people whose holiday decor storage is already negotiating for more closet space.
Common Mistakes to Avoid
The first mistake is skipping prep. Cleaning and sanding may not be glamorous, but they make the difference between a sign that lasts and a sign that peels like a sunburn.
The second mistake is using too much paint with stencils. A nearly dry brush or foam pouncer works best. Build color slowly. Heavy paint is the main reason letters bleed.
The third mistake is choosing a font that is too delicate. Thin script may look beautiful on a computer screen but disappear on textured wood. Mix one decorative font with one simple font for balance.
The fourth mistake is over-distressing. Farmhouse style should look gently aged, not attacked. Sand edges and high points first, then stop and evaluate.
The fifth mistake is weak hanging hardware. An old shelf can be surprisingly heavy. Use anchors, studs, or properly rated hangers. Gravity has no respect for your aesthetic.
My Experience Making a Farmhouse Sign From an Old Shelf
The first time I made a farmhouse sign from an old shelf, I was not trying to be clever. I was cleaning the garage, which is how many DIY projects begin and several questionable life choices are discovered. The shelf was leaning behind a stack of paint cans, dusty and slightly scratched, with two old bracket holes near the ends. It was not beautiful yet, but it had potential. More importantly, it was free, which is one of my favorite design styles.
I wiped it down, and the rag immediately turned a color that can only be described as “garage beige.” After cleaning, I realized the wood had a nice weight and a few dents that looked intentional if I stood far enough away. I sanded the front lightly, leaving the corners worn. The old bracket holes bothered me for about five minutes, then I decided they looked rustic. This is a powerful DIY mindset: when you cannot fix it, name it character.
For the background, I chose a warm white paint because I wanted the sign to brighten a small kitchen wall. I used two thin coats, letting a little of the wood tone show through near the edges. Once dry, I printed the word “Gather” in a bold serif font, transferred it with pencil and carbon paper, and filled it in with black craft paint. The first letter looked great. The second letter looked like I had painted it while riding a horse. I took a breath, corrected the edge with the background paint, and remembered that handmade does not mean machine-perfect.
The most satisfying part was distressing. I sanded the corners, then lightly scuffed parts of the lettering so it looked older. Suddenly the shelf stopped looking like a leftover storage board and started looking like something from a cozy country kitchen. I added a matte clear coat and attached D-rings on the back. When it went on the wall, the whole space felt warmer. The sign did not scream for attention; it simply made the room feel more finished.
What surprised me most was how personal the project felt. A store-bought farmhouse sign can be pretty, but a sign made from an old shelf carries a small story. It reminds you that decor does not always need to arrive in a box. Sometimes it is already in your house, hiding behind the holiday bins, waiting for sandpaper and a second chance. Since then, I have made smaller shelf signs for a laundry nook, a coffee station, and a covered porch. Every one turned out slightly different, and that is the point. The charm comes from the old wood, the imperfect finish, and the fact that no one else has the exact same piece.
Why This DIY Project Is Worth It
A farmhouse sign from an old shelf is more than a craft project. It is a practical lesson in seeing value where it already exists. You get custom wall decor, save money, reduce waste, and create something that fits your home instead of settling for whatever phrase the store decided everyone needed this season.
It is also approachable. You do not need a workshop full of expensive tools. You do not need advanced woodworking skills. You need a shelf, a plan, a little patience, and the courage to believe that sanding dust is temporary but farmhouse charm is forever.
Conclusion
Turning an old shelf into a farmhouse sign is one of the easiest ways to add rustic character to your home without spending much money. The project is flexible enough for beginners but creative enough for experienced DIY decorators. Start by choosing a sturdy shelf, clean and sand it properly, decide on a painted or stained finish, add simple lettering, distress with restraint, and seal the final piece. In the end, you will have a custom farmhouse wood sign with history, warmth, and a little bit of sawdust-earned pride.
The next time you see an old shelf waiting for the trash pile, pause before saying goodbye. It might not be clutter. It might be your next farmhouse sign, standing there quietly and hoping you own sandpaper.