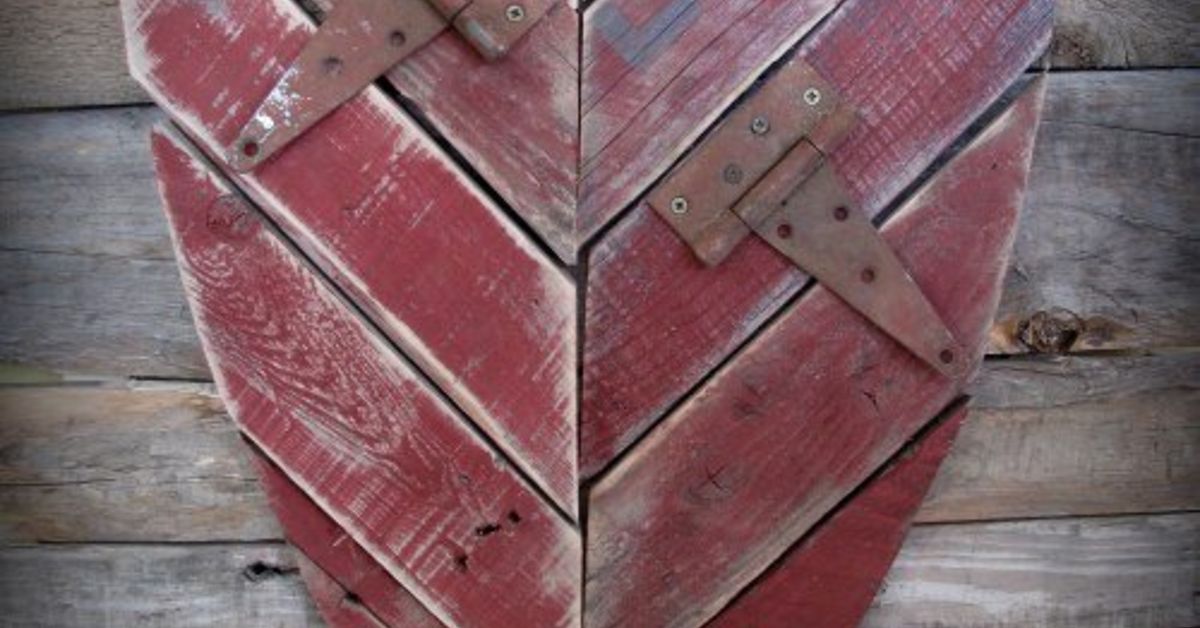
Valentine’s Day decor has a way of dividing people into two teams: the “buy something glittery at the store” team and the “I can make that with scrap wood and questionable confidence” team. If you are happily standing in the second group, welcome. Today’s project is an easy pallet wood Valentine’s hearta rustic, charming, budget-friendly DIY decoration that looks like it belongs in a cozy farmhouse entryway, on a mantel, or leaning casually against a wall as if it did not just take over your kitchen table for an afternoon.
This project uses reclaimed pallet wood, simple tools, paint or stain, and a heart template. The final result can be sweet, weathered, modern, romantic, or slightly imperfect in the most lovable way. That is the magic of pallet wood: it already has character. Scratches, knots, nail holes, and uneven grain all say, “I have lived a life,” which is more interesting than “I came from aisle seven.”
In this guide, you will learn how to choose safe pallet wood, prep the boards, design a heart shape, assemble the piece, finish it beautifully, and customize it for your home. Whether you are making Valentine’s Day decor, a handmade gift, or a year-round rustic wall accent, this DIY pallet wood heart is easy enough for beginners and satisfying enough for experienced crafters.
Why Make a Pallet Wood Valentine’s Heart?
A pallet wood heart is one of those DIY projects that checks all the good boxes. It is affordable, beginner-friendly, customizable, and forgiving. If one board is slightly crooked, it looks rustic. If your paint is uneven, it looks distressed. If your sanding is not perfect, congratulationsyou have achieved “farmhouse texture.”
Unlike many seasonal decorations that get used once and then disappear into a storage bin, a wooden heart can work far beyond February 14. Paint it red or pink for classic Valentine’s Day decor, whitewash it for a cottage look, stain it for farmhouse style, or add a small banner for a personalized touch. It can hang on a front door, sit on a shelf, decorate a bedroom, or become part of a gallery wall.
Choosing the Right Pallet Wood
Before you start cutting and painting, choose your pallet carefully. Not all pallets are ideal for indoor crafts. Look for clean, dry wood without oily stains, strong odors, mold, or unknown residue. A pallet that smells strange is not being “mysterious.” It is politely asking you to leave it alone.
For safer DIY use, look for pallets stamped with HT, which means heat-treated. Avoid pallets marked MB, which indicates methyl bromide fumigation. You should also avoid painted industrial pallets or anything that may have carried chemicals, food waste, or heavy-duty commercial materials. When in doubt, skip it. Free wood is wonderful, but not if it brings unwanted problems into your craft room.
Best Pallet Wood Signs to Look For
- Clean, dry boards with no chemical smell
- An HT stamp or clear heat-treated marking
- No dark stains, mold, or sticky residue
- Boards that are not badly warped or split
- Wood thick enough to hold small nails, screws, or glue
Materials and Tools You Will Need
You do not need a professional workshop to make this DIY pallet wood heart. Basic tools are enough. If you are new to woodworking, keep the design simple and let the finish do the decorating.
Materials
- Clean pallet boards or reclaimed wood slats
- Two narrow backing strips or scrap wood supports
- Wood glue
- Small nails, brad nails, or short wood screws
- Sandpaper in medium and fine grits
- Paint, stain, whitewash, or craft paint
- Clear sealer, matte topcoat, or wax finish
- Heart template, poster board, or kraft paper
- Hanging hardware, twine, ribbon, or sawtooth hanger
Tools
- Jigsaw, scroll saw, or handsaw
- Hammer, drill, or brad nailer
- Pencil
- Measuring tape
- Clamps
- Safety glasses
- Dust mask
- Work gloves
A jigsaw makes cutting curves easier, especially for the heart shape. However, if you do not have one, you can create a slatted heart by cutting each board to different lengths and arranging them into a heart silhouette. That version is even more beginner-friendly because it avoids curved cuts.
Step 1: Break Down and Clean the Pallet
Start by carefully removing the boards from the pallet. Use a pry bar, hammer, or pallet buster if you have one. Work slowly so the boards do not split. Pallet wood can be stubborn, and the nails sometimes act like they signed a lifetime contract.
Once the boards are removed, pull out any leftover nails or hammer them flat if they are safely embedded and will not interfere with cutting. Brush away dirt and debris. If the wood is dusty, wipe it with a damp cloth and allow it to dry completely before sanding or painting.
Step 2: Sand the Boards
Sanding is not the glamorous part, but it is the difference between “rustic charm” and “splinter delivery system.” Use medium-grit sandpaper first to smooth rough areas, then finish with a fine grit. You do not need to erase every imperfection. Nail holes, weathering, and small dents give the finished heart its handmade personality.
Always wear a dust mask and safety glasses while sanding reclaimed wood. Sand outdoors or in a well-ventilated area if possible. If the pallet wood has old paint and you do not know its history, avoid aggressive sanding and use extra caution. For decorative indoor projects, clean unfinished pallet boards are usually the better choice.
Step 3: Decide on Your Heart Design
There are two easy ways to build a pallet wood Valentine’s heart. The first method is to assemble several boards into a square or rectangle, trace a heart template, and cut the full shape with a jigsaw. The second method is to cut individual boards into different lengths, then arrange them into a heart silhouette without cutting curves.
Option A: Cut-Out Heart
This version gives you a smooth, classic heart outline. Lay your boards side by side, attach backing strips across the back, trace a large heart shape on the front, and cut around the outline. It looks polished but still rustic.
Option B: Slatted Heart
This version is great for beginners. Cut several pallet boards into staggered lengths, then arrange them vertically so they form a heart shape. The top boards are shorter, the middle boards are longer, and the bottom boards taper down. No curved cutting requiredjust clever arranging and a little patience.
If you want the easiest route, choose the slatted heart. If you want a more defined silhouette, choose the cut-out heart. Either way, you will end up with rustic Valentine decor that looks handmade in the best possible way.
Step 4: Make a Heart Template
Fold a large piece of paper in half and draw half of a heart along the fold. Cut it out, unfold it, and you have a symmetrical template. This old-school method works beautifully and costs nothing. It is basically geometry wearing a cute outfit.
Place the template on your arranged pallet boards and adjust the size until it feels right. For a mantel or shelf, a heart around 12 to 18 inches tall works well. For a front door or statement wall piece, go larger20 to 28 inches can make a bold but still manageable decoration.
Step 5: Assemble the Backing
Lay the boards face down in the order you want them. Place two narrow support strips across the back, one near the upper third and one near the lower third. Apply wood glue where the strips meet the boards, then secure them with short screws or nails.
Make sure your screws are not longer than the combined thickness of the support strip and front boards. Nobody wants surprise screw tips poking through the front like tiny metal party crashers. Clamp the boards while the glue dries if needed.
Step 6: Trace and Cut the Heart
Flip the assembled panel over and trace your heart template onto the front. Use a jigsaw to cut slowly along the pencil line. Let the tool do the work; forcing the saw can create rough edges or uneven curves. For tight curves near the top of the heart, move patiently and pause when needed.
After cutting, sand the edges until they feel smooth. You can round them slightly for a softer look or leave them more defined for a rustic farmhouse style. If a tiny piece chips off, do not panic. Pallet wood is naturally imperfect, and a little distressing often makes the finished project look better.
Step 7: Paint, Stain, or Whitewash
Now the fun begins. A classic Valentine’s heart usually leans into red, pink, blush, white, or burgundy. But you can also go neutral with gray stain, walnut stain, whitewash, or a soft weathered finish. The goal is to match your home, not to make your living room look like a candy aisle exploded.
Finish Ideas
- Classic red: Bold, cheerful, and unmistakably Valentine’s Day.
- Distressed white: Perfect for farmhouse or cottage decor.
- Pink ombre: Playful and soft, especially for bedrooms or nurseries.
- Dark stain: Elegant, rustic, and easy to use year-round.
- Whitewash over stain: Weathered, romantic, and subtle.
To distress the finish, paint the heart and let it dry. Then lightly sand the edges and raised grain until some natural wood peeks through. Focus on areas that would naturally wear over time, such as corners and edges. This gives the piece an aged look without making it seem like it survived a small furniture tornado.
Step 8: Add Decorative Details
Your pallet wood heart can be simple and beautiful as is, or you can dress it up. Add a small burlap bow, a mini bunting banner, stenciled letters, painted initials, lace ribbon, faux greenery, or a tiny wooden word cutout. For a personalized gift, stencil a family name, wedding date, or short message such as “Love,” “Be Mine,” or “Home.”
If you like a modern look, keep the decoration minimal. A stained wood heart with one small white word can look clean and stylish. If you love vintage charm, add layered ribbons, antique buttons, or a crackle paint finish. If your style is farmhouse, twine and white paint are your best friends.
Step 9: Seal the Wood
A clear sealer protects your work and makes the finish last longer. Use a matte or satin clear coat for a natural look. If the heart will hang indoors, a light craft sealer or furniture wax may be enough. If it will be displayed on a covered porch, choose a finish suitable for outdoor exposure.
Avoid placing unfinished pallet wood decor where it will get soaked by rain. Pallet wood can absorb moisture, swell, or warp. A covered porch is usually fine, but direct weather is not ideal unless the piece is properly sealed.
Step 10: Add Hanging Hardware
Turn the heart over and attach your hanging hardware. A sawtooth hanger works well for smaller hearts. For larger pieces, use D-rings and picture wire. Twine or ribbon can also be attached for a rustic look, but make sure it is strong enough to support the weight.
Before hanging, check that the heart sits level. If one side dips, adjust the hanger slightly. This is also a good time to admire your work, brush sawdust off your sleeves, and pretend the entire project was effortless.
Creative Ways to Display a Pallet Wood Valentine’s Heart
One of the best things about this project is how versatile it is. You can hang the heart, lean it, layer it, or use it as part of a larger seasonal display. Because it is made from wood, it adds texture and warmth that paper or plastic decorations cannot match.
Display Ideas
- Hang it on a front door with a ribbon loop.
- Lean it on a mantel with candles and greenery.
- Add it to a Valentine’s Day tiered tray.
- Use it as a backdrop for a dessert table.
- Place it above a bed or reading nook.
- Make several smaller hearts for a wall arrangement.
- Give it as a handmade Valentine’s gift.
Common Mistakes to Avoid
The most common mistake is choosing the wrong pallet. Dirty, stained, or unknown pallets are not worth the risk. Another mistake is skipping sanding. Even rustic decor should be safe to touch. Also, do not overload the heart with decorations. Pallet wood already has personality, so let it breathe a little.
Another small but important tip: test your paint or stain on a scrap piece first. Pallet wood can absorb finish unevenly, and different boards may react differently. A quick test helps you avoid surprises. Unless you enjoy surprise blotches, in which case, carry on boldly.
Easy Variations for Different Styles
Farmhouse Pallet Wood Heart
Paint the heart white, sand the edges, and add a burlap bow. This version works well with neutral decor and looks beautiful on a mantel or entry table.
Romantic Red Valentine Heart
Use deep red paint, then dry-brush a little brown or black around the edges for depth. Add a small twine hanger for rustic contrast.
Modern Minimalist Heart
Stain the wood dark walnut and add one small white painted word. Keep the surface clean and simple.
Scrap Wood Patchwork Heart
Use different widths and tones of pallet wood for a patchwork effect. Paint a few boards pink or white while leaving others natural.
Family Keepsake Heart
Add names, initials, or a meaningful date. This makes the project feel personal and gift-worthy without requiring complicated techniques.
Experience Notes: What Making an Easy Pallet Wood Valentine’s Heart Teaches You
The first thing you learn while making an easy pallet wood Valentine’s heart is that reclaimed wood has opinions. One board may be smooth and cooperative, while another twists slightly, splits near a nail hole, or refuses to sit flat like it has somewhere better to be. That is not a failure. It is part of the charm. Working with pallet wood teaches you to adjust, improvise, and stop chasing factory-perfect results.
One helpful experience is to lay out more boards than you think you need before choosing the final arrangement. Pallet boards vary in color, grain, thickness, and texture. When placed side by side, some combinations look balanced while others feel too busy. A good trick is to arrange the boards from light to dark or alternate rough and smooth textures. This makes the heart look intentional rather than random.
Another lesson is that sanding takes longer than expected, but it is worth every minute. At first, you may be tempted to say, “It’s rustic, so rough is fine.” Then one splinter later, your opinion will mature. The goal is not to make the wood look brand-new. The goal is to make it safe, pleasant to handle, and ready to accept paint or stain. A lightly sanded pallet board still looks rustic, but it feels much better.
Cutting the heart shape can feel intimidating, especially if you are using a jigsaw for the first time. The best approach is to cut slowly and leave a little extra outside the pencil line. You can always sand down the edge afterward. Trying to cut perfectly in one pass often creates wobbles. Think of the jigsaw as a dance partner: guide it gently, do not wrestle it.
Paint choice also changes the mood of the whole piece. Bright red feels festive and classic. Soft pink feels sweet and handmade. Whitewash feels relaxed and farmhouse-inspired. Dark stain feels mature enough to leave up all year. If you are unsure, make two small test patches on scrap wood. Pallet wood absorbs finish in unpredictable ways, so testing saves both time and dramatic sighing.
The most satisfying part is distressing the finished heart. A little sanding along the edges can instantly make the piece look aged and cozy. The trick is restraint. Sand lightly, step back, and look at the whole piece before continuing. Over-distressing can make the heart look less “vintage farmhouse” and more “rescued from a very emotional garage.”
If you are making this as a gift, personalization makes a big difference. A tiny painted name, a meaningful date, or a short phrase can turn scrap wood into something memorable. Handmade gifts do not need to be perfect; they need to feel thoughtful. A pallet wood heart says, “I made this for you,” which is already more charming than most store-bought decorations.
Finally, this project reminds you that DIY decor does not need to be complicated to be beautiful. With a few pallet boards, a basic heart shape, and a little paint, you can create something warm, rustic, and personal. It is affordable, approachable, and flexible enough for many styles. Plus, every time someone compliments it, you get the pleasure of saying, “Thanks, I made it,” which is basically the crafter’s version of a victory parade.
Conclusion
An easy pallet wood Valentine’s heart is a simple DIY project with big decorative payoff. It turns reclaimed wood into a warm, personal piece of Valentine’s Day decor that can be rustic, romantic, modern, or farmhouse-inspired. By choosing clean heat-treated pallet wood, sanding carefully, using a simple template, and finishing the piece with paint or stain, you can create a handmade heart that looks beautiful without requiring advanced woodworking skills.
Whether you hang it on your door, lean it on your mantel, or give it as a thoughtful handmade gift, this project proves that charming decor does not need to be expensive. Sometimes all it takes is scrap wood, a little creativity, and the courage to ignore the sawdust on your socks.