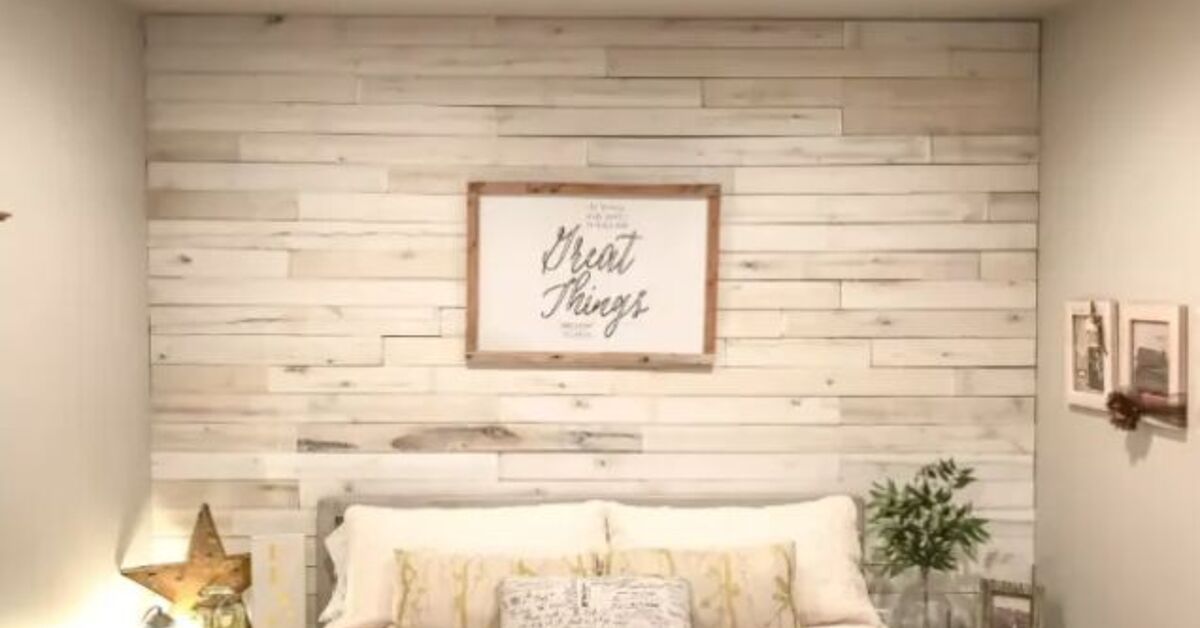
A plain wall is basically a giant billboard that says, “I haven’t decided who I am yet.” A DIY wood wall fixes that
in a single weekendadding warmth, texture, and the kind of “wow” that makes people assume you own at least one
tool you actually know how to use.
This tutorial walks you through planning, prep, installation, and finishingplus the real-life lessons most people
only learn after they’ve glued a board on upside down (no judgment; we’ve all been there in spirit). Whether you’re
building a shiplap wall, a modern wood slat wall, a board and batten accent, or a classic plank feature wall, the
fundamentals are the same: choose the right material, hit studs, stay level, and finish clean.
Why a Wood Accent Wall Works So Well
A wood wall brings dimension that paint can’t fake. It softens echo in big rooms, makes bedrooms feel cozier, and
turns “builder basic” into “custom.” It also hides minor drywall sins (tiny dents, questionable patches, that one
spot you swore you’d sand… eventually).
From an SEO standpoint (yes, even walls deserve SEO), people search for DIY wood wall tutorial
because they want clear steps, a realistic tool list, and confidence they won’t ruin a whole room. That’s exactly
what we’re doing here.
Pick Your Wood Wall Style
Before you buy anything, decide what you’re building. The best wood wall is the one that matches your space, your
patience level, and your tolerance for measuring.
Shiplap Wall
Clean lines with subtle shadow gaps. Great for farmhouse, coastal, and “I watch home renovation shows like it’s my
sport” vibes. Often comes as interlocking boards, which helps keep spacing consistent.
Plank Wall (Tongue-and-Groove or Square Edge)
More natural and flexible: stained, whitewashed, rustic, modernanything goes. Tongue-and-groove boards give you
a tight, aligned fit; square-edge planks look more casual and can be spaced intentionally.
Modern Wood Slat Wall
Vertical slats (often on a backing board) create a sleek, architectural look. This style is popular because it
looks high-end, but the build is surprisingly straightforward if your spacing is consistent.
Board and Batten
Dimensional trim strips over a wall (or over a backer) create a grid or vertical patternclassic, clean, and
extremely forgiving once it’s caulked and painted.
Wood Paneling Sheets
The fastest coverage for large walls. Modern panels can look fantastic, but seams and edges need careful planning
and trim for a finished look.
Tools and Materials (Don’t PanicYou Won’t Need All of This)
Common tools:
- Tape measure, pencil, and a straightedge or chalk line
- Stud finder (or the “knock and hope” methodstud finder is better)
- Level (2–4 ft) or a laser level
- Miter saw or circular saw (plus a safe cutting surface)
- Brad nailer (optional but life-changing) and appropriate nails
- Construction adhesive (often recommended for extra hold)
- Caulk gun, paintable caulk, wood filler, putty knife
- Sanding sponge or sandpaper, shop vac or tack cloth
Materials:
- Your chosen wood (shiplap boards, planks, slats, battens, or panels)
- Trim (optional): baseboard cap, corner trim, top ledge, or picture frame molding
- Finish: paint, stain, clear coat, or all three if you’re feeling brave
- Spacers (nickels, tile spacers, or scrap wood strips work great)
Step 1: Choose the Wall and Check Reality
Pick a wall that deserves the spotlight: behind a bed, a living room focal wall, a dining room, or an entryway.
Avoid walls with active moisture issues (obvious stains, peeling paint, musty odor). Wood and moisture are like
oil and water… except the “oil” is your budget.
Look at outlets, switches, vents, and thermostats. A wood wall means you may need outlet box extenders or slightly
longer screws for cover plates. Also check door casing clearanceyour new wall thickness can interfere with trim
if you don’t plan for it.
Step 2: Acclimate the Wood (Yes, Even If It’s Excited to Be Here)
Bring your boards into the room and let them sit for at least 48 hours. Wood expands and contracts with humidity,
and acclimation helps prevent warping, buckling, or gaps that appear like surprise plot twists a week later.
Step 3: Prep the Wall for a Clean Install
Start with a mostly smooth surface. Remove picture hooks and anything that’ll prevent boards from laying flat.
If you’re covering a very glossy wall, lightly scuff-sand so adhesive and caulk bond better.
Decide whether you’re removing baseboards. Many DIYers remove baseboards for a cleaner, flush install, then reinstall
or add a new baseboard on top. For quick projects, you can install to the baseboard and add shoe moldingjust make
sure the first board is level.
If you’re building a slat wall, consider painting the wall behind it (usually a dark color) first. That way, any tiny
gaps read as “intentional shadow” rather than “oops.”
Step 4: Mark Studs and Snap Reference Lines
Find studs and mark them from floor to ceiling. This is one of the most important steps for a durable wood wall.
Even with adhesive, mechanical fastening into studs keeps boards secure over time.
Use a level or laser to draw a straight reference line where your first course (row) will sit. Floors and ceilings
can be out of levelsometimes dramaticallyso you’re building from a true line, not from “whatever the house feels like today.”
Step 5: Install the Wood Wall (Choose Your Build)
Option A: Shiplap Wall (Horizontal Boards)
Shiplap is popular because it has a built-in overlap or groove that creates consistent reveals. Install typically starts
at the bottom and moves up.
- Cut your first board to length. Dry-fit it on the wall.
- Level it. Shim if needed. If the first board is off, everything will be off. The wall will look like it’s sliding into the ocean.
- Apply a modest bead of construction adhesive on the back (optional but helpful).
- Nail into studs. For many shiplap profiles, you can nail through the overlapping lip so fasteners are hidden.
- Stagger end seams (avoid lining joints up in a vertical zipper).
- Continue upward, checking level every few rows.
- Leave a small expansion gap at edges (top/side) to be covered by trim or caulk later.
Pro move: If your boards are prefinished, use matching filler for nail holes and handle them gently
to avoid scratches that will haunt you at sunset when the light hits just right.
Option B: Plank Wall (Rustic or Clean)
Plank walls can be reclaimed wood, store-bought planks, tongue-and-groove pine, or even ripped plywood strips.
The key is consistency and a plan for edges.
- Sort boards by color and grain before installingthink of it as arranging a charcuterie board, but for walls.
- If staining, prefinish boards (stain + seal) before installation for easier coverage and less mess.
- Start at the bottom (or top if your specific tongue-and-groove profile is better that way) and keep courses straight.
- Use spacers if you want a consistent gap between square-edge planks.
- Cut around outlets carefully; a jigsaw can help for notches and odd shapes.
- Nail into studs and add adhesive if boards have any tendency to cup or twist.
Option C: Modern Wood Slat Wall (Vertical Slats)
This is the “architectural magazine” look. Your main job is keeping slats straight and evenly spaced. Everything else
is just math wearing a flannel shirt.
- Decide slat width and spacing. Common looks are narrow slats with small gaps, but choose what fits your room scale.
- Paint the wall behind the slats (often dark) and let it dry fully.
- Cut slats to identical length. A stop block on a miter saw makes this fast and consistent.
- Install the first slat perfectly plumb using a level. This sets the pattern for the whole wall.
- Use a spacer block for every gap so spacing stays consistent.
- Fasten with adhesive and brad nails. Check plumb every few slats.
Design tip: Slats look especially sharp behind a TV, around a fireplace, or as a headboard-style feature wall.
Just keep heat clearances in mind for any fireplace surround.
Option D: Board and Batten (Painted Texture)
Board and batten is forgiving and dramaticperfect if you want a custom look without staining wood. Most of the “magic”
happens in layout, caulk, and paint.
- Choose your height (common: lower third, half wall, or full height).
- Install a horizontal base board (and sometimes a top rail) level across the wall.
- Calculate batten spacing so the pattern ends evenly at both sides.
- Install vertical battens: adhesive + nails, checking plumb as you go.
- Fill nail holes, caulk seams, sand lightly, then prime if needed.
- Paint with a durable finish (eggshell or satin is popular; semi-gloss for extra wipeability in busy areas).
Quick spacing example: If your wall is 120 inches wide and you want 8 battens, subtract the combined batten widths
from 120, then divide the remaining space into equal gaps. Dry-layout with painter’s tape before committing.
Step 6: Finish Like You Meant to Do This All Along
Finishing is where DIY projects either look professional… or look like a craft fair booth that got rained on.
Take the extra hour. It pays back every time you walk past the wall.
- Fill: Use wood filler for nail holes (especially on trim and stained wood). Let it dry fully.
- Sand: Lightly sand filler smooth. Vacuum dust and wipe clean.
- Caulk: Use paintable caulk for seams where wood meets wall/trim. Smooth with a damp finger or tool.
- Prime: Prime raw wood or MDF if you’re painting, especially cut ends and patched areas.
- Paint/Stain: Apply even coats. For stain, follow with a clear topcoat if you want more durability.
If your wall is in a high-traffic area (kids, pets, that one friend who touches everything), consider a tougher topcoat
or a scrubbable paint finish. Beauty is great; washable beauty is better.
Common Mistakes (and How to Avoid Them)
- Not starting level: Fix it on the first row, not the tenth. Shim early.
- Ignoring wood movement: Acclimate boards and leave tiny expansion gaps at edges.
- Skipping stud fastening: Adhesive helps, but studs are your long-term insurance policy.
- Messy seams: End seams need planning. Stagger joints and keep cuts crisp.
- Rushing finish work: Caulk and filler are the difference between “custom” and “close enough.”
Budget and Timeline Reality Check
A DIY wood accent wall can be budget-friendly or bougie, depending on material. Prefinished shiplap and specialty slat panels
cost more but save time. Basic pine, MDF battens, or plywood strips can be very affordable with more finishing effort.
Time-wise, many wood walls are a 1–2 day project:
Day 1 for prep, layout, and install; Day 2 for filler/caulk/sand and final paint or topcoat.
If you prefinish boards first, add drying time (your wall is patient; your living room may not be).
Maintenance: Keeping Your Wall Looking Sharp
Dust slat walls with a microfiber duster or vacuum brush attachment. For painted walls, spot-clean with a gentle cleaner
and a soft cloth. For stained wood, avoid soaking; wipe spills quickly and recoat high-touch areas if the sheen dulls over time.
Experience Notes: of “Stuff People Don’t Tell You Until You’re Holding the Caulk Gun”
The first lesson from real DIY wood wall projects is that the wall you think is flat is almost never flat. Drywall
bows, corners drift, and studs sometimes sit like they’re trying to avoid eye contact. That’s why your plan needs two things:
a reference line you trust (laser levels are basically cheat codes) and a willingness to use shims without taking it personally.
Shimming isn’t failureit’s precision with a side of humility.
Second: buying “just enough” material is a classic rookie move. Even careful installers waste boards on outlet cutouts,
end cuts, and the occasional “how did I measure that so confidently and still get it wrong?” moment. Build in extra material
so you’re not sprinting to the store for one board while your room sits half-dressed like it got interrupted mid-makeover.
Third: prefinishing is a love-it-or-hate-it step, but it’s often the difference between “nice wall” and “wow.” When boards
are stained and sealed before installation, you avoid lap marks, missed edges, and the misery of brushing finish into tiny
gaps between planks. Prefinishing also keeps you from dripping stain onto your baseboard like a crime scene reenactment.
The trade-off is patience: you need space to lay boards flat and time to let them cure.
Fourth: don’t underestimate outlet and switch logistics. A wood wall changes thickness, which can make outlet boxes sit too
deep. The fix is usually simple (box extenders and longer screws), but it’s much easier when you plan for it up front rather
than discovering it at 10:47 p.m. while holding a faceplate and whispering, “Why won’t you fit?” Also, label breakers if you
need to remove devicesfuture you will be grateful.
Fifth: the finish stage is where confidence goes to get tested. Nail holes look tiny until you paint and suddenly every
divot becomes a constellation. The winning combo is the right filler, a light sand, and paint that’s applied evenly.
Caulk is similar: too little leaves gaps; too much looks like you iced the wall with a shaky hand. If you’re new to caulk,
practice on scrap, keep a damp rag nearby, and remember: smooth, consistent pressure beats speed every time.
Finally: accept that wood walls are part construction, part styling. The best-looking walls usually involve stepping back
frequently to check balancegrain distribution, seam placement, and how the pattern looks from the doorway (not just from
two inches away). If you install while standing too close, you’ll miss the big picture. Take breaks, view it from across
the room, and adjust as you go. A DIY wood wall is not just buildingit’s editing. And yes, you’re allowed to be proud when
guests “casually” ask who your contractor was.
Conclusion
A DIY wood wall is one of the highest-impact upgrades you can do without taking out a loan or learning Latin. Pick a style
that fits your room, acclimate your materials, start level, fasten into studs, and don’t rush the finishing work. Whether
you go with a shiplap wall, wood slat wall, board and batten, or classic planks, the result is the same: a space that feels
warmer, more custom, and way more “you.”